What would you consider the most versatile tool on a set? Most filmmakers and grips would probably come to the same conclusion — the C-Stand, otherwise known as the workhorse of a film production. They are the humble heroes that can impact both the quality of a shot as well as the safety of a set. In this article, we’ll cover the most common ways of how to use a C-Stand on a set and the fundamental steps to setting one up.
what is c-stand
First, let’s define C-Stand
As versatile as C-Stands are, they are generally built in similar ways. While they can differ in size and lock mechanisms, they generally have the same fundamental parts that can be used in countless ways.
c-stand DEFINITION
What is a C-stand?
A C-Stand is a metal stand designed to position lights, silks, flags, backdrops, and other tools on a set. C-Stand is believed to be short for Century Stand because they were used in early cinema to hold sun reflectors that were 100 square known as Centuries. C-stands are composed of a base with three legs, two risers to extend upward, a gobo head, and a gobo arm which attaches to the hobo head. C-Stands are one of the most versatile tools on a set and are a grip’s best friend.
Parts of a C-Stand
- Base including three legs
- Two risers that extend upward
- Gobo head
- Gobo arm
C-Stand lighting
What are C-Stands used for
C-Stands date back to early cinema and overtime grips and filmmakers have used them in countless ways. But here is a list of the most fundamental reasons why someone would use a C-Stand on set.
1. Position flags
One of the most common ways a C-Stand is used on set is to position or “stick” a flag to modify light. Negative fill, nets, and diffusion flags can all be attached to the stand to be placed precisely where it needs to be.
How to use a C-Stand • Shaping Light with Flags
2. Hanging lights
Lights can be extended overhead of a set or subject using a C-Stand. It is important that this is done safely and with appropriately weighted lights that the stand can support.
3. Two stands for diffusion
Two C-Stands can be used together to grip both sides of a larger diffusion grid or silk. Beyond diffusion, grips also use this for larger duvetyne sheets for negative fill.
4. Two stands for backdrops
A common use for filmmakers of a smaller budget and no studio is to use two C-Stands with two arms rigged together to hang a green screen or any other material for the background of a shot.
5. Boom pole
If you are conducting a stationary interview, using a C-Stand to position a boom pole to capture audio can help you if you are short on hands. These techniques plus a few more are demonstrated in the video below.
What are C-Stands used for • 5 Reasons to use one
Now that you understand the most common uses of the C-Stand, it’s important to know the individual parts before setting one up.
C-stand for camera tutorial
Parts of a C-Stand
C-Stands may vary in size, width of metal, and base locking mechanisms. But most stands are composed of the same fundamental parts. Understanding these parts will better help you understand how to use a C-Stand.
1. Base
The base of a C-Stand has three legs of different heights so that they can be collapsed together. Bases can differ based on the type of stand you have. Some bases have a Rocky Mountain leg in which the tallest reg can be raised upward to put on a curb or ledge. Others do not and rely on a spring loaded system.
2. Gobo Head/Grip Head
The gobo head, also known as the grip head, is what connects gobo arms to the stand. This is why they are also referred to as joints. Gobo heads have diamond shaped holes in which the arms are inserted. Once the head is tightened these holes close and clamp down on the arms to properly secure the rig.
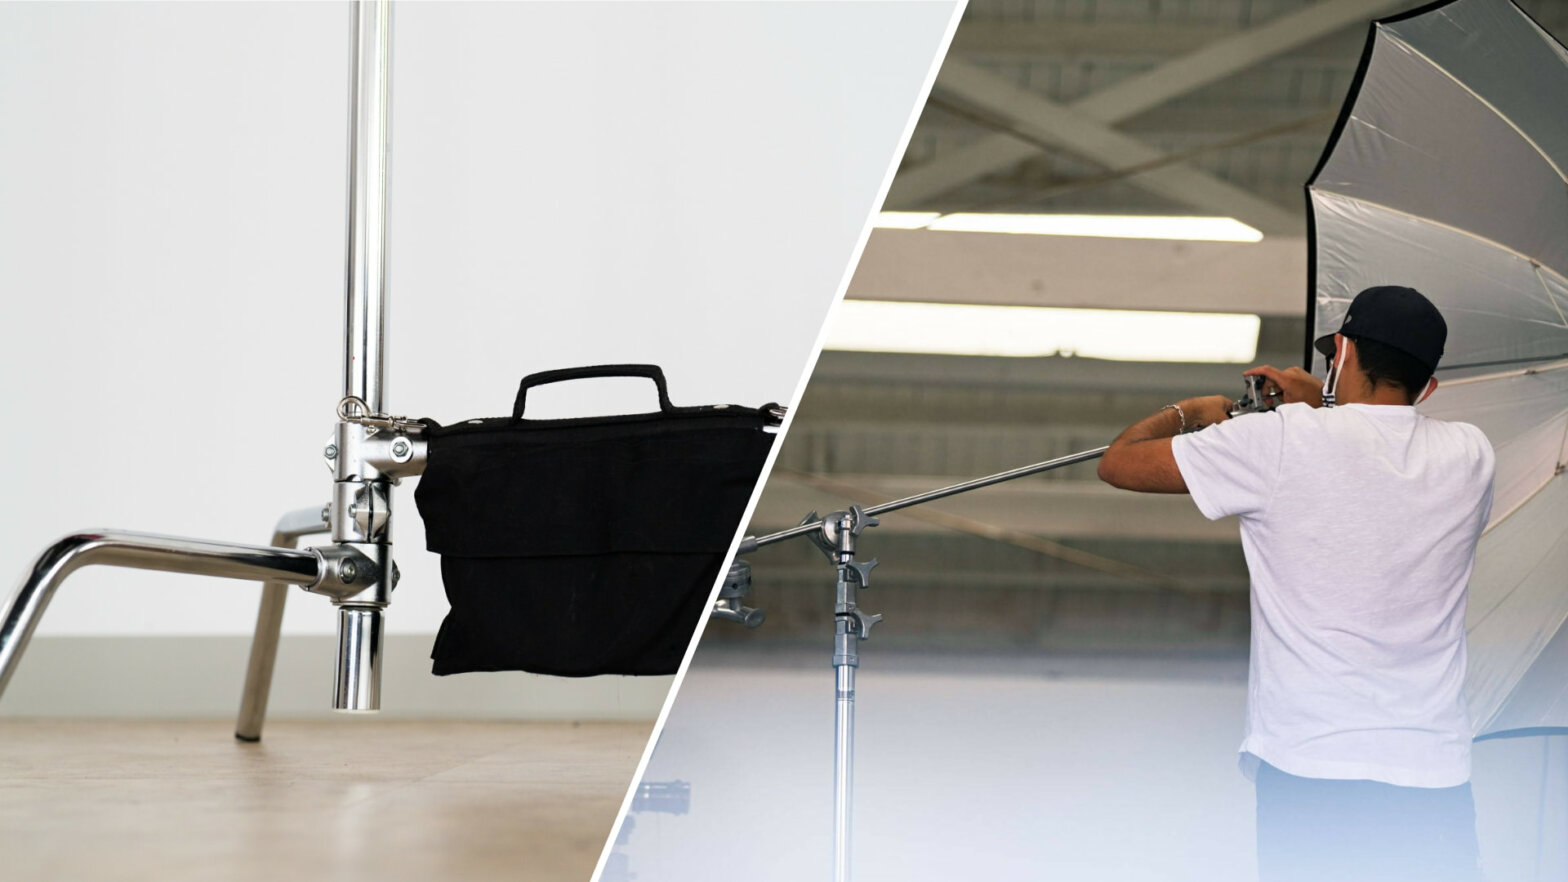
3. Gobo Arm/ Grip Arm
The gobo arm is what allows flags, lights, etc. to hang over a set out of frame from a camera. They attach to the main part of the C-Stand via the gobo head. To get a better understanding of the parts of the C-Stand, check out this video produced by one of the innovators.
C-Stand for camera basics
Now that you understand the fundamental parts of a C-Stand, let’s dive into how to set one up so that you can use them on your next project.
How to open c-stand legs
How to use a C-Stand
Learning how to use a C-Stand is incredibly important because it also affects the safety of the set. There are key steps to keep in mind when setting up a C-Stand to ensure the safety of the crew and talent on set.
1. Unfolding the legs
Unfolding the legs of a C-Stand depends on the type of base your stand has. For instance a turtle base will have a lever that will unlock the legs while other stands have a knob you will need to loosen to unfold the legs. No matter what base you have, it’s important to make sure that all of the legs are spread out completely and are locked in place.
2. Positioning the stand
When you are placing your C-Stand on the floor in the position it needs to be, make sure that the tallest, biggest leg is facing toward the weight that is being supported. This will make the stand more stable.
3. Sandbag
Next, you will place a sandbag (or two) on the tallest leg of the C-Stand. Why? If placed on the shorter two legs, the weight of the sandbag will fall on the ground and will not support the C-Stand as much. On the tallest leg, the entire weight of the sandbag falls on the C-Stand. Watch these first three steps being demonstrated in the video below.
PRO TIP: How to use a C-Stand
4. Mount your light/flag
Whatever you are mounting whether it be a flag, net, or light, you will typically be attaching it to the knuckle at the end of the gobo arm. The biggest thing to remember when tightening this knuckle is “Righty tighty/ Lefty loosey.”
Always make sure that you are tightening the knuckle toward the weight of the flag/light. This will make sure that if the light begins to fall, the weight of it will further tighten the knuckle. If it were on the other side, the weight of the light will loosen the knuckle and potentially fall. For a more visual demonstration, check out the video below. This step is incredibly important for safety on set.
C-Stand lighting • Filmmaking Tips
5. Raising the C-stand
To raise the C-Stand upward, you will need to extend the risers. Always start by raising the top riser first. If you raise the bottom one, you will not be able to reach the next riser.
How to open C-Stand legs and use them
6. Grabbing a stand
When transporting a C-Stand, the very first thing to remember is to grab the gobo arm and the pole within your palm. If your hand grabs in between the arm and pole, it will be crushed when handing it off to someone.
Grip tips: Types of C-Stands
7. Transporting a C-Stand
When carrying a C-Stand, light stand, rail, or any other long piece of equipment around set, be sure to be shouting “Points!” This warns others that there is a long piece of equipment moving and to be more cautious. This is especially important when turning corners or walking through doors.
8. Storing C-Stands
C-Stand bases are designed to all have an identical footprint. This means they can be nested or soldiered together when storing them on set, ultimately taking up less space. To do this, simply place the tallest leg over the medium leg of another C-Stand.
How to use a C-Stand 101 with Eric Jang
C-Stands are the workhorse of a film set. They are one of, if not the single most versatile piece of equipment on a set. From big budget studio sets to lower budget DIY filmmaking, a C-Stand is a great investment for any filmmaker. Not to mention their durability can often make them last decades.
Related Posts
UP NEXT
A Complete List of Film Terms
Now that you understand what a C-Stand is and how to use a c stand, be sure to learn all of the essential film terms that are thrown around on a set. From lighting terms to camera terms to set terms, we’ve compiled a complete list of film terms every filmmaker should know.
Up Next: Ultimate Film Glossary →

Showcase your vision with elegant shot lists and storyboards.
Create robust and customizable shot lists. Upload images to make storyboards and slideshows.

