Brand Mood Board Template
Define your brand’s identity
A brand is all about unique and recognizable design across every visual aspect of your business, product, or project. Every aspect from logos to colors to copywriting to graphic design should be cohesive. While this sounds like a tall task, a brand mood board helps make the process a bit clearer.
In this guide, we'll walk you through a universal process using StudioBinder’s mood board creator to visualize each step. Whether you're using software or just a sheet of paper and a pen, the following steps will help you create a compelling mood board.
Steps in this guide
Step 1
1. Create a blank mood board
Different projects require slightly different approaches to mood boards. If you're crafting a brand, focus on colors, typography, and imagery.
For example, product designs may emphasize textures, materials, and design elements. Full campaigns may require other visual concepts like photography, video, and motion graphics. No matter your project type, you'll need to find mood board examples you can use as inspiration for your mood board to better define your brand.

How to do this in StudioBinder
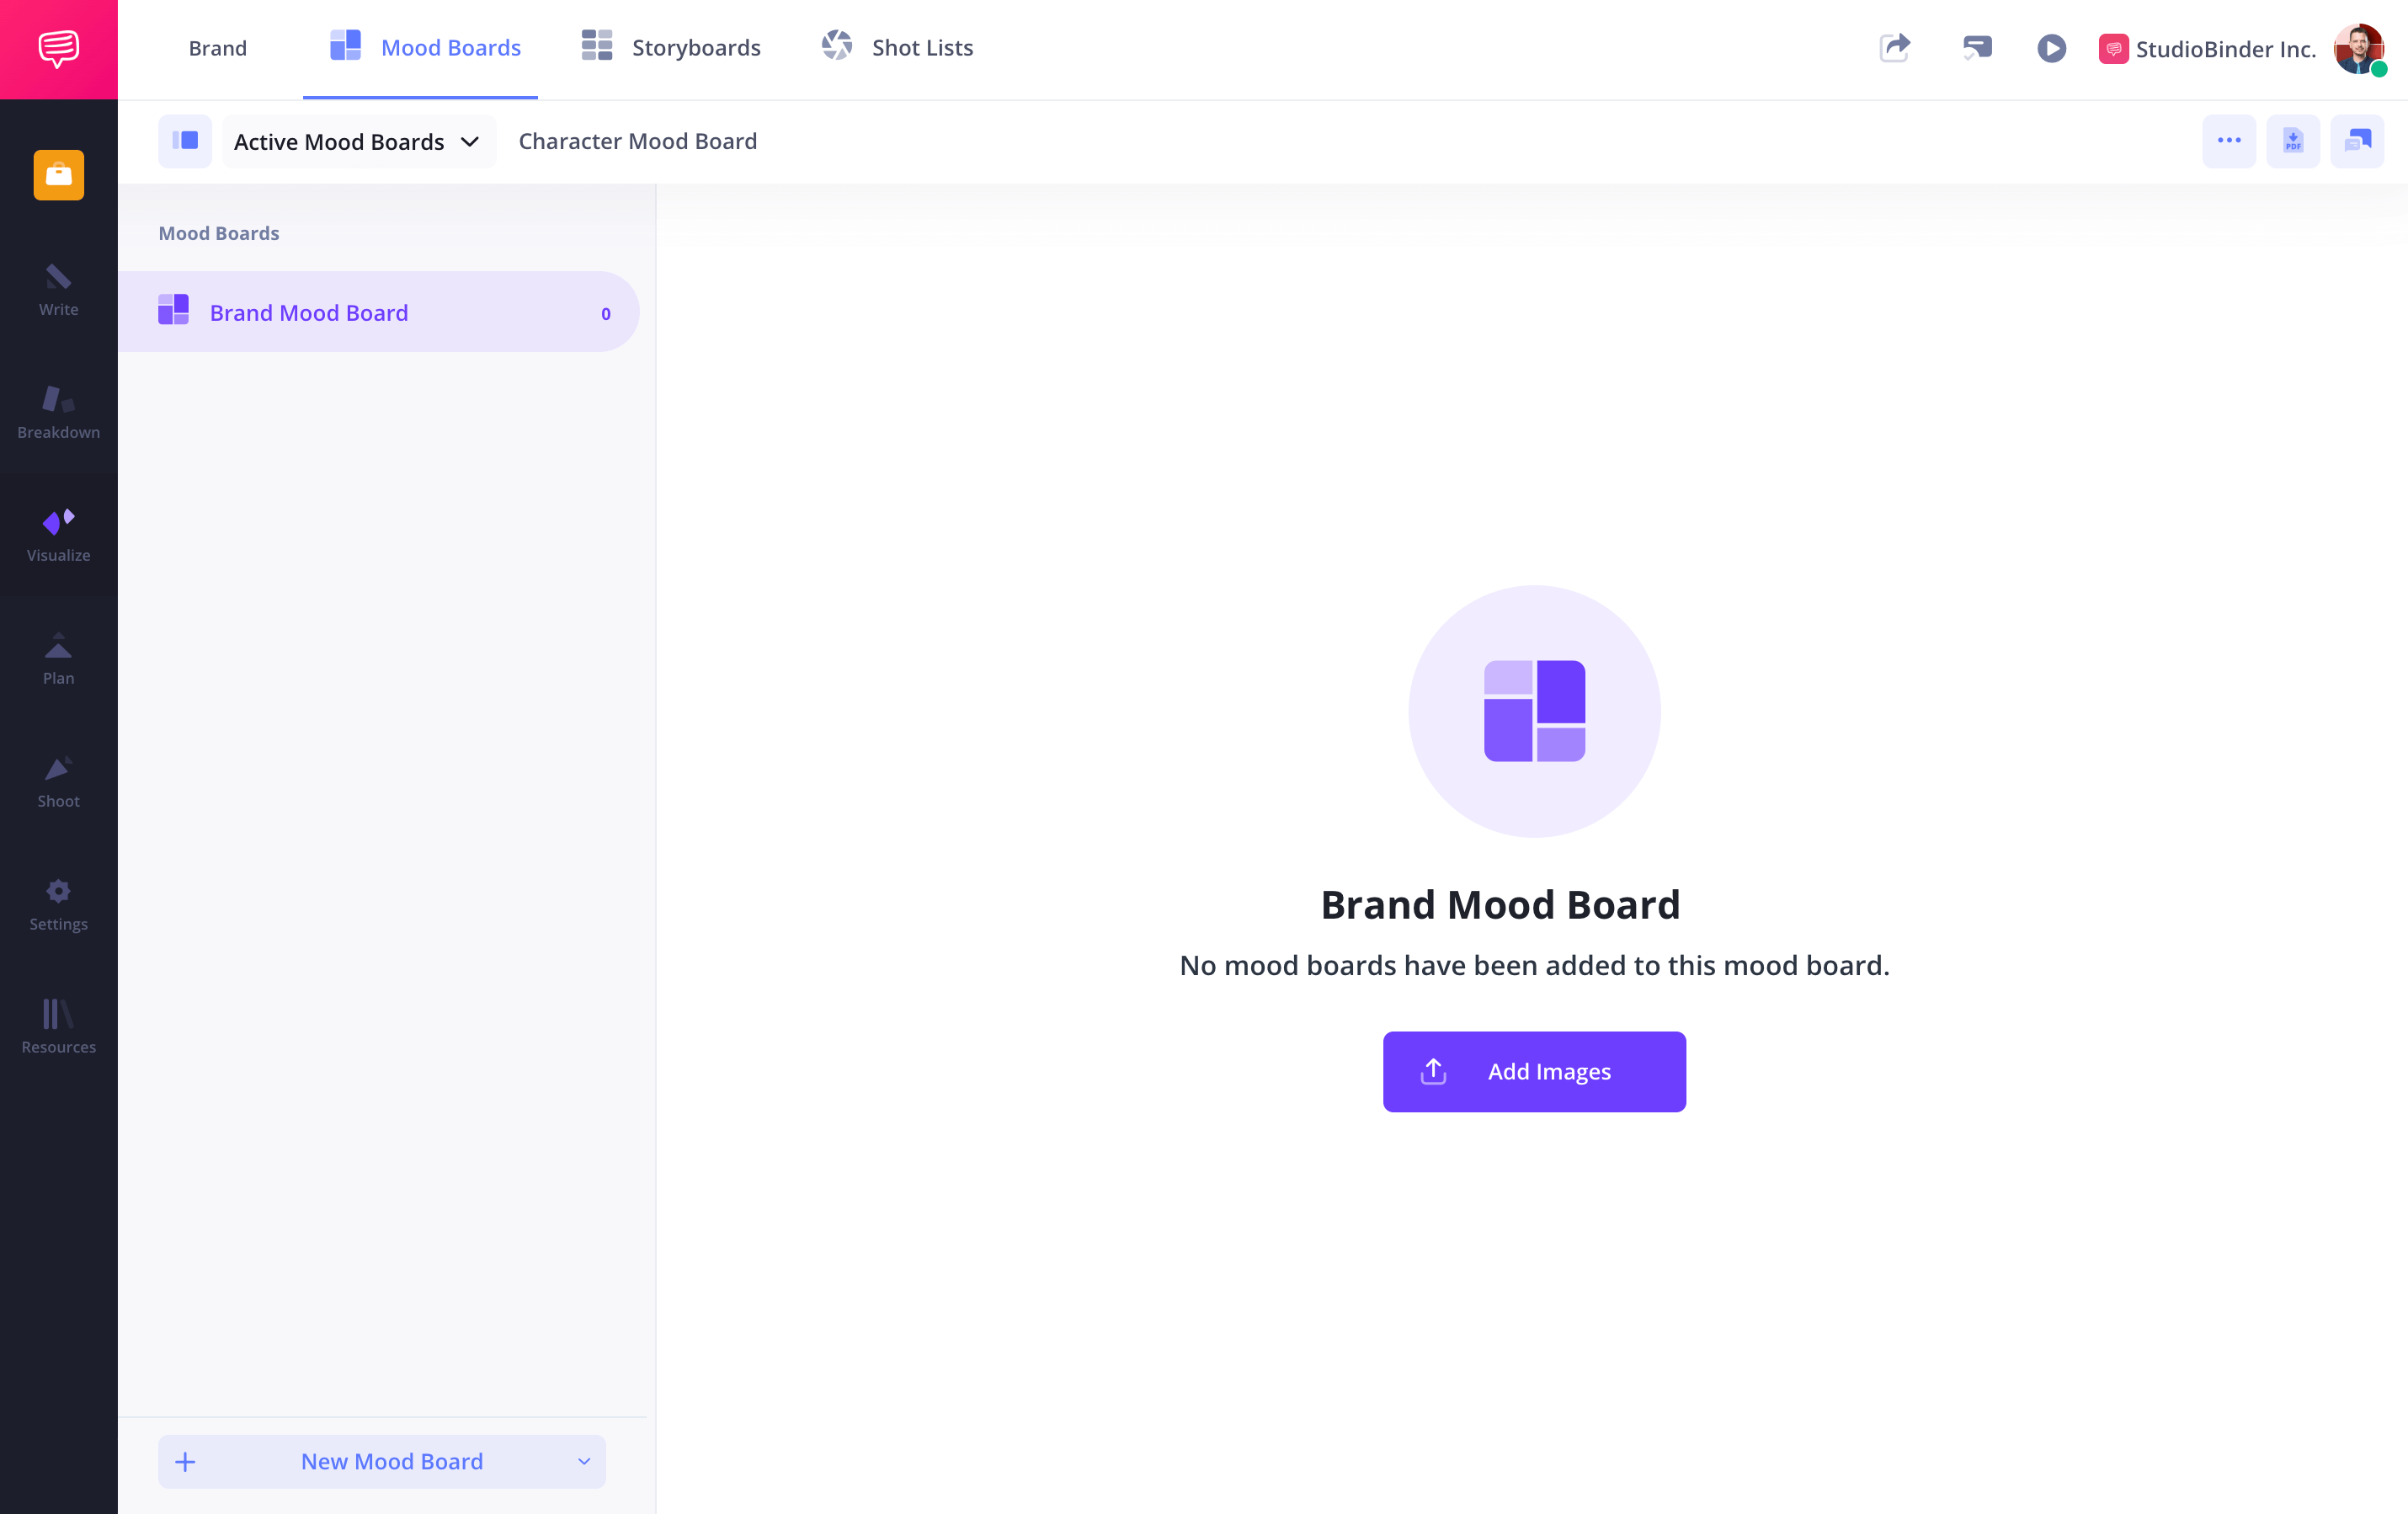
- From the project page, select Mood Board.
- Create mood boards for every important category.
Step 2
2. Gather Images
With a direction in mind, gather images that resonate with your brand's identity. This step is about intuition—select visuals that evoke a feeling, even if you can't articulate why. Use your references from Step 1 as a guide for what to collect.
Seek images from all different types of media such as photographs, illustrations, online editorials, or even vintage magazine campaigns. Don't limit yourself to just one type of image; variety will help you get a more well-rounded feel for your brand.


How to do this in StudioBinder
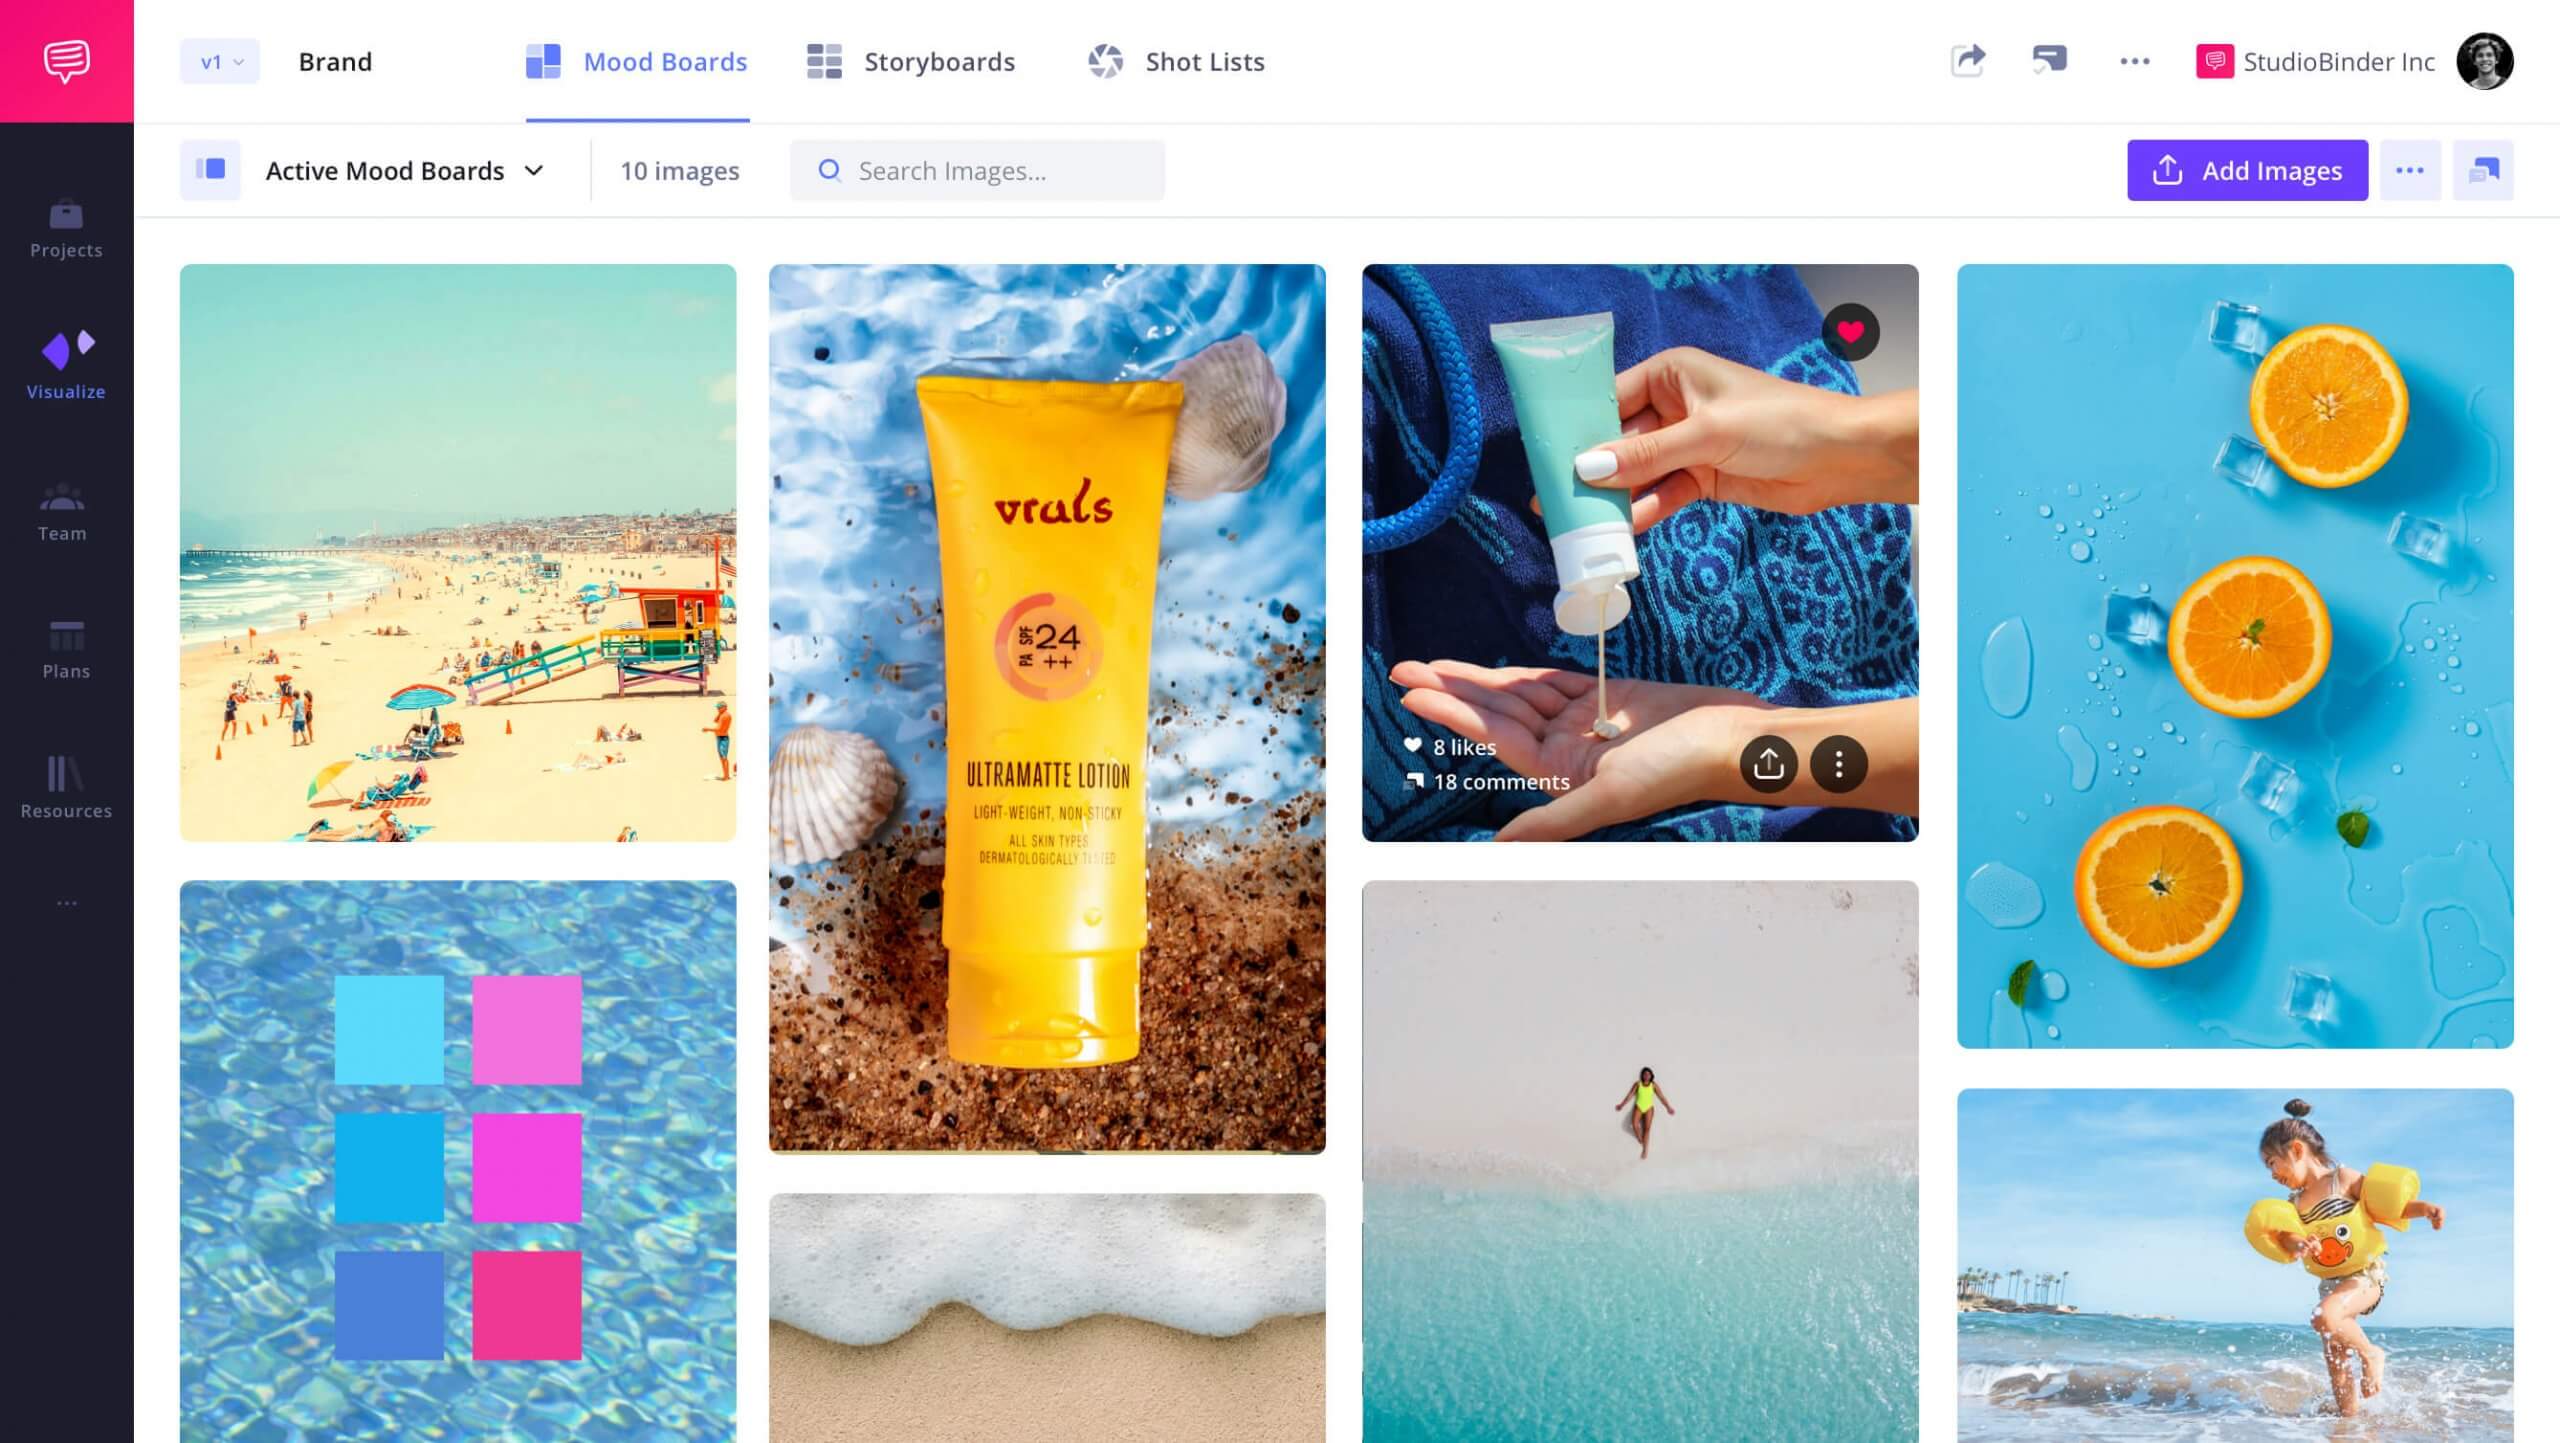
- Search the web and save images to your computer.
- Upload images to your various mood boards.
Step 3
3. Add Details
Adding details will sharpen your presentation of your brand vision. This might include text descriptions linking images, or defining a color scheme to solidify the aesthetic, crucial for designers needing exact color references. Typography, fonts, and other specific visual details can be placed in this step, as well.


How to do this in StudioBinder
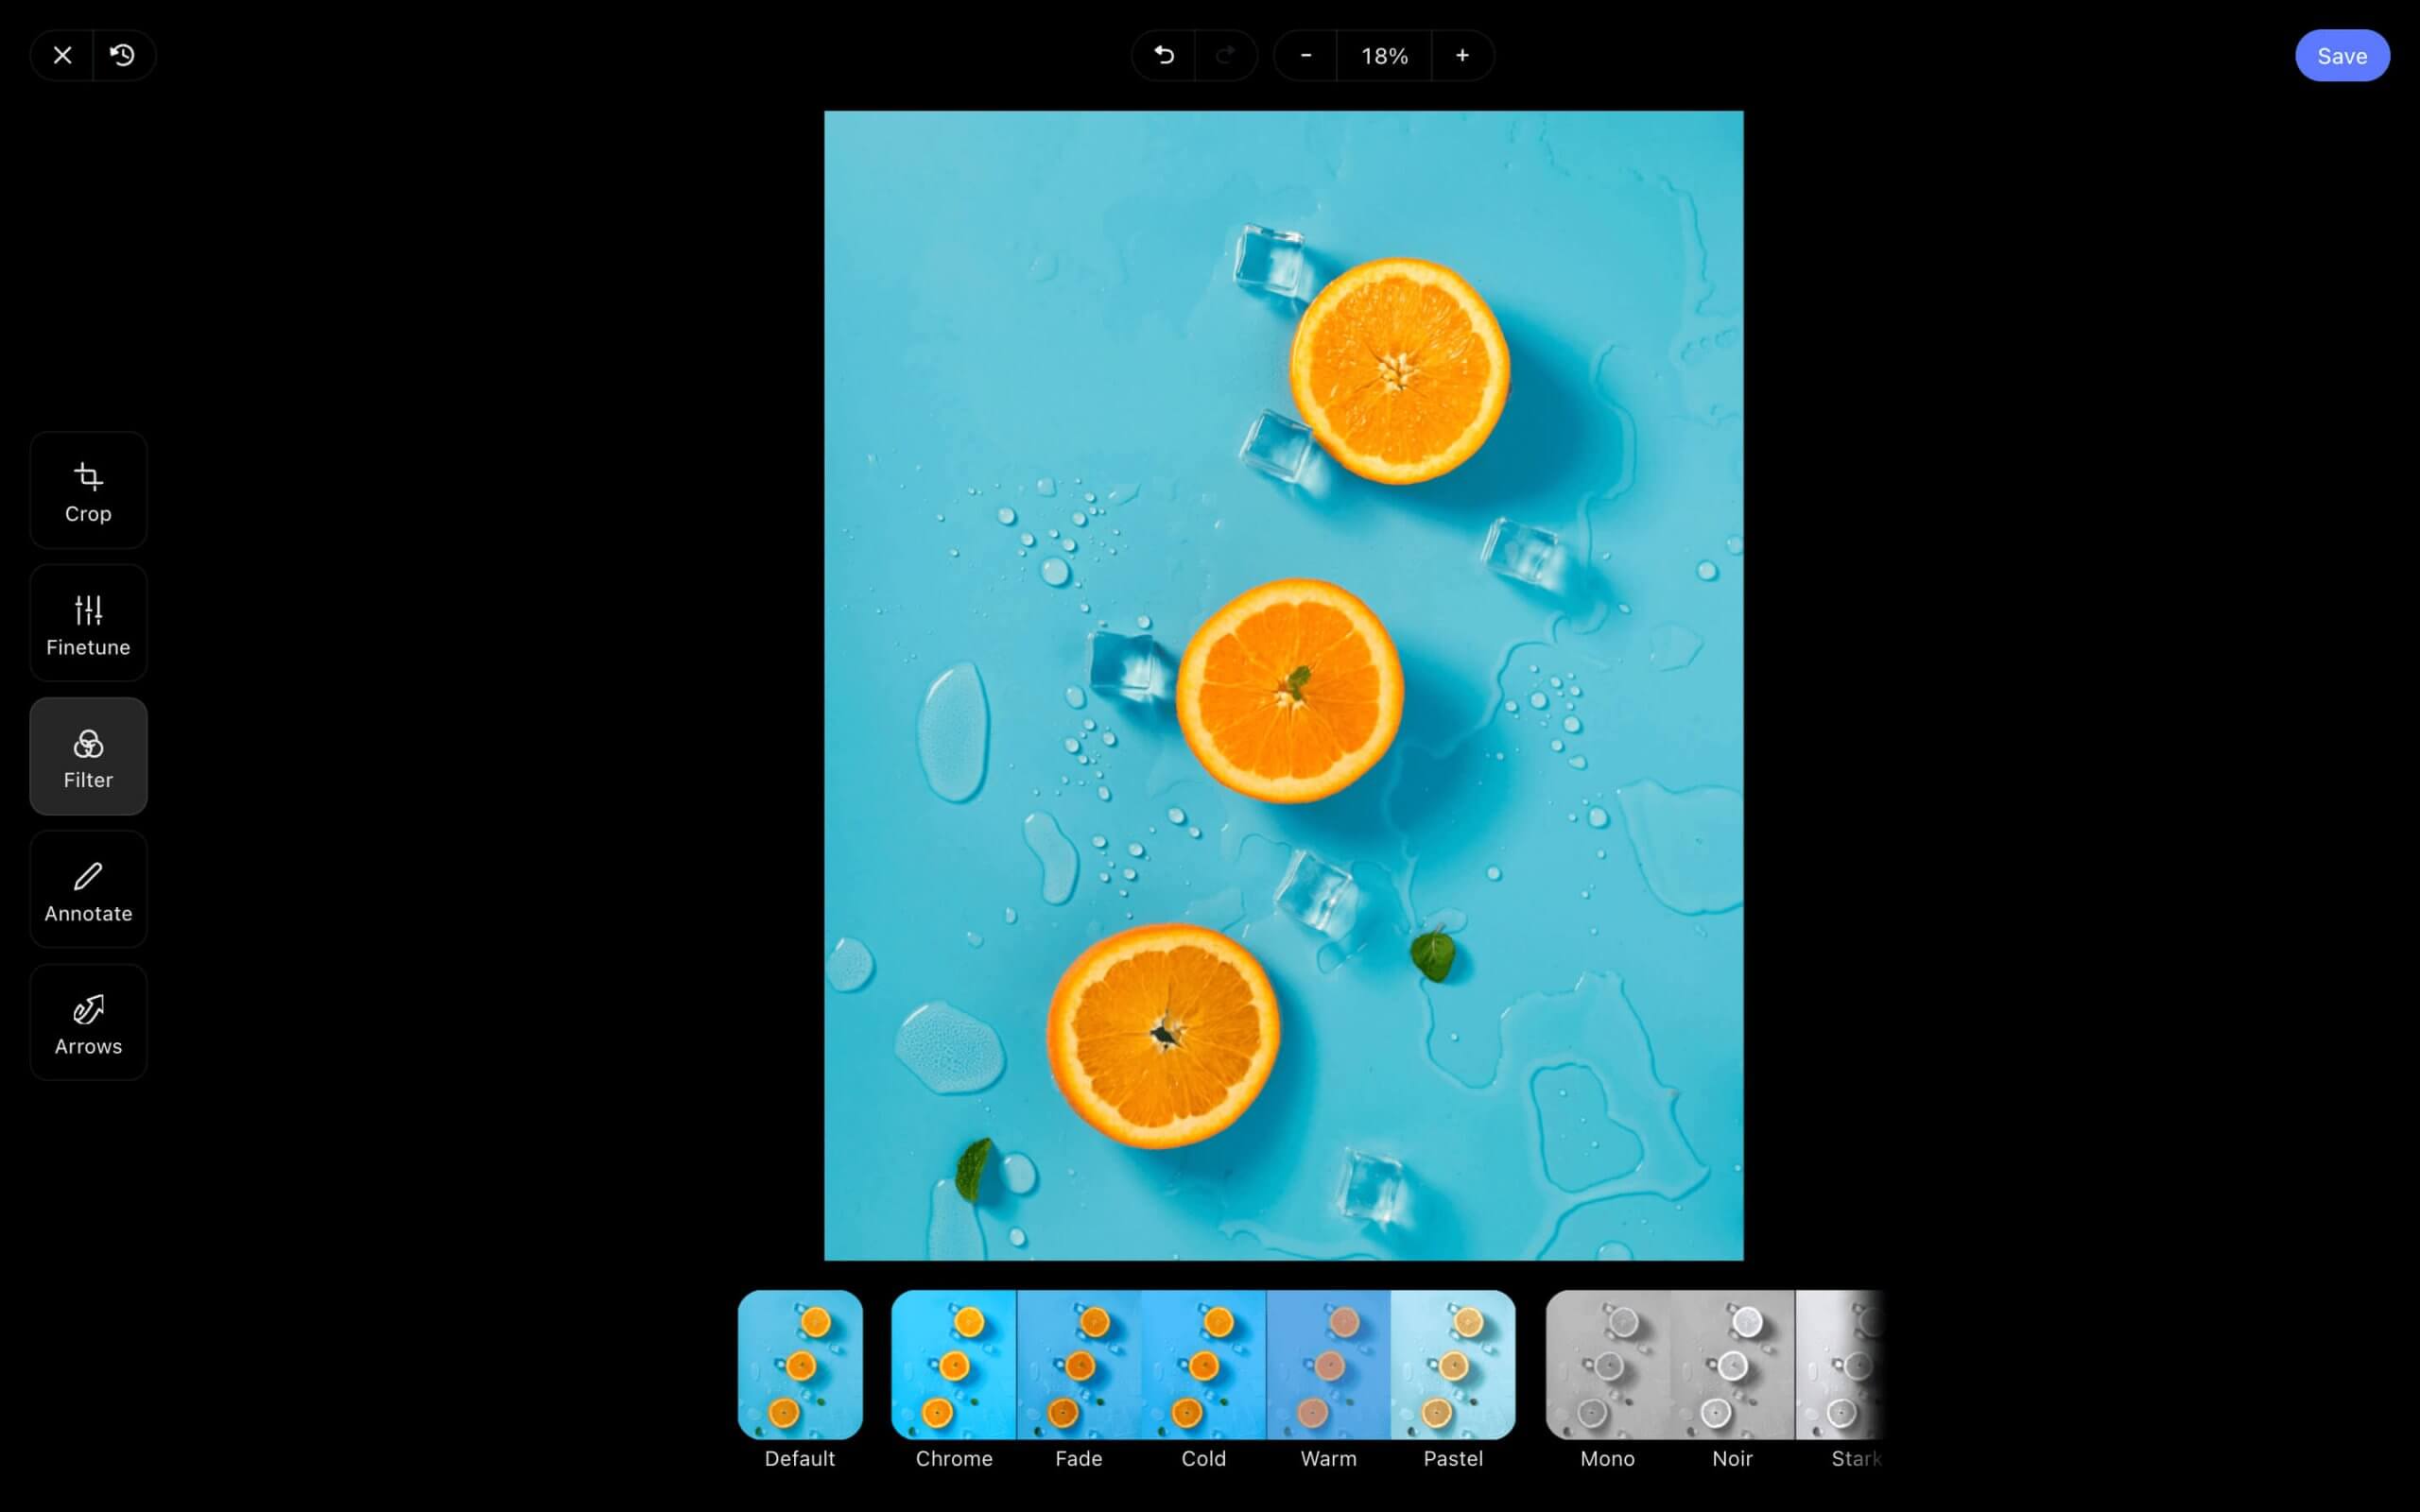
- Open the image from the mood board.
- Select Edit.
- Crop, annotate, or fine tune your image settings.
Step 4
4. Arrange the Mood Board
Organize your mood board content purposefully. Branding is all about cohesiveness across a variety of design principles. Utilize the arrangement of your mood board to show how cohesive your ideas are for the brand. Think of the entire layout as one piece. Do the individual parts of it create a sum that matches your brand’s identity?


How to do this in StudioBinder
- Consider "zones" to group images in proximity.
- Drag to rearrange images into a layout that tells a story.
Step 5
5. Collaborate & Share
Your brand mood board may start as a personal vision, but sharing it is critical. Whether pitching a campaign or collaborating with team members, feedback can enhance the project’s impact.


How to do this in StudioBinder
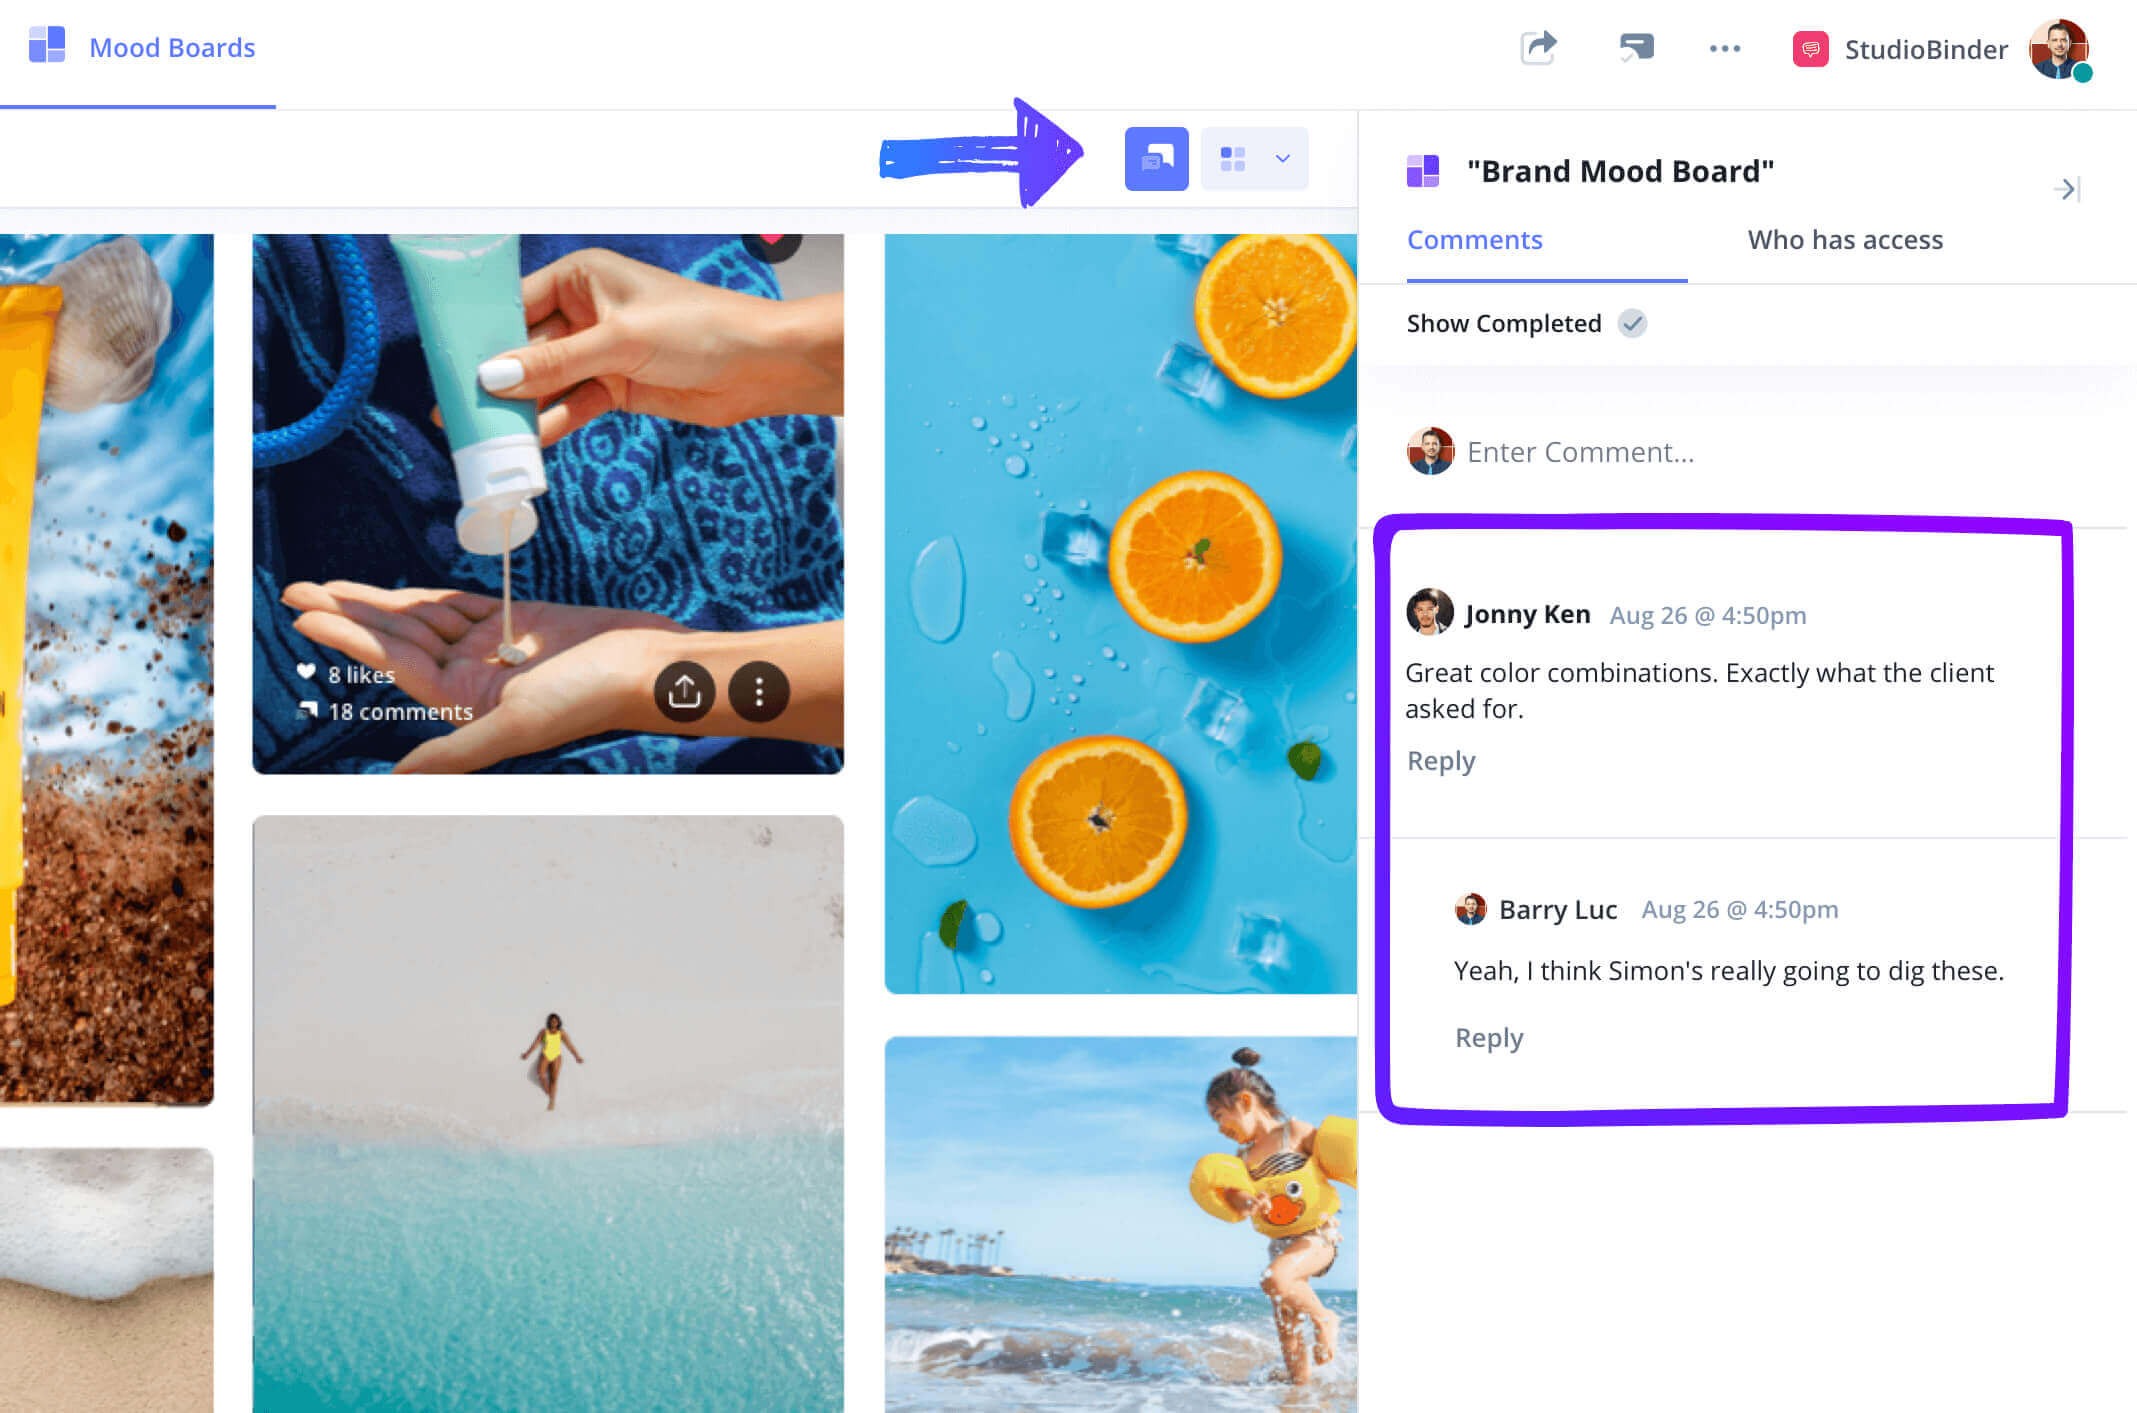
- Create a View Only link or Invite Collaborators to work with you.
- Use the Comments sidebar to review feedback.
Conclusion
Brand Mood Board Complete
The process of creating a brand mood board is an ongoing one. Even after completing your initial mood board, be sure to periodically revisit and update it to reflect your brand's evolving identity.
This brand mood board template is one of many creative mood board templates you can use. Browse all other creative templates on our Templates page.