Photoshoot Shot List Template
Create a photoshoot shot list
You have a vision for your photoshoot. You may even have a vision for every shot in your shoot. But you’re worried that in the chaos of production, some elements of your favorite shots may be forgotten. This is where creating a shot list can help you nail your final shots all while giving you peace of mind.
In this guide, we'll be using StudioBinder’s shot list software as our shot listing tool of choice, but the steps are universal.
Steps in this guide
Step 1
1. Analyze the Mood Board or Pitch
Before you dive into creating a shot list, it’s super important to have a solid grasp of the aesthetic, story, and goals for your photoshoot. This is where any source material comes into play whether it's a photography mood board, treatment, or pitch.
These materials should give you a clearer idea of the overall theme, tone, and style you’re aiming for.

How to do this in StudioBinder
- Preview the treatment and tag photography elements directly within StudioBinder.
Pro Tip — Keep your source materials in mind and gather some reference images to help shape the style and composition of your shoot. These can come from your previous work or other inspirational sources like photography, paintings, or films.
Step 2
2. Consider the Shots
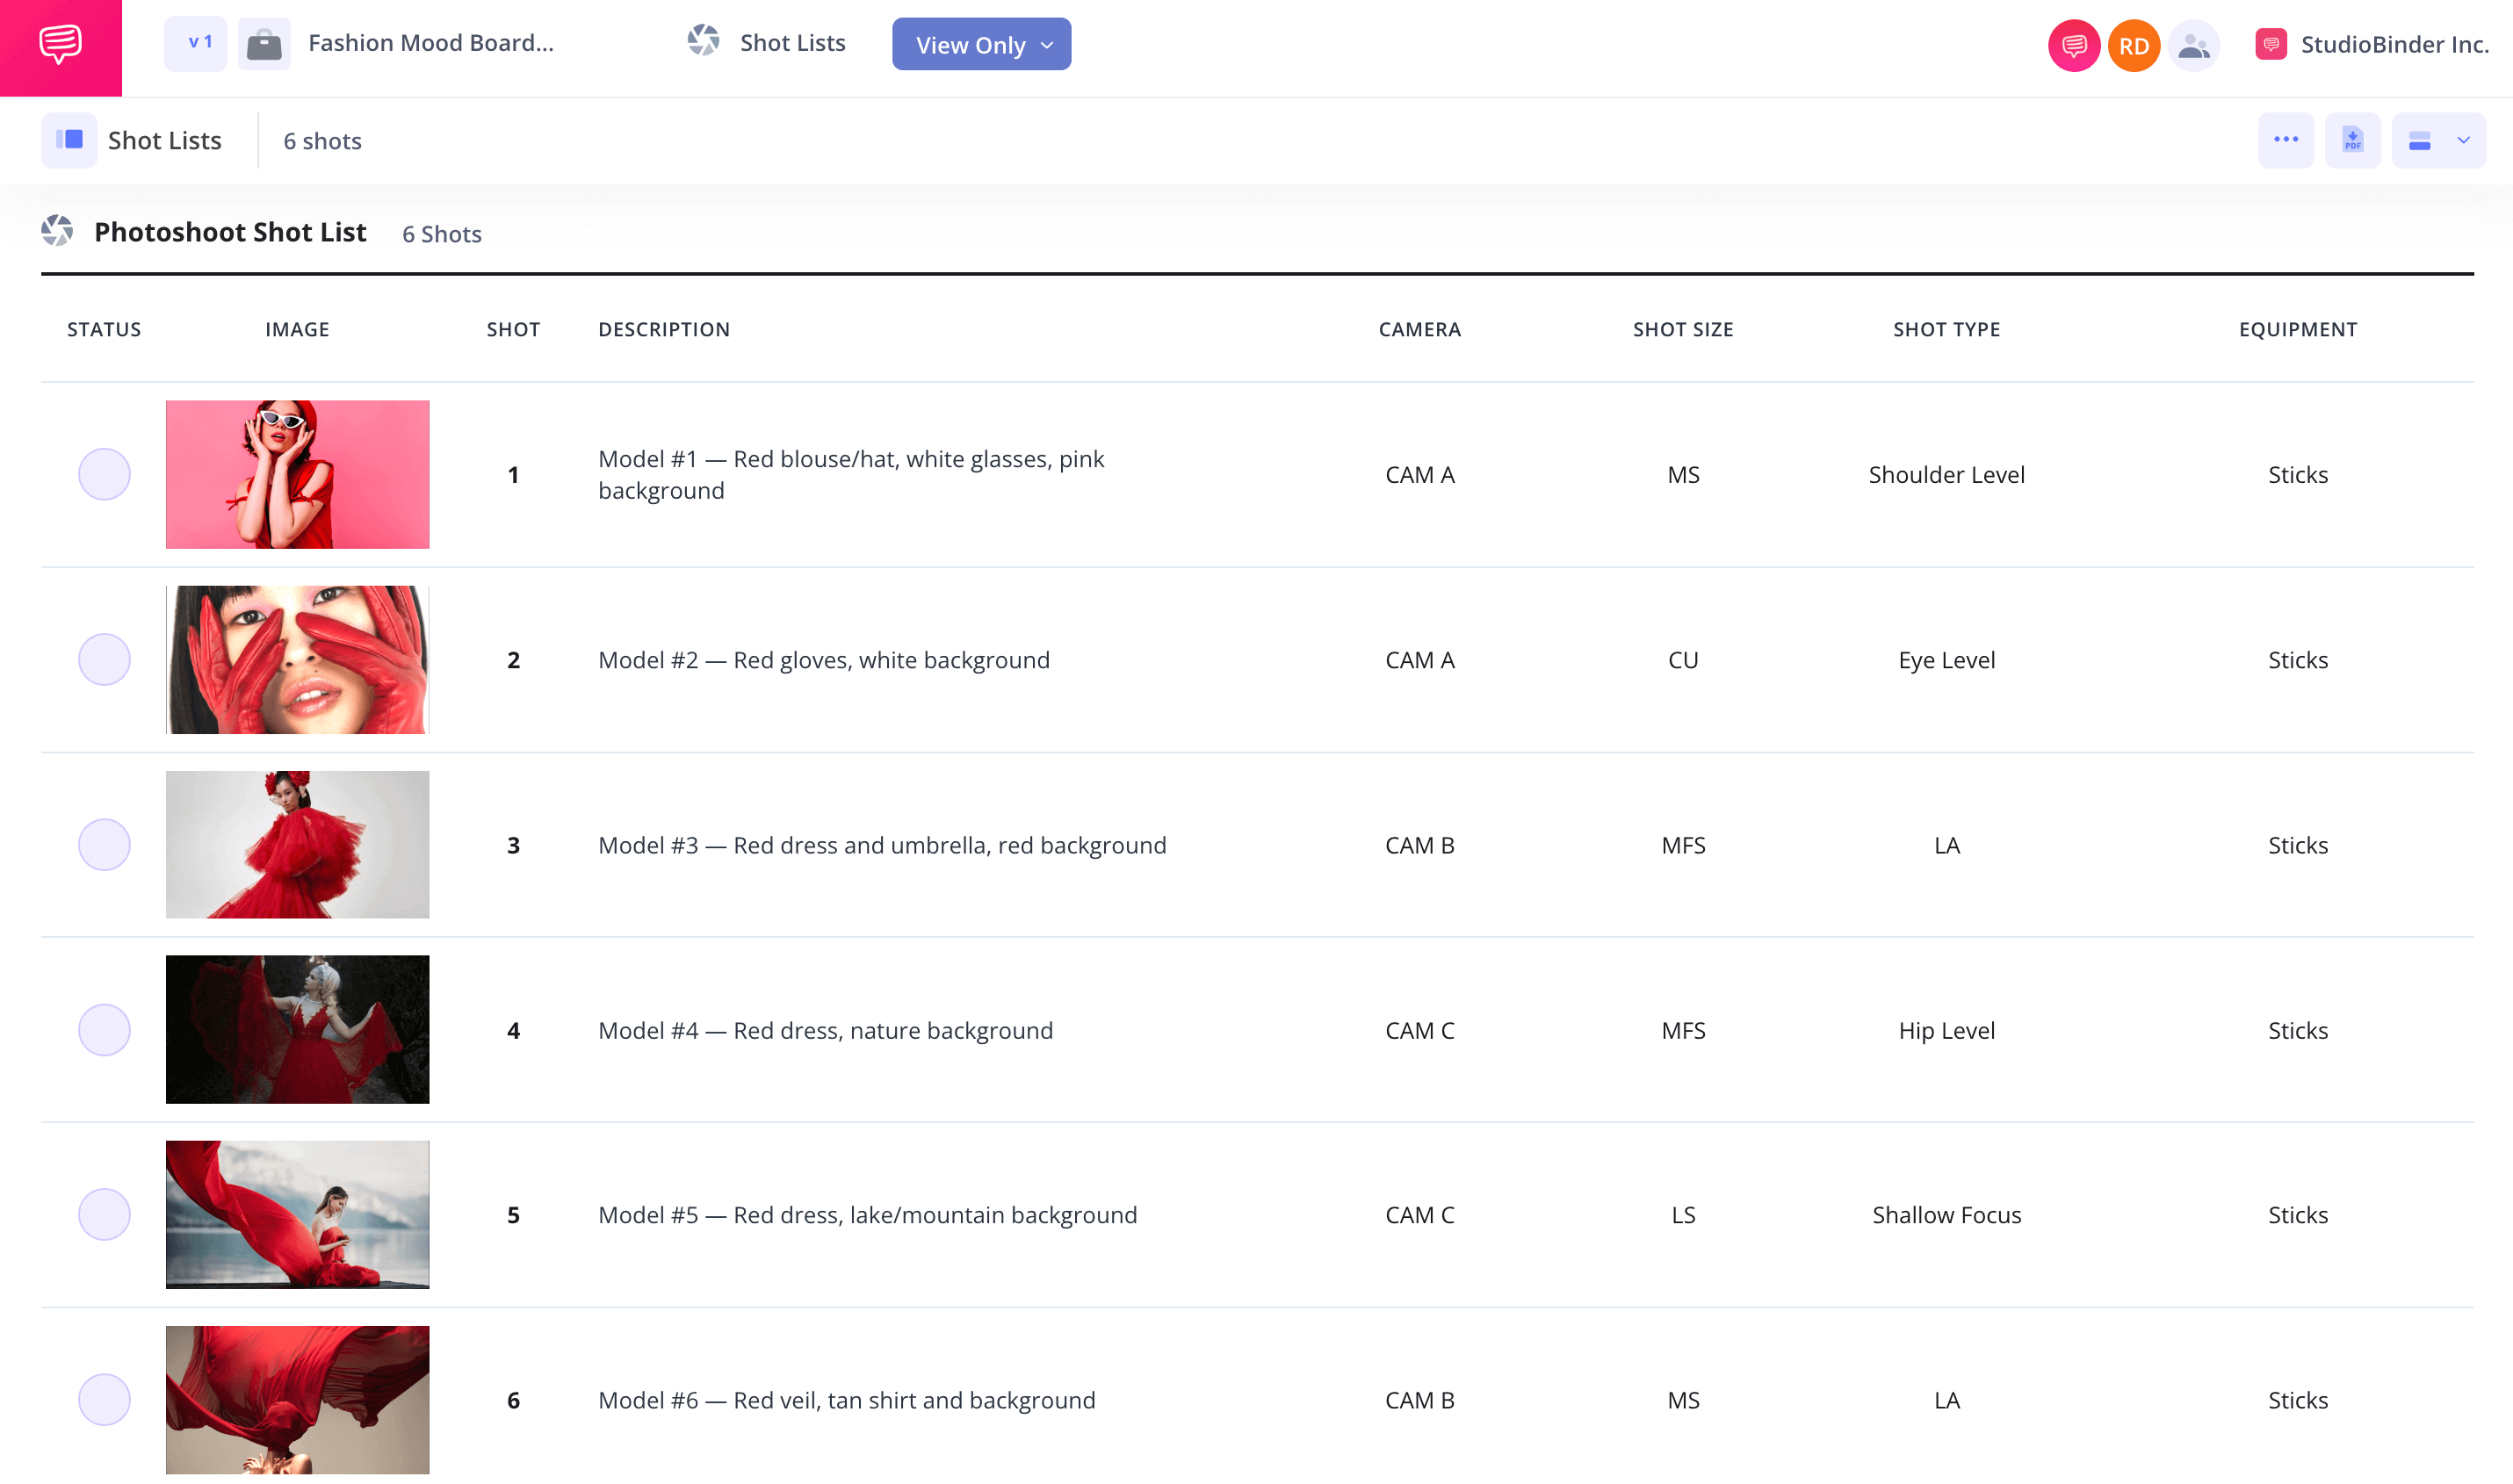
Once you have a grasp of the creative direction, it's time to dive into the details of the shots. Think intentionally about the camera angles, shot sizes, styling, and lighting of your photo shoot and how they contribute to the final shots. Now is also the time to determine how much variety you want in your shots. Do you want a mix of wide shots, medium, and close-up shots? Will you be incorporating any special or unique angles?
Depending on the nature of your photoshoot, different types of photography will require different composition techniques. For example, portrait photography typically requires a variety of close-ups, medium shots, and full-body shots to capture the subject’s essence in different ways. Event photography, on the other hand, may require a mix of candid wide shots, group photos, and detailed close-ups. Create your shot list with intentional creativity.


How to do this in StudioBinder
- Select from dozens of shot spec options, lens, shot angle, shot size, subject, location, and more.
Step 3
3. Collaborate
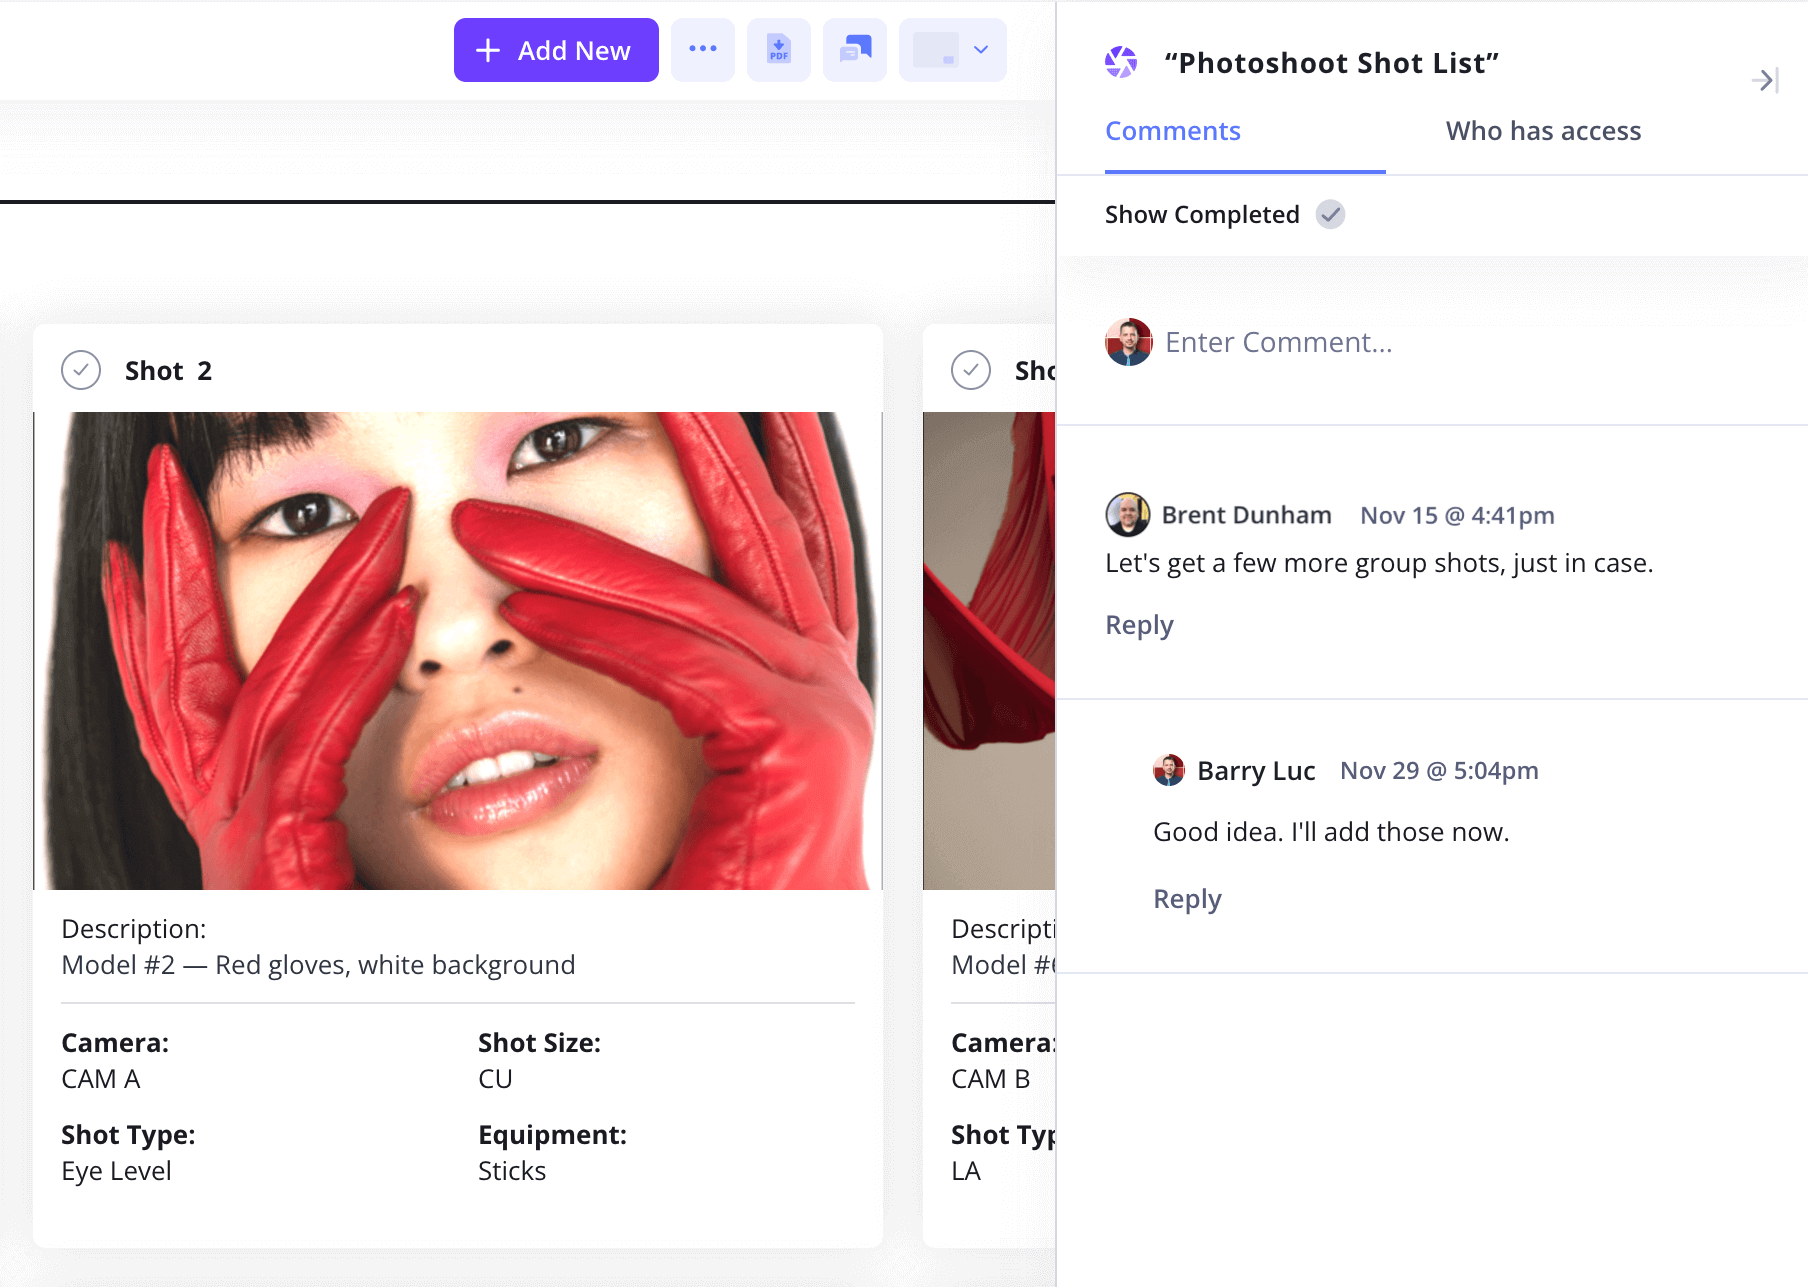
Sharing your shot list is key to a smooth creative collaboration during your photoshoot. Get your team involved—whether it's stylists, assistants, or even the client—right from the planning stage. Working together will refine the shot list and make sure all the creative elements come together nicely. Don’t forget to use feedback to tweak your plans and bring in fresh ideas.


How to do this in StudioBinder
- Keep everyone on the same page with collaboration features such as commenting and shot to-do lists.
Step 4
4. Make a Floorplan
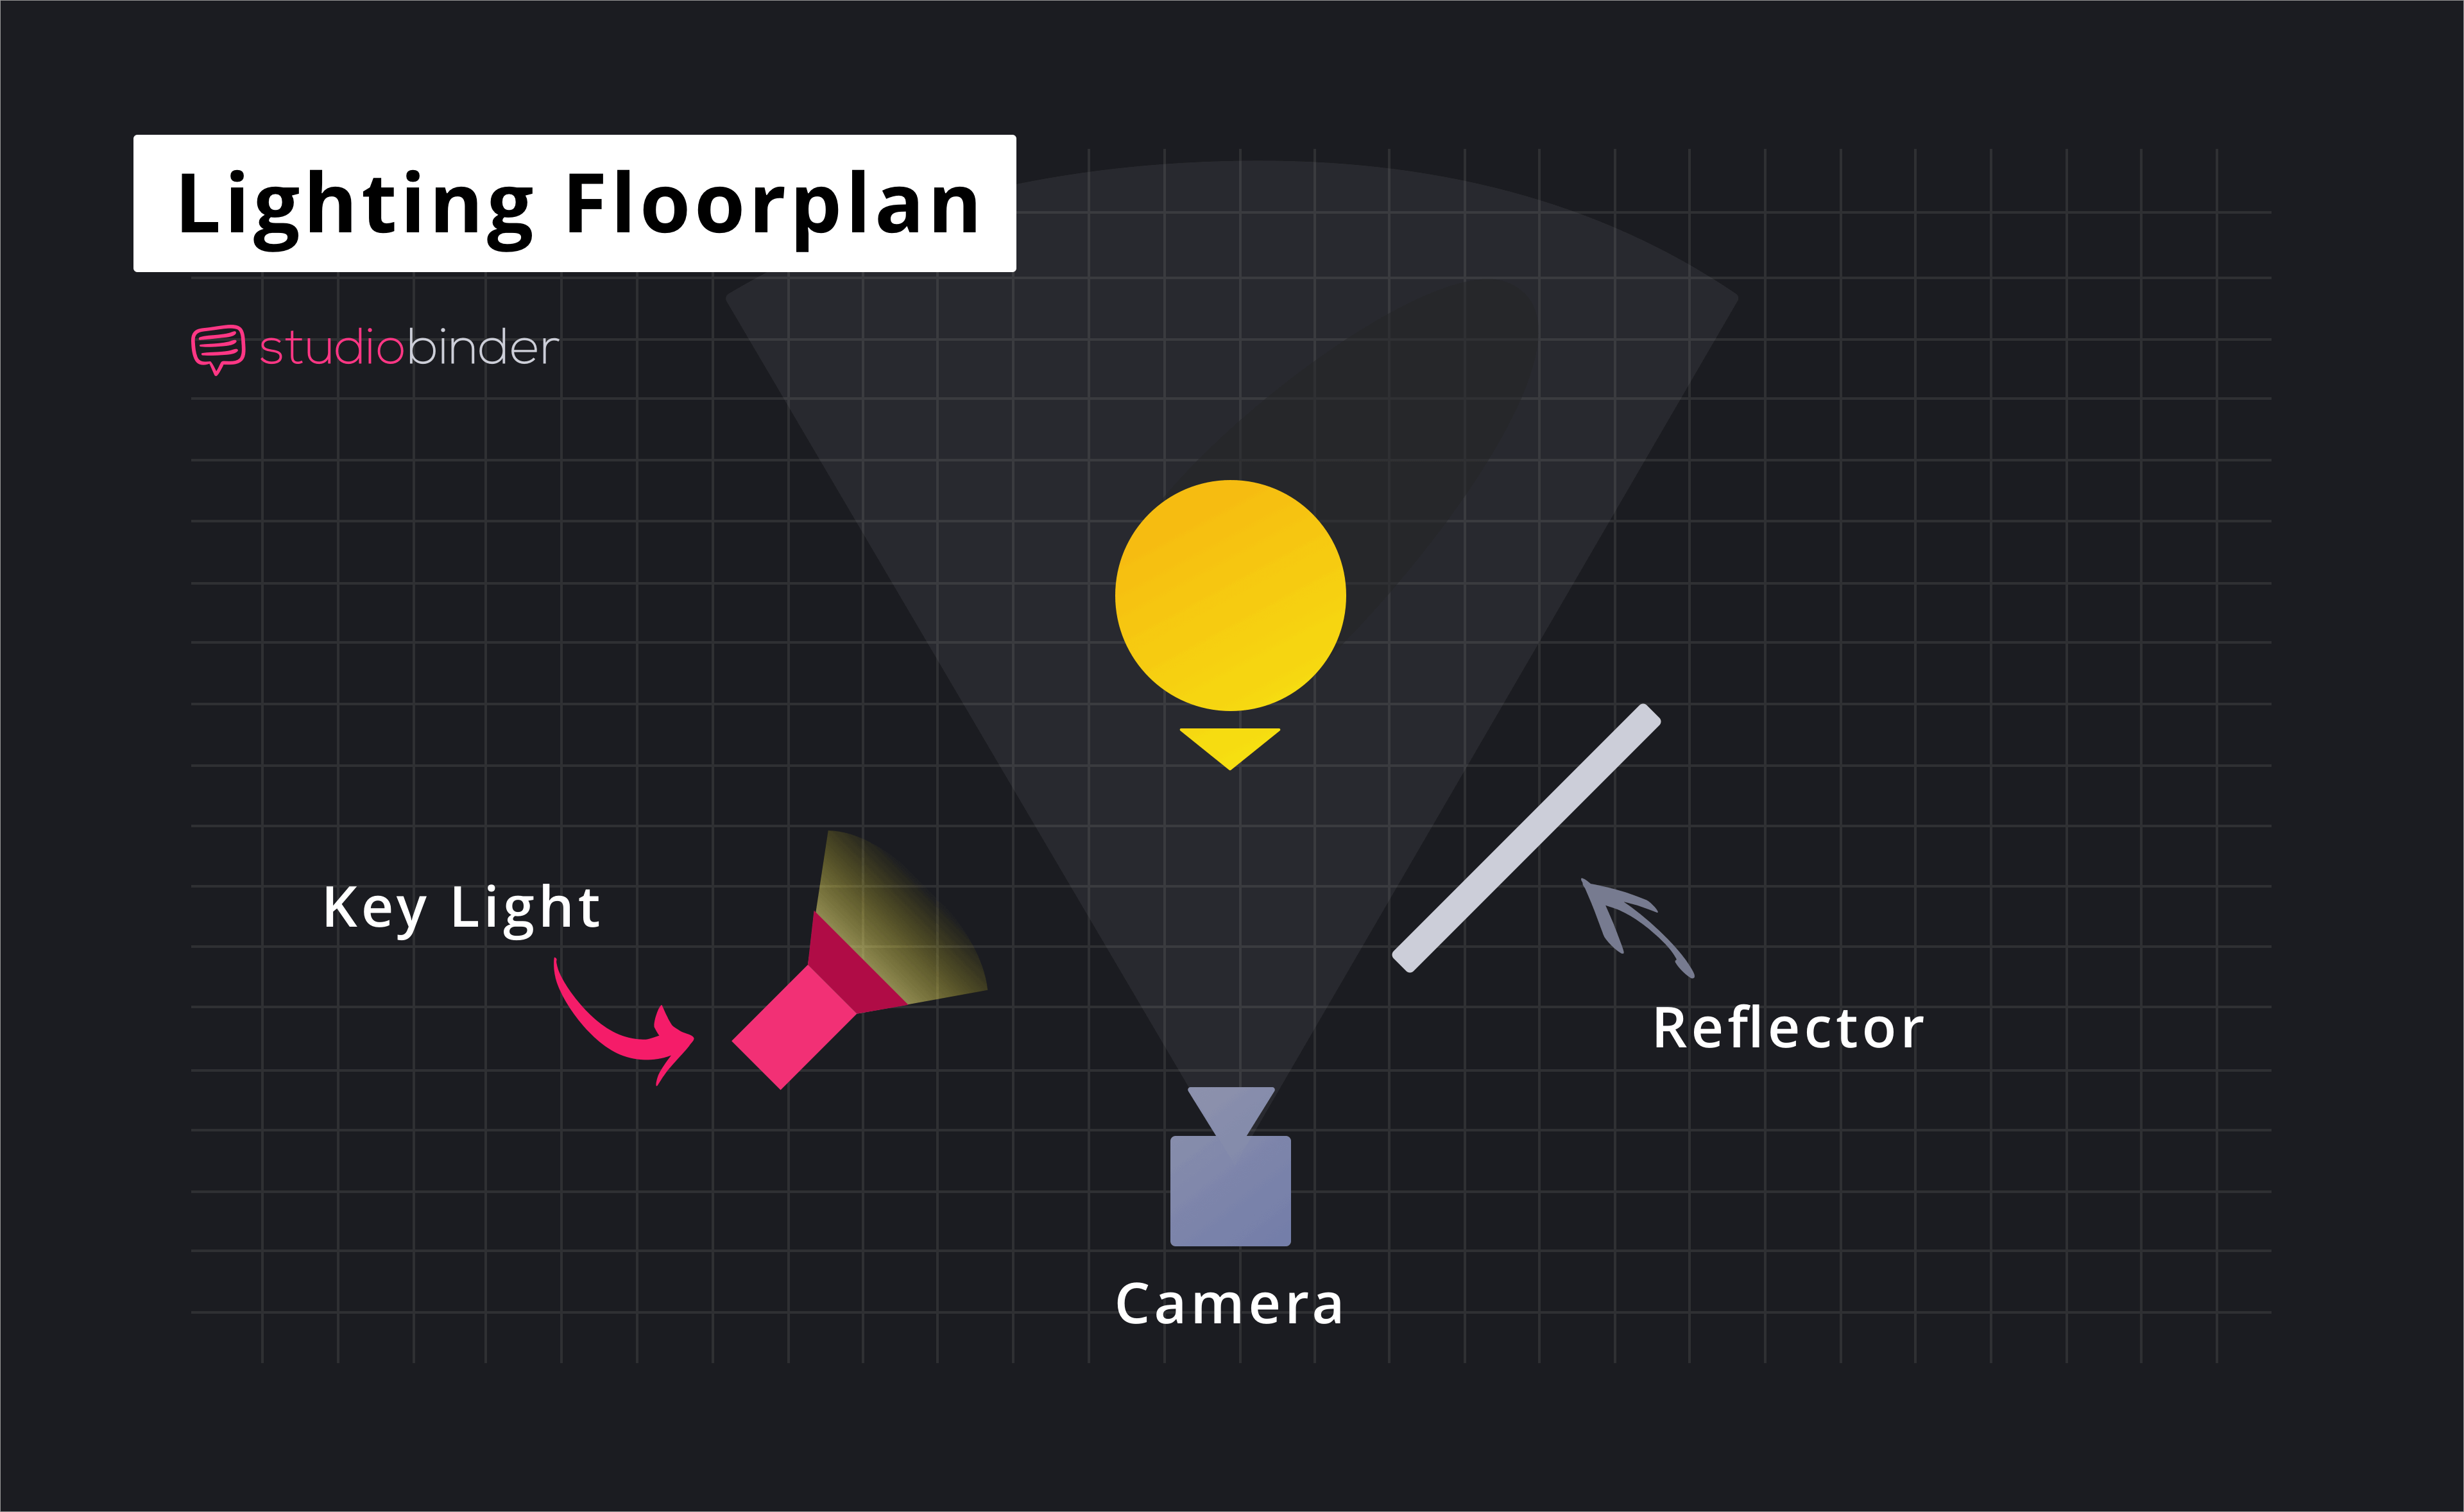
Make a layout or floor plan of your shoot location. It helps you visualize where each shot will happen and makes managing logistics on the shoot day easier. A solid floor plan can save you time and avoid unnecessary movement during the photoshoot.


How to do this in StudioBinder
- Upload floor plans directly to your shot list.
- Use a webcam to scan and adjust the image within the app.
Step 5
5. Group into Setups
Organize your shots into setups to maximize efficiency. How you group your photos will depend on the type of photoshoot you are planning. For example, if you're shooting an event you may want to group the shot list according to the event schedule. If you're shooting an editorial photography, you may want to group according to locations, backgrounds, and lighting setups. This will minimize time spent on re-arranging equipment or subjects.


How to do this in StudioBinder
- Collaborate with your team in the comments of your shot list to ensure shots are grouped in the most efficient way.
Step 6
6. Print It
Once you've finalized your shot list, print out a copy to have handy during the shoot. This way, you can easily keep track of your shots without needing to rely on digital devices, and you can share it with your team to keep everyone on the same page


How to do this in StudioBinder
- Access your shot list from anywhere with an internet connection through its cloud-based platform.
- Customize PDFs with StudioBinder for a more compact layout.
Step 7
7. Mark Shots as You Complete Them
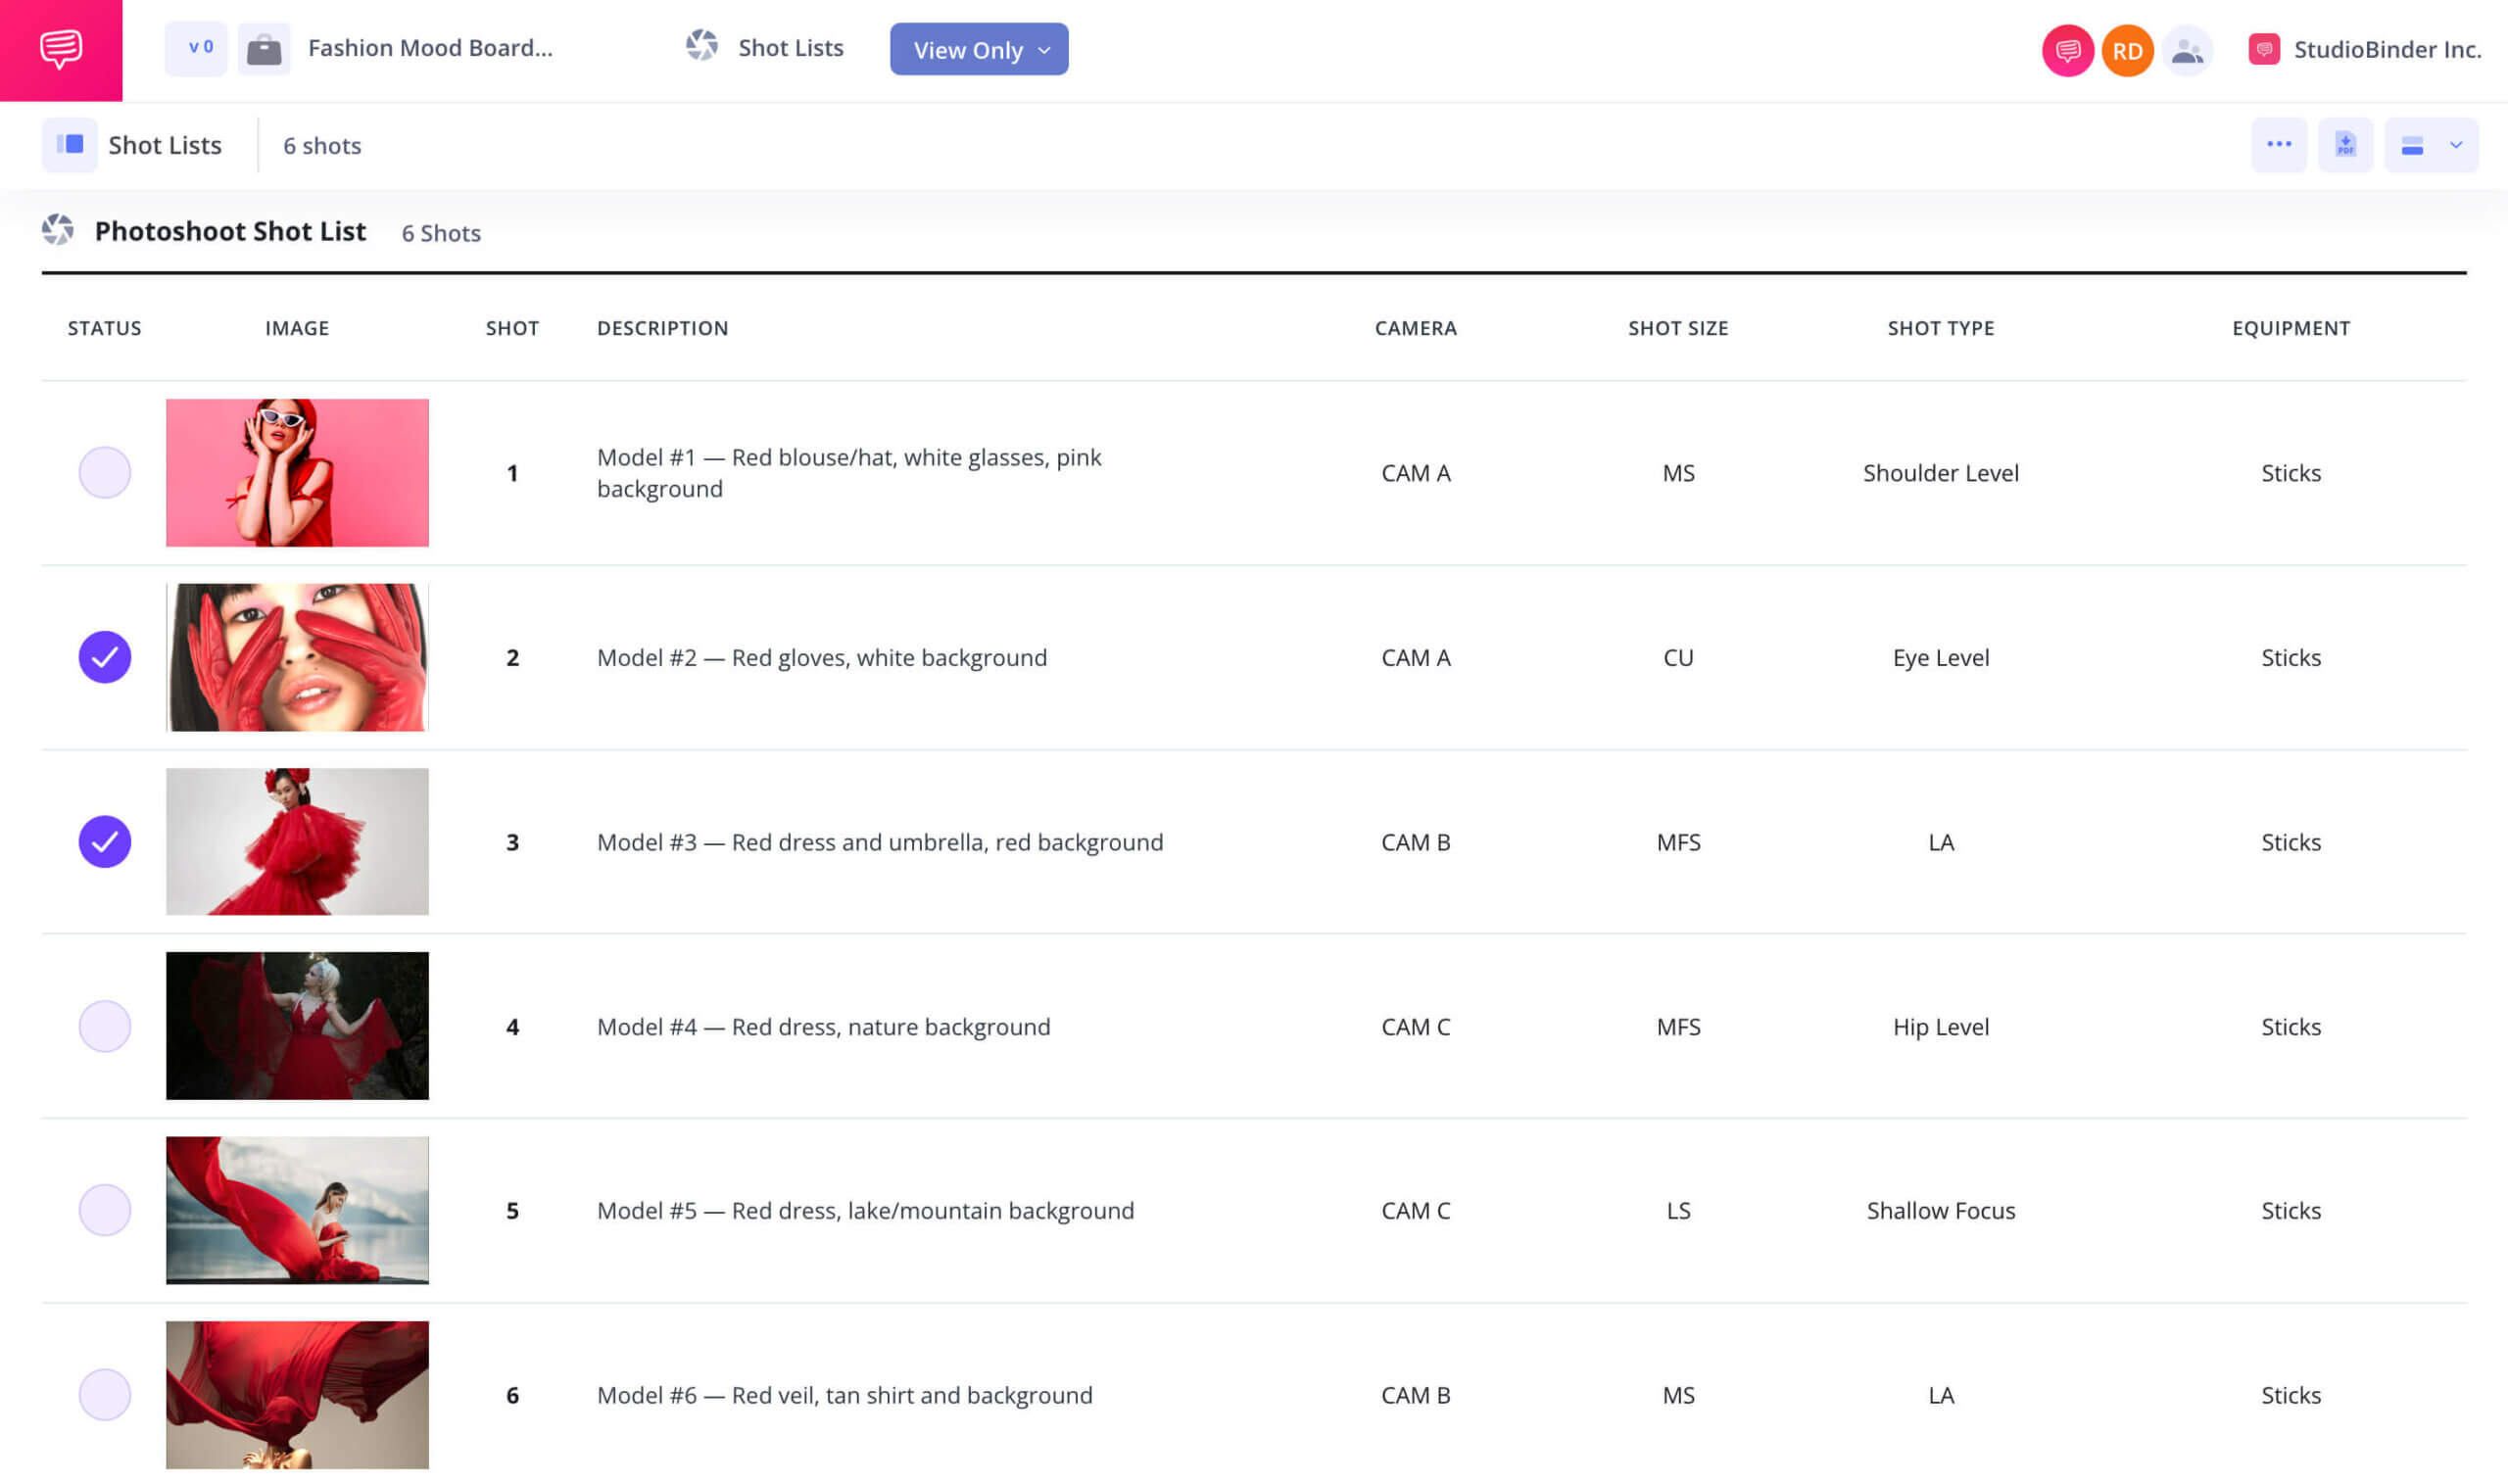
As you go through your shoot, check off each shot once it's done. This way, you can easily keep track of what's completed and what’s left, so nothing gets missed. Plus, using a digital tool lets you make real-time updates and adjustments if necessary.


How to do this in StudioBinder
- Ensure that any missed shots are noted so that when you log into StudioBinder next time, you can efficiently plan for pickups.
Conclusion
Shot list complete
Now that your shot list is ready, you can walk onto the set with confidence, knowing you've got a solid game plan in hand. This prep lets you focus on bringing your creative vision to life and makes everything run a lot smoother.
This shot list template is just one of several options you can choose from. Take a look at our Shot List Templates page to explore the full collection.