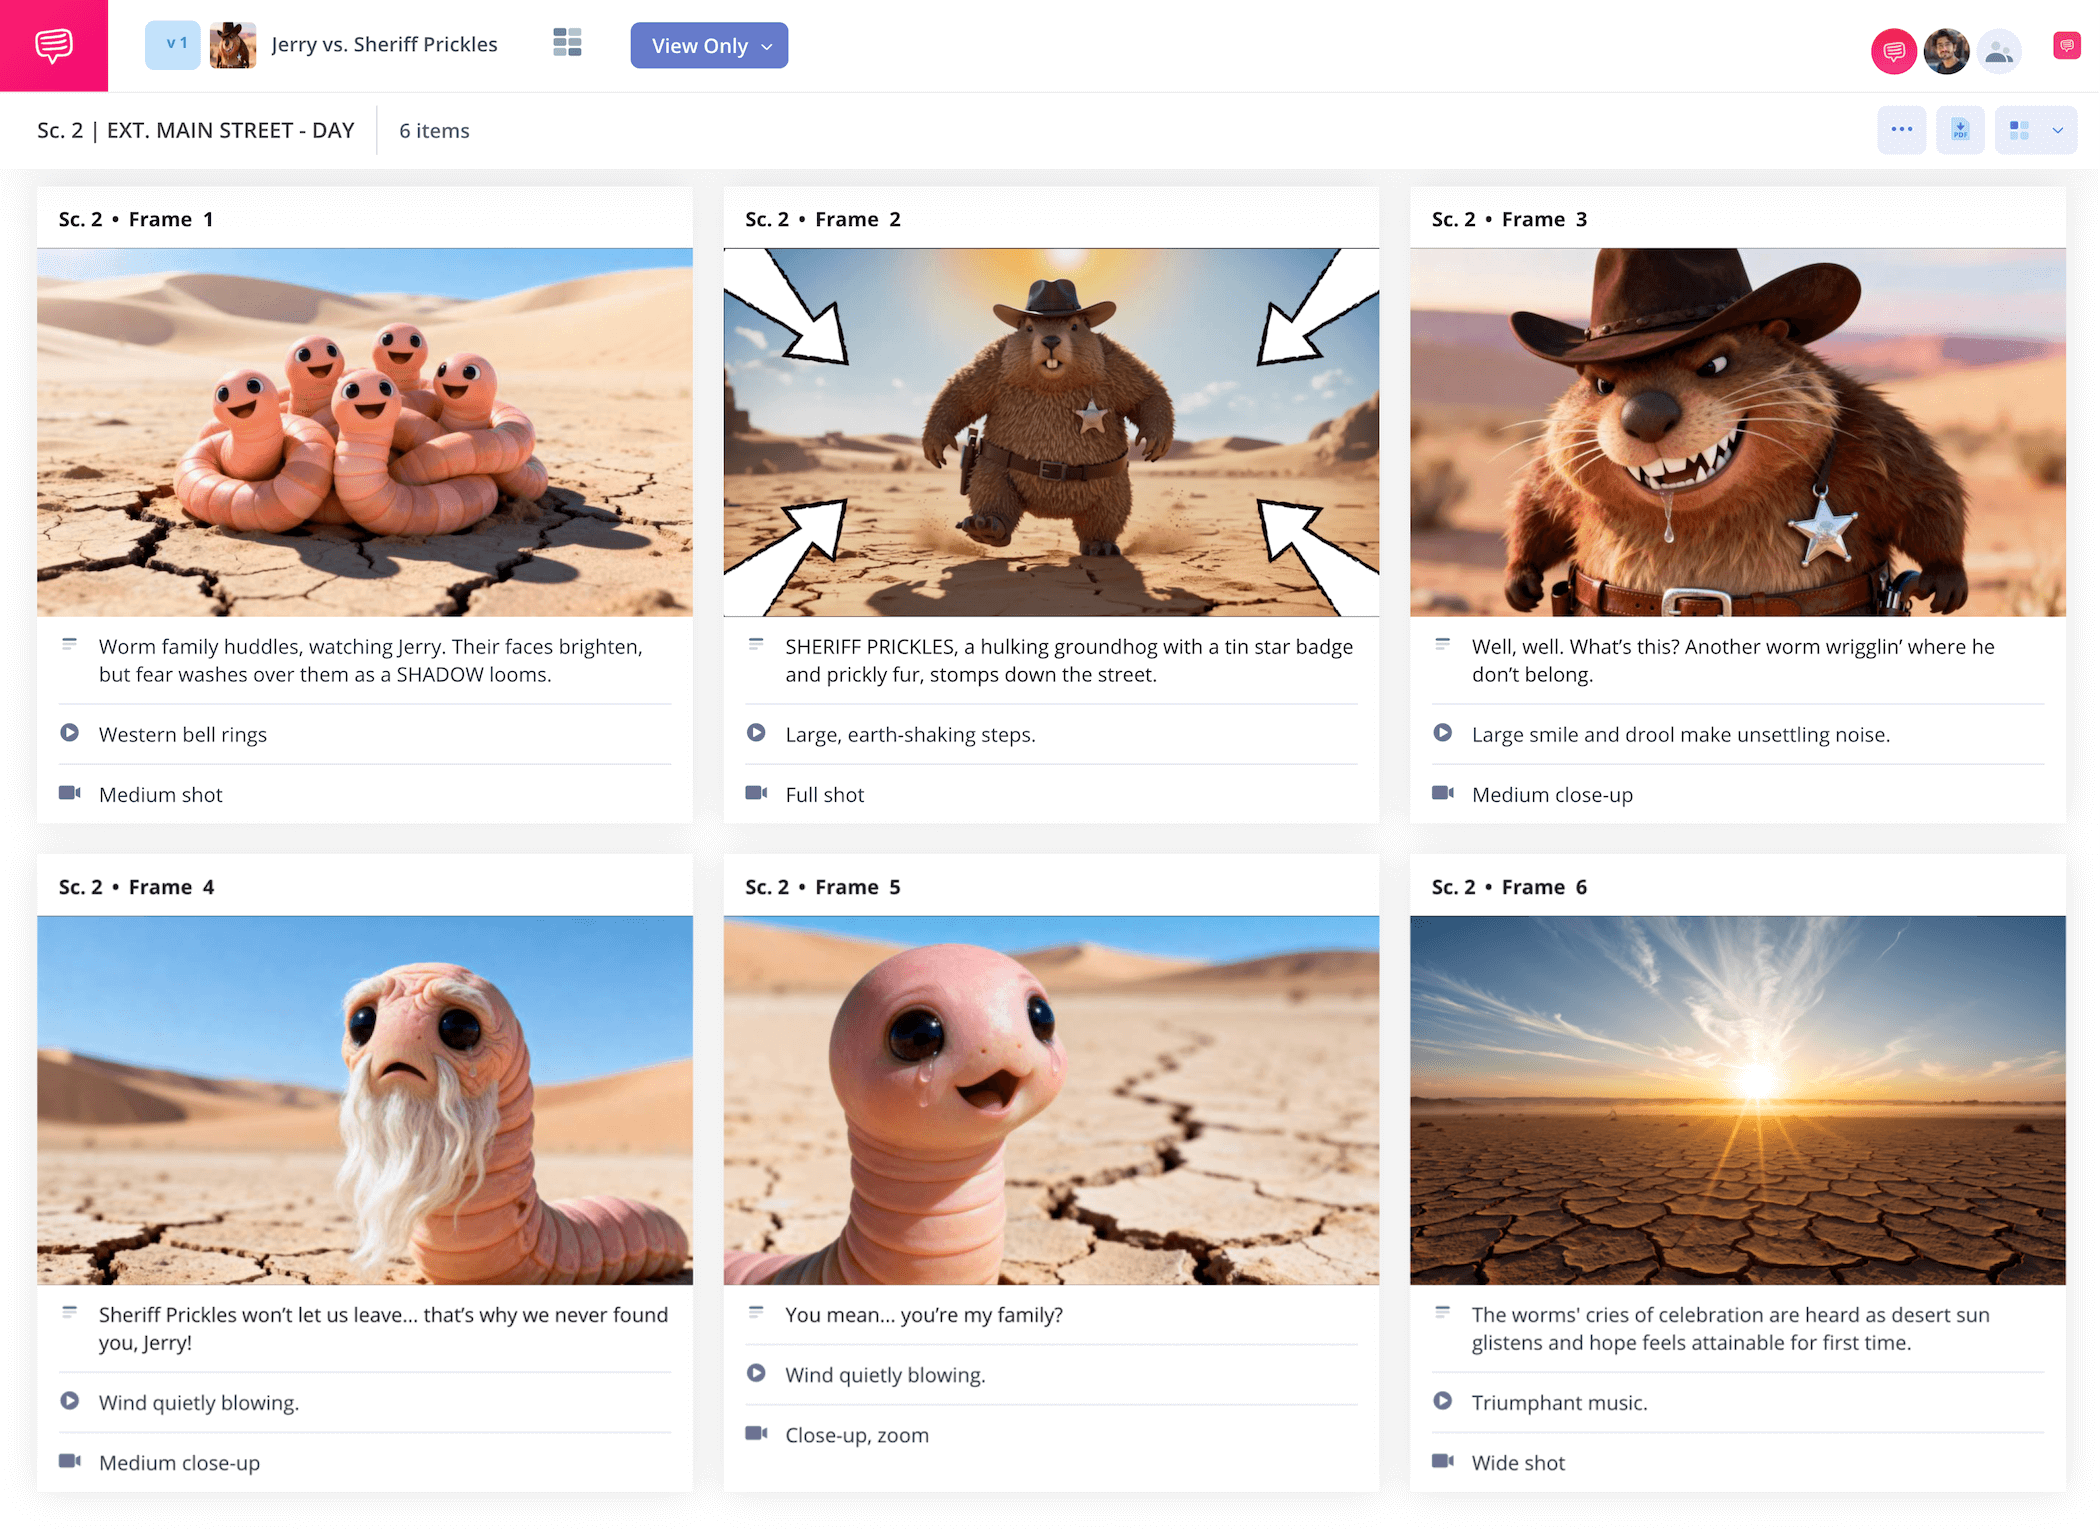
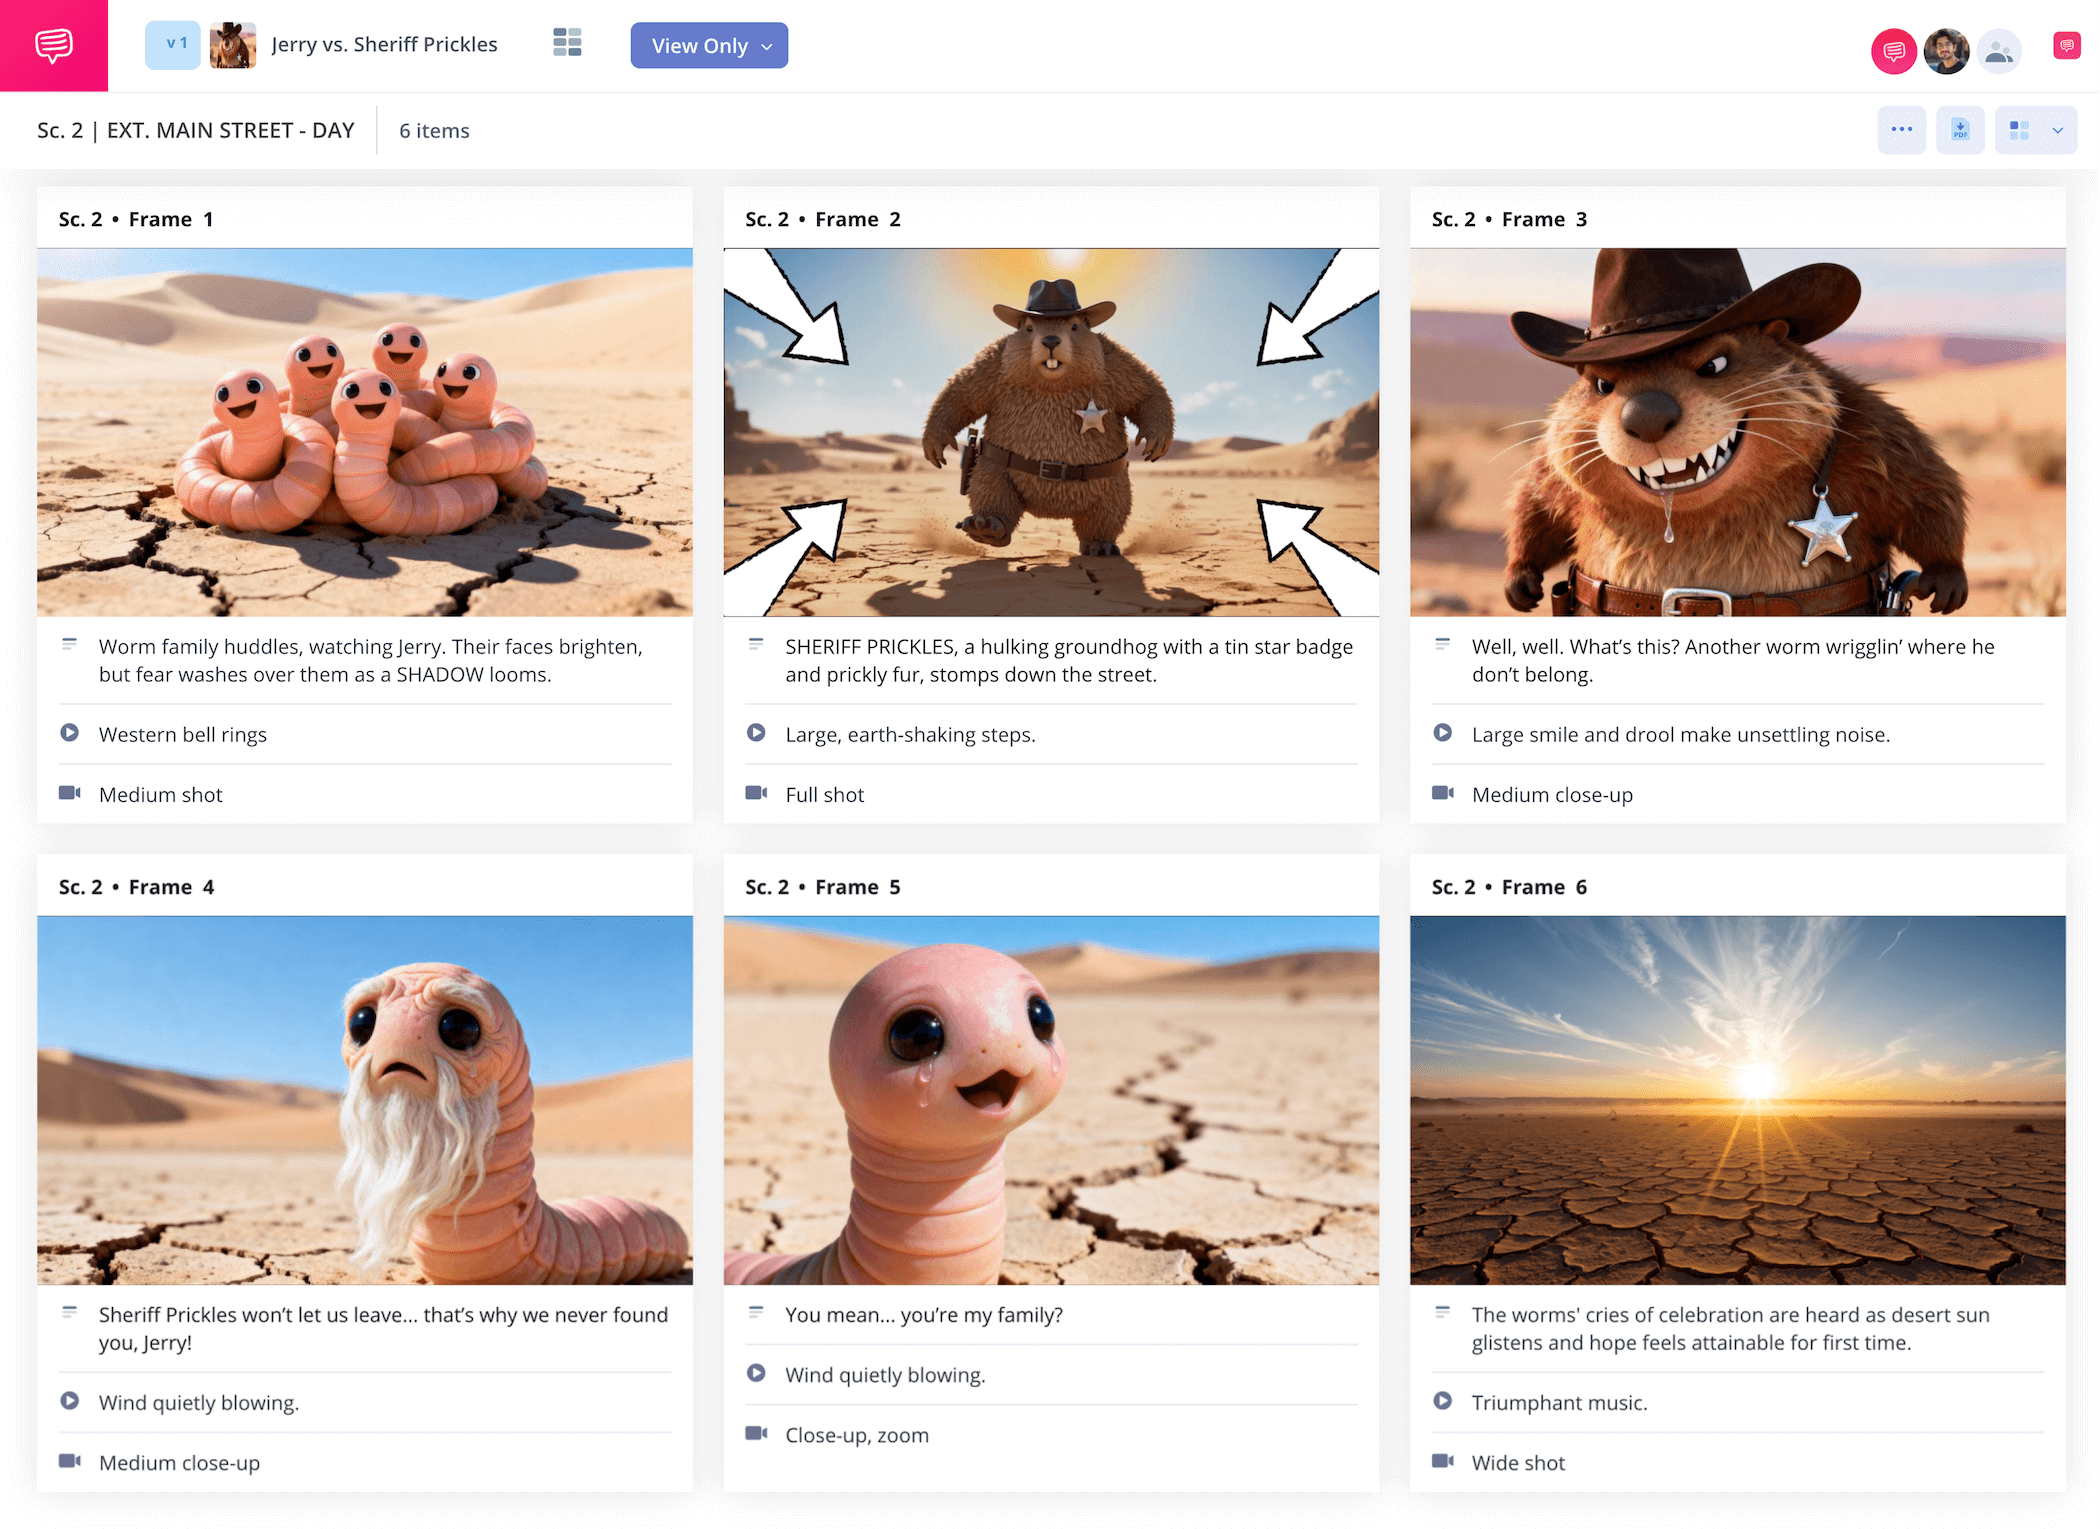
home → TEMPLATES → Storyboard
Animation Storyboard Template
Animation storyboard template
Creating a storyboard for animation is an essential step in bringing a great animated story to life on screen. The animation storyboard acts as a blueprint for how the subsequent animatics stage will approach bringing environment and character movements to life for the first time. Because of this, understanding the full range of emotions and physicality during the animation storyboard process is not a job to be taken lightly.
You’ll require an animation storyboard template, along with a guide to help see you through the process. Follow the steps below on how to format and utilize professional animation storyboards using StudioBinder’s Storyboard Creator.
Step 1
1. Map the script
All animated storyboard journeys begin with a script, or at least an awesome idea that begs to be animated. Even then, it’s best to first put that idea into words before jumping straight to the pre-production storyboarding process. In order to get the entire team, especially the visual artists, on the same page, you’ll need to start transmitting those descriptive ideas into your animation storyboard template.
With StudioBinder, you can either import a script into your animated storyboard template, or start manually and add descriptions as you go.
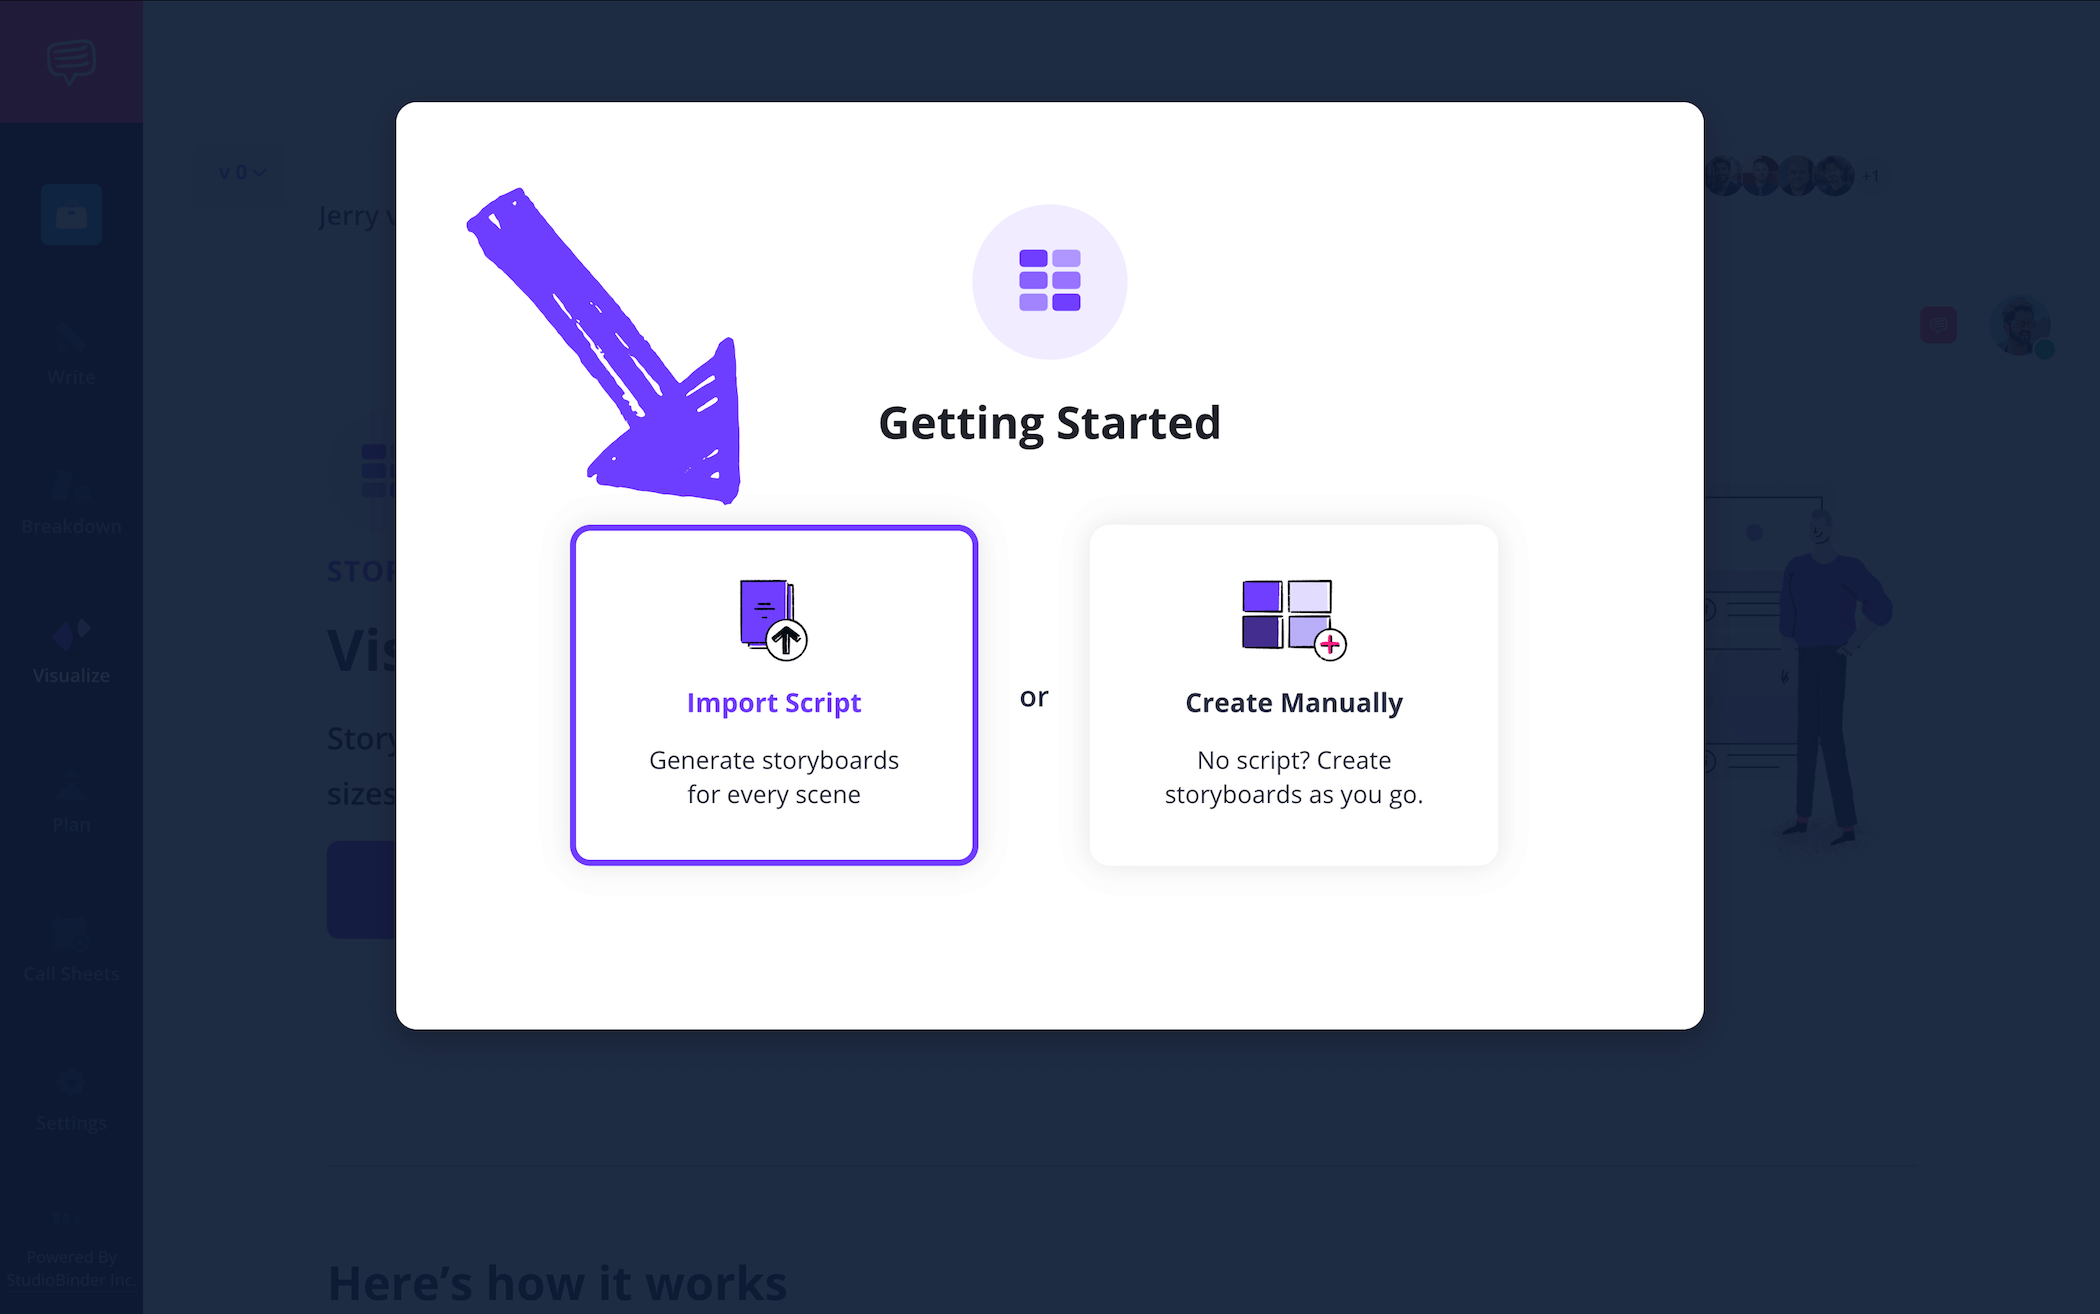
If you import your script, you can view it side-by-side with your storyboard, and even turn specific script lines into frames on your storyboard by simply clicking on them and selecting add frame.
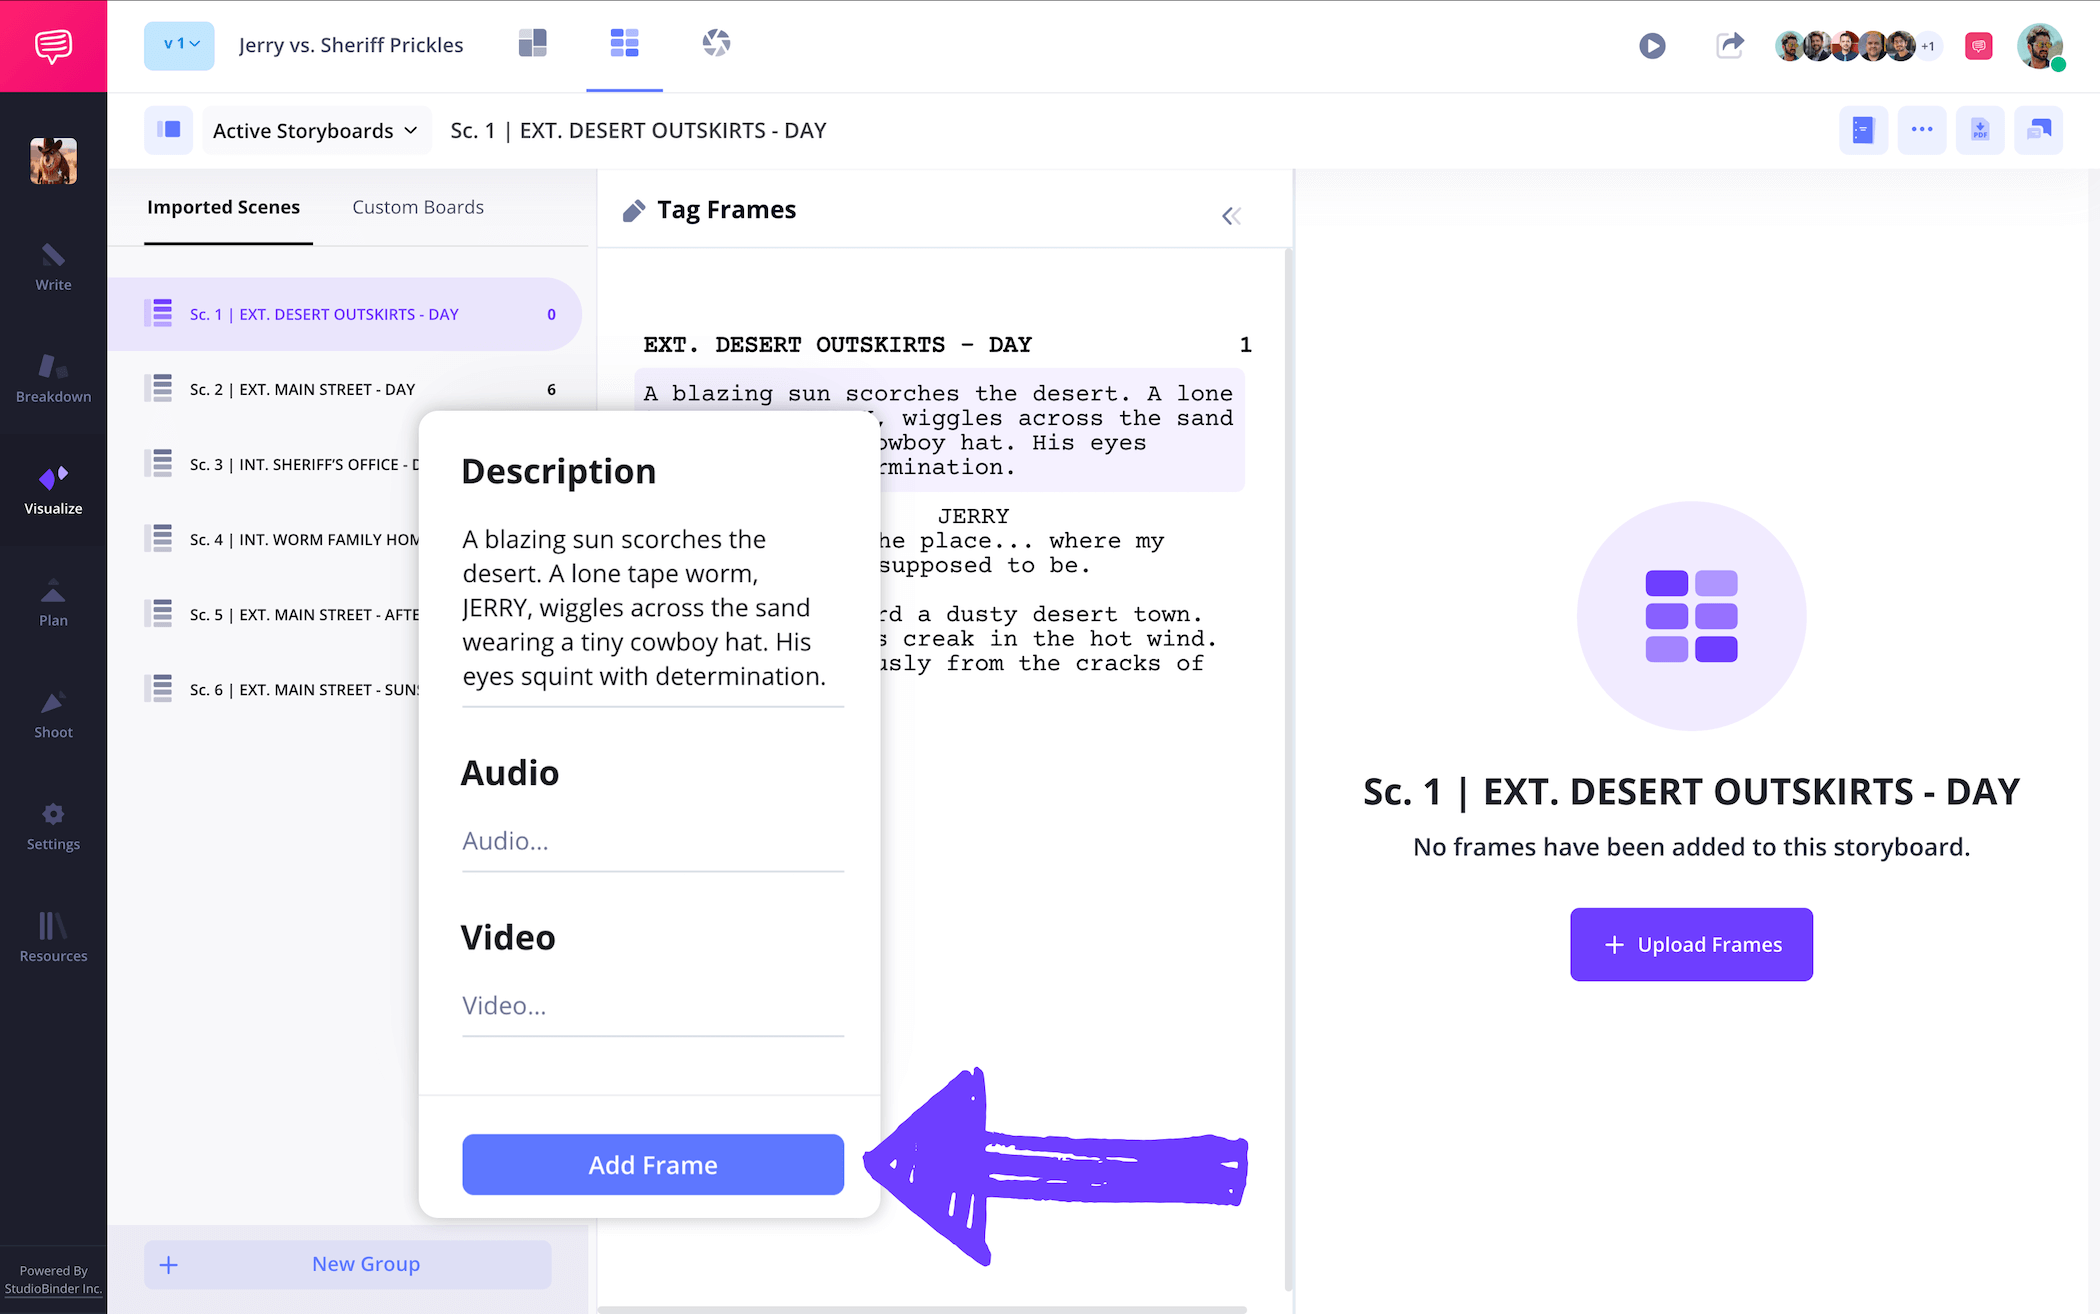
After you've tagged all the key visual shots in your scene, you'll have blank storyboards and you can begin adding descriptions for all of them.
Step 2
2. Introduce images
Perhaps you want to add some quick sketches from your team’s storyboard artists, or maybe you need to include higher quality digital illustrations that resemble something closer to what the final animation passes will look like. Either way, animation storyboards can’t exist without images.
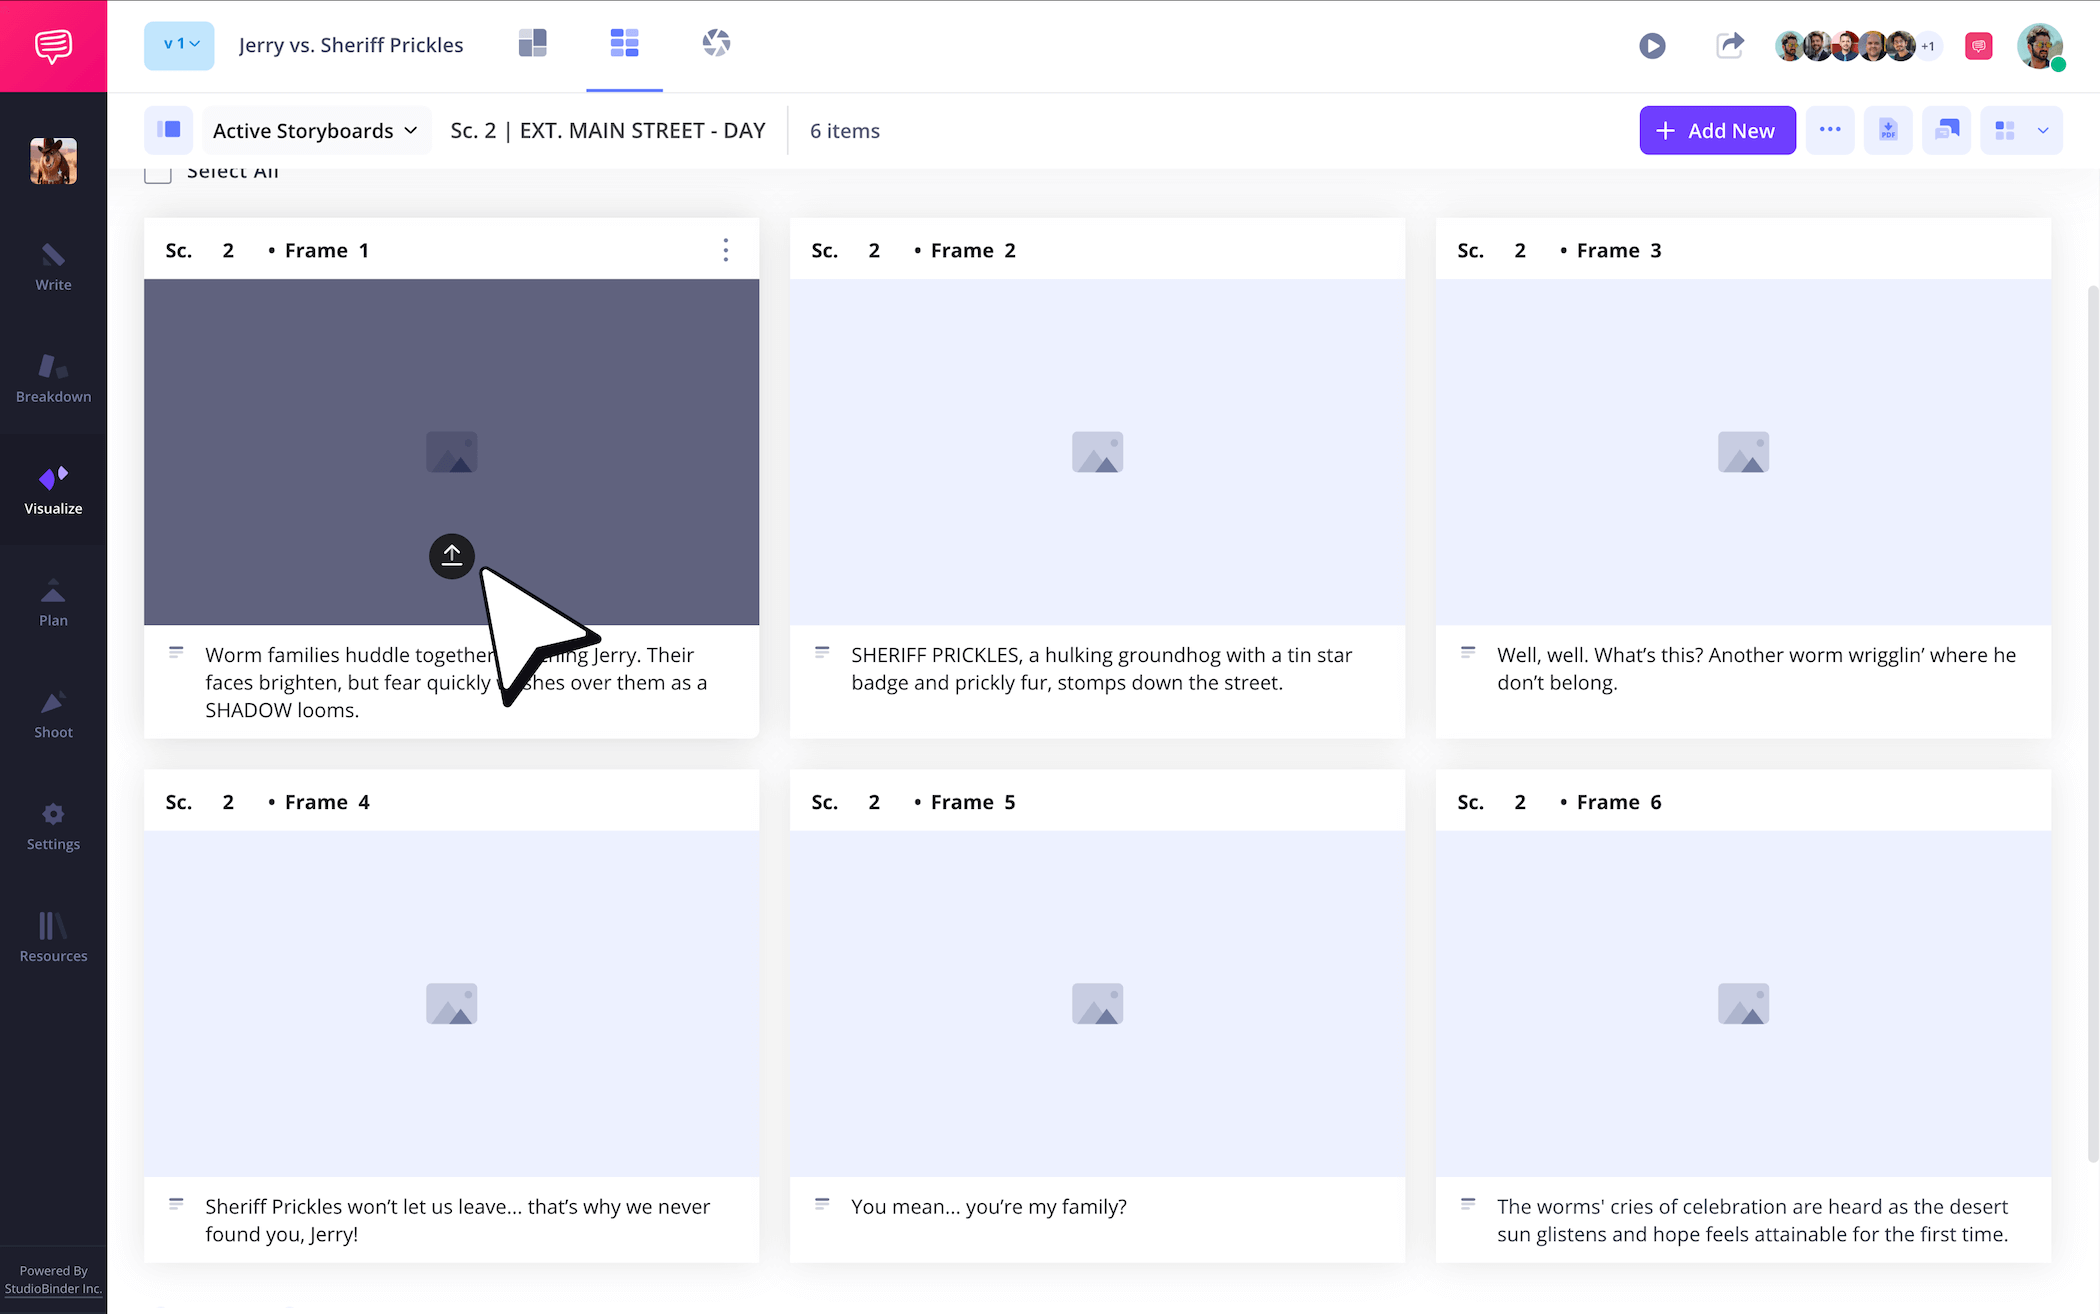
When you’re ready to add visuals to your storyboard for animation, all you need to do is hover your mouse over any empty frame and select the upload image icon.
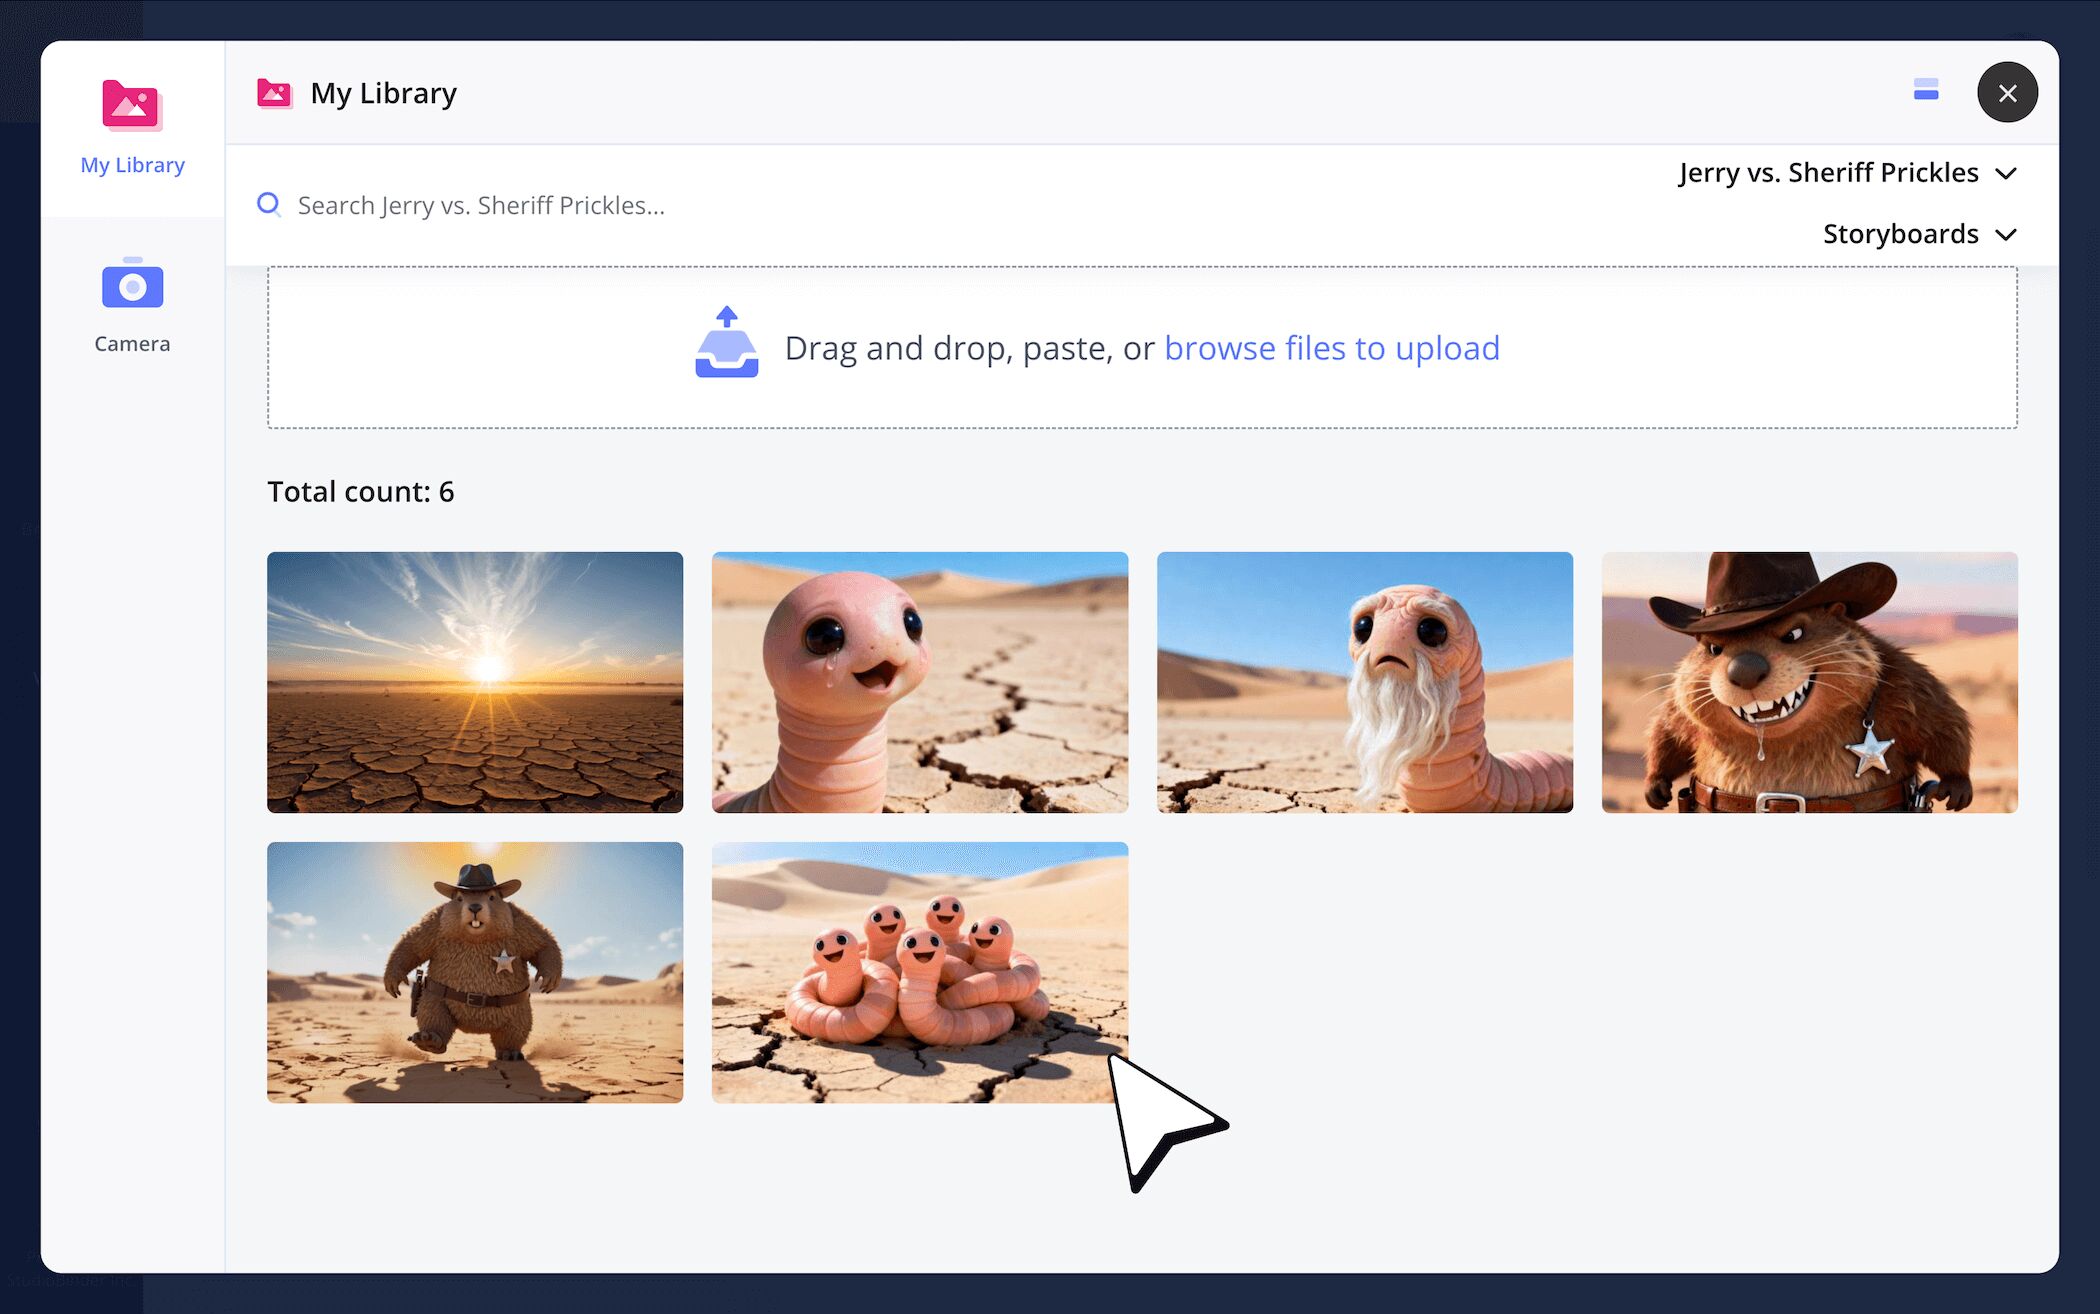
You’ll often switch back and forth between new and previously discarded images as everyone from layout artists, editors, and directors provide their feedback. StudioBinder automatically saves every image imported in your project library, so don’t worry about losing your mind over losing images.
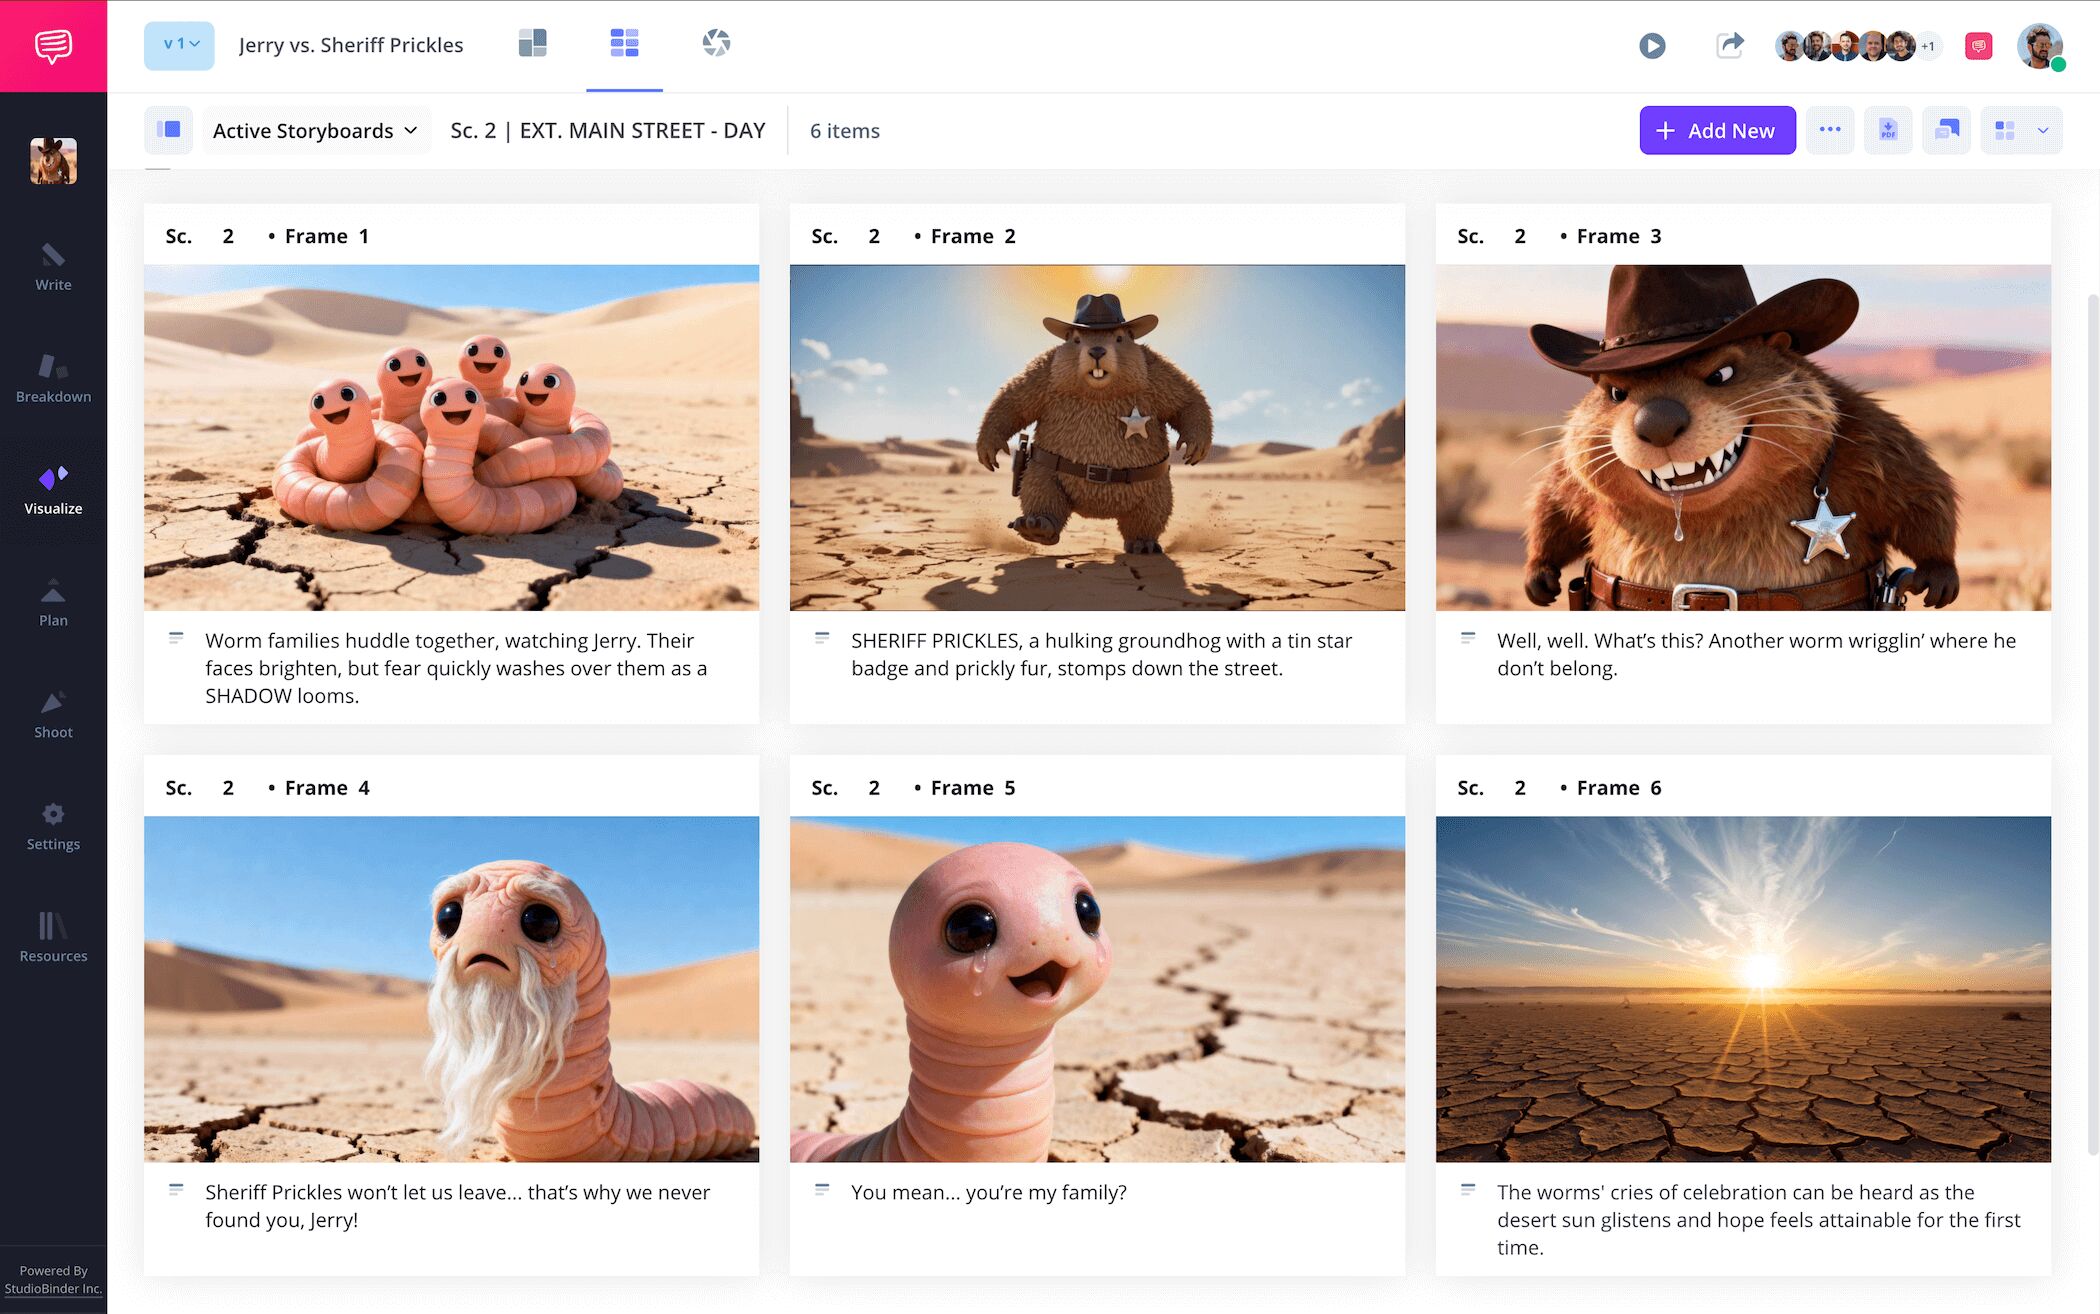
One by one, just go through all your images the same exact way and you'll quickly have a professional animation storyboard example that you can present to your entire team to get everyone on the same page.
Step 3
3. Customize frame settings
There are plenty of animation storyboard examples out there that get by just fine without writing any field details under their illustrated frames. It really all comes down to artist and director preference in storyboard animation. Still, if you and your team find such details helpful, well, it’s time to customize away!
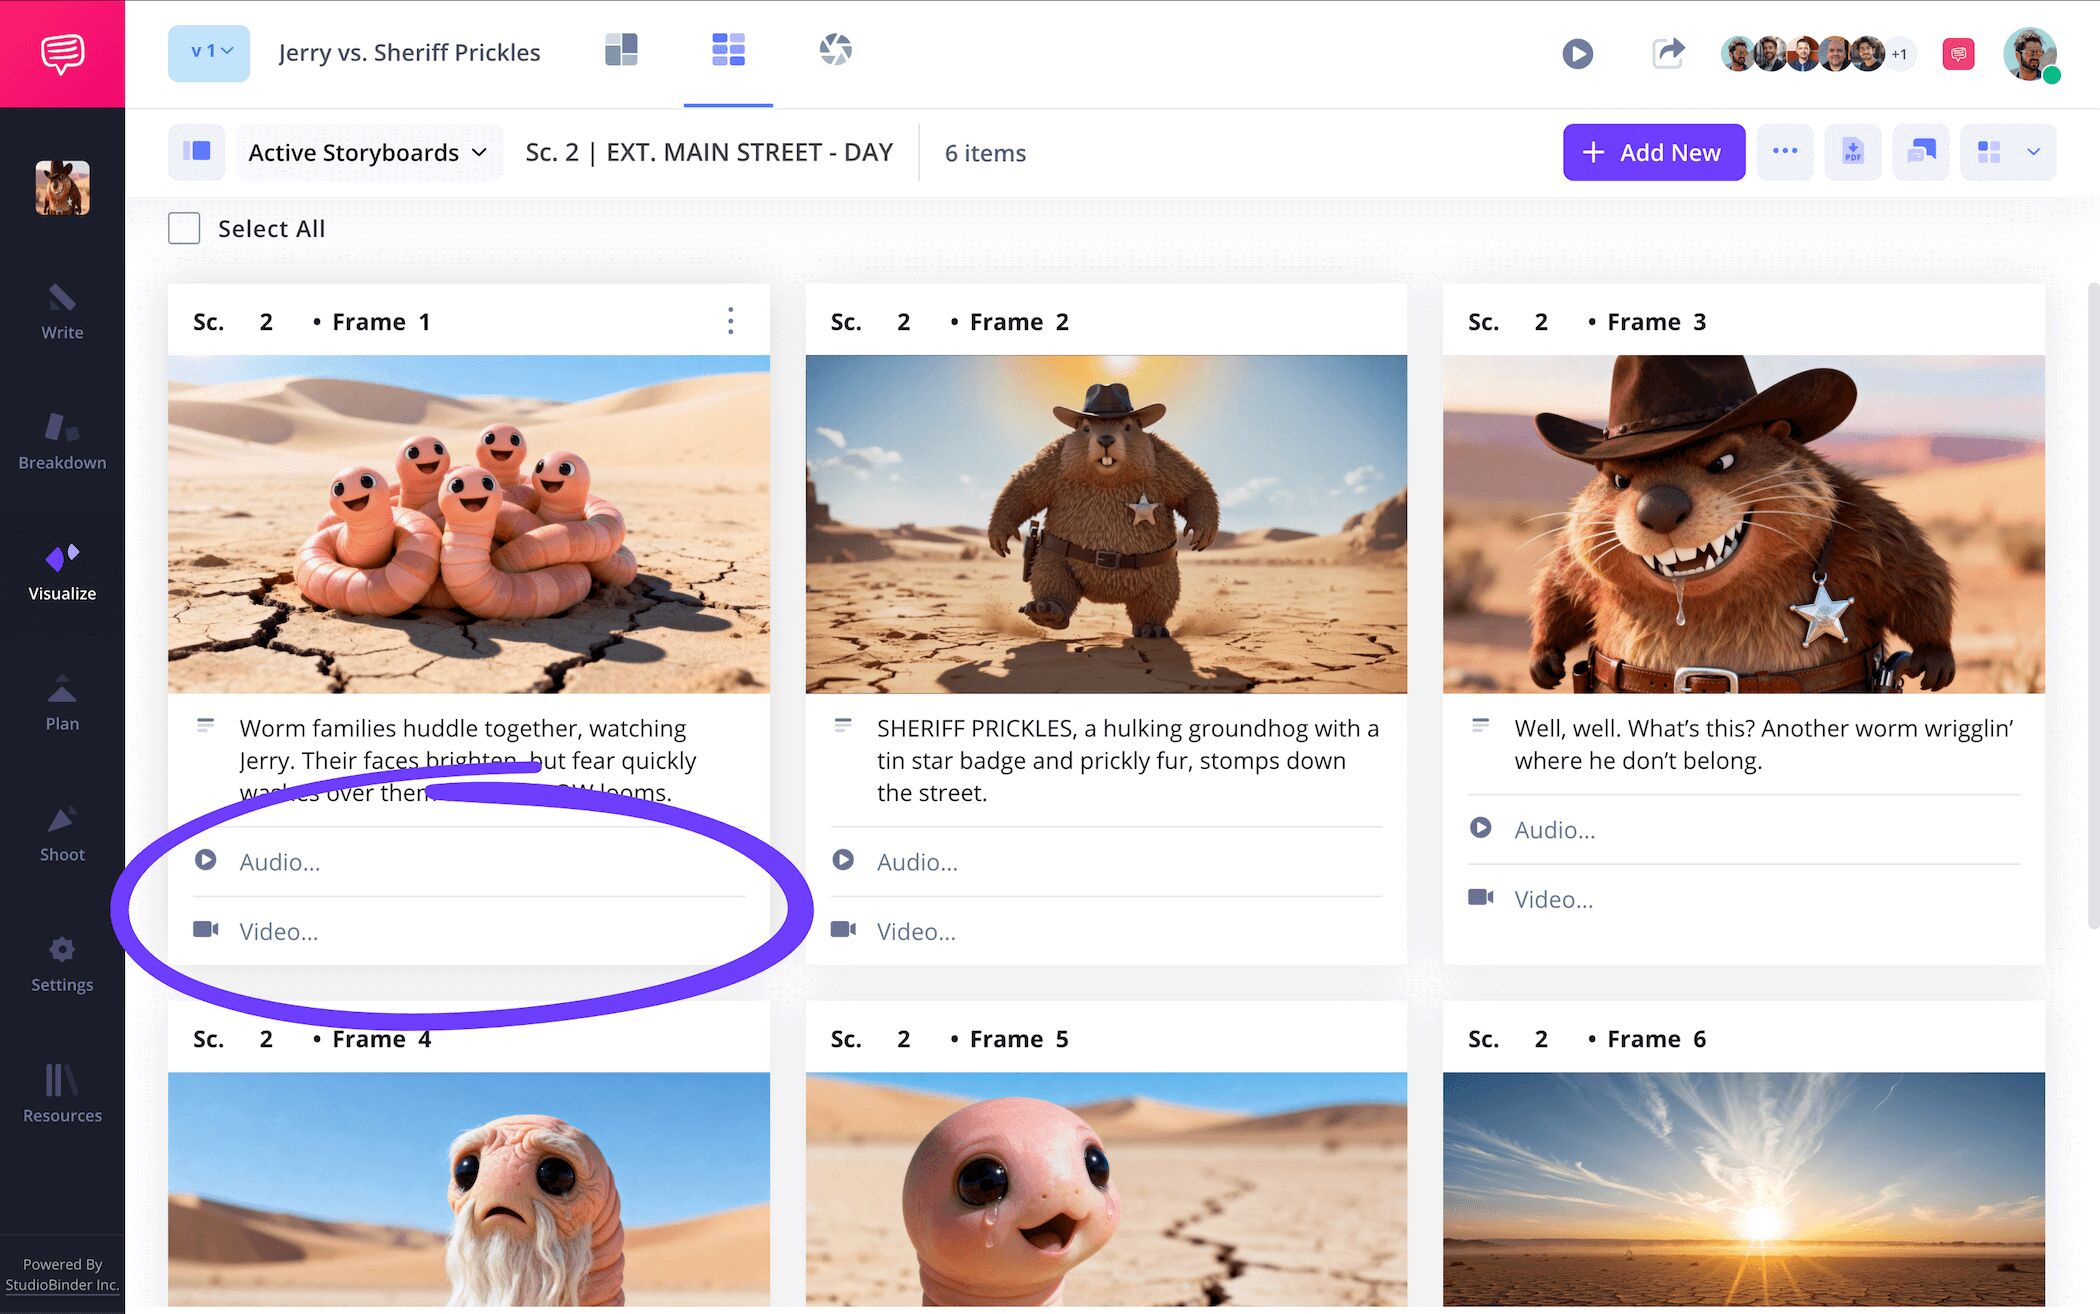
To customize your field details in StudioBinder, select customize frames in the settings bar. Here you can toggle any of the field bars that appear under your frames on or off.
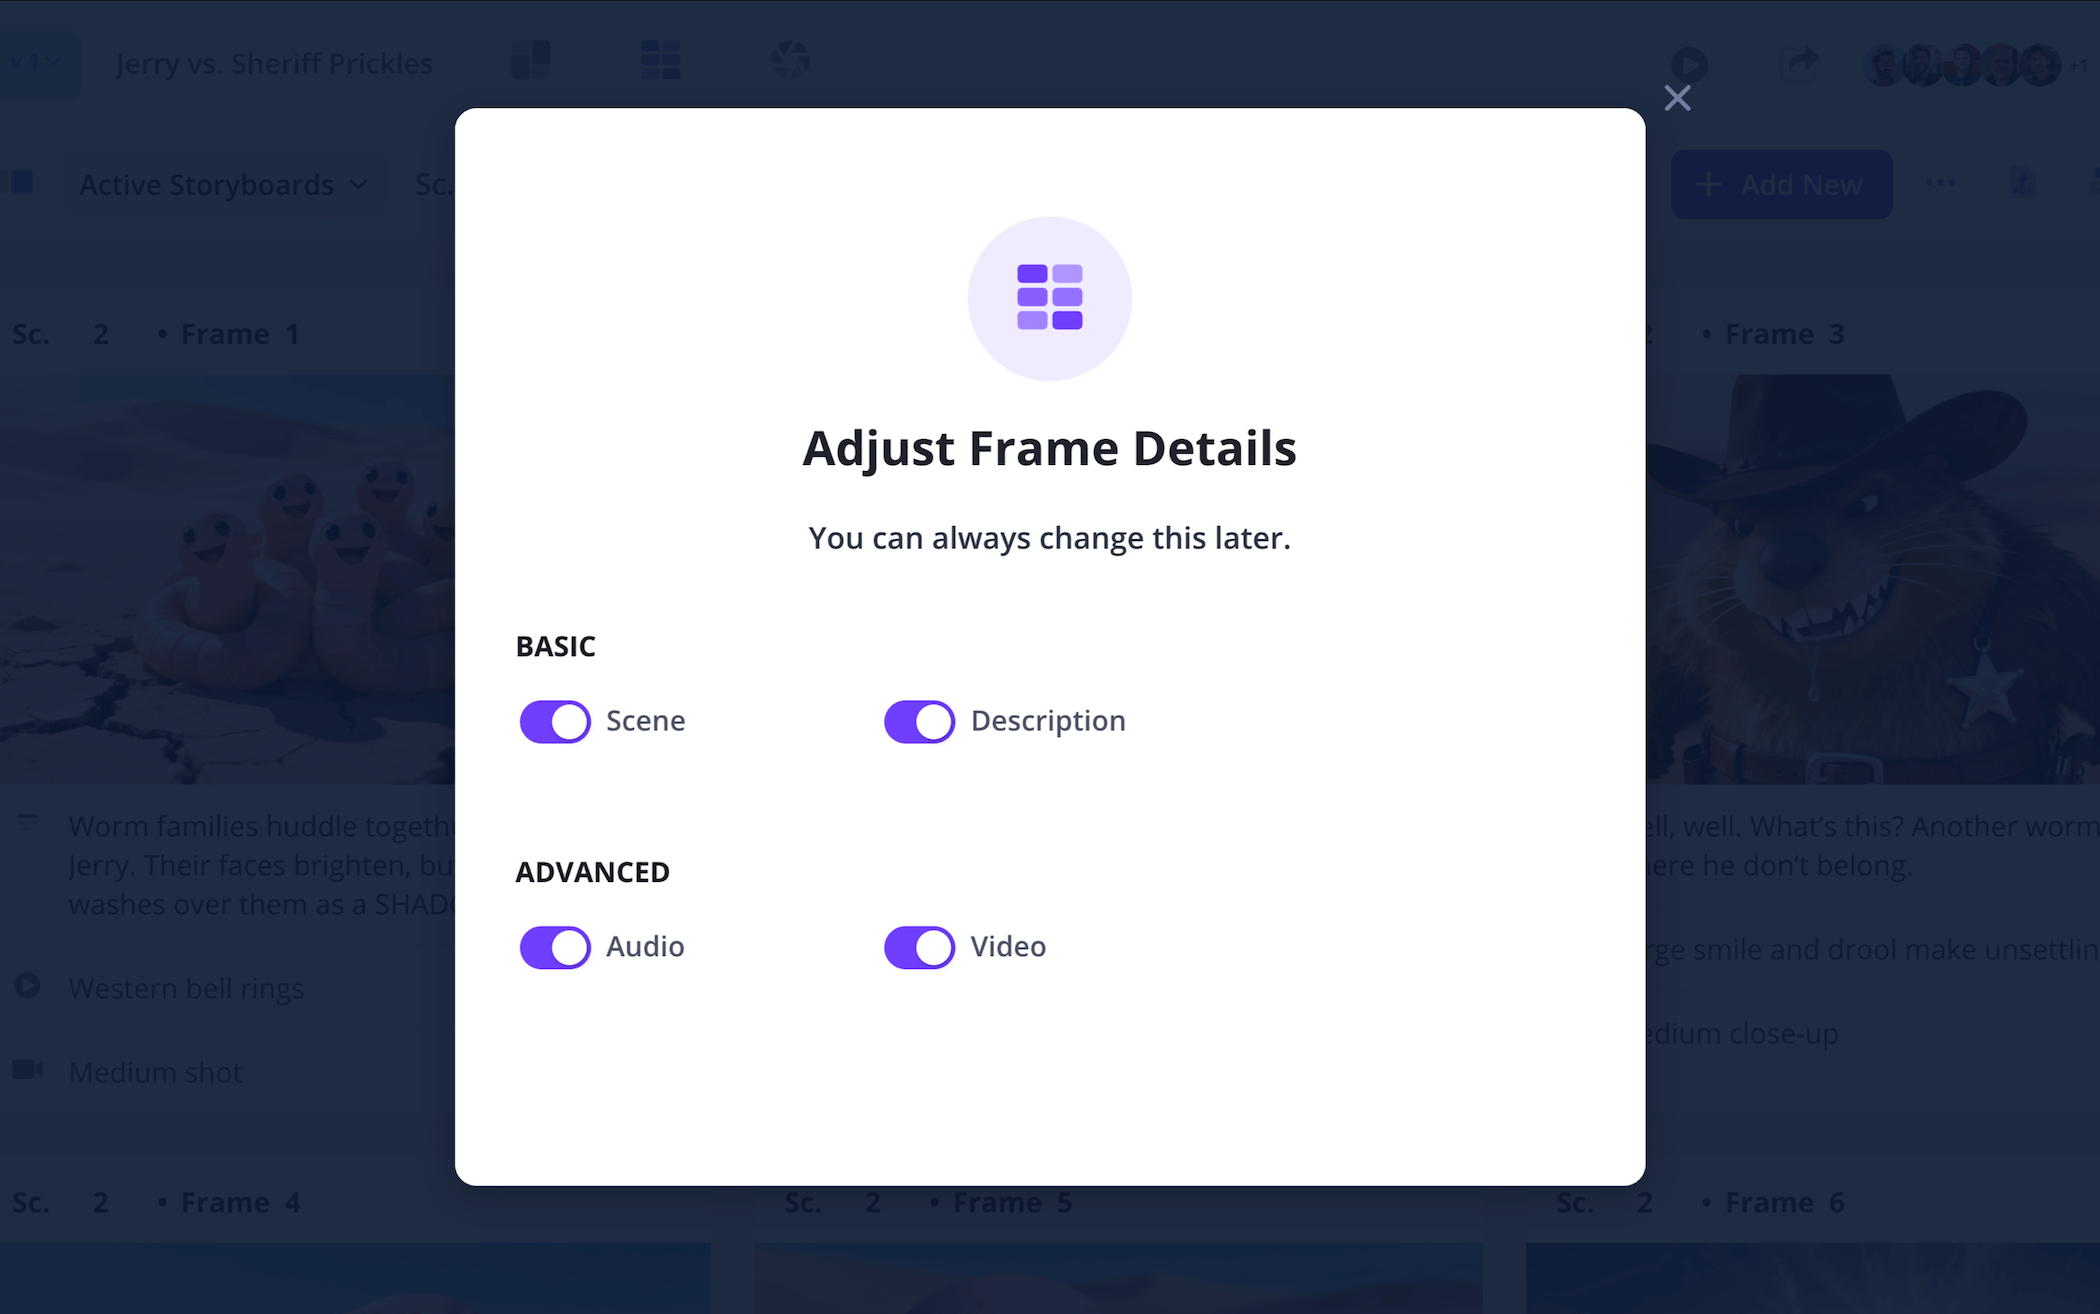
Now when you return to your animated storyboard, you can fill out the fields below each frame, whether that’s audio, video, description, scene, or all of the above.
Step 4
4. Edit your illustrations
Let’s say the storyboard artists provide a sketch or digital image that requires a little more fixing up. Maybe the coloring on the lead animated villain needs to be a bit less bright and welcoming, or some quick annotations need to be made to emphasize the quirky ways an animated character moves in a particular scene. Whatever the case, the frames in a storyboard for animation will likely come across the need for one touch up or another.
With StudioBinder, you can click on any image in any frame and select the edit button to start initiating your team’s required adjustments.
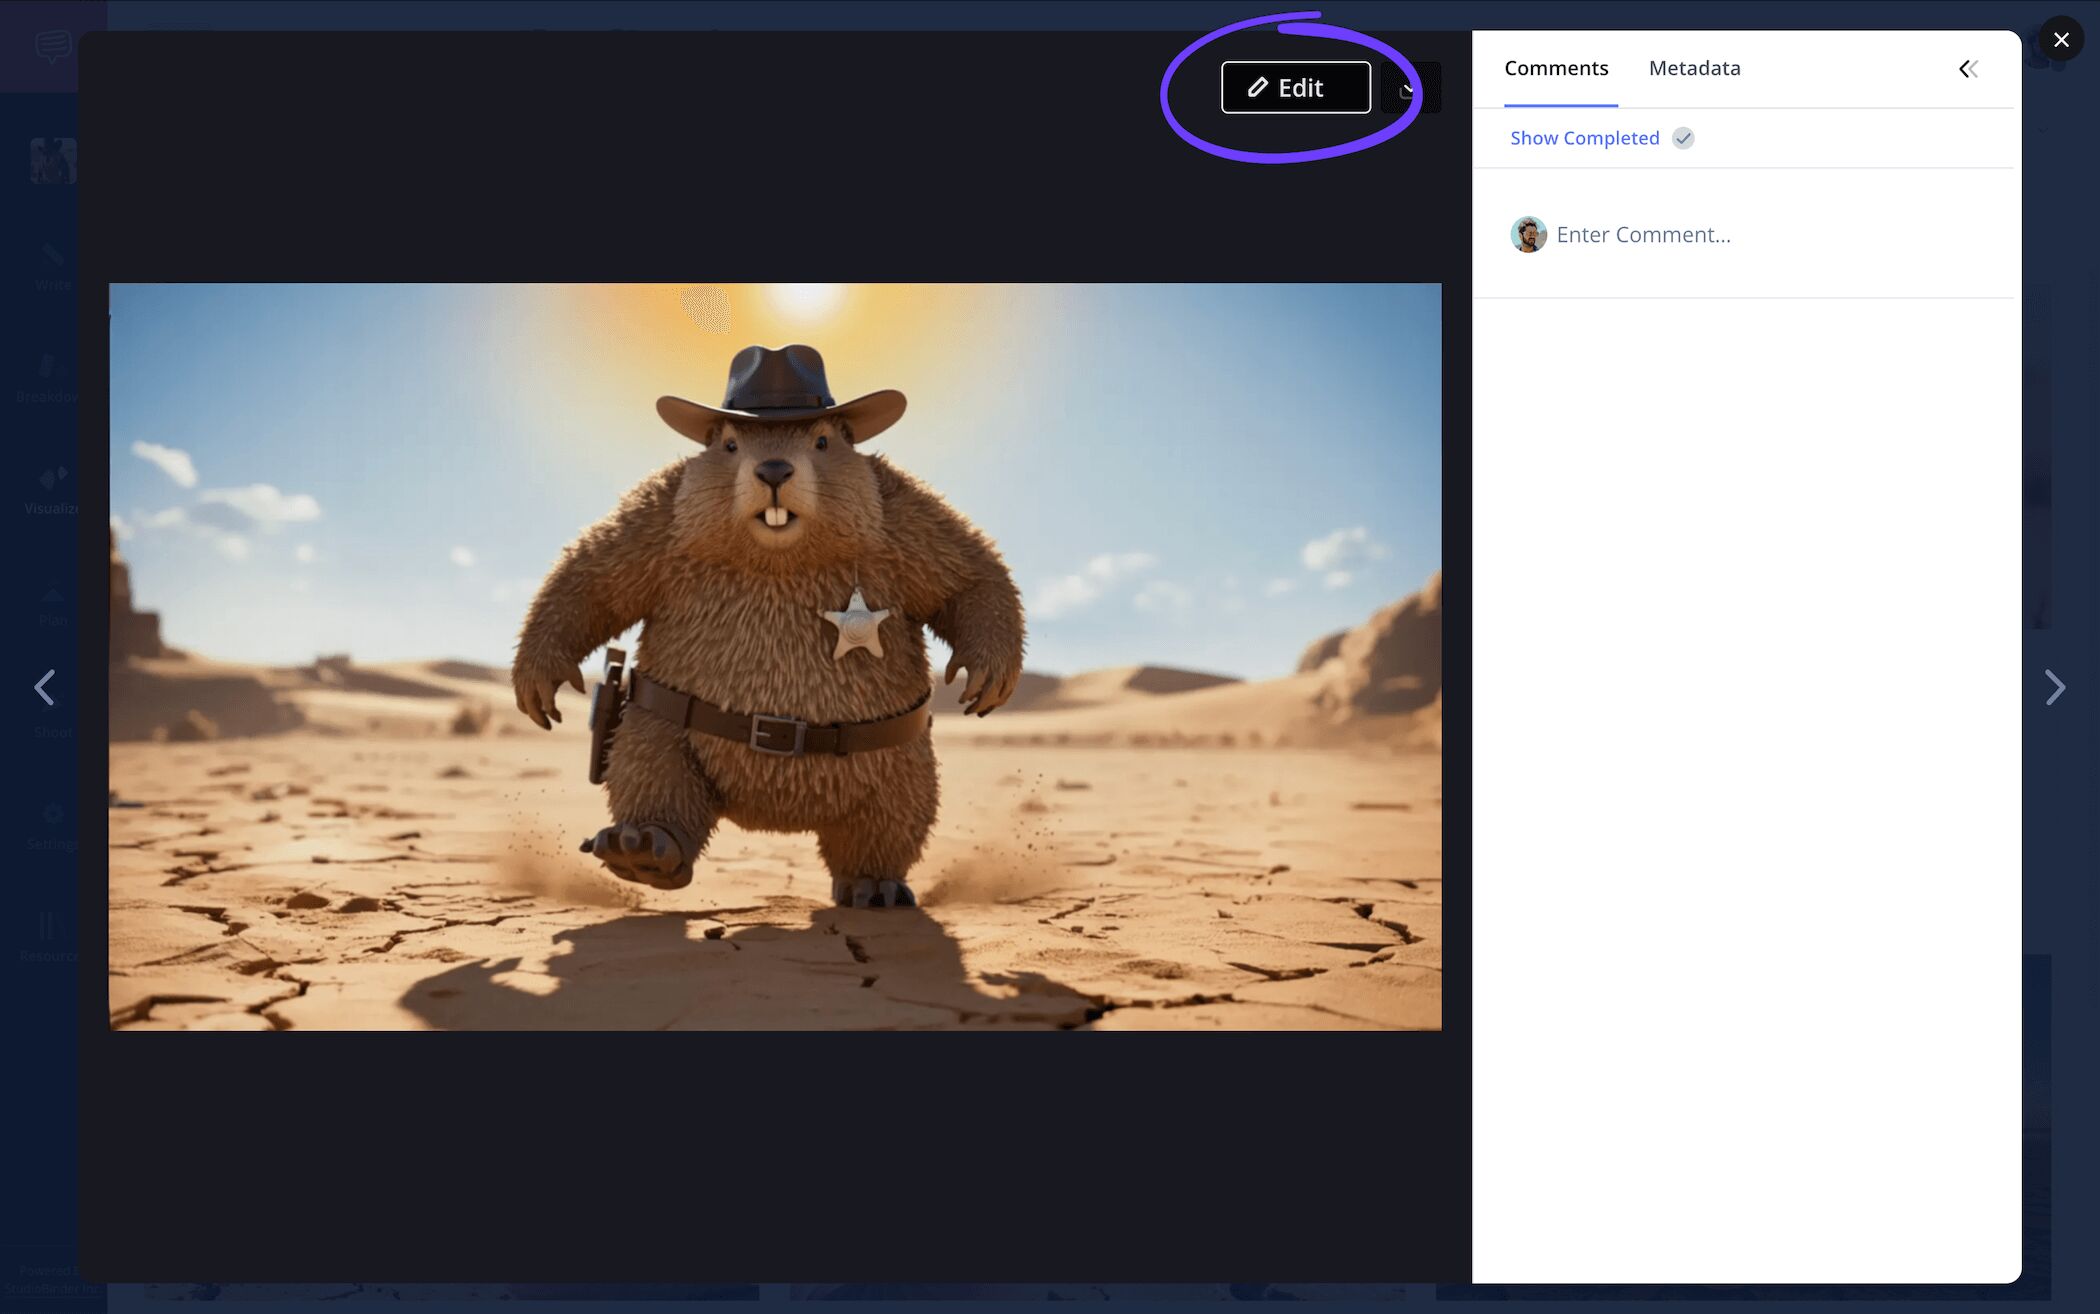
Now in the edit page, you can make any adjustments you need, from adding arrows or text to your image, to cropping the image at just the right length.
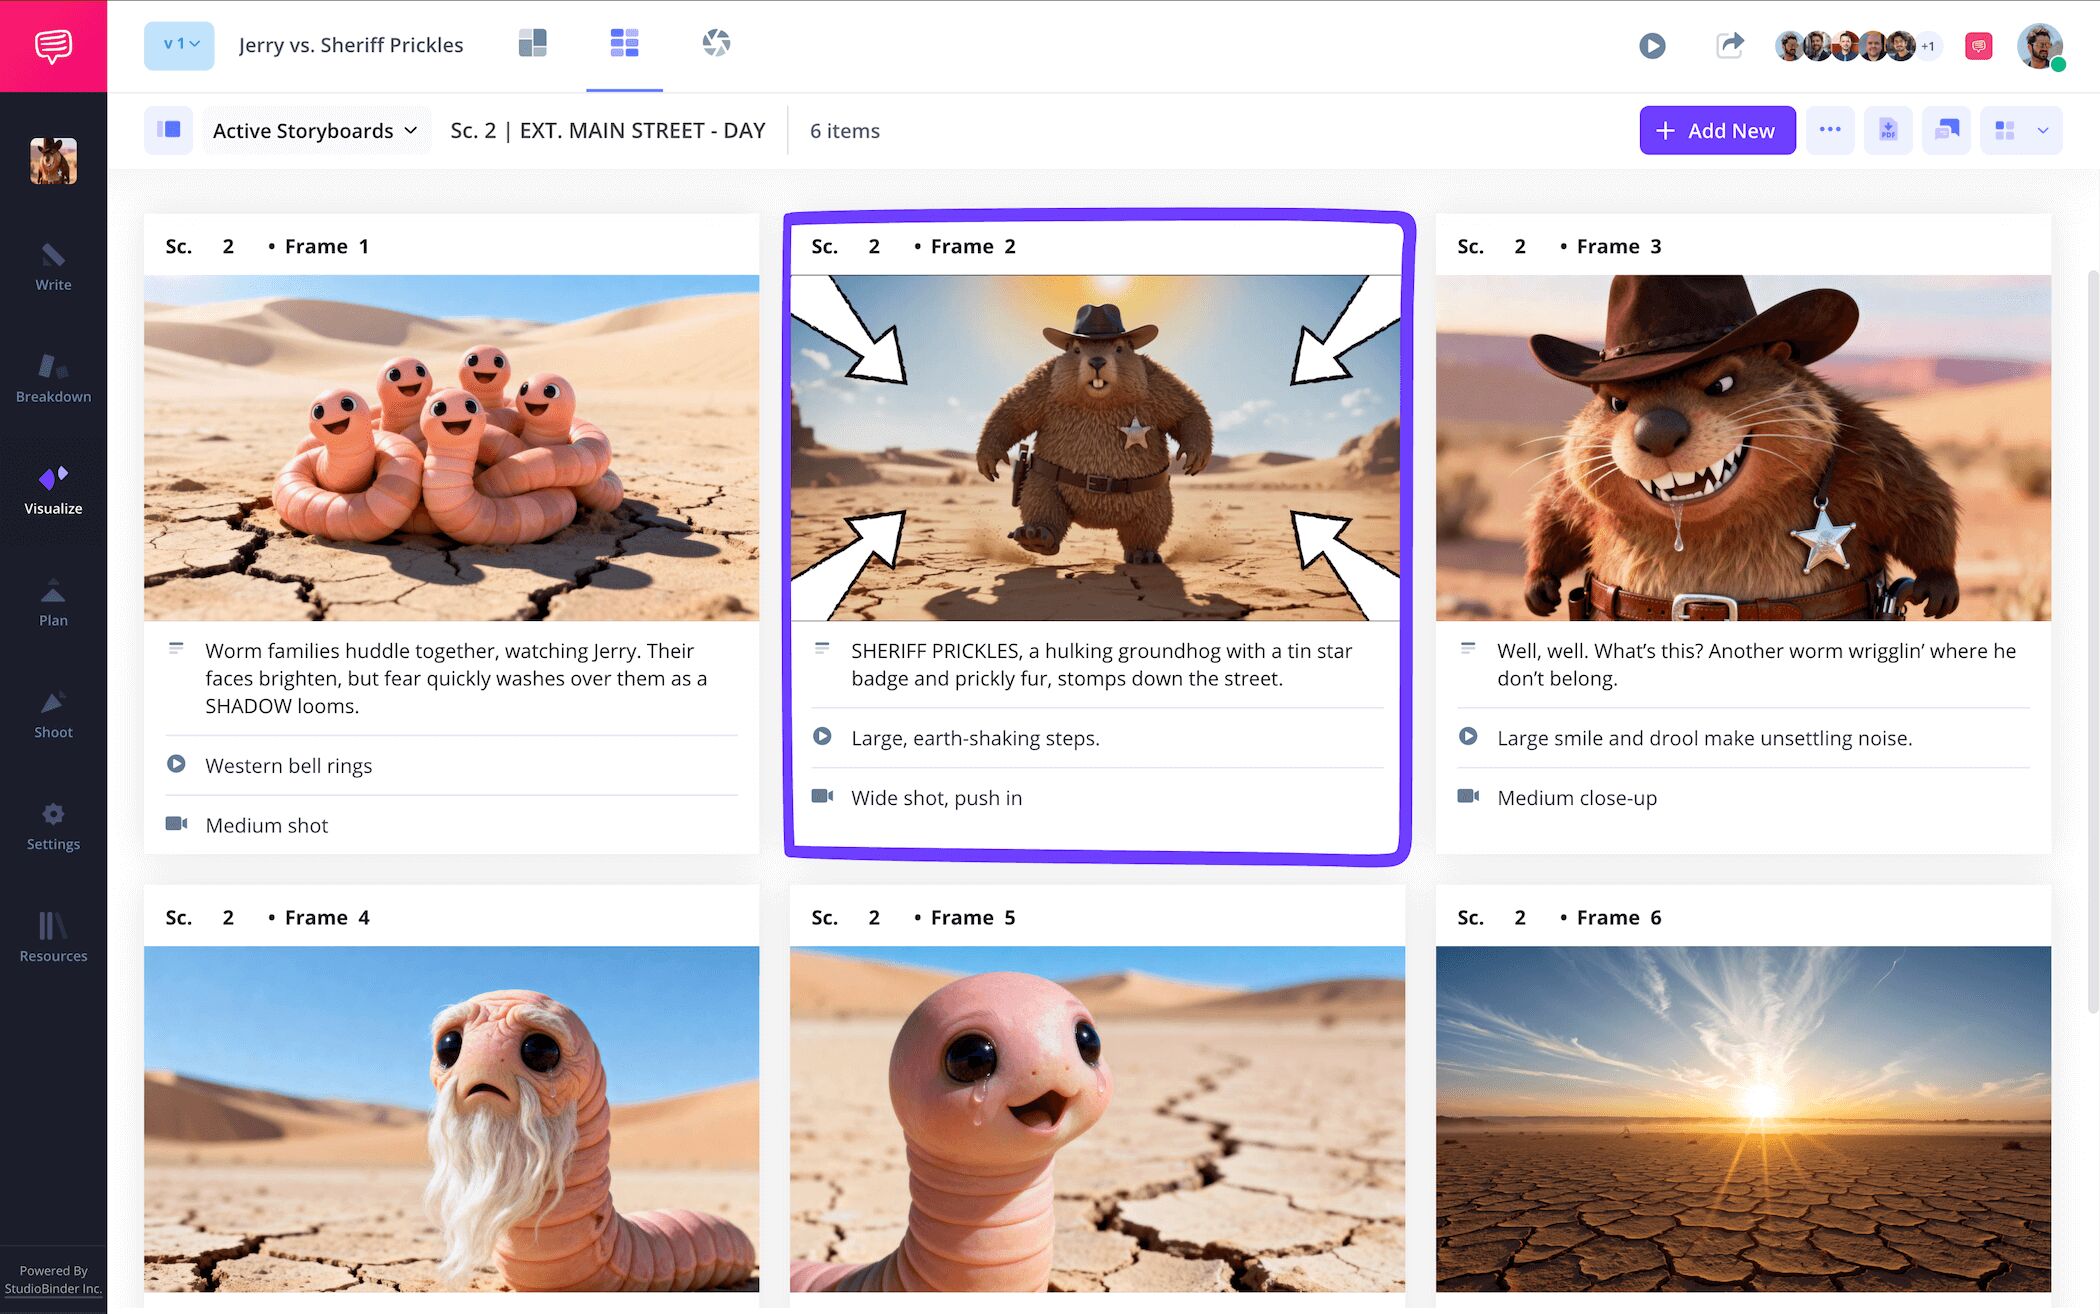
In our example, the intro shot for our animated western antagonist could use some touching up with some camera movement.
Click Arrows and you'll find a row of various arrow styles that you can use.
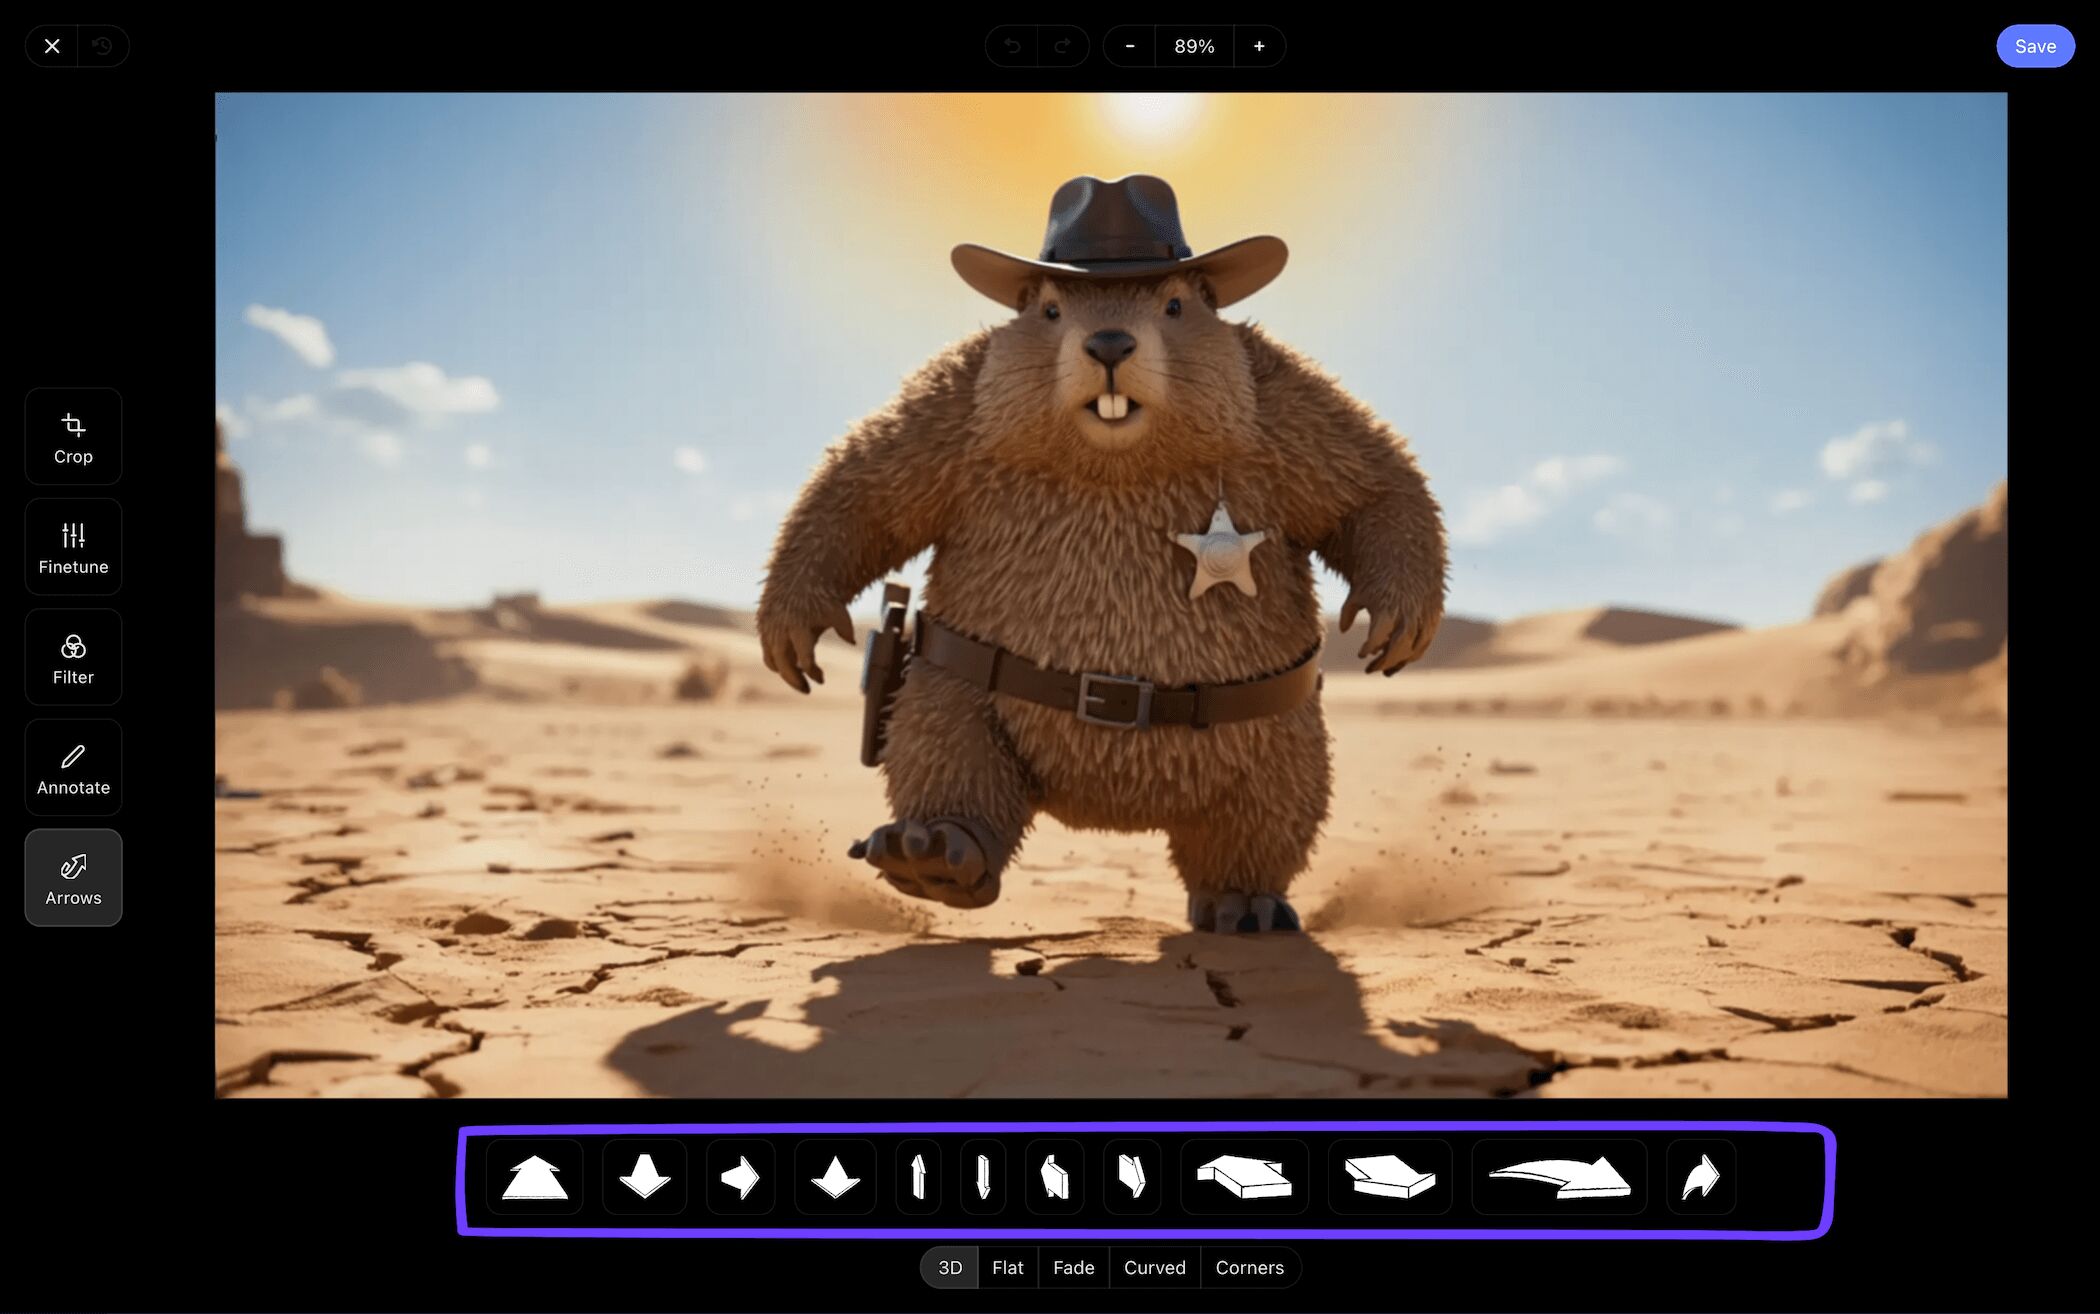
These storyboard arrows all use to think visually and get our creative juices flowing. In this case, a steady zoom in can be effective. Just grab the corner arrows and place the appropriate diagonal arrow in the correct corner.
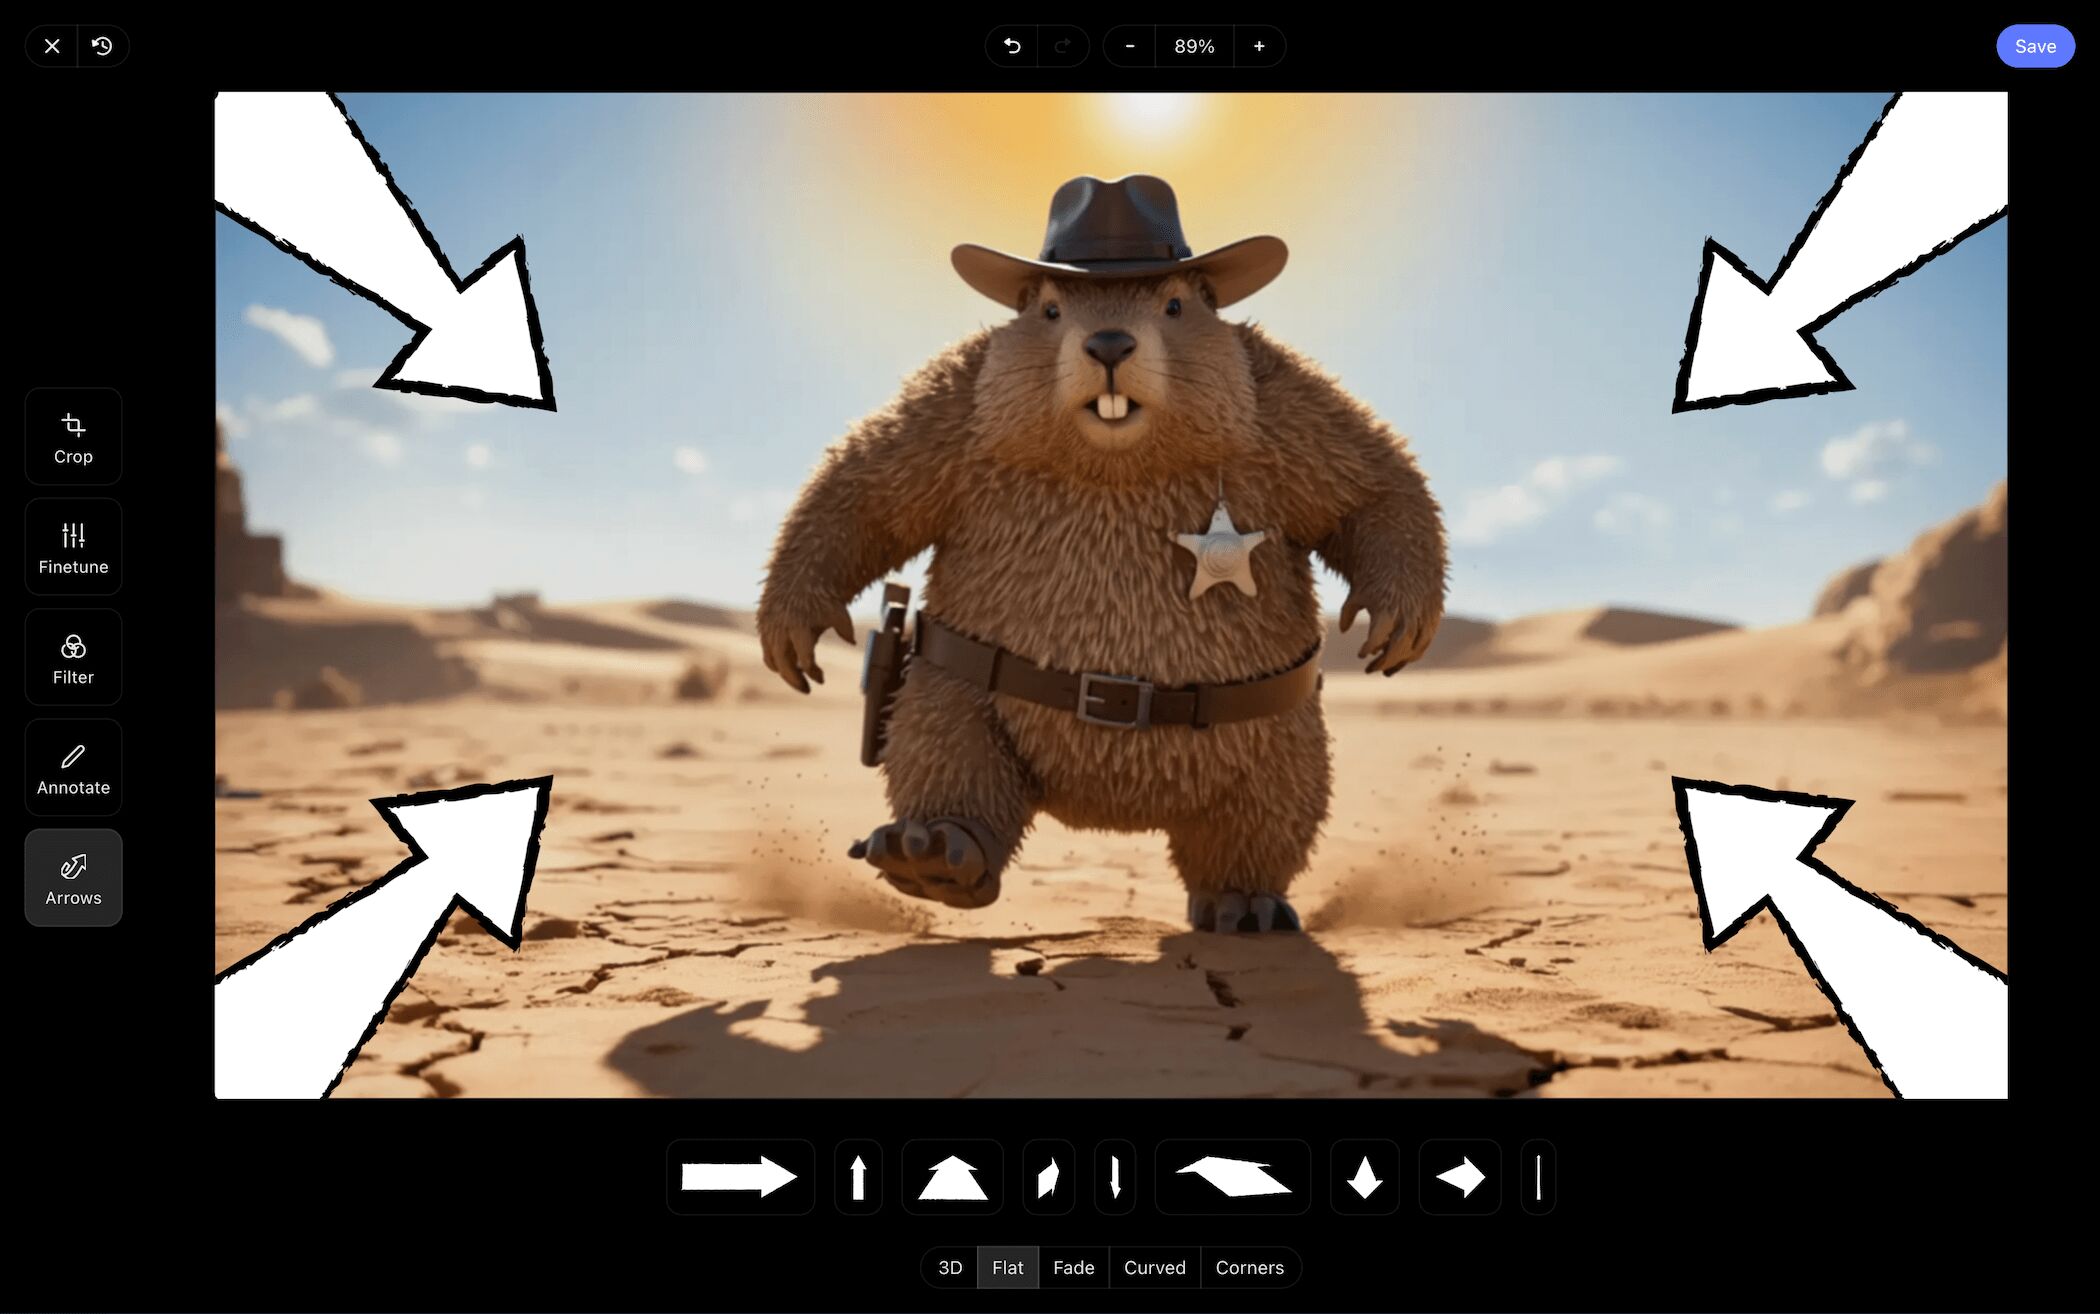
After adding the storyboard arrows in the image editor, click Save and you'll see the updated image will be automatically placed inside the panel.
Step 5
5. Print your storyboard
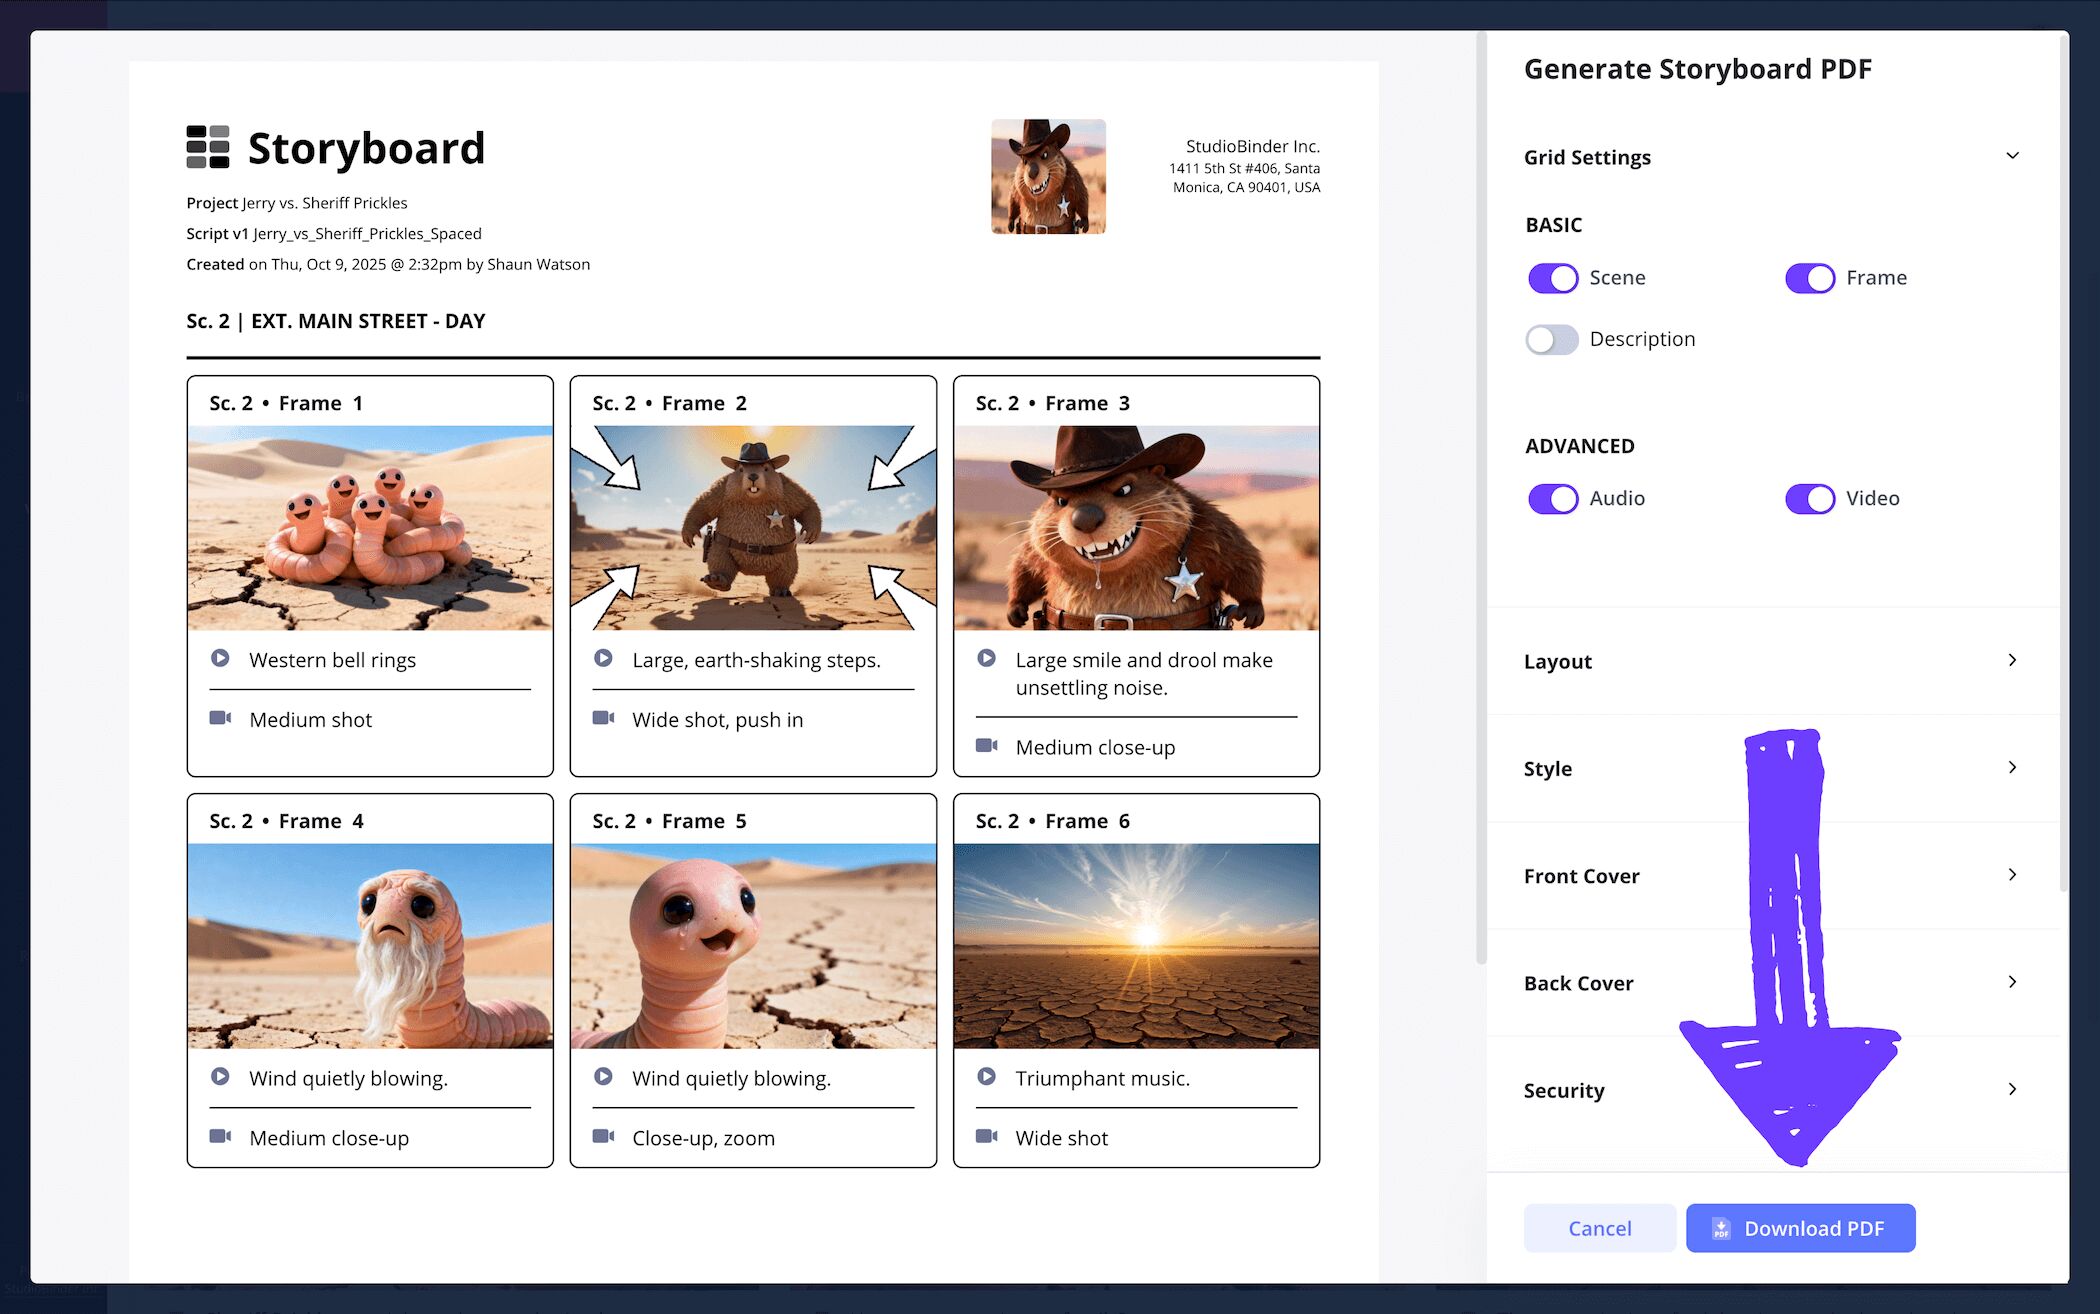
When your animation storyboard is finished and production is ready to move onto the animatics stage, saving your team’s storyboard as a printable PDF will likely be a priority. With StudioBinder, you can professionally customize and download your storyboard with ease.
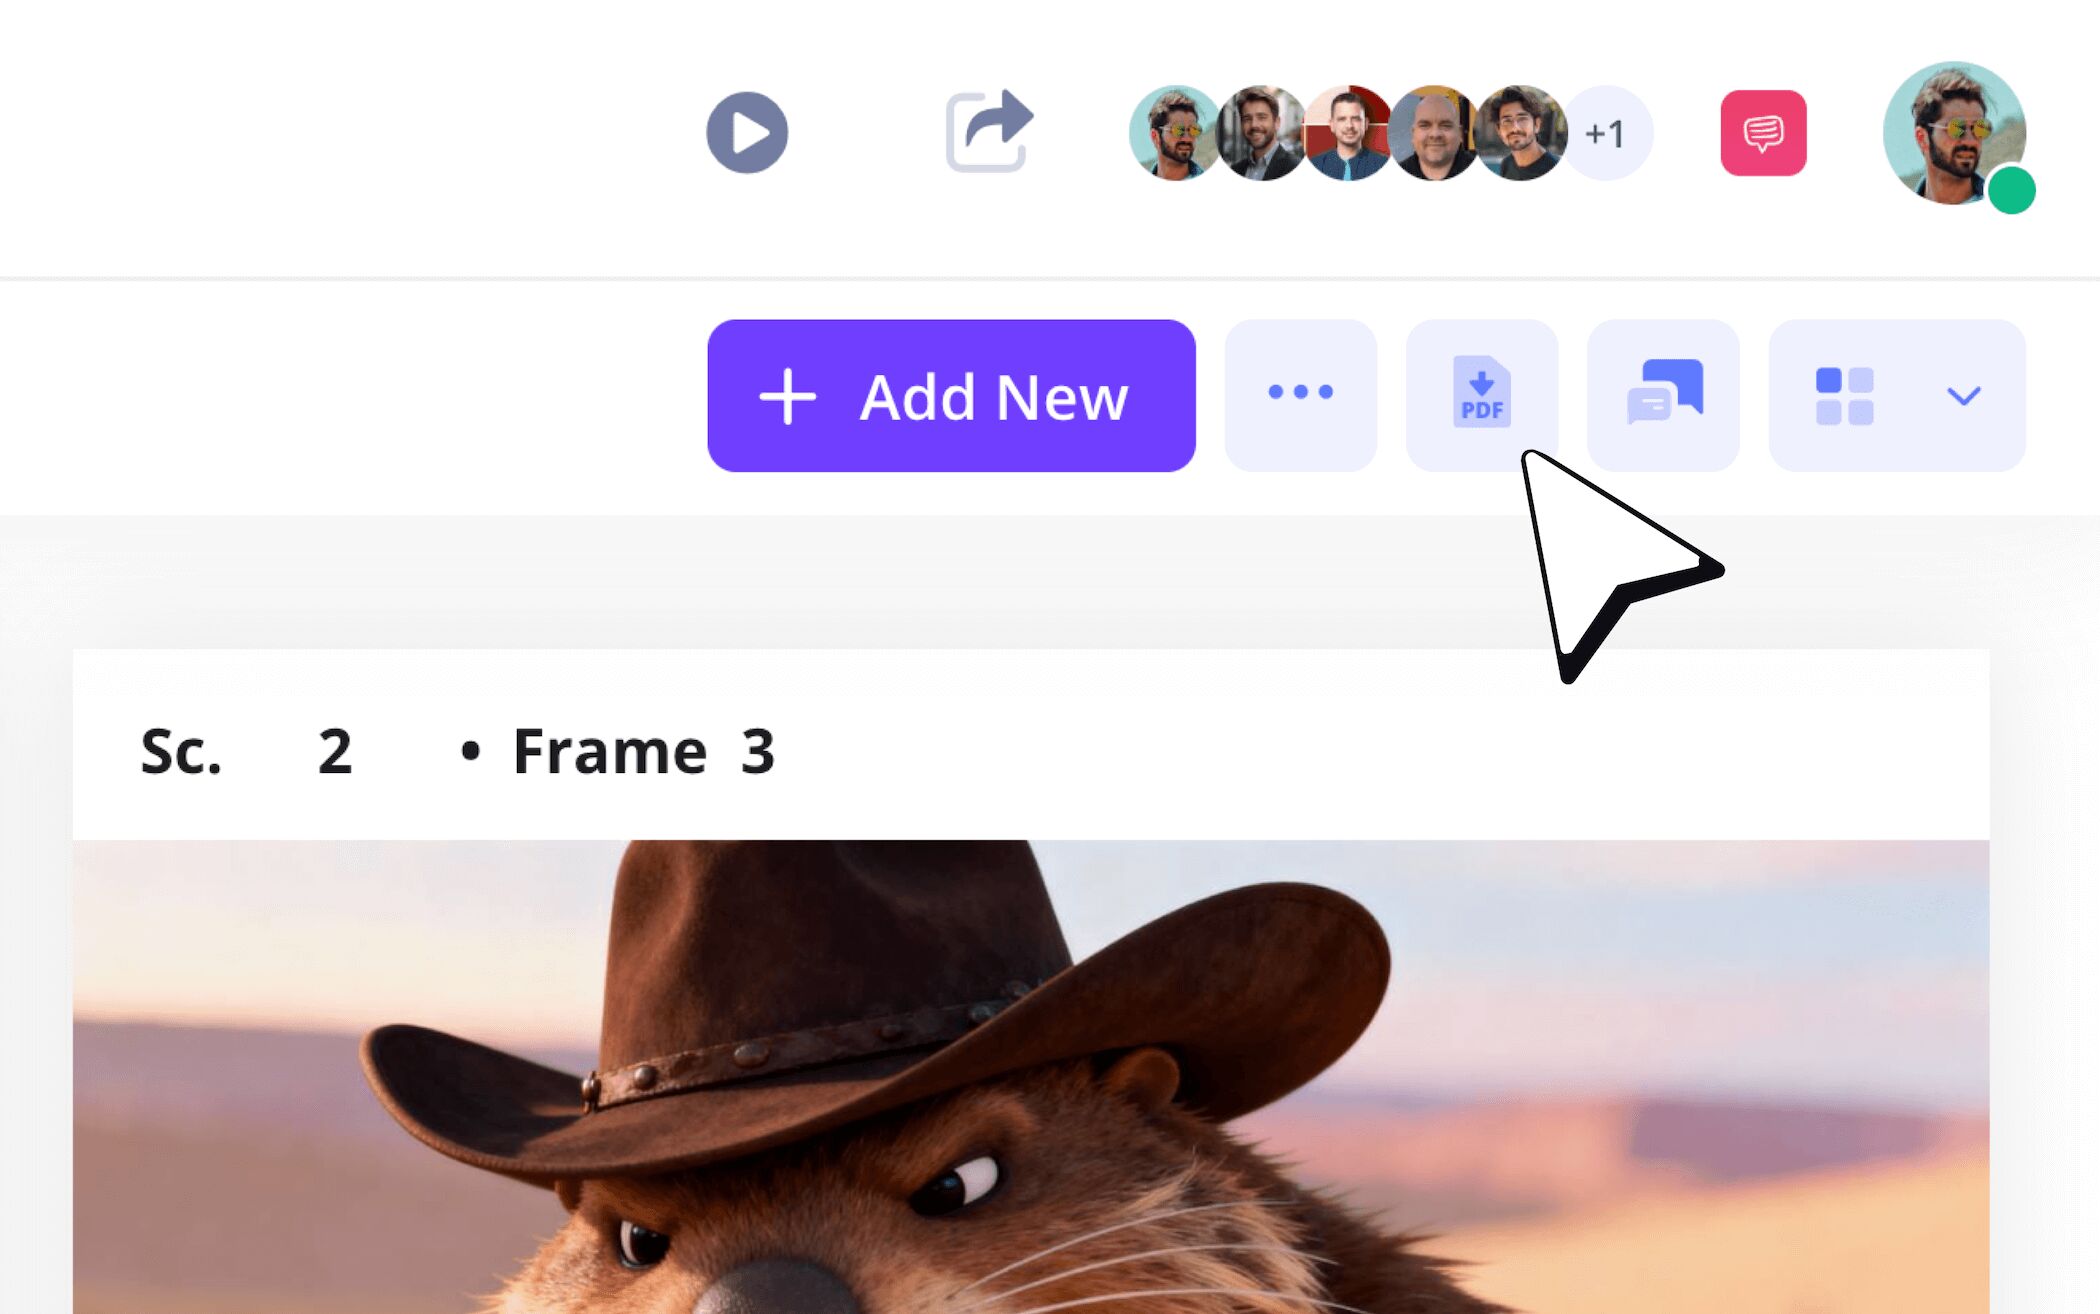
Simply hit the generate PDF icon at the top right of your storyboard animation page.
Once you’ve navigated through the settings page and customized your document in a way that fits your team’s animation production needs, hit the download PDF button. Just like that, you now have an official animation production document ready to be printed and handed out to your coworkers.
Conclusion
All done!
With the above list of animation storyboard examples and steps to help you and your team navigate through all your storyboard animation needs, you’ll be on your way to creating the best pre-visualization in the animation industry.
Be sure to explore more free storyboard templates on StudioBinder’s template page to find an even larger variety of projects to dive into.
Frequently Asked Questions
Your questions, answered
An animation storyboard is a vital step in the film pre-production process when bringing any great animation narrative to life. This is typically the first step in taking the descriptions of settings and characters from the script page to the drawing stage. The action of the script is turned into comic book-like panels that essentially map out what the finished animation will look like and how it will flow visually.
There’s no one size fits all way to approach an animation storyboard. Preferences will usually be established by the pre-production team. Some productions prefer detailed descriptions of action and shot set ups below each frame, while others prefer the visual frames do all the describing.
Depending on the animation production you’re working on, there will always be specific needs catered to specific visions. However, you can still prepare for the storyboard process by anticipating the more broader steps below.
- Read the script and pay extra attention to character and setting descriptions.
- Discuss with the director and pre-production team how to best bring this particular animated vision to life.
- Customize the frame numbering and aspect ratio of your blank storyboard template.
- Add sketches, illustrations, and reference images to your animation storyboard.
- Be prepared and flexible when it comes to shifting narrative and tonal changes from the writers. Animation is a long creative process that is constantly evolving throughout the entirety of production.
