home → TEMPLATES → Storyboard
Anime Storyboard Template
Anime storyboard template
If you want to bring the signature cinematic atmosphere of the anime art form to life, you’ll need an anime storyboard template (or e-konte in Japanese) that can meet all your complex visual needs. Since Japanese anime storyboards are treated as a sort of miniature version of the final film, you’re stepping into a pretty sacred stage of anime creation. This is where you’ll officially lock down the pacing, mood, and narrative elements that will shine through once all visual elements are finalized.
With this anime storyboard guide, we’ll walk you through all the need-to-know steps when it comes to the anime storyboarding process. We’ll be using StudioBinder’s storyboard creator but these steps can also be broadly applied to any storyboarding approach.
Step 1
1. Setup your storyboard
Since anime storyboarding is less rigid than western animation when it comes to needing a completed script before starting this stage, you may or may not be ready to include a screenplay with your storyboard project just yet.
Once you begin a new storyboard project with StudioBinder, you have the option to either import a script or start creating manually.
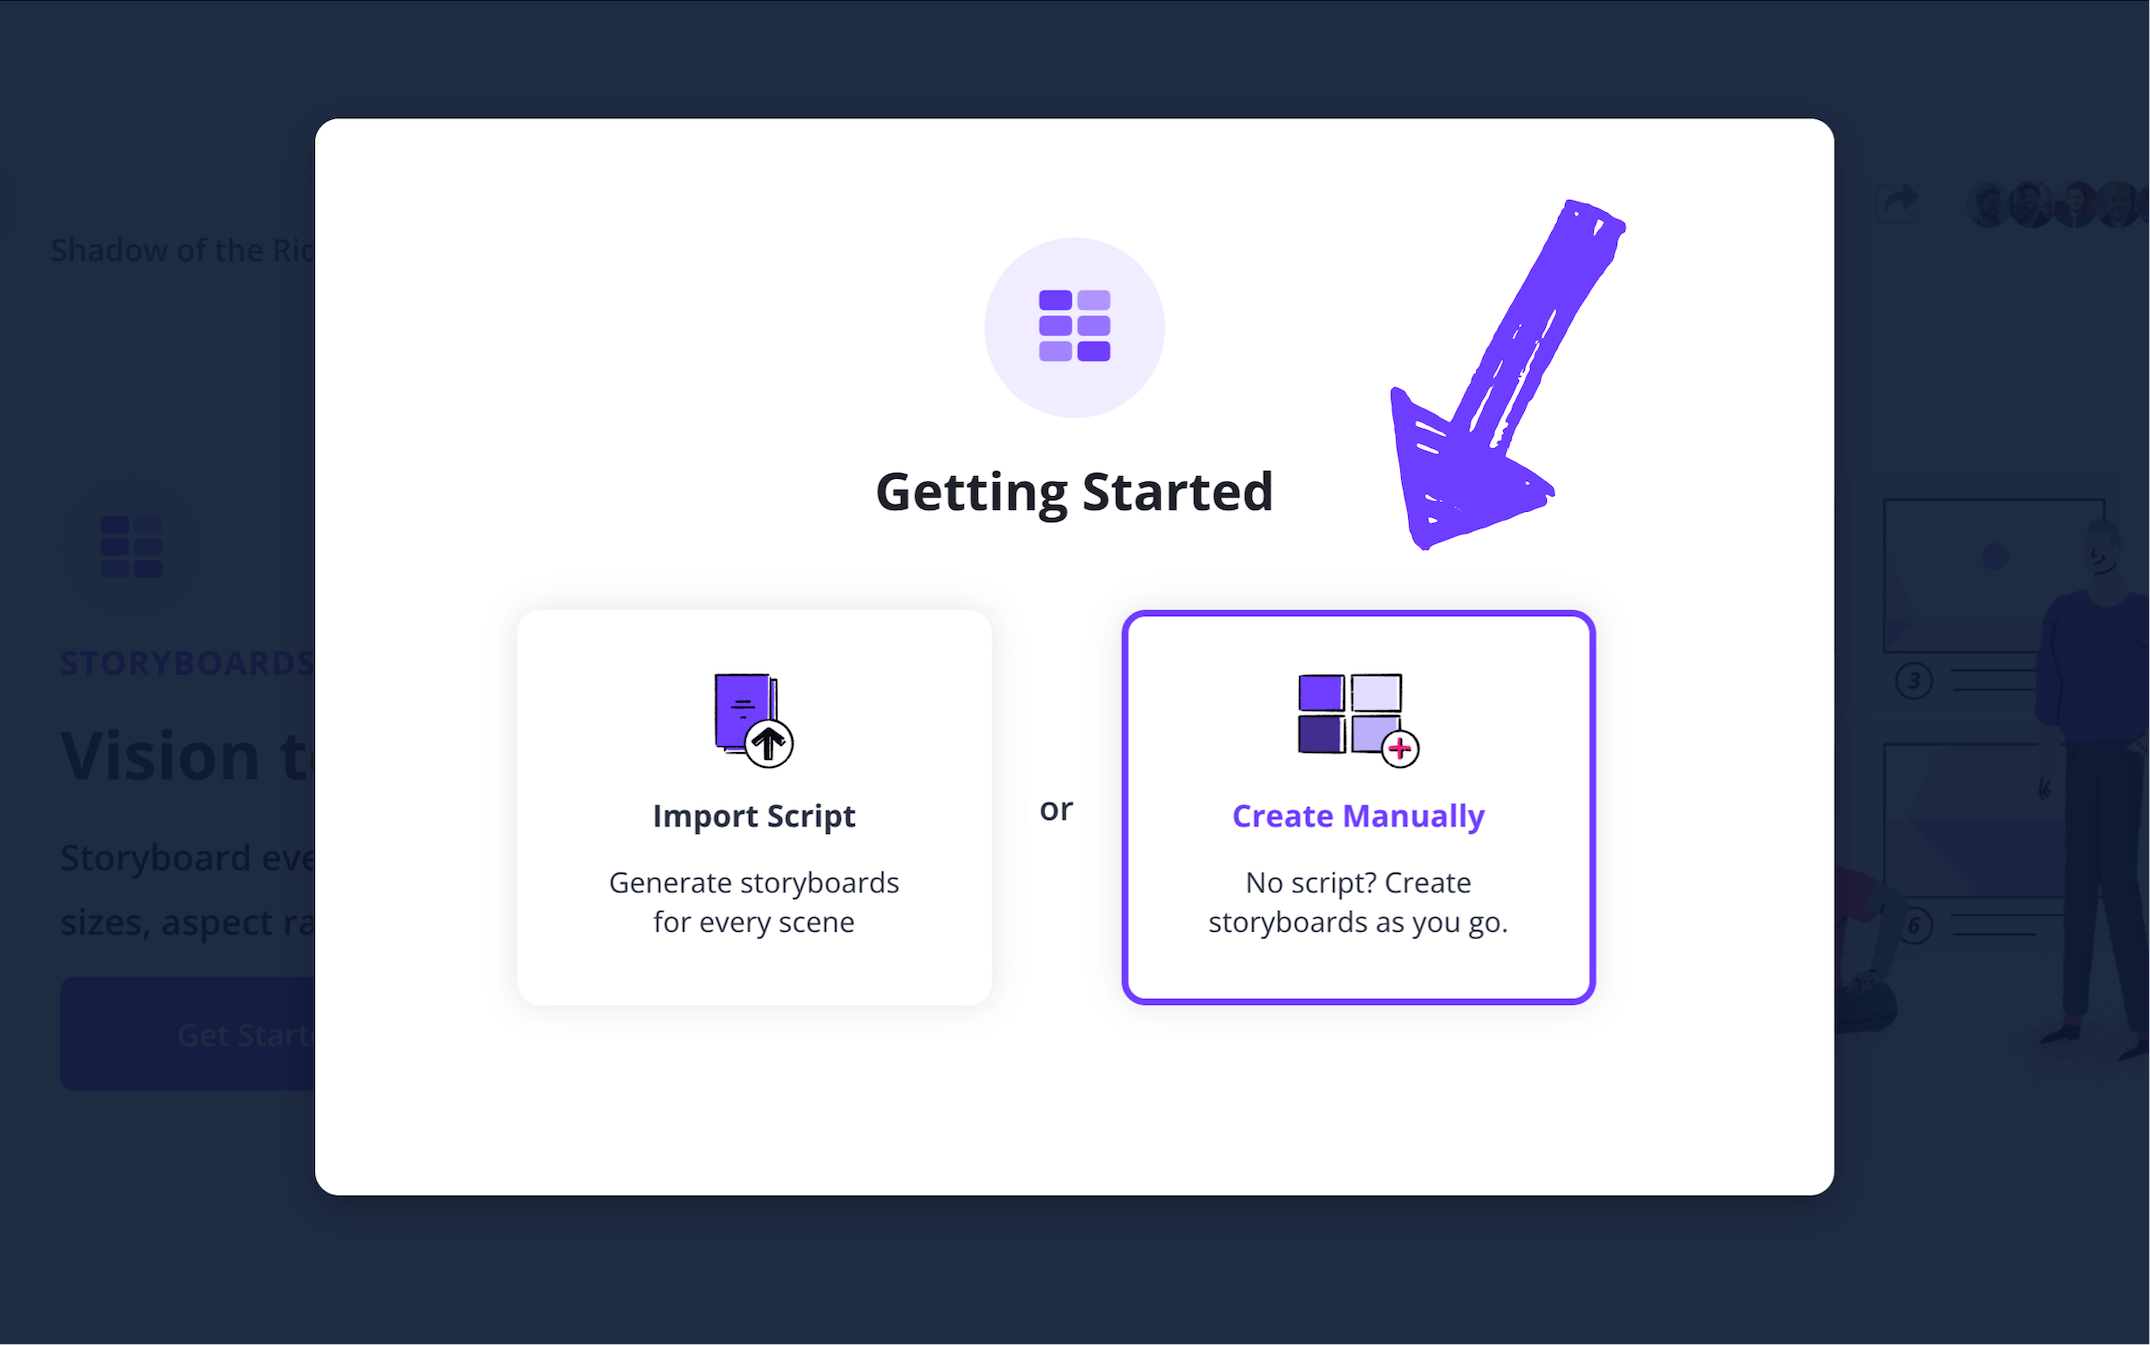
If you choose not to import a script upon setup, you can still do so at any time while building your storyboard template anime project.
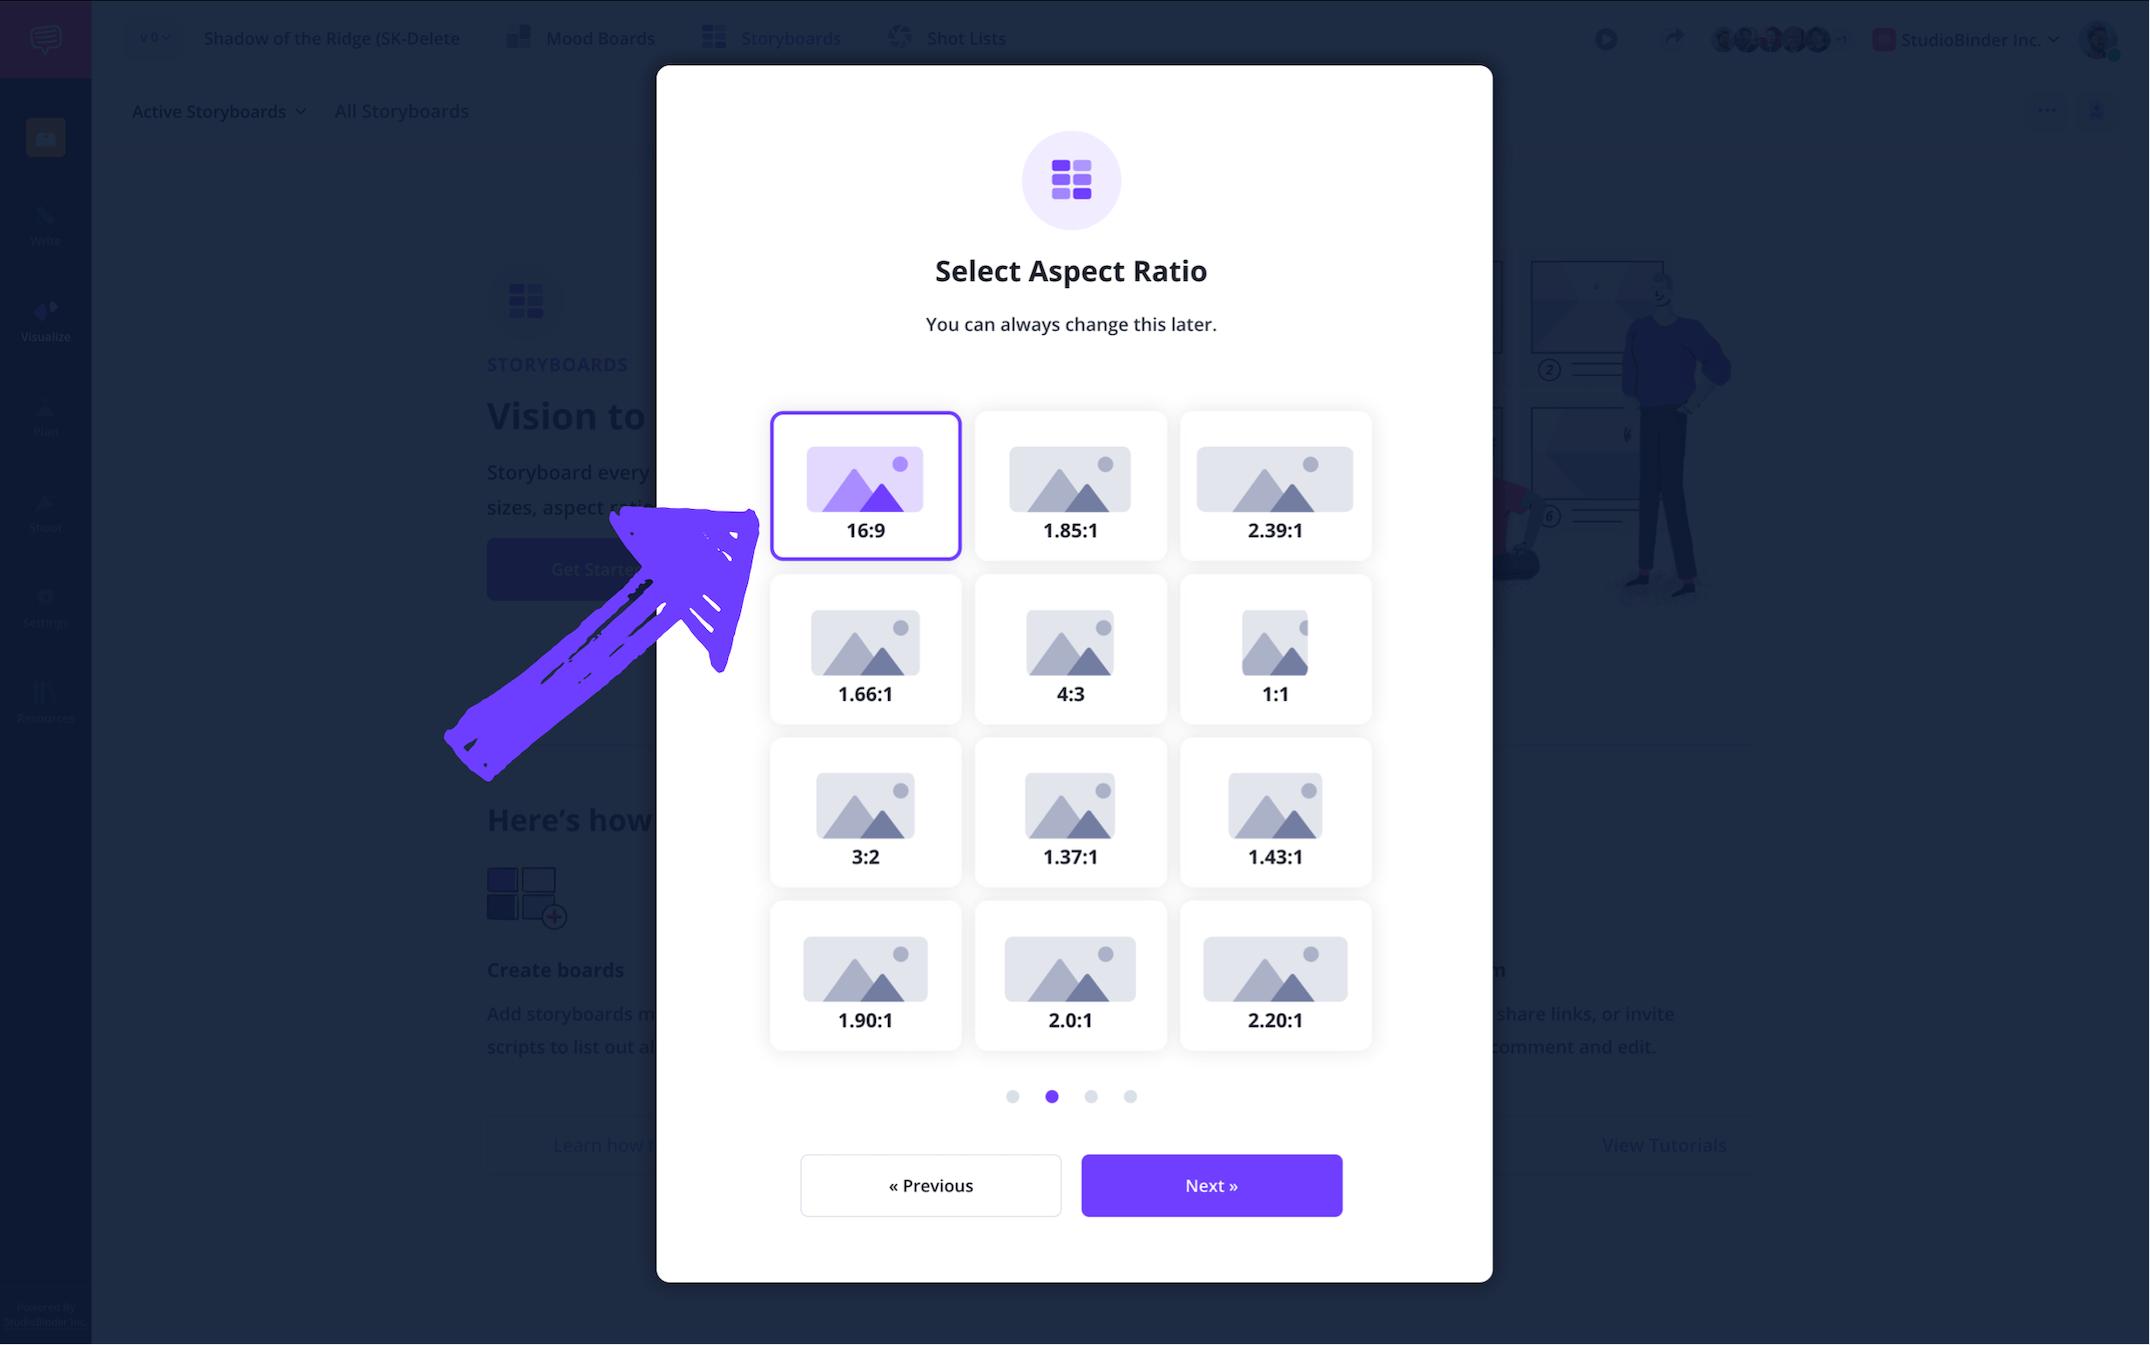
Clicking Create Manually will prompt you to name your storyboard. Then you’ll select the aspect ratio you want your storyboard images to be displayed in.
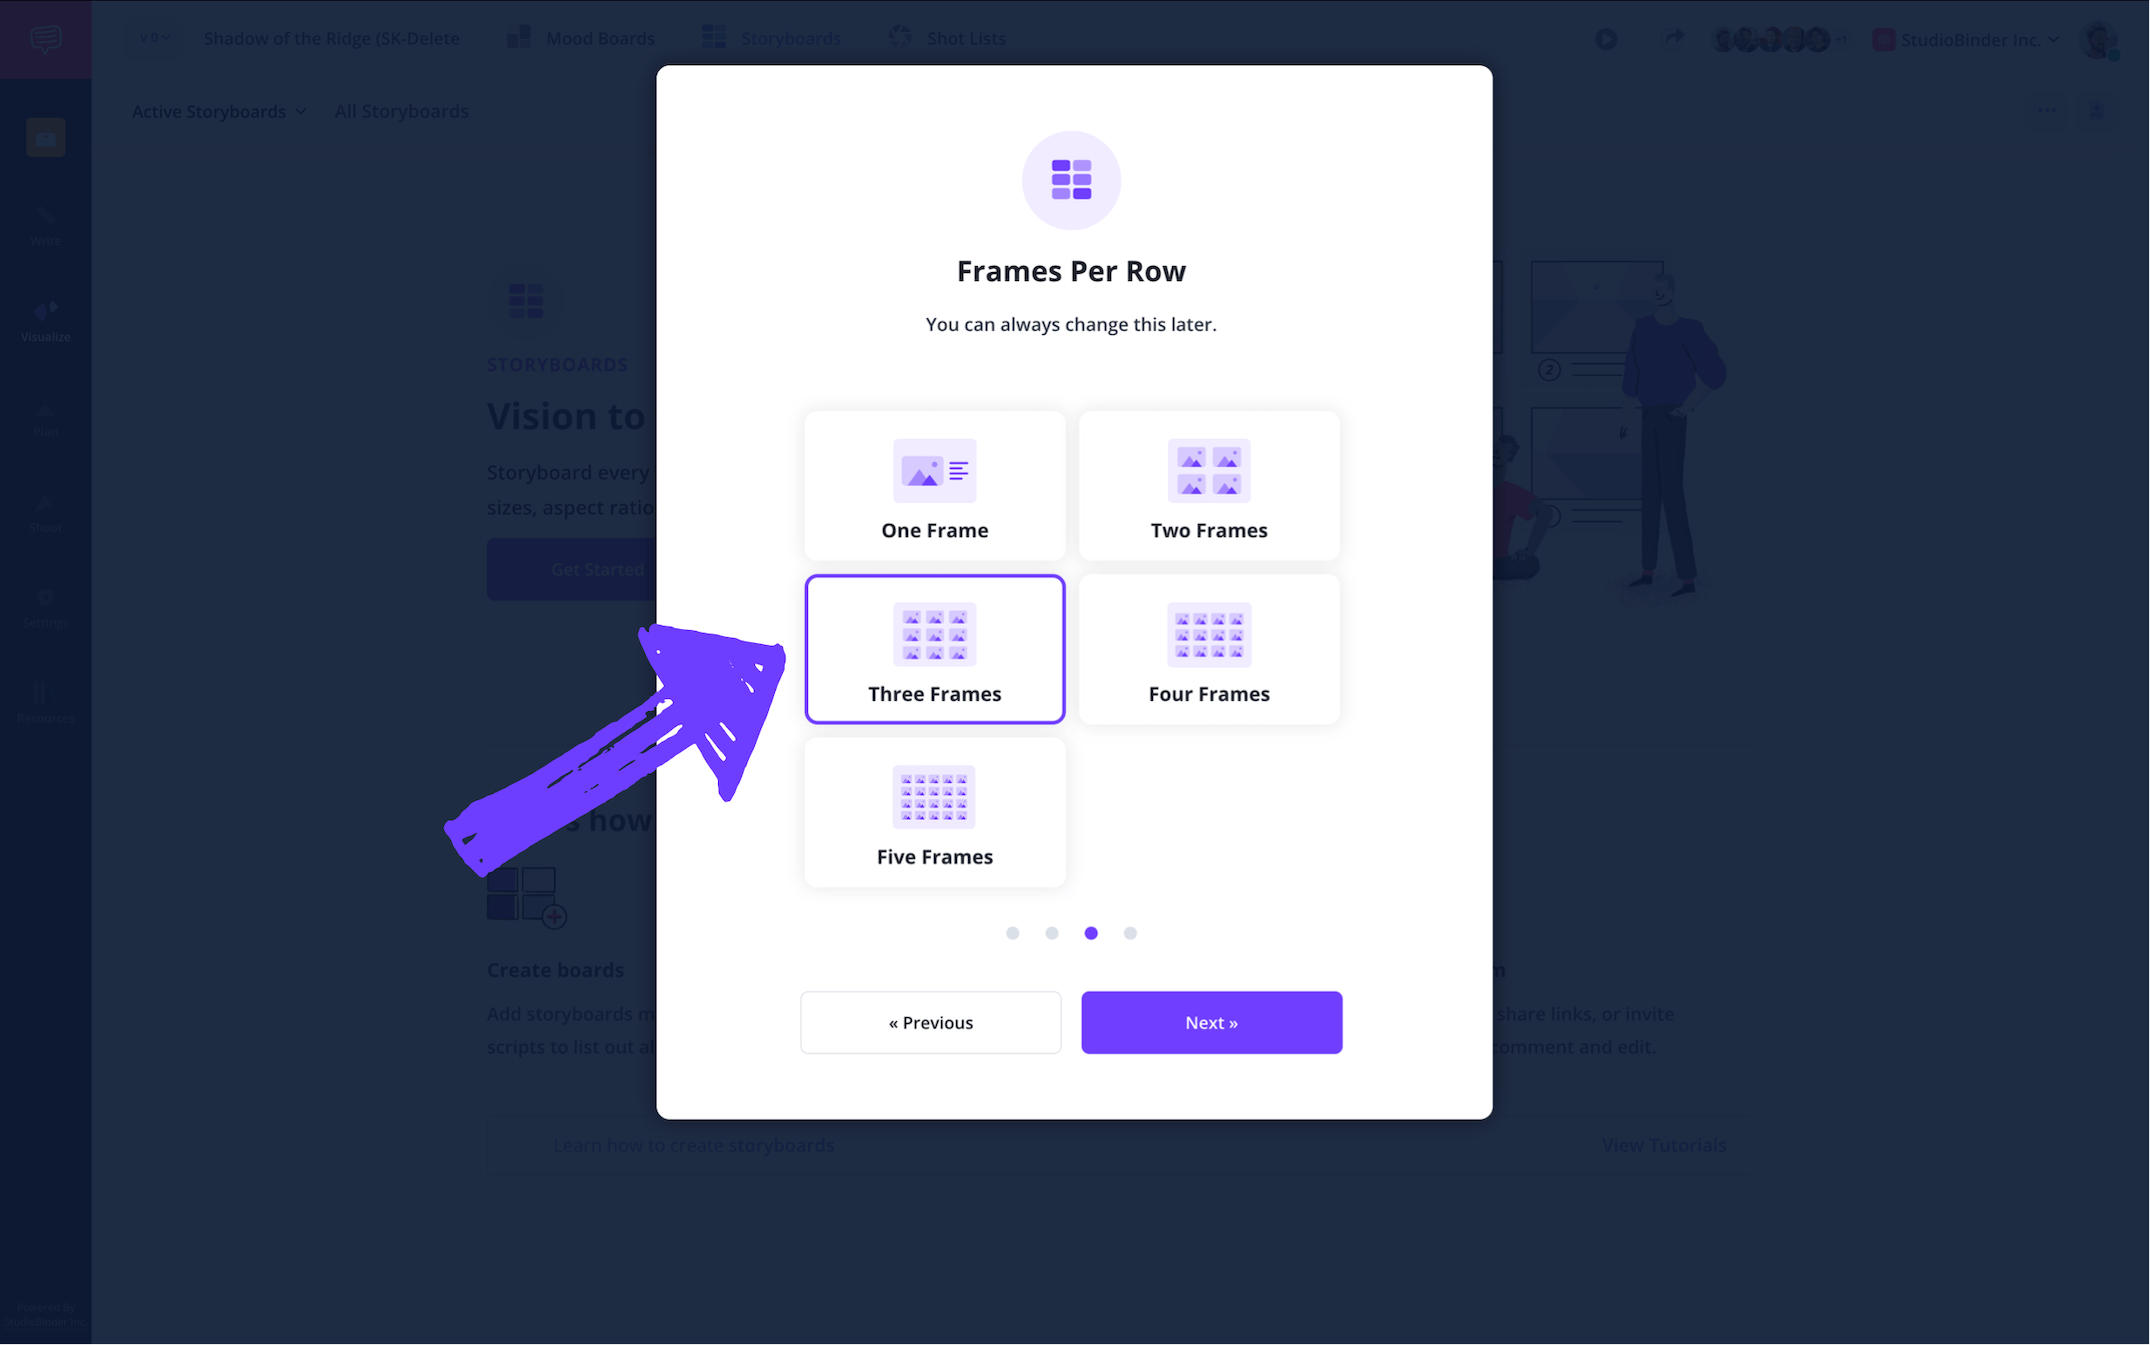
Next, you’ll select the number of frames per row you prefer, as well as the overall number of frames you want to start out with.
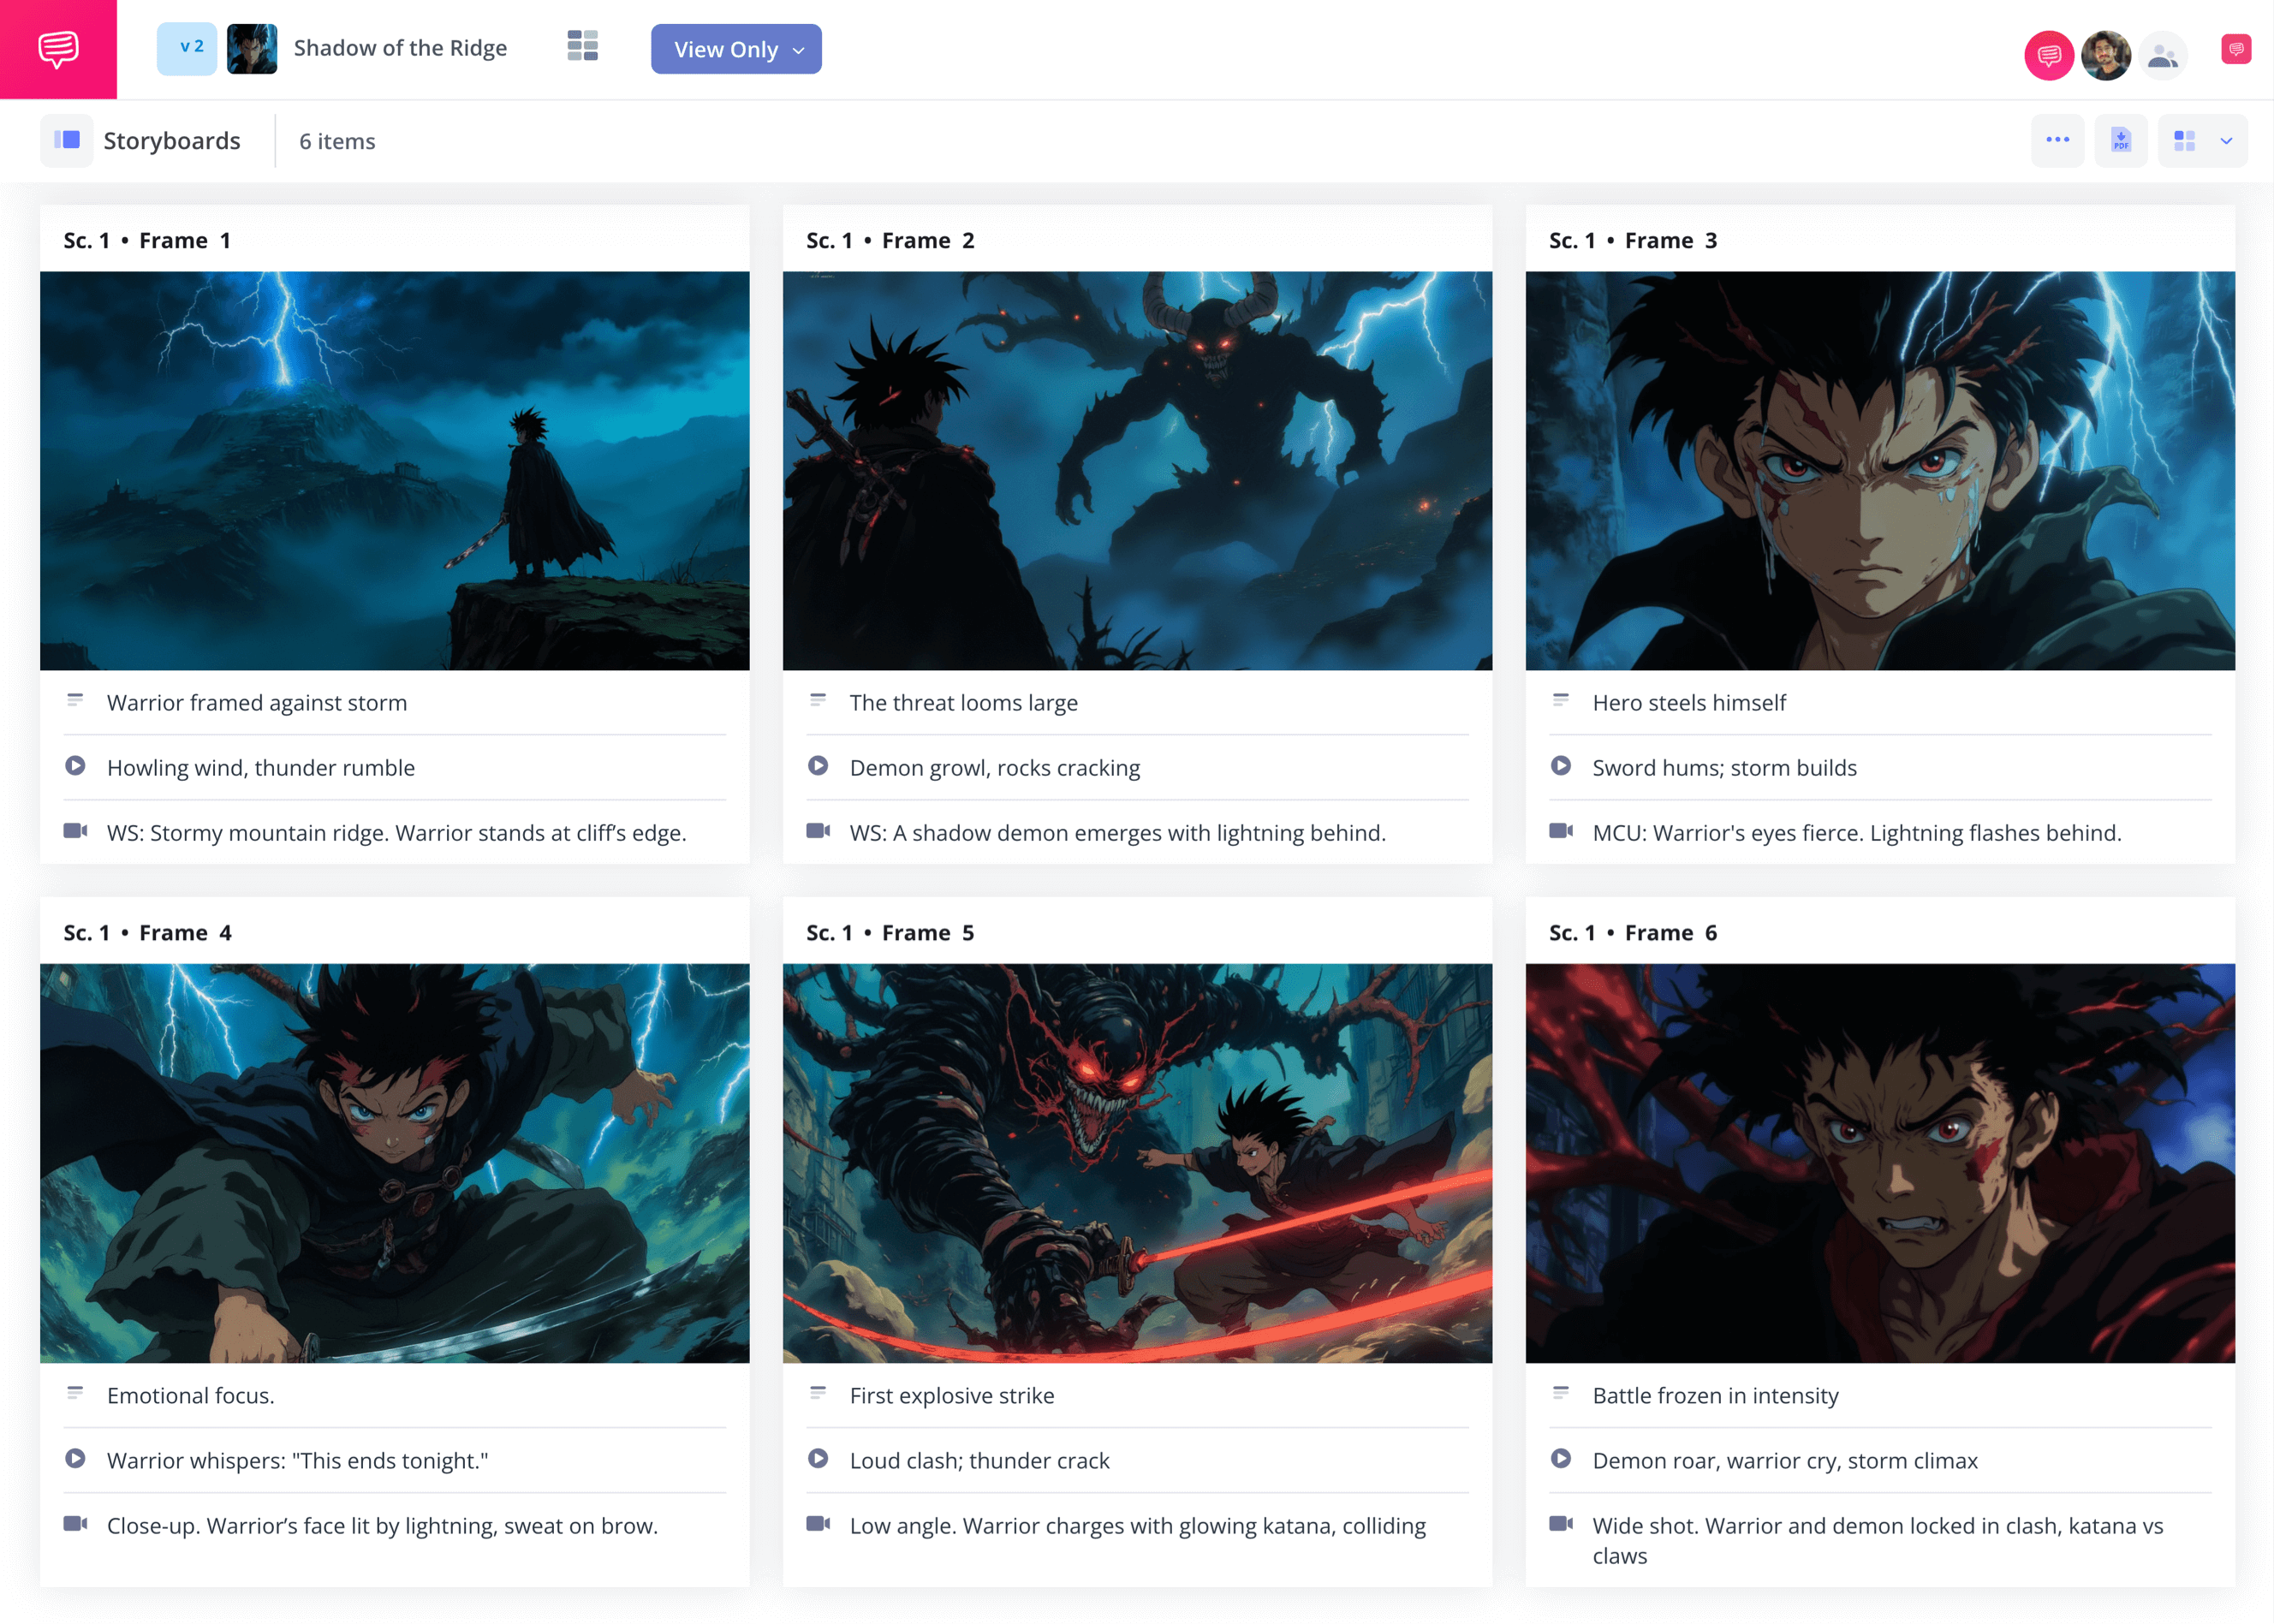
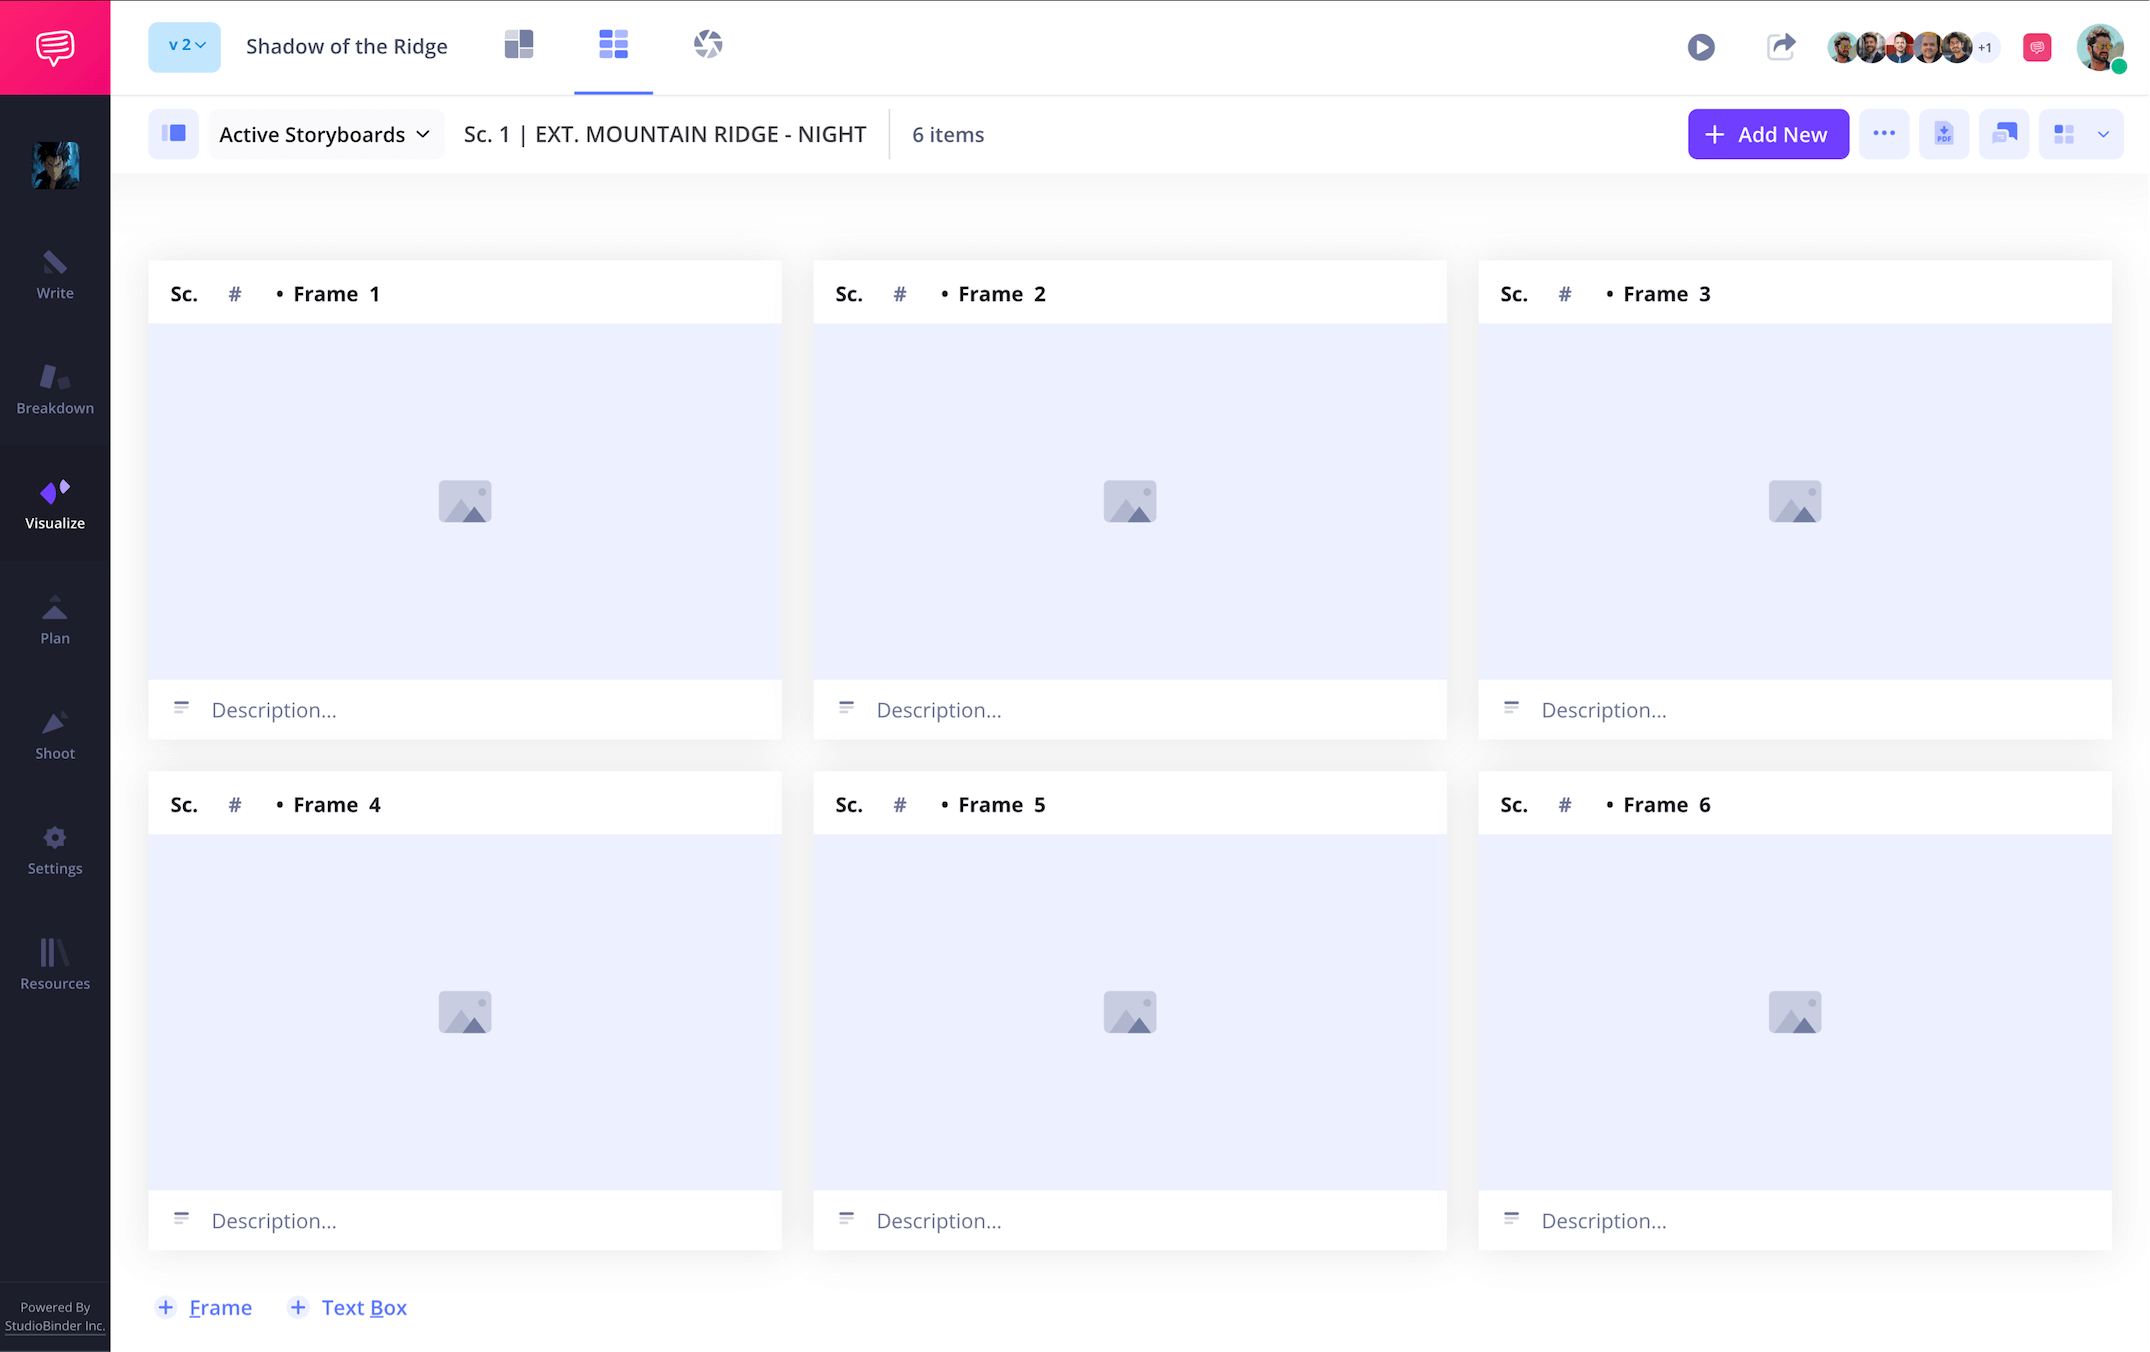
Now your blank anime storyboard template is ready to go and will look something like this:
Step 2
2. Customize your frames
Though it’s not custom to have a finalized screenplay when you start developing your japanese anime storyboard template, you may still have some basic scene scenarios written out, or even just general scene outlines to go by. As a result, you’ll want to get some of those descriptions organized under your blank frames to help guide your illustrations.
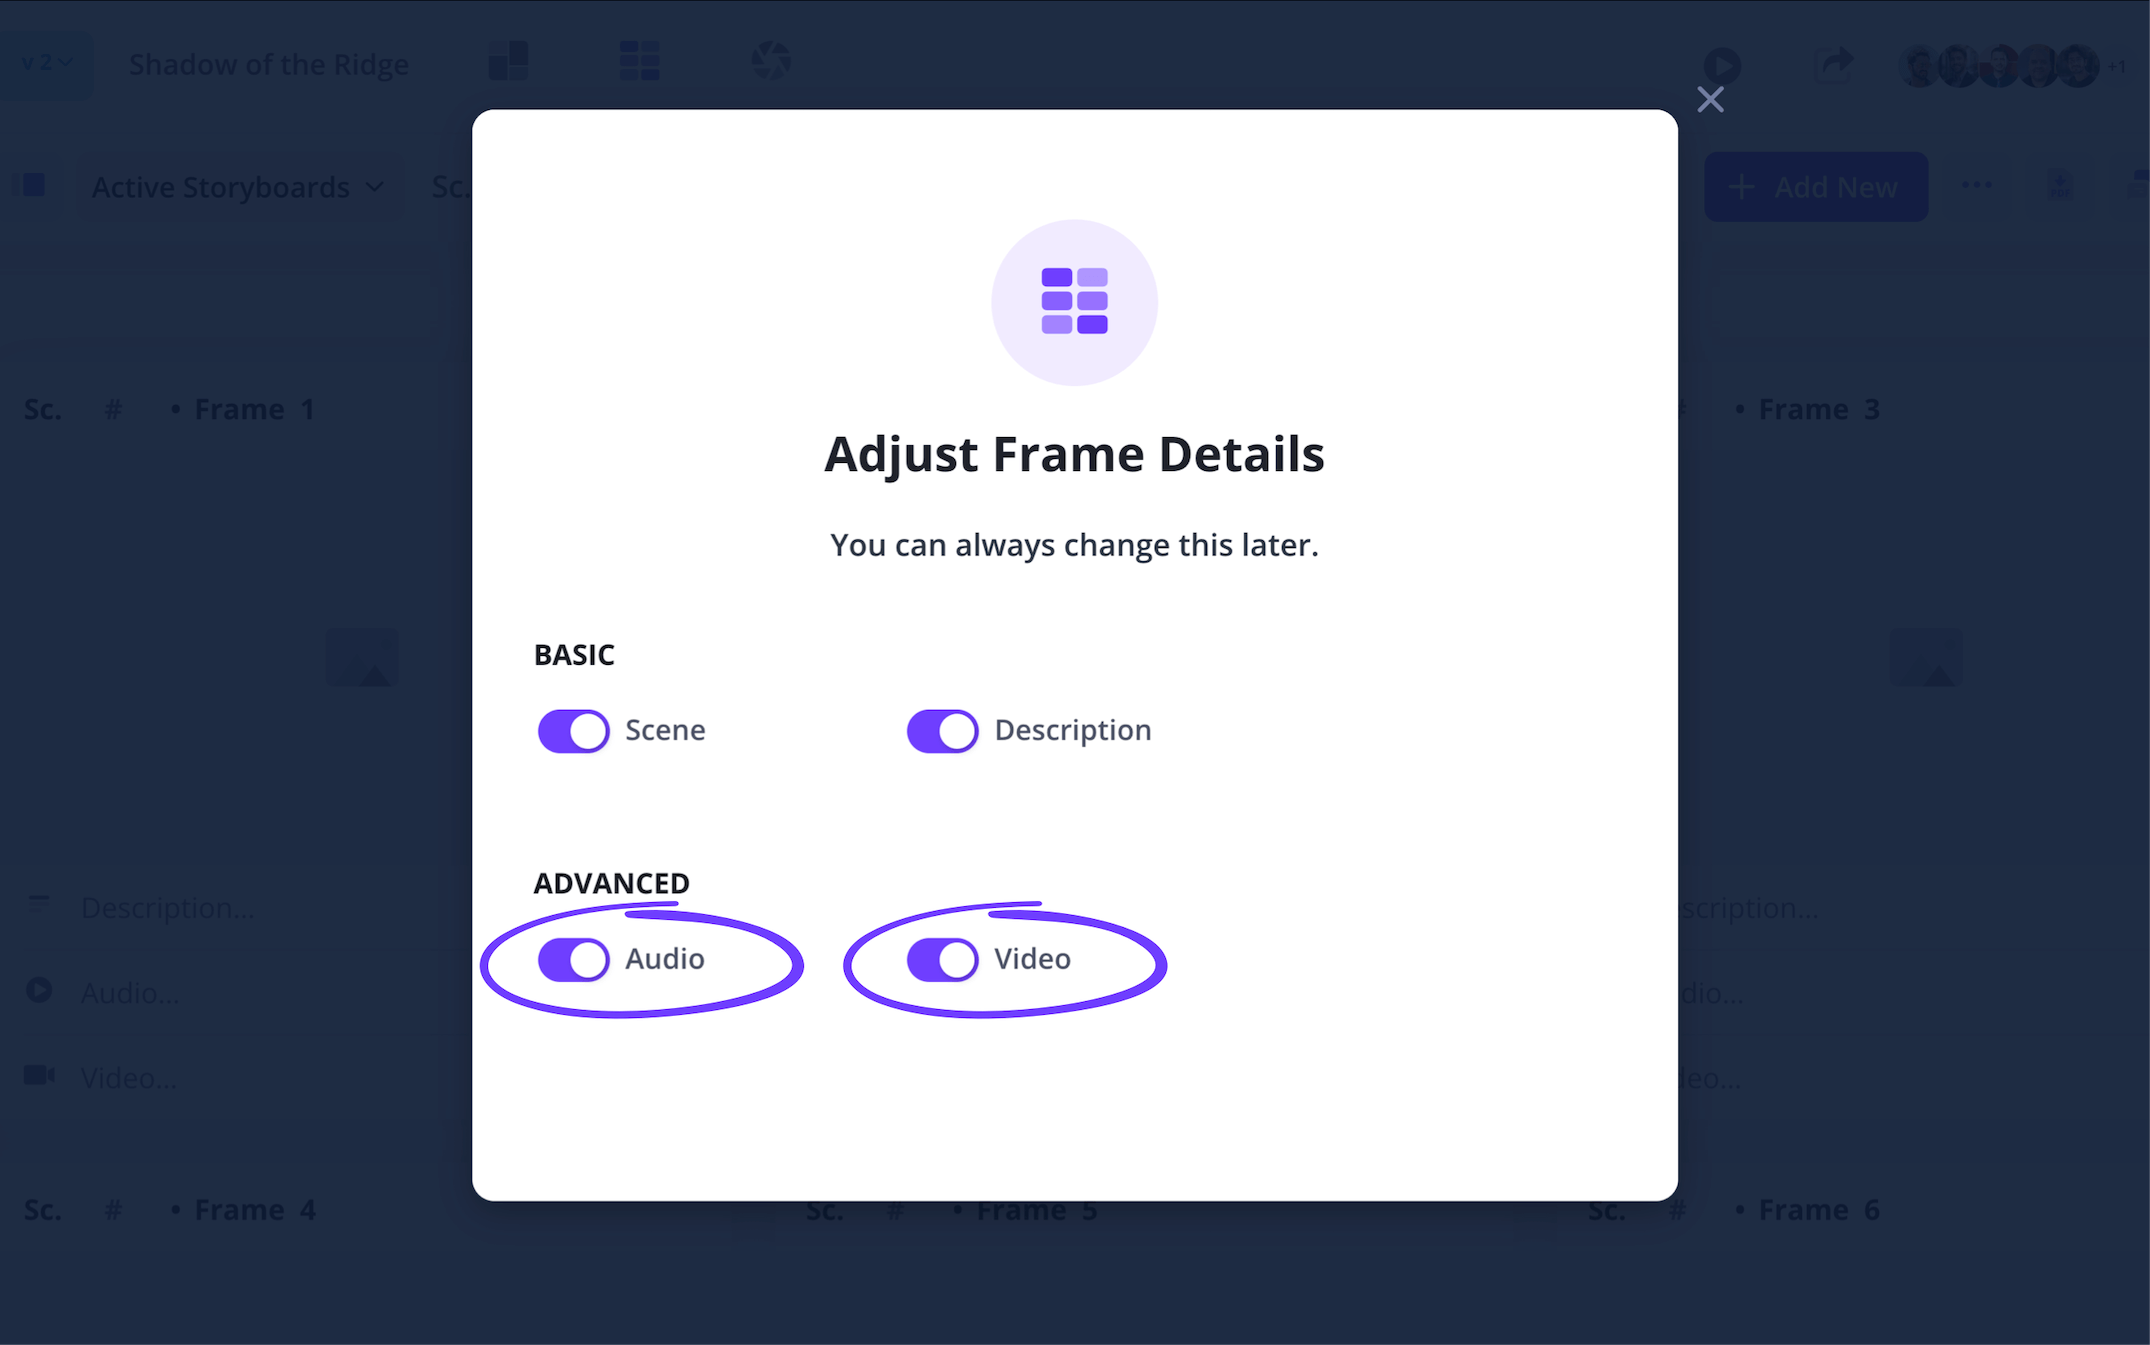
Depending on how detailed your pre-written ideas are, your need for certain descriptive fields will vary. To customize the fields below your frames, go to settings and click Customize Frames.

For our example, we have a lot of ideas ready for how our anime scene will look and sound, so we’re going to make sure all the field bars under our frames are toggled on.
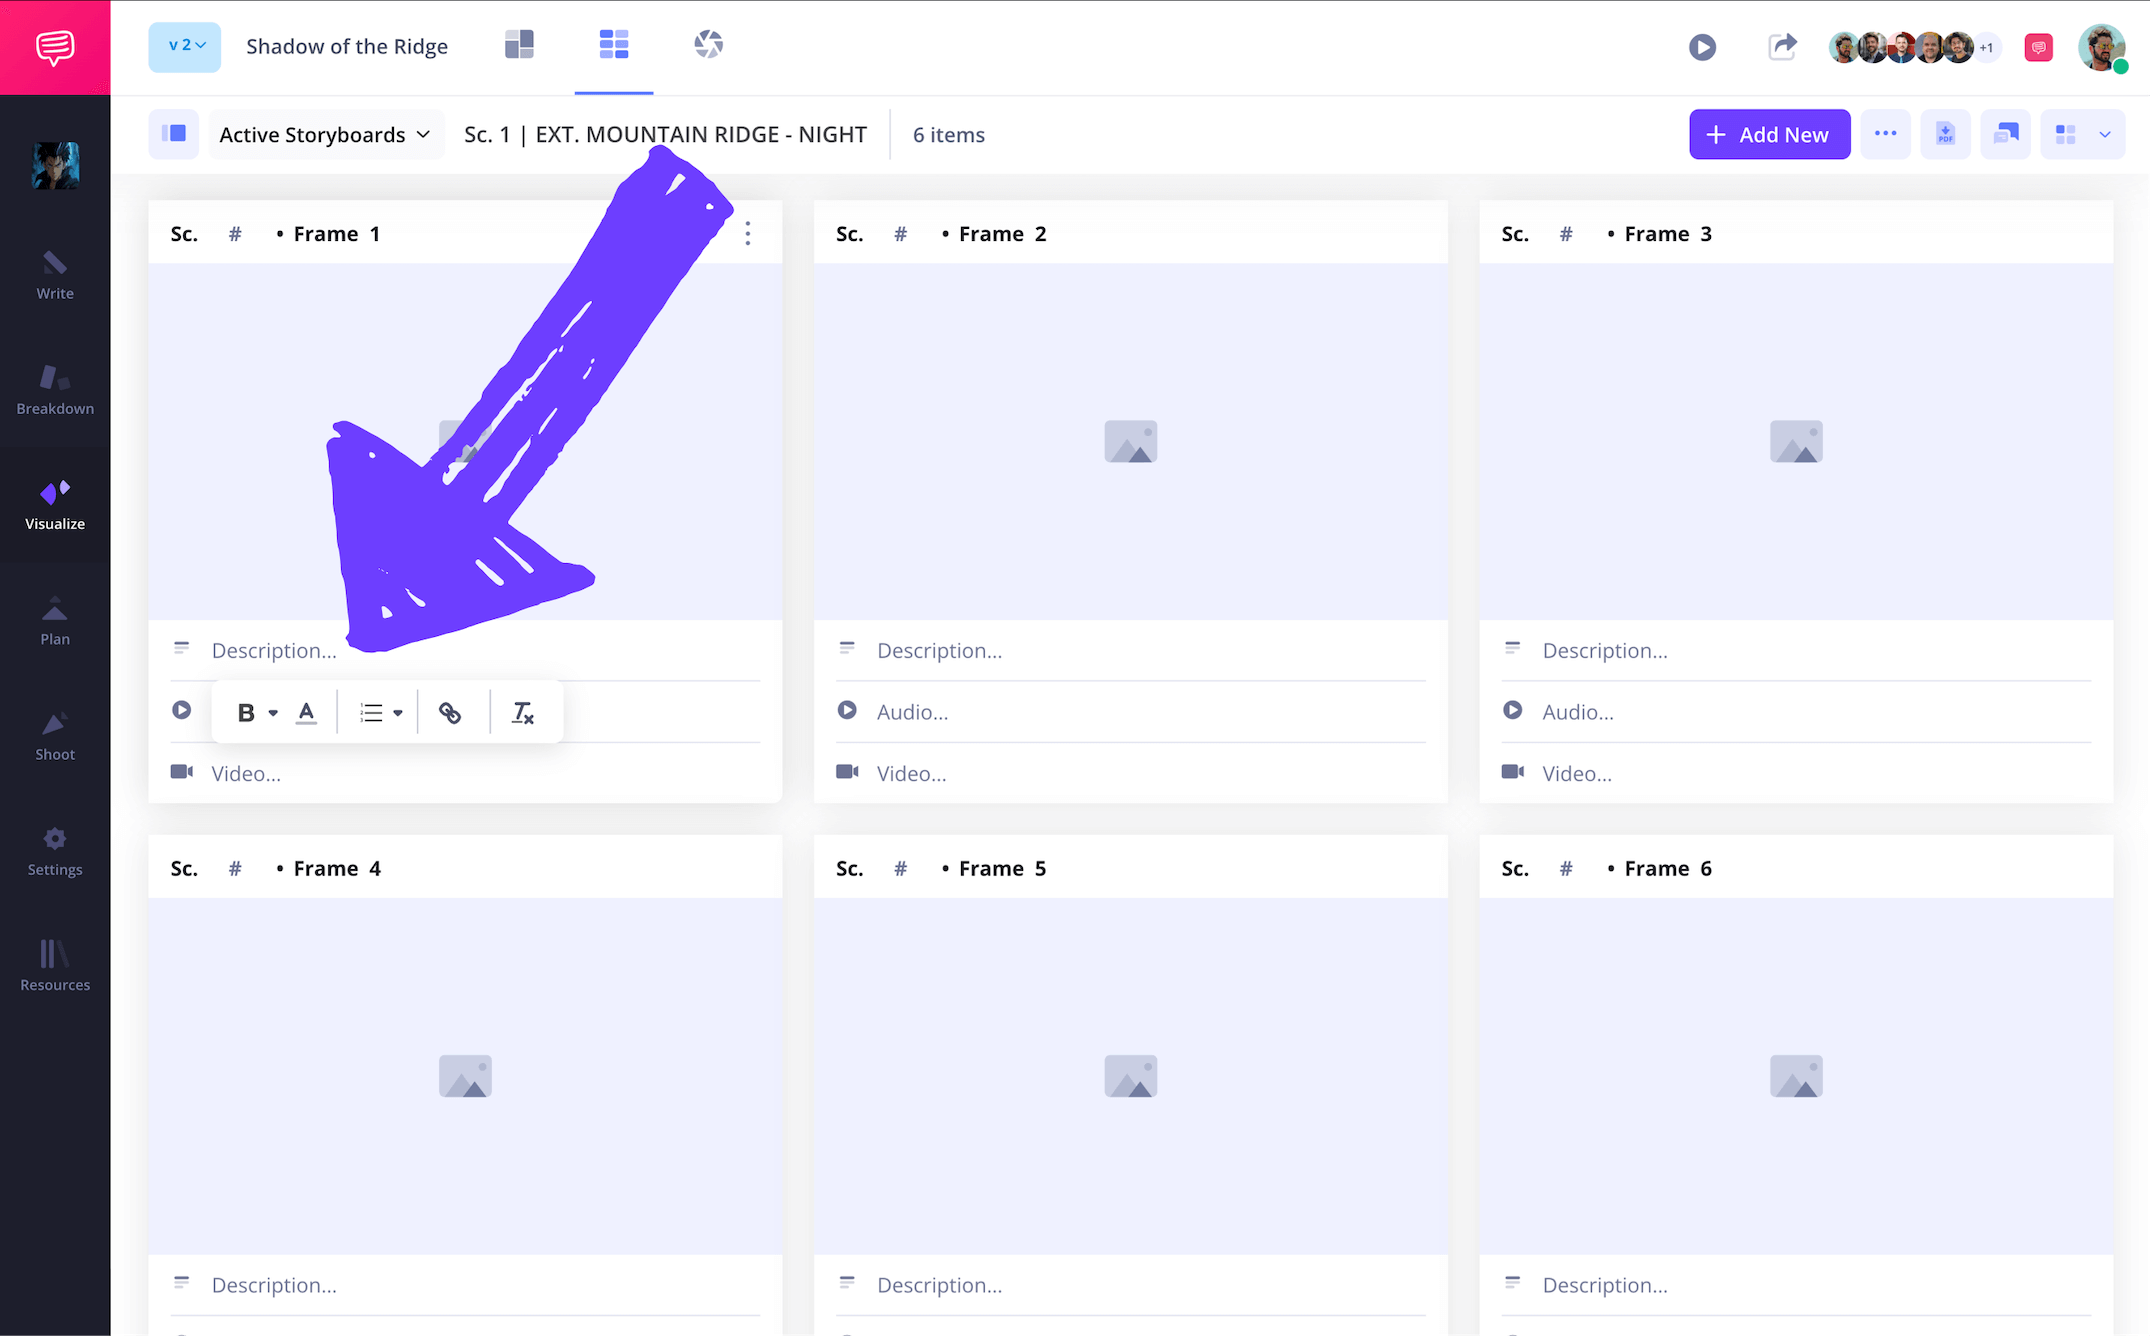
Now when you return to your storyboard template anime project, you can start filling out whichever fields you chose to leave in. We’re going to fill out the description, audio, and video fields to really set the stage for our anime vision.
Step 3
3. Include images
With your rough narrative ideas laid out before you, it’s time to let your images guide the overall film tone and pacing of your anime project. Maybe you’re sketching images yourself, or maybe you’re pulling template images from other sources. Either way, establishing visuals is where Japanese animation really begins to breathe.
To add images to your storyboard anime template, just hover your cursor over any blank panel and click the Upload Image icon.
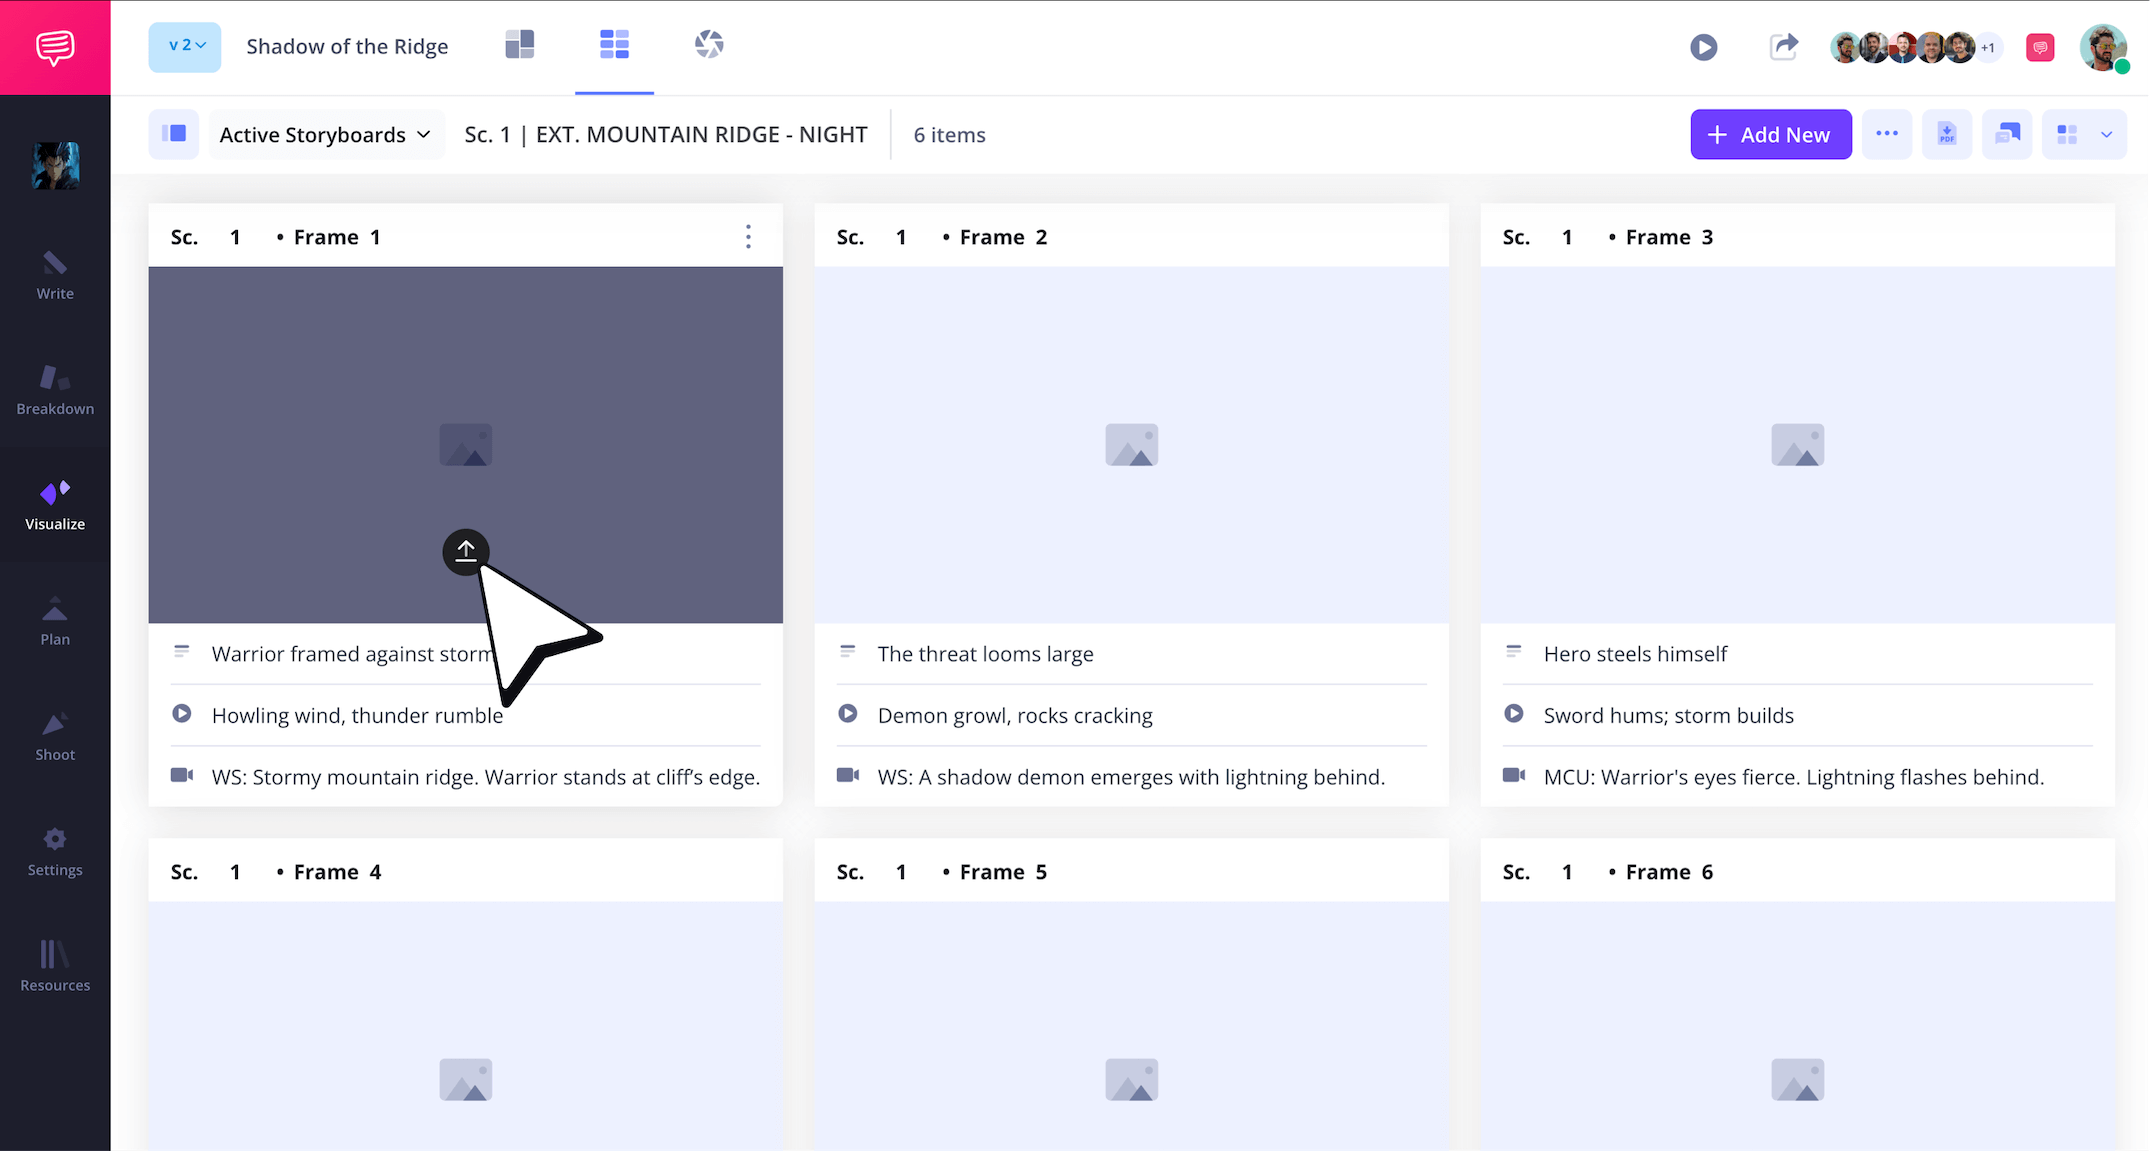
Now you can just drag and drop your image file into the photo library pop-up. From there, your image will be automatically applied to your anime storyboard template.
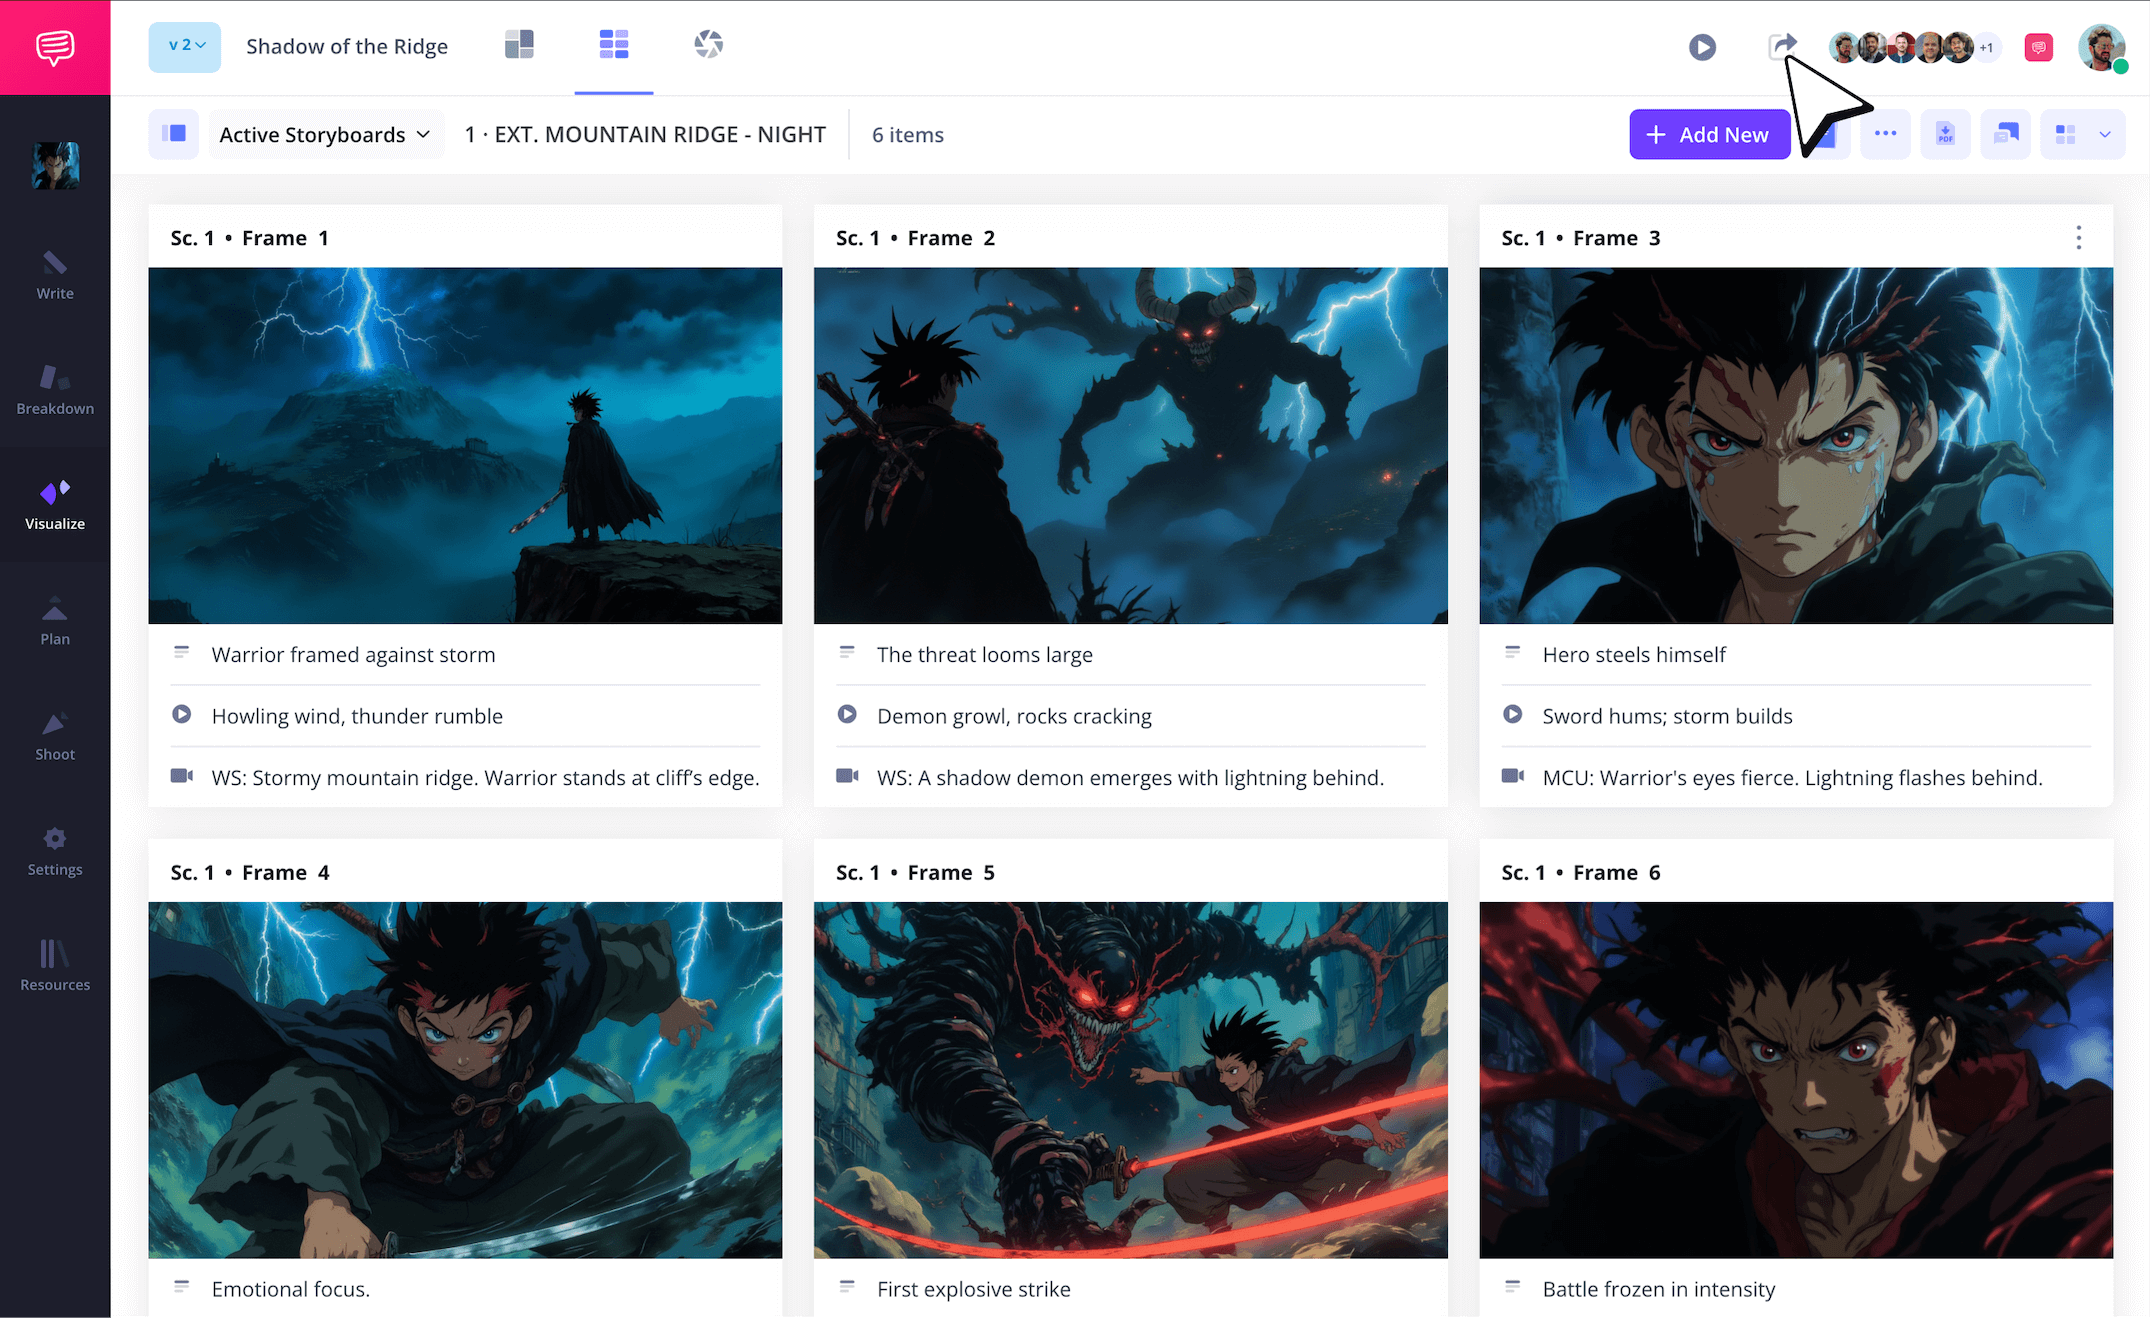
With your storyboard images shaping your anime narrative, you may want to start sharing your progress with anyone from the animation producer to the chief director to receive some feedback.
To let anyone view your storyboard and add notes, click Share Storyboards Page at the top.
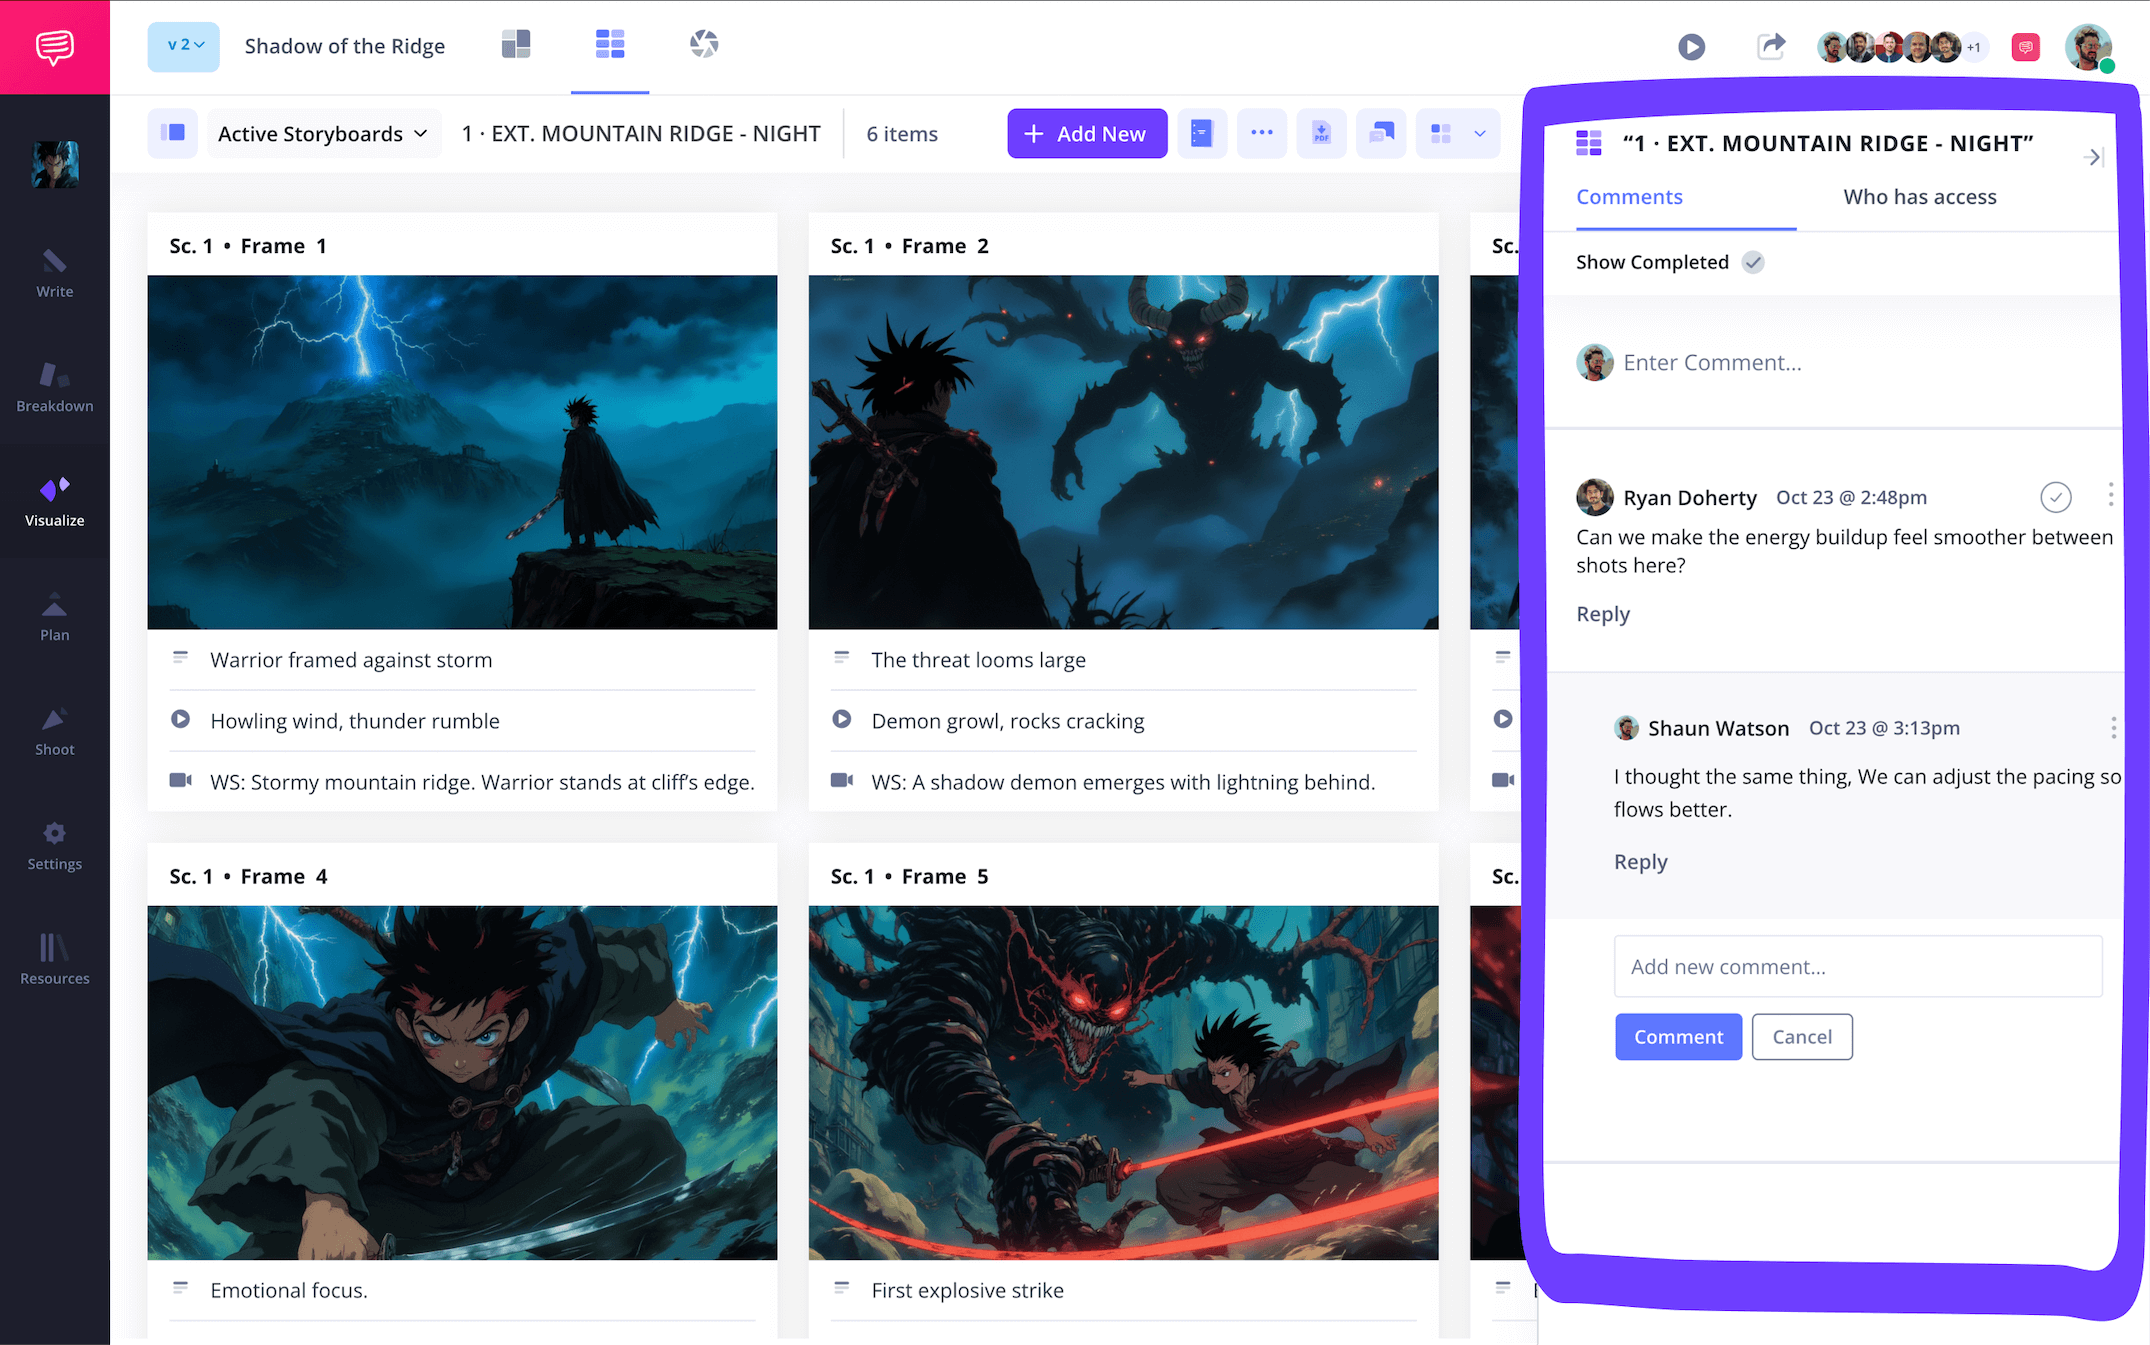
By setting your invited collaborator’s permission to commenter or editor, they’ll be allowed to send feedback through the comments sidebar. To reply, just type your response and click Comment.
Step 4
4. Add storyboard arrows
Let’s say after inviting your art director to view your storyboard, they send you a comment about how they don’t think the villain has an intimidating enough presence. This could be a case of the image not capturing enough of the villain’s evil side, or it could be that the intended camera movement for this shot isn’t quite coming through. If the latter is the diagnosis, then arrows are the cure.
To add arrows to help convey action, click on the image, and then click Edit.
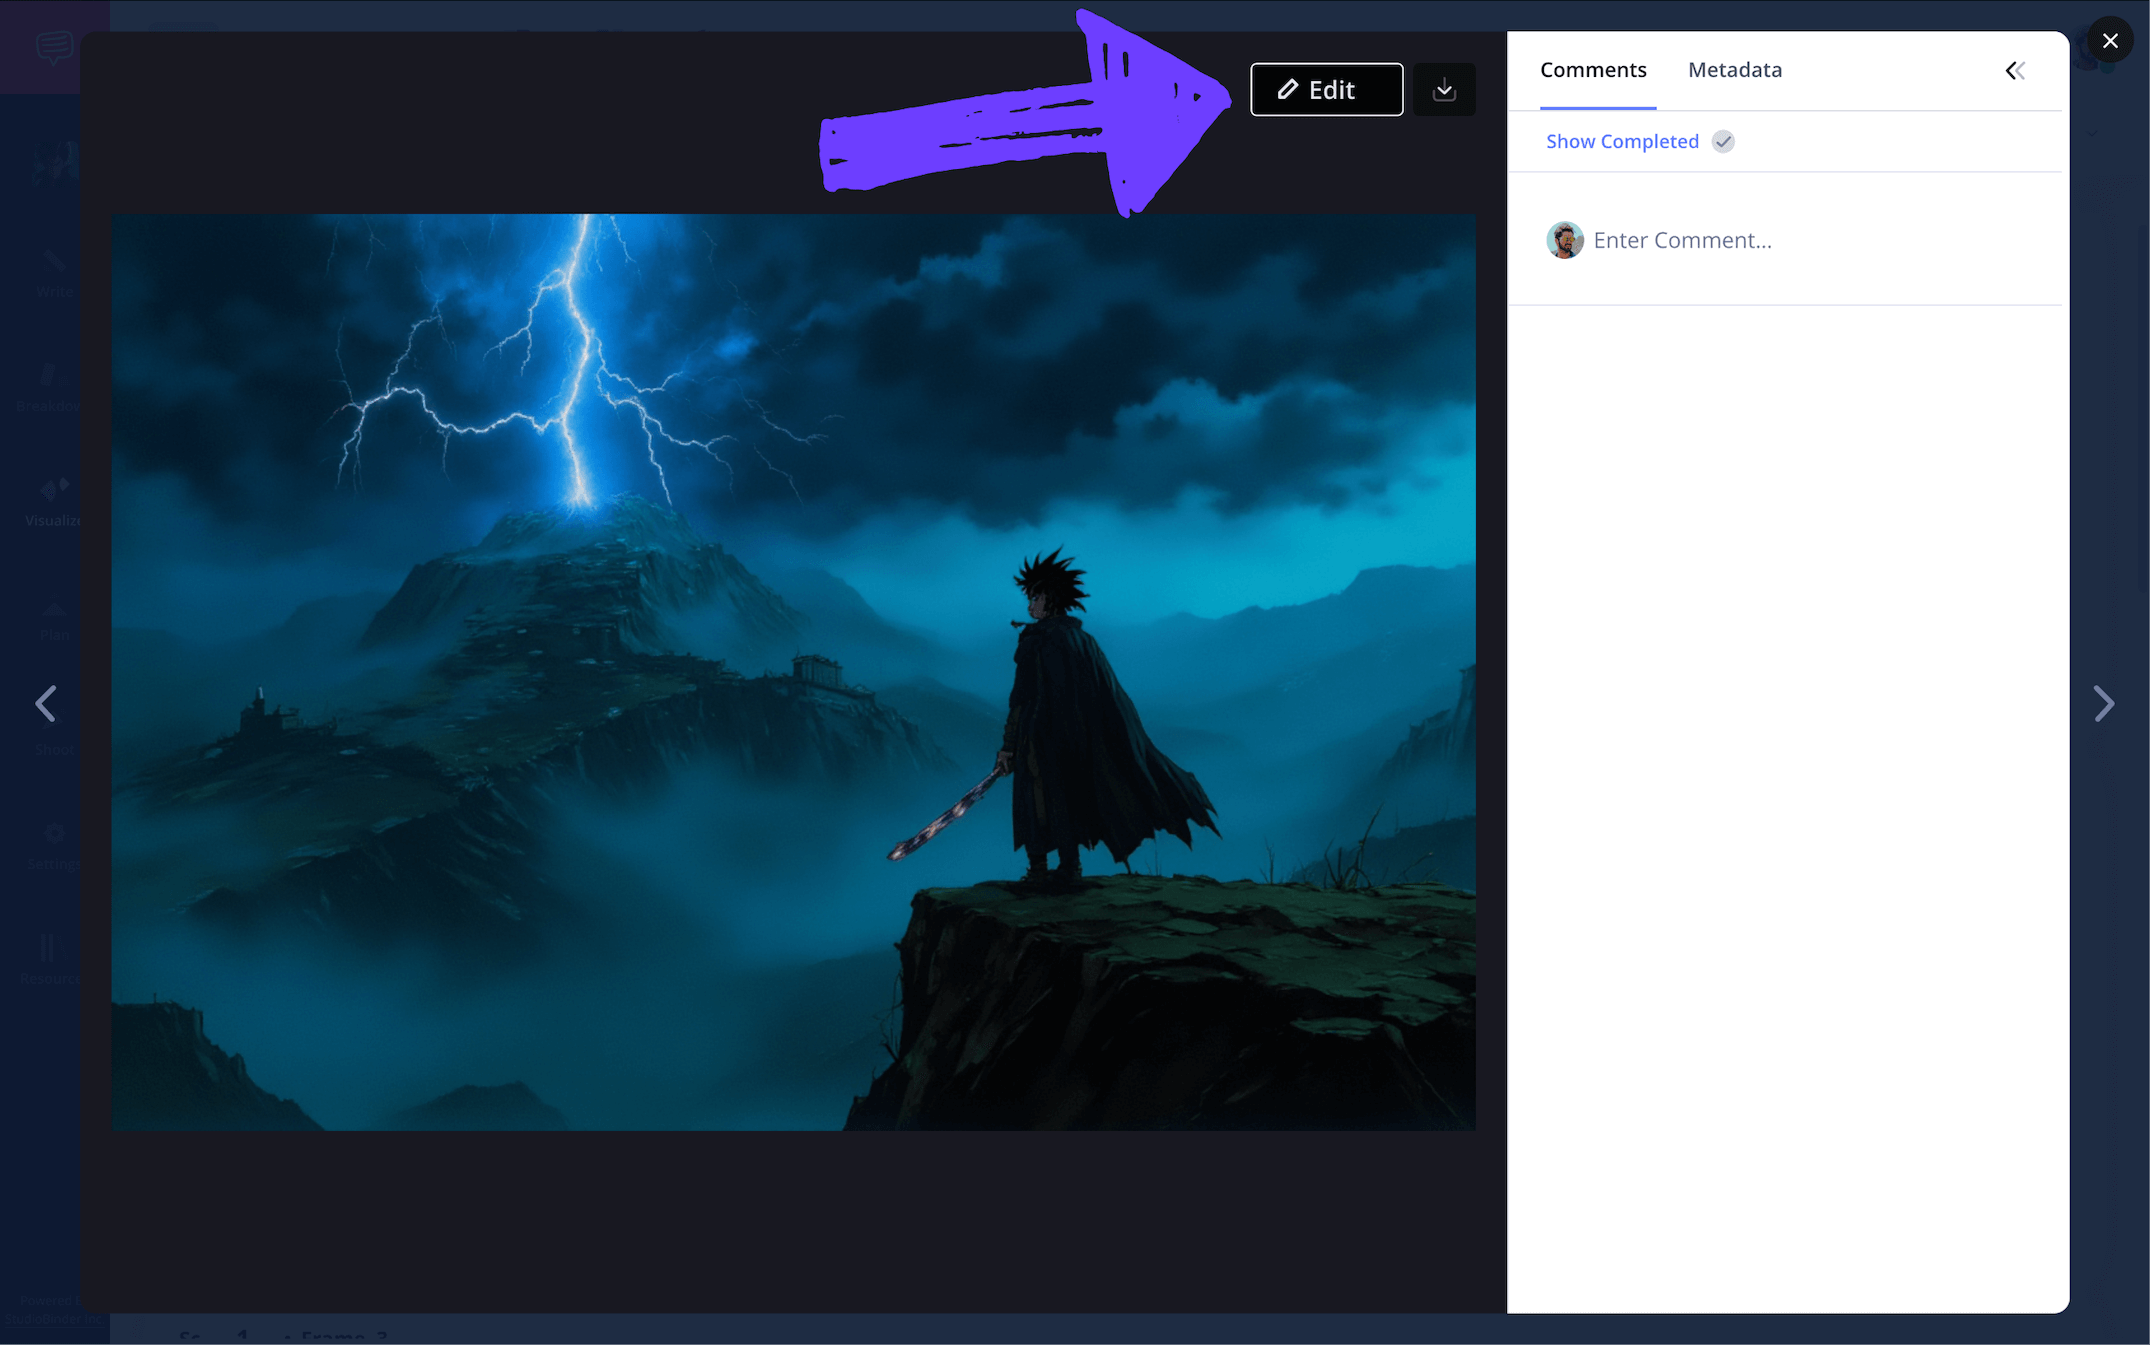
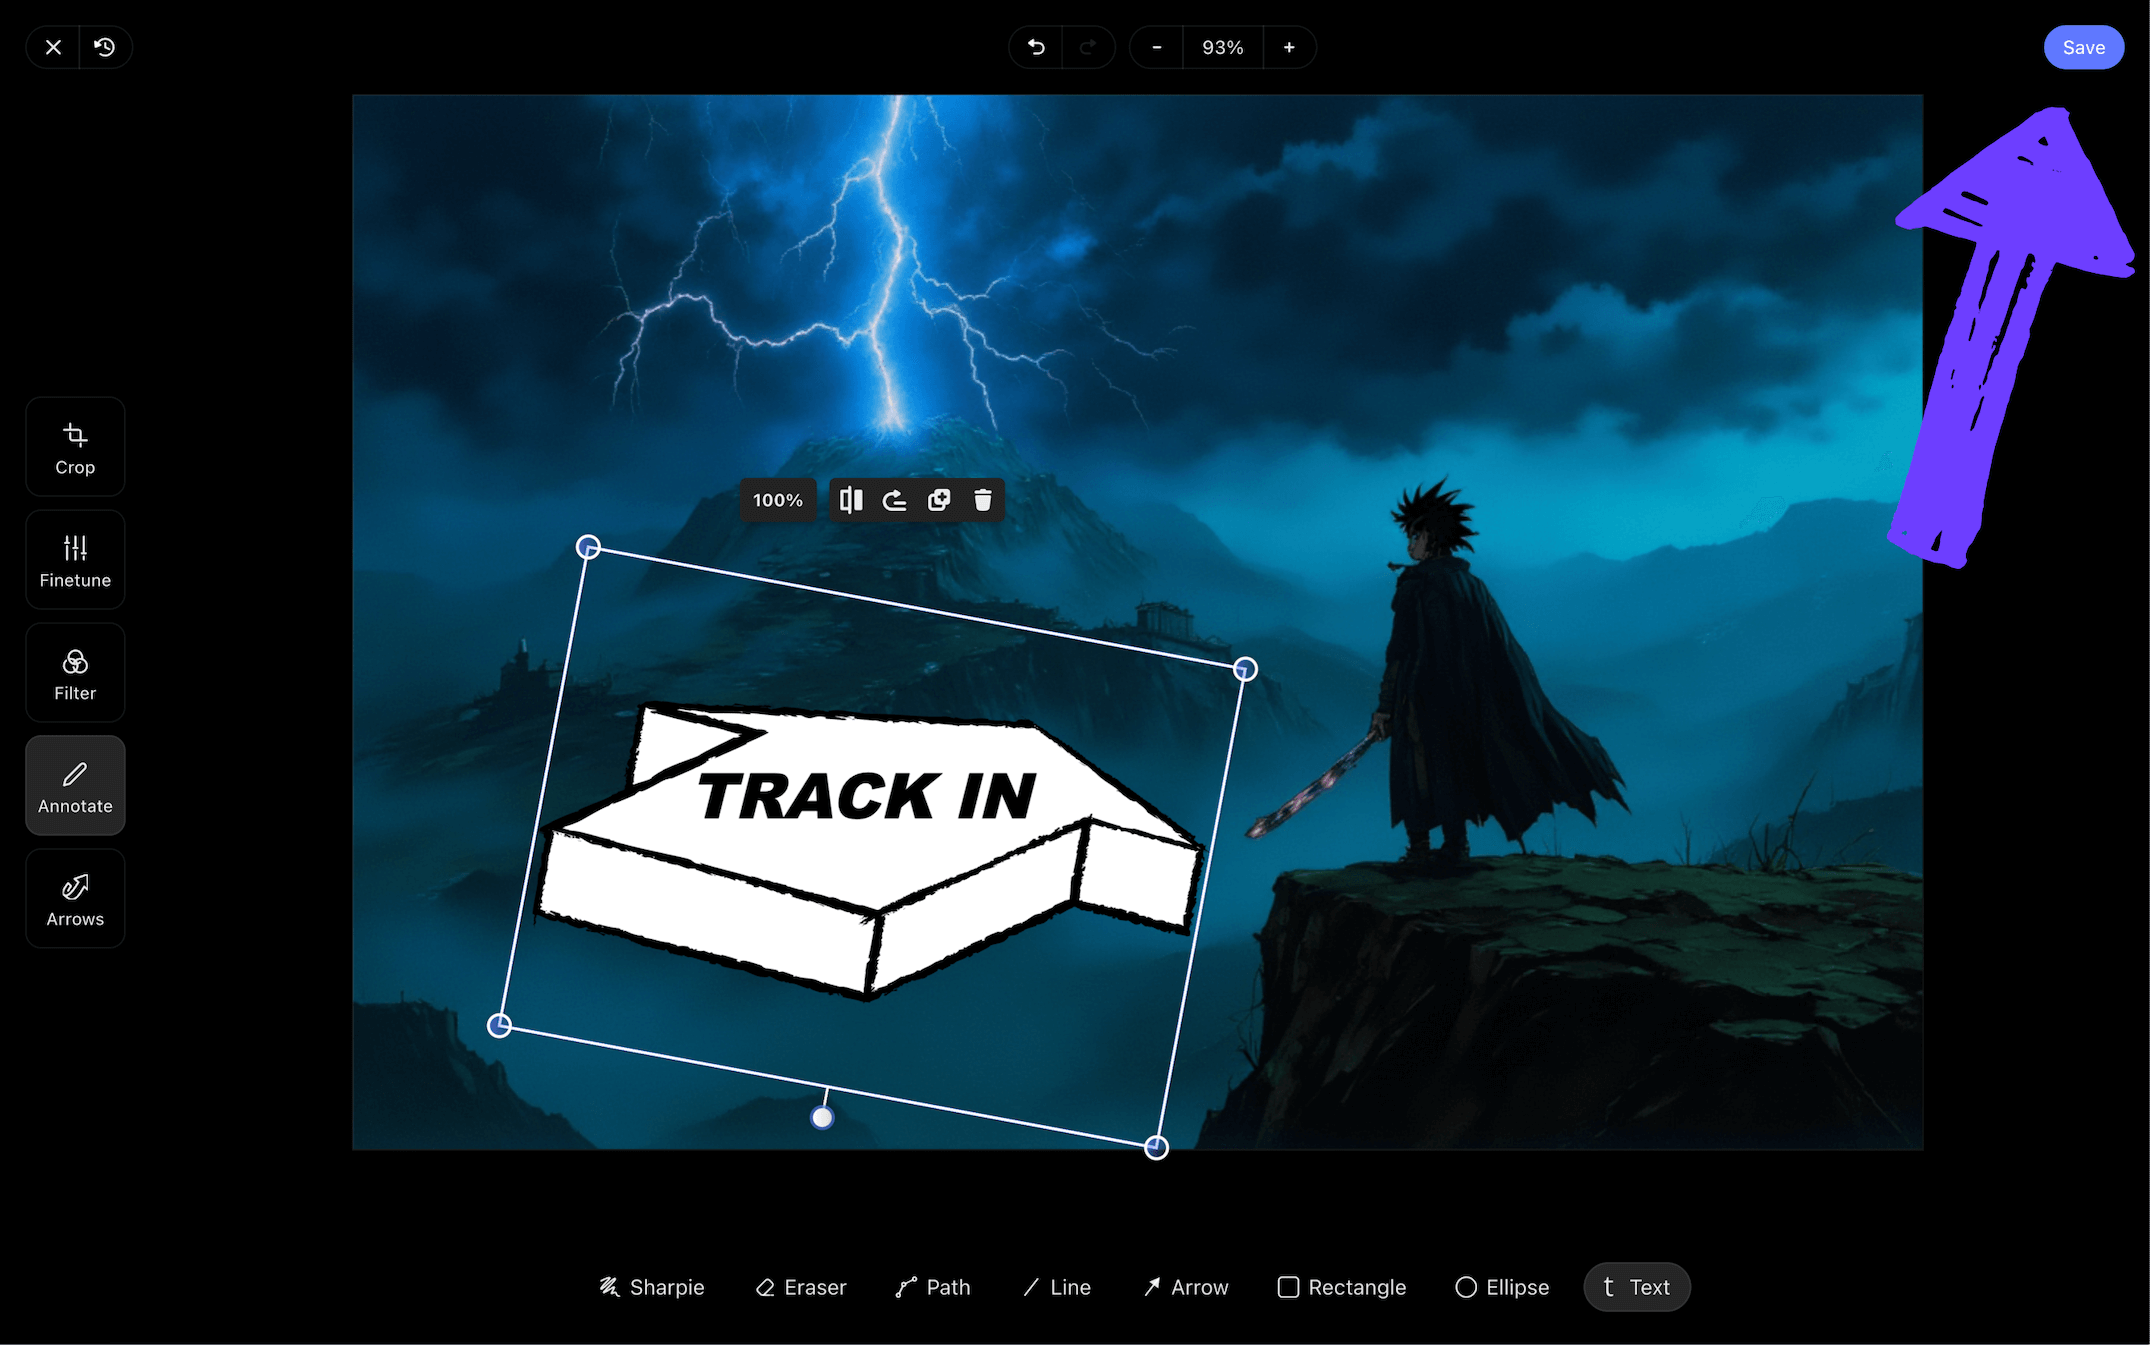
On the image editor page, you’ll select the arrows tab to the left. Now you can choose from a variety of customizable arrow options below.
To make the shadow demon in our example really feel like an impossible enemy for our hero, we want to emphasize the camera tilt-up intended for this shot by applying two arrows pointing up.
Then we’ll select the annotate tab on the left and add some text on the arrows to make sure they get the point of the action across.
Now just click Save and you’ll see your newly edited image with arrows has replaced the original image in your storyboard anime template.
After clicking Save, you'll notice that the newly annotated image has been saved directly into the panel.

Step 5
5. Print your storyboard
Once your storyboard is completed, you’ll likely want to download and print so physical copies can be distributed to key animators, editors, producers, and every other department that will benefit from your creative document.
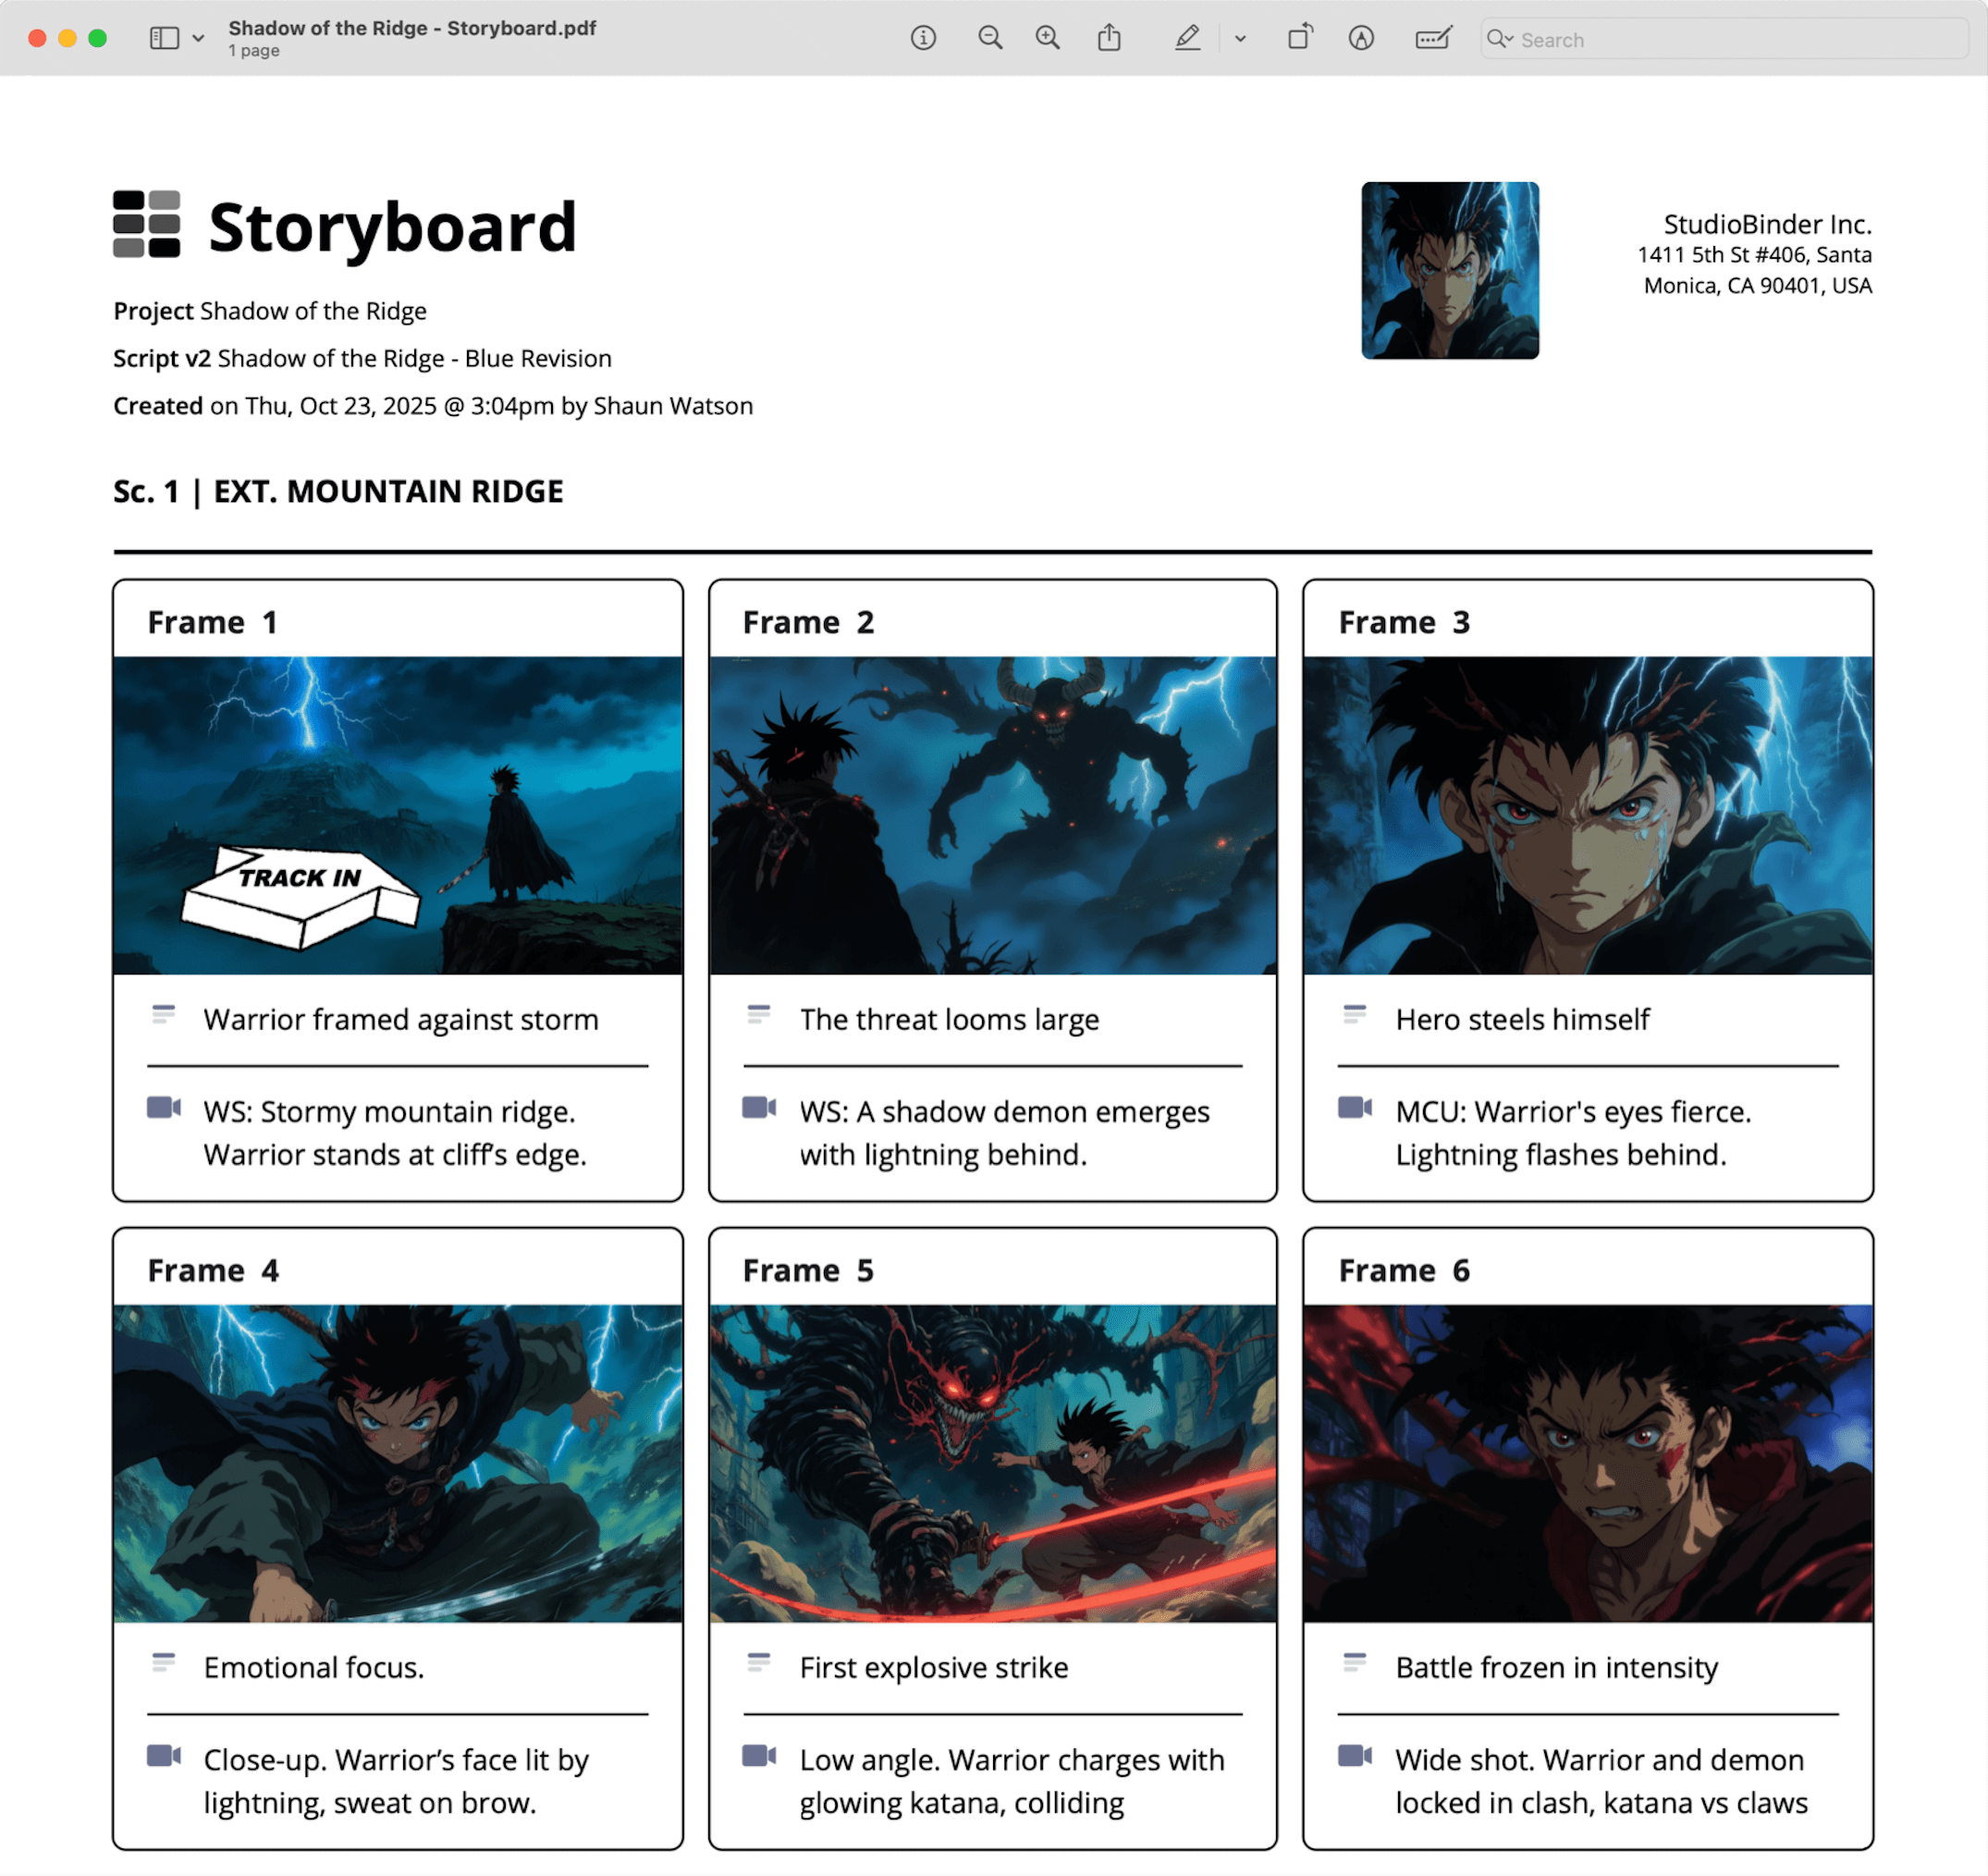
To download your Japanese anime storyboard template as a printable PDF, click Generate PDF on the top right.

StudioBinder allows you to customize your anime storyboard document to fit any department’s needs. Toggle the specs you would like visible on the PDF storyboard, and then just click Download PDF.

Now enjoy the experience of seeing your anime production collaborators bring your storyboard vision to life!
Conclusion
Bringing your anime to life
With a solid grasp on how to approach building an anime storyboard template, you just might be on your way to becoming the next Hayao Miyazaki!
But anime storyboarding isn’t the only kind of storyboard guide StudioBinder has to offer. Be sure to check out the many more free storyboard templates you can jump into now!
Anime Storyboard FAQs
Anime storyboard basics explained
An anime storyboard template is like any storyboard. It consists of blank panels for individual sketched out shots to be applied, as well as descriptions underneath each panel providing the specific details of the shot. The defining difference for an anime storyboard however, is that a finished script is not required to guide you through the process. In fact, the narrative, mood, and pacing is often found and established during the storyboarding process in Japanese animation.
A typical storyboard anime template isn’t very different from a traditional western animation storyboard template. The difference is more defined by the approach. In Japanese anime, the director is illustrating and creating the narrative beats of the storyboard almost entirely by themselves. Whereas in western animation, storyboarding is more of a collaborative process, with storyboard artists and several other production departments being more heavily involved in visual and narrative development.
With an art form as emotionally complex and expressive as anime, there are bound to be many technical mistakes on the road to bringing such beauty to life. However, the most common and least discussed in storyboarding, is respecting the director’s process. Since Japanese anime storyboarding is unique in that it’s very director-led – as opposed to American animation storyboarding, which is more collaborative – it’s common for colleagues to want to push the director in certain directions. But the truth is, what makes anime so artistically interesting is largely the fact that it’s the result of a singular vision, and trusting in this unique process is important.
Writing an anime storyboard is a pretty flexible process. The addition of descriptions under each shot frame really depends on the preference of the director of the anime project. It’s not uncommon though for storyboard illustrations to get added first without any descriptions. This is because in anime, the visual art tends to have more of an impact on shaping the characters and story than the script itself does.
