home → TEMPLATES → Storyboard
Commercial Storyboard Template
Commercial storyboard template
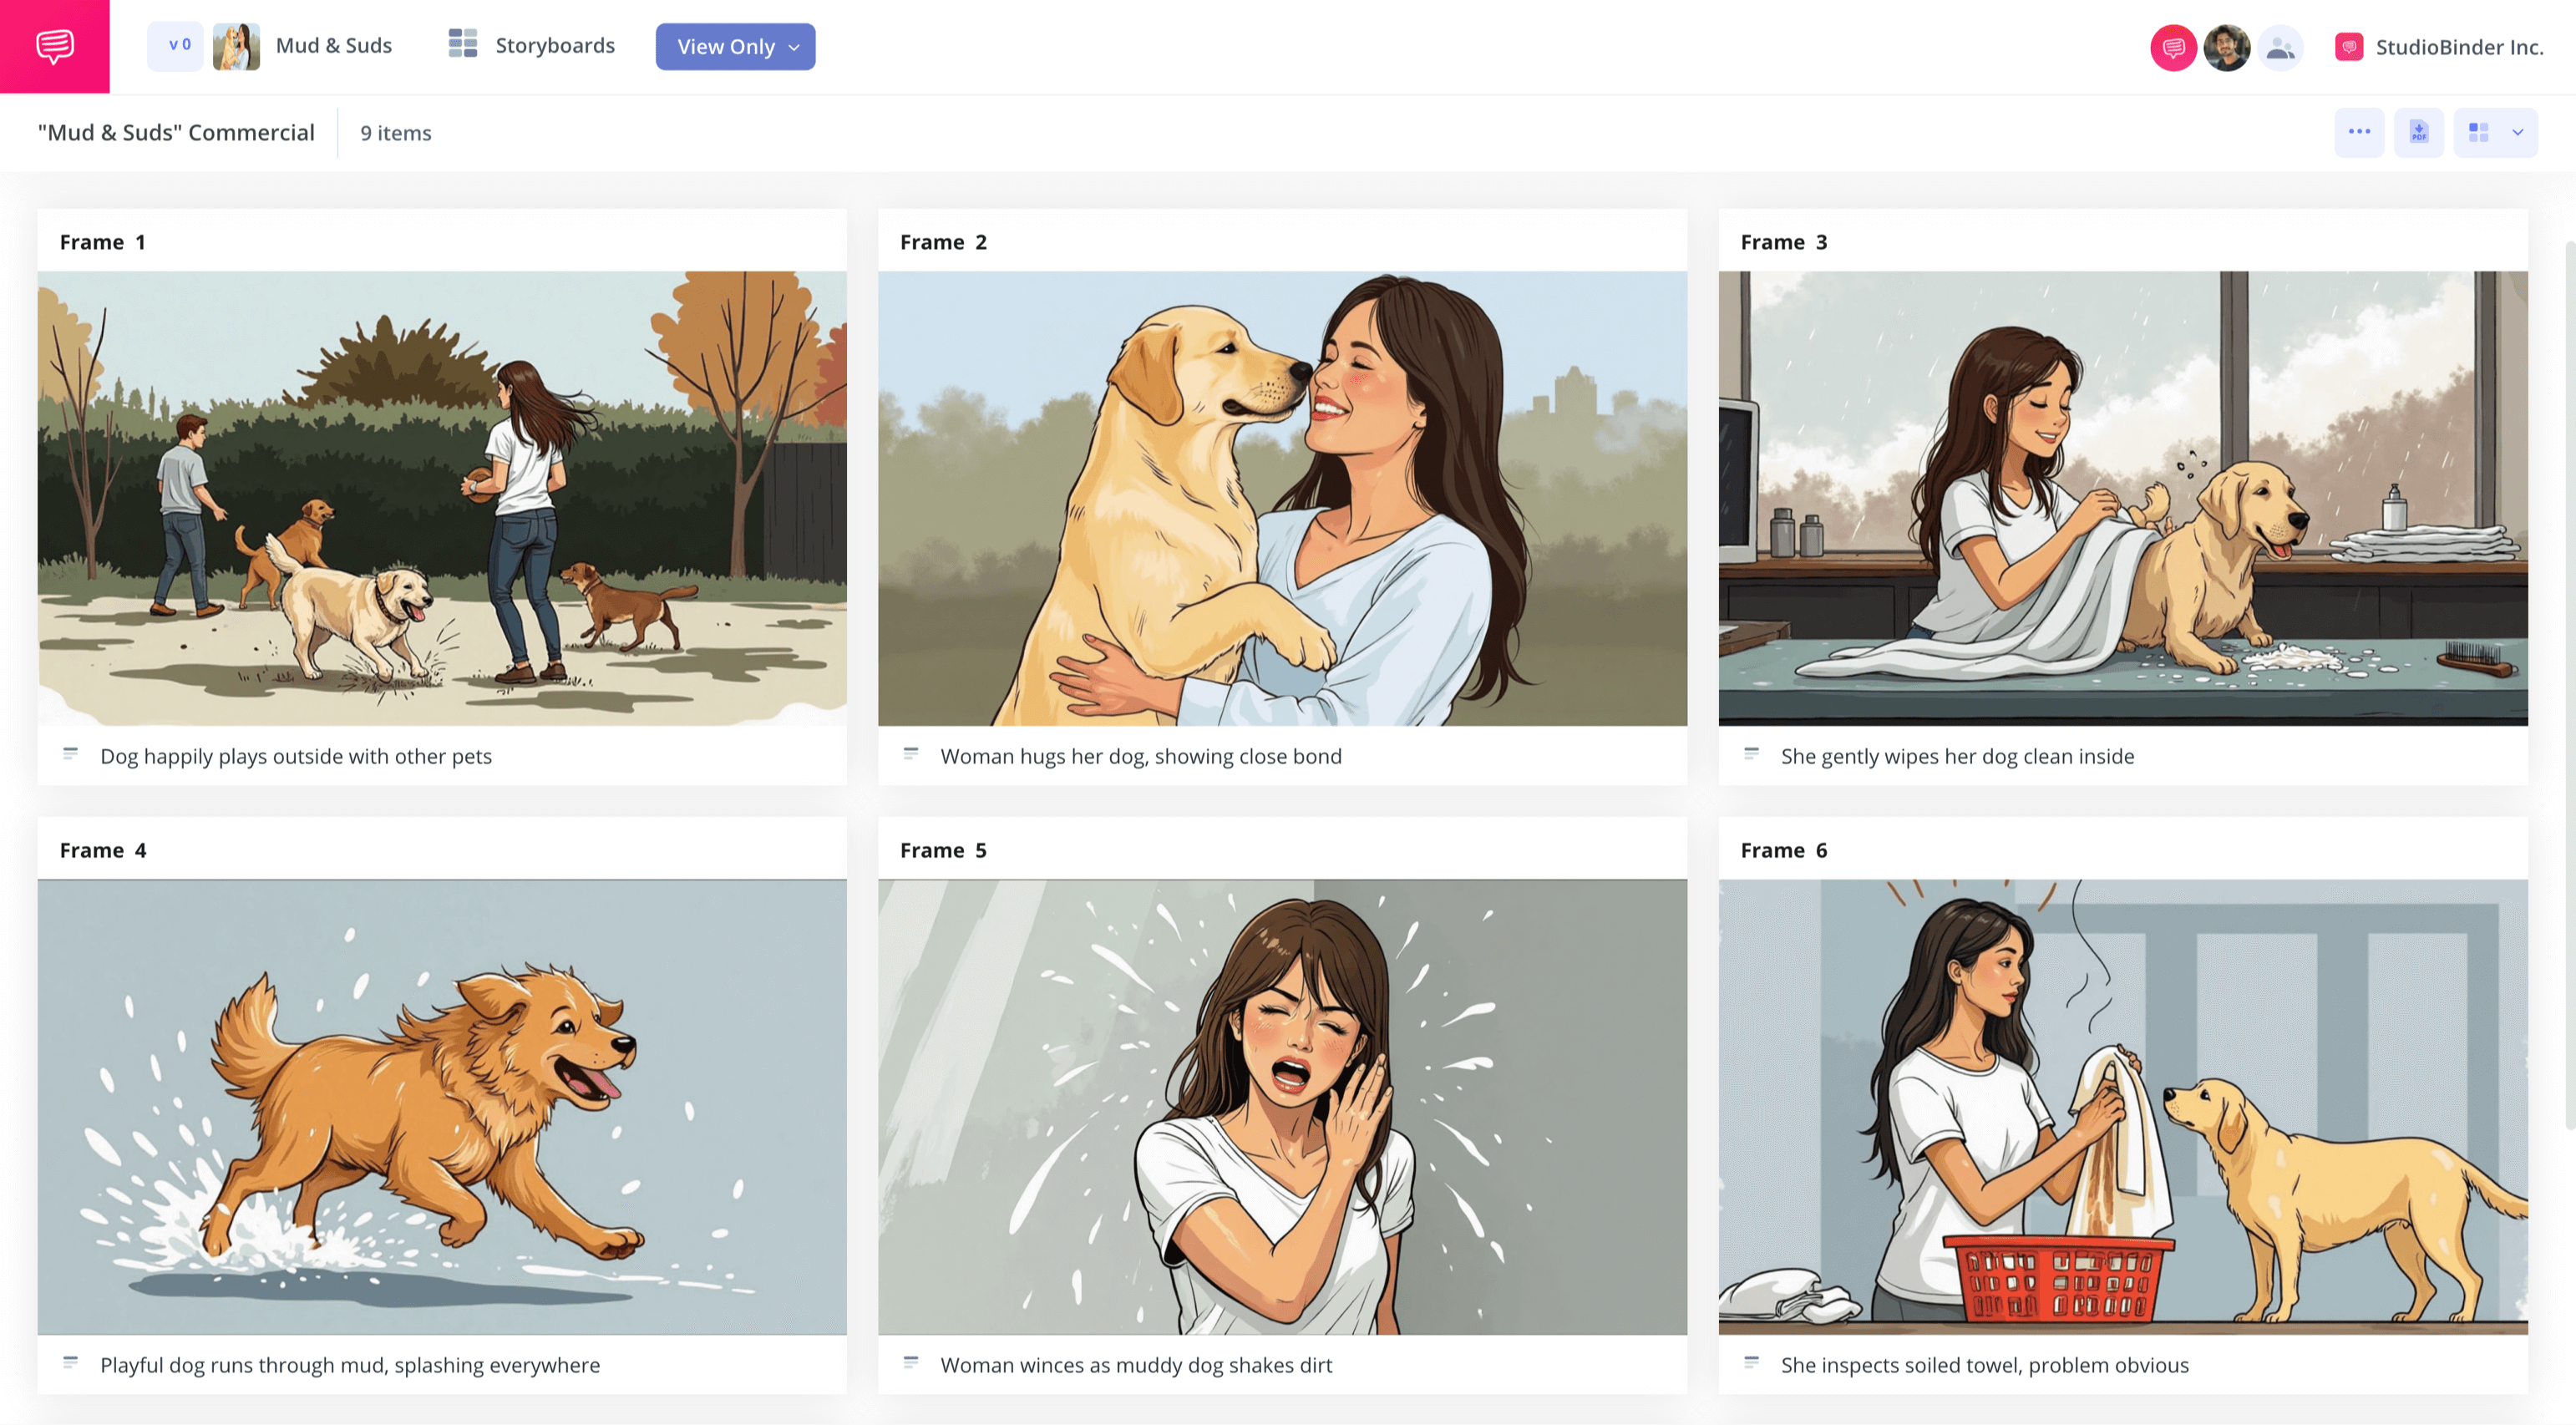
Advertising a great brand through a television break is an age-old tradition that requires all the best tools to catch the eyes and ears of your customers. As you and your team develop your short narrative vision, having a commercial storyboard template with an easy-to-use interface is an essential need.
StudioBinder’s TV commercial storyboard template and the guide below will help you initiate your team’s commercial break concept. With StudioBinder’s storyboard creator, you’ll have all you need to allow those creative sparks to fly.
Step 1
1. Set up your template
You’ve pinpointed your demographics, you’ve brainstormed a narrative and visual language that will appeal to consumers in that demographic, now it’s time to fix up a storyboard template that will beautifully showcase your team’s hard work.
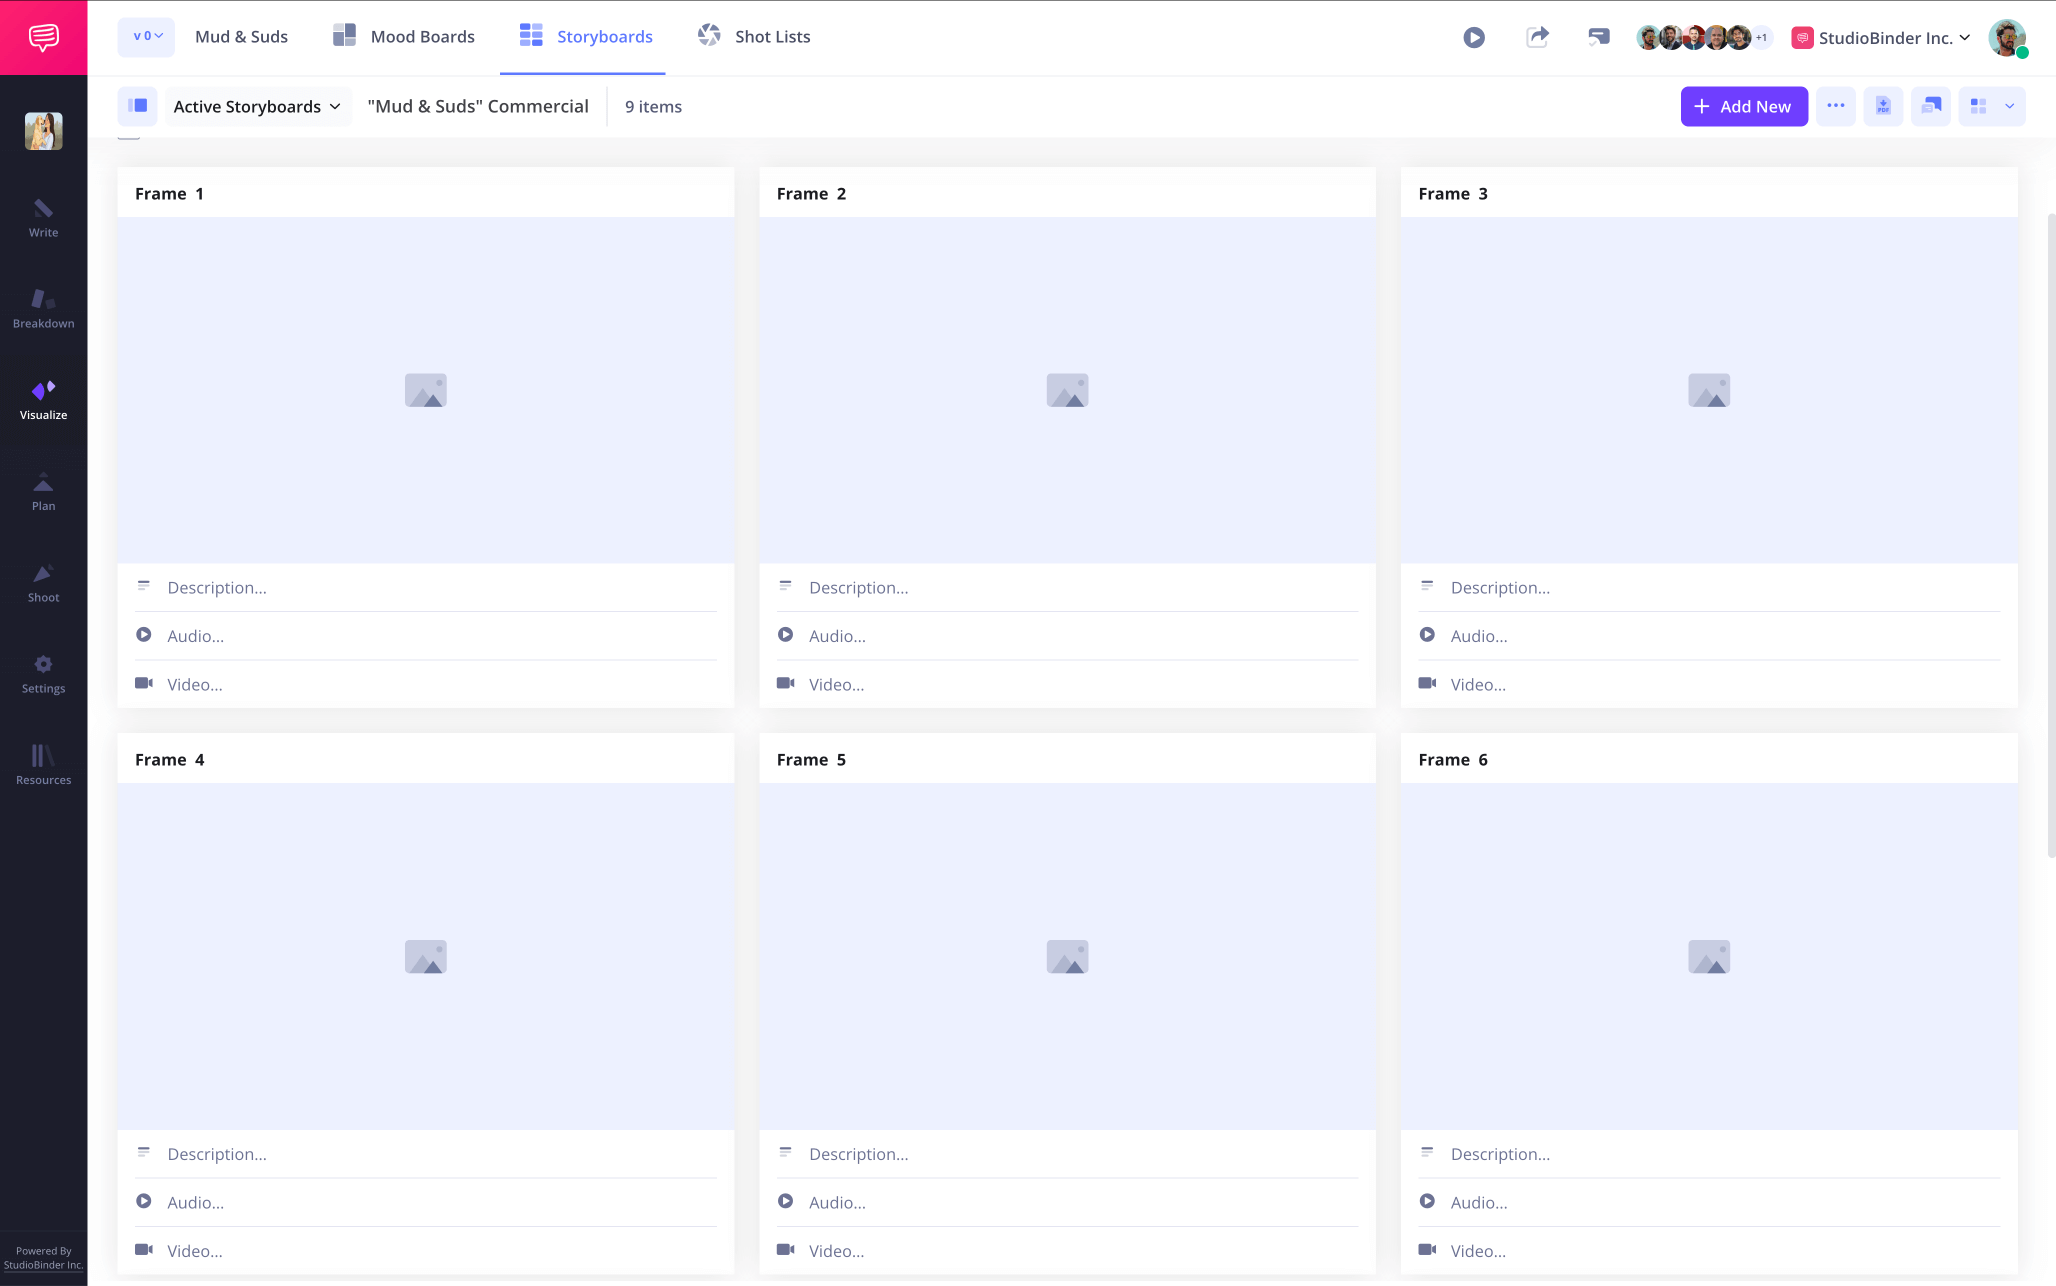
While most professional ad agencies have a ready-to-go script when starting the storyboarding process, it’s also possible you’re beginning with nothing but a strong visual or conceptual idea that hasn’t been fully put into words yet. Wherever you and your team are in the process, once you start a new project in StudioBinder, you’ll have the choice to either import a script or create manually.

If you import a script, StudioBinder will automatically organize all your scenes in the exact order they’re laid out in the script. It’s good to remember that you can import a script at any point in the process, so no rush!
In the meantime, you can start with a batch of blank frames to get the process started.
Step 2
2. Establish your settings
Upon setting up your project, you’ll be prompted to input details for your TV commercial storyboard such as aspect ratio and frame numbering. But since developing a television spot is a constantly evolving process, you may need to make adjustments to these details as you go.
Navigate to the settings tab at any time to change any storyboard details that require updated customizations as you go.

By default, you'll notice Scene number, Descriptions, Audio and Video toggled "on" which is valuable for many projects. However, in our current project, we only need the description field visible so we'll disable the rest.

Step 3
3. Include visuals
A television commercial shoot has to be air tight when it comes to scheduling and location, which is why adding, replacing, and re-adding images as creative and budget needs fluctuate is an expected part of the storyboarding process. Throughout the barrage of creative briefs and production requests, you’ll need to initiate image changes easily and reliably.
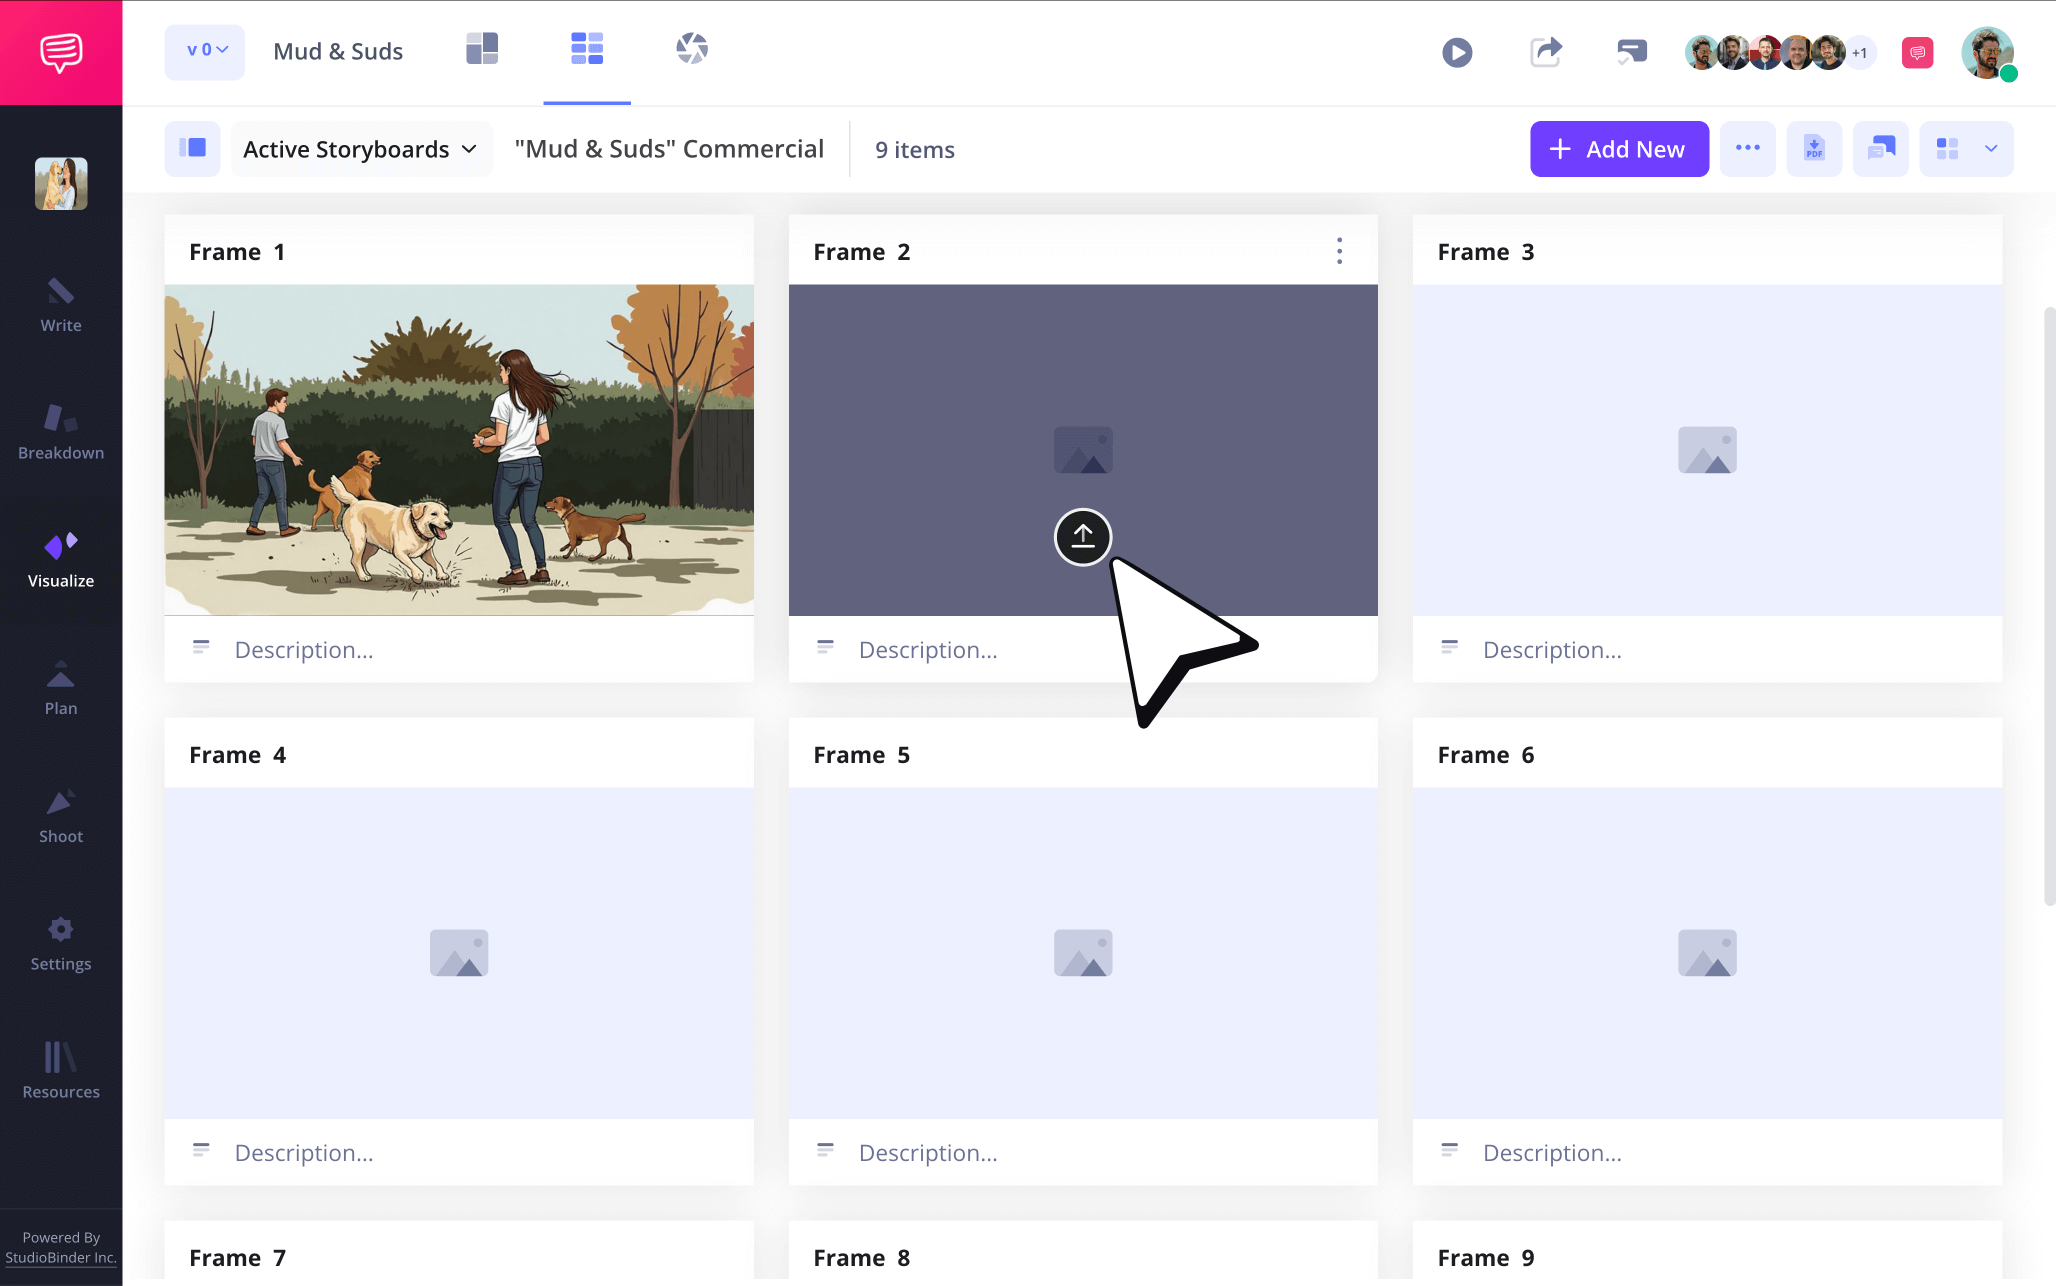
You can add or change images in your television commercial storyboard by simply selecting upload or remove while hovering over any frame.
After you've uploaded your storyboard images, you can enter a description to reinforce the visuals on your storyboard.
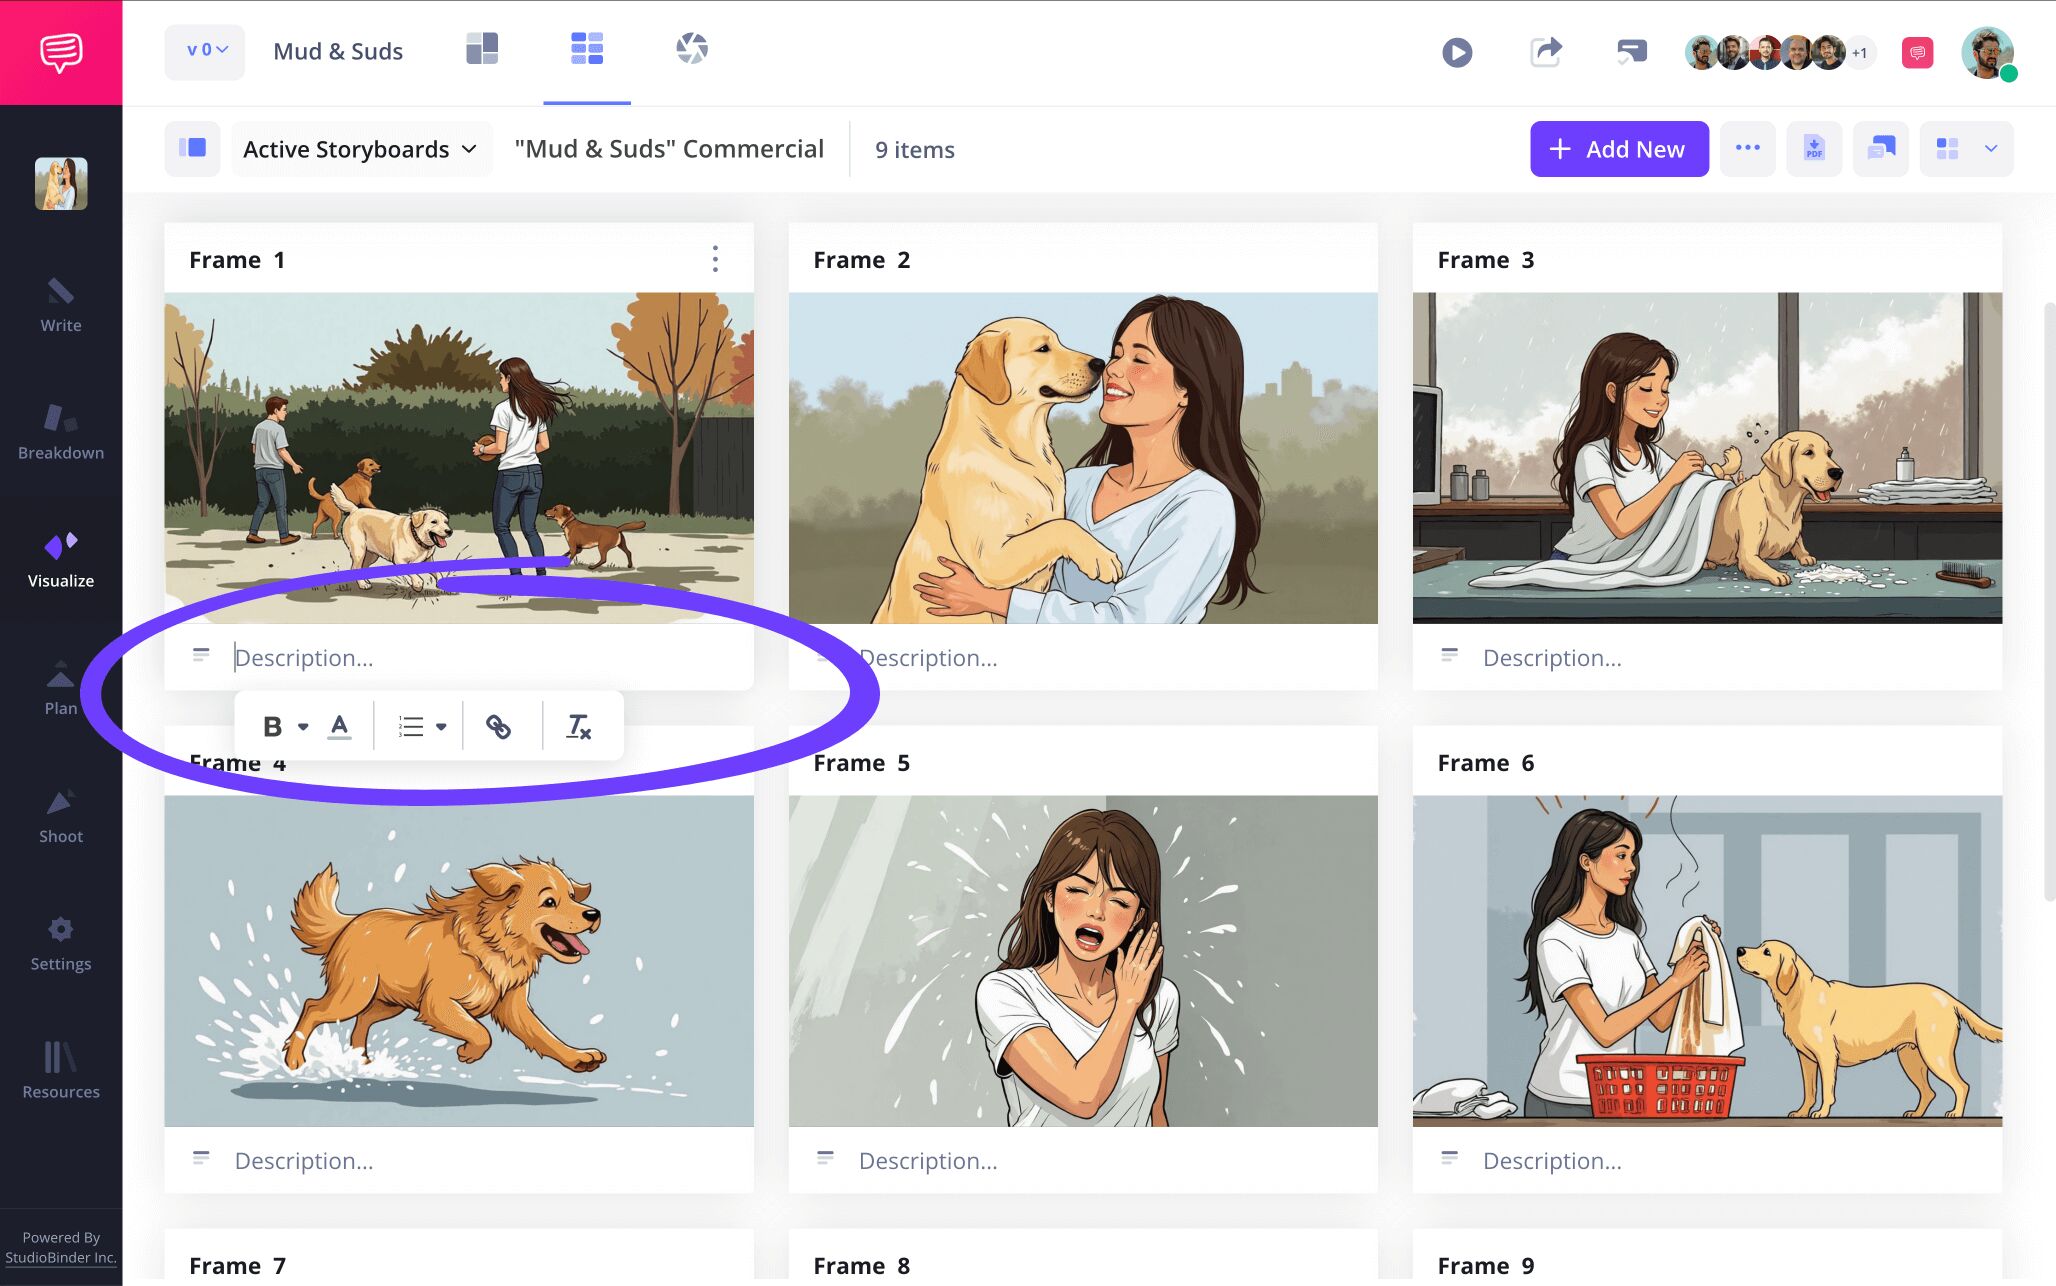
Now you'll have the visuals and descriptions working seamlessly together as a TV commercial storyboard. It should look something like this:
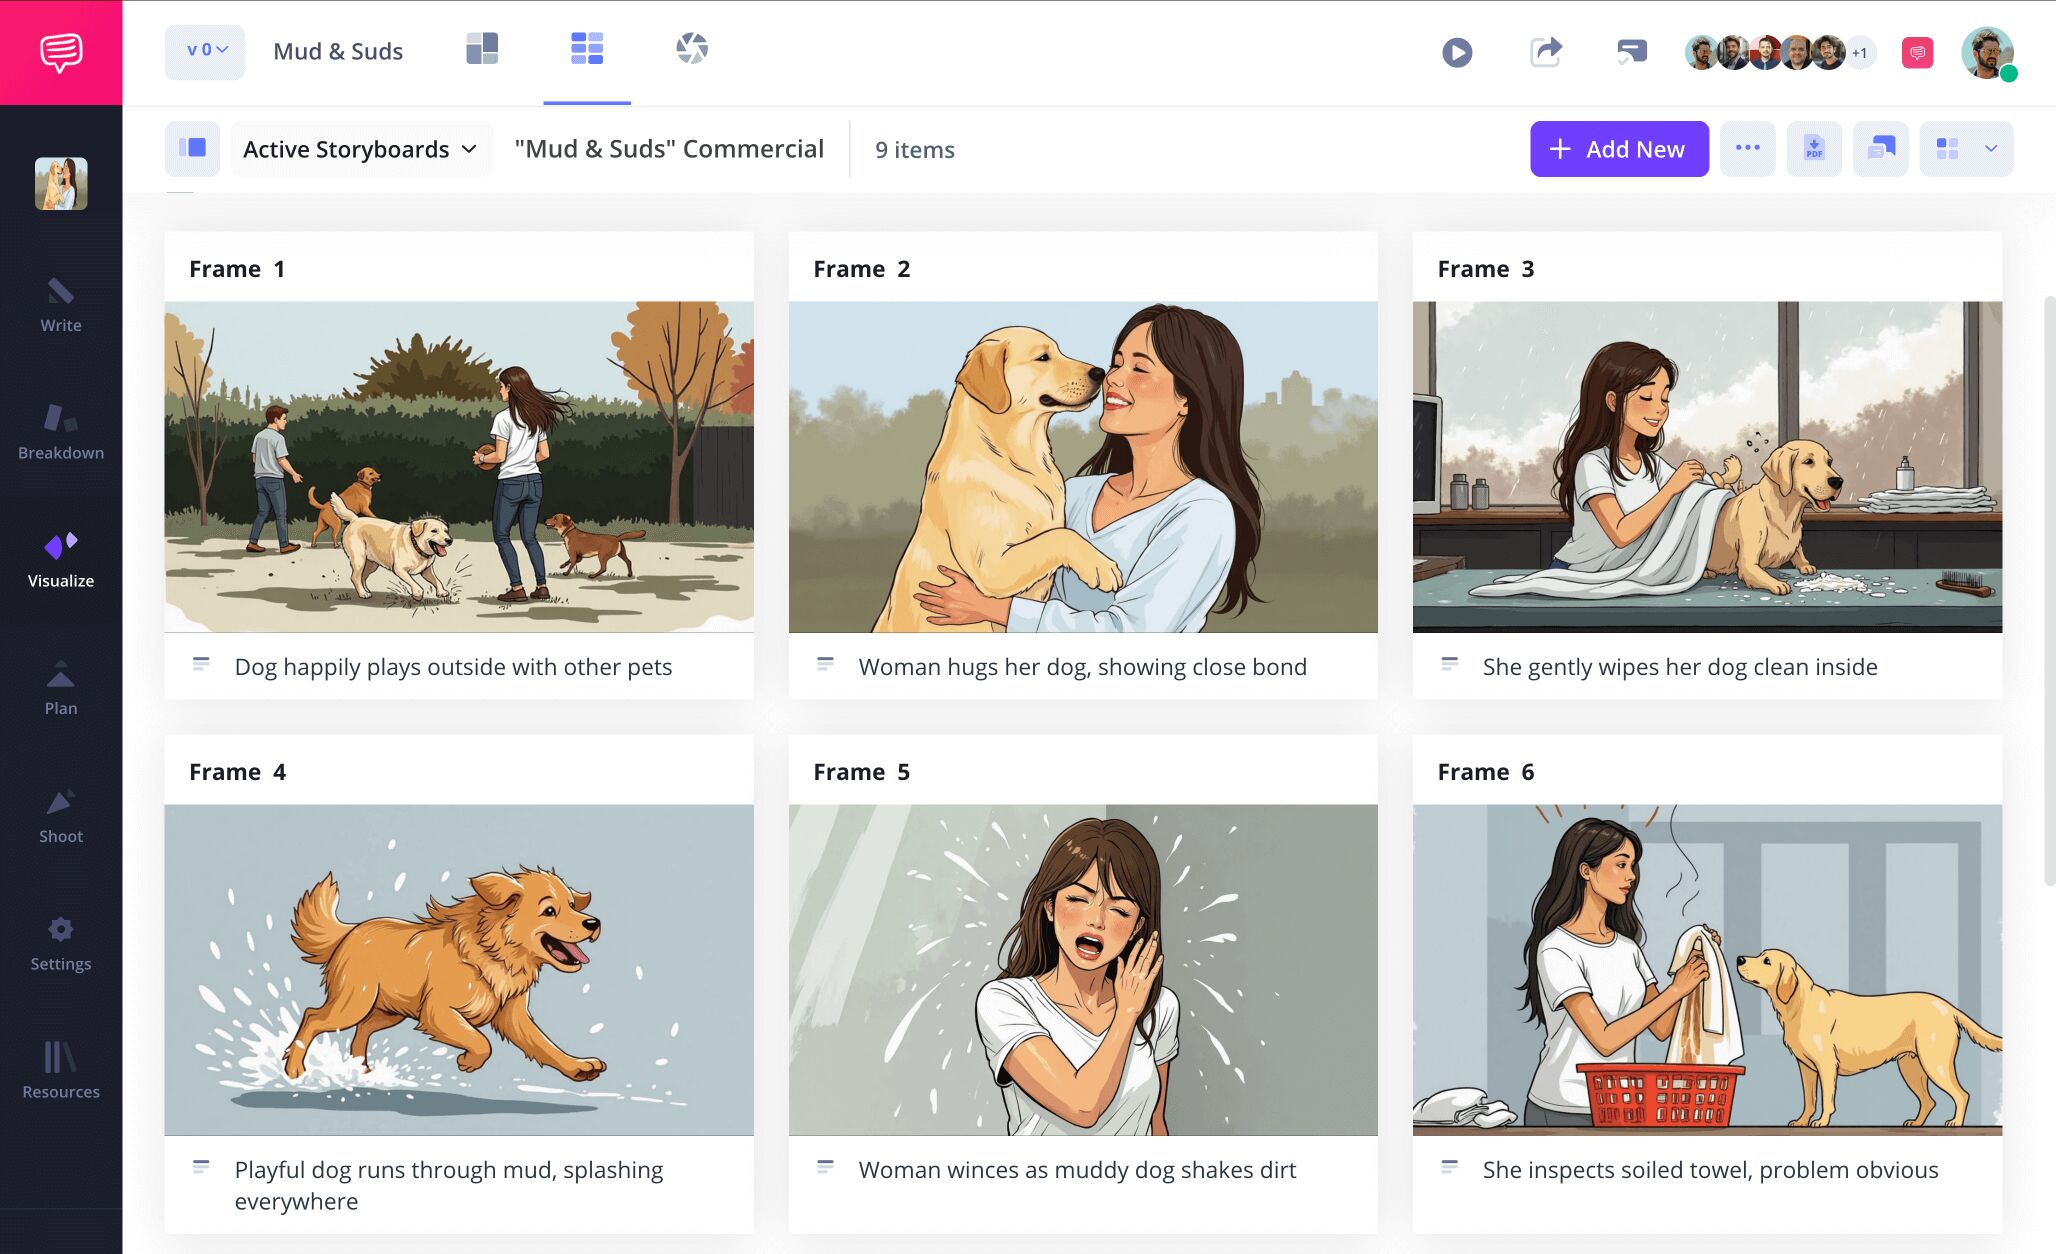
Pretty nice, right?
Now let’s say you discard a sketch from a frame and sometime down the line the director requests it back. Rather than pull your hair out and scramble to find the image in your team’s endless array of files, simply click on the upload icon.
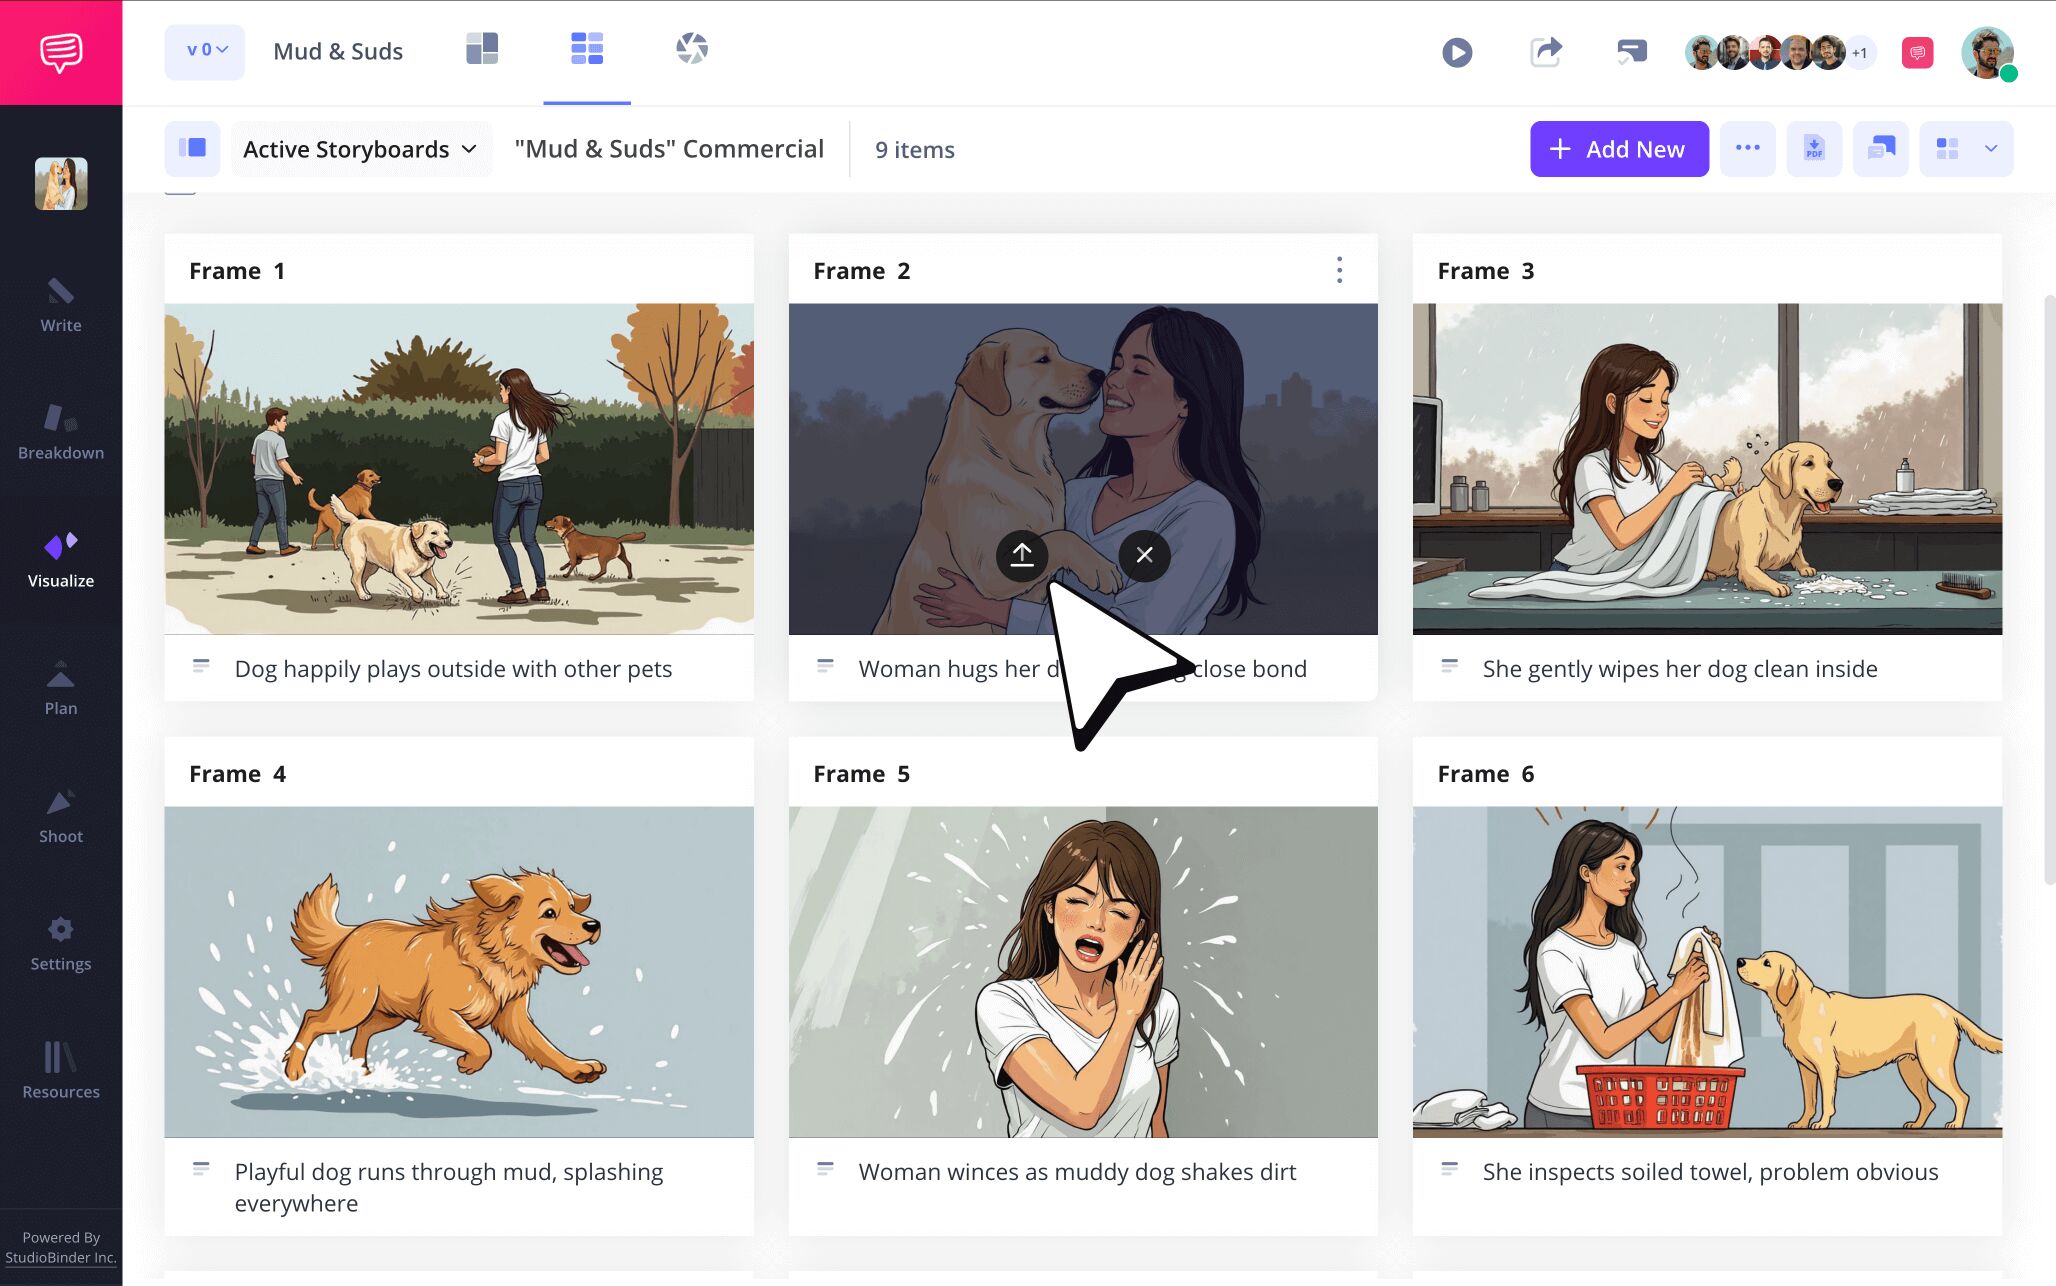
You'll notice the Media Library appears in a pop-up where StudioBinder automatically saves every image you’ve uploaded.

Simply click on any image and this will automatically replace the previous image.
Step 4
4. Accessorize your image
Sometimes a sketch or rendered image comes down the pipeline that needs a little more expression added to help get a sequence’s point across. With StudioBinder’s image edit feature, quick yet professional-looking additions can be added by anyone on your team at any time.
As you can see in the sample TV commercial storyboard example, this particular TV spot moment requires more emphasis on the fact that the dog is making an exceptionally large and messy jump.
To access the image editor, click on any image and in the pop-up, click Edit.
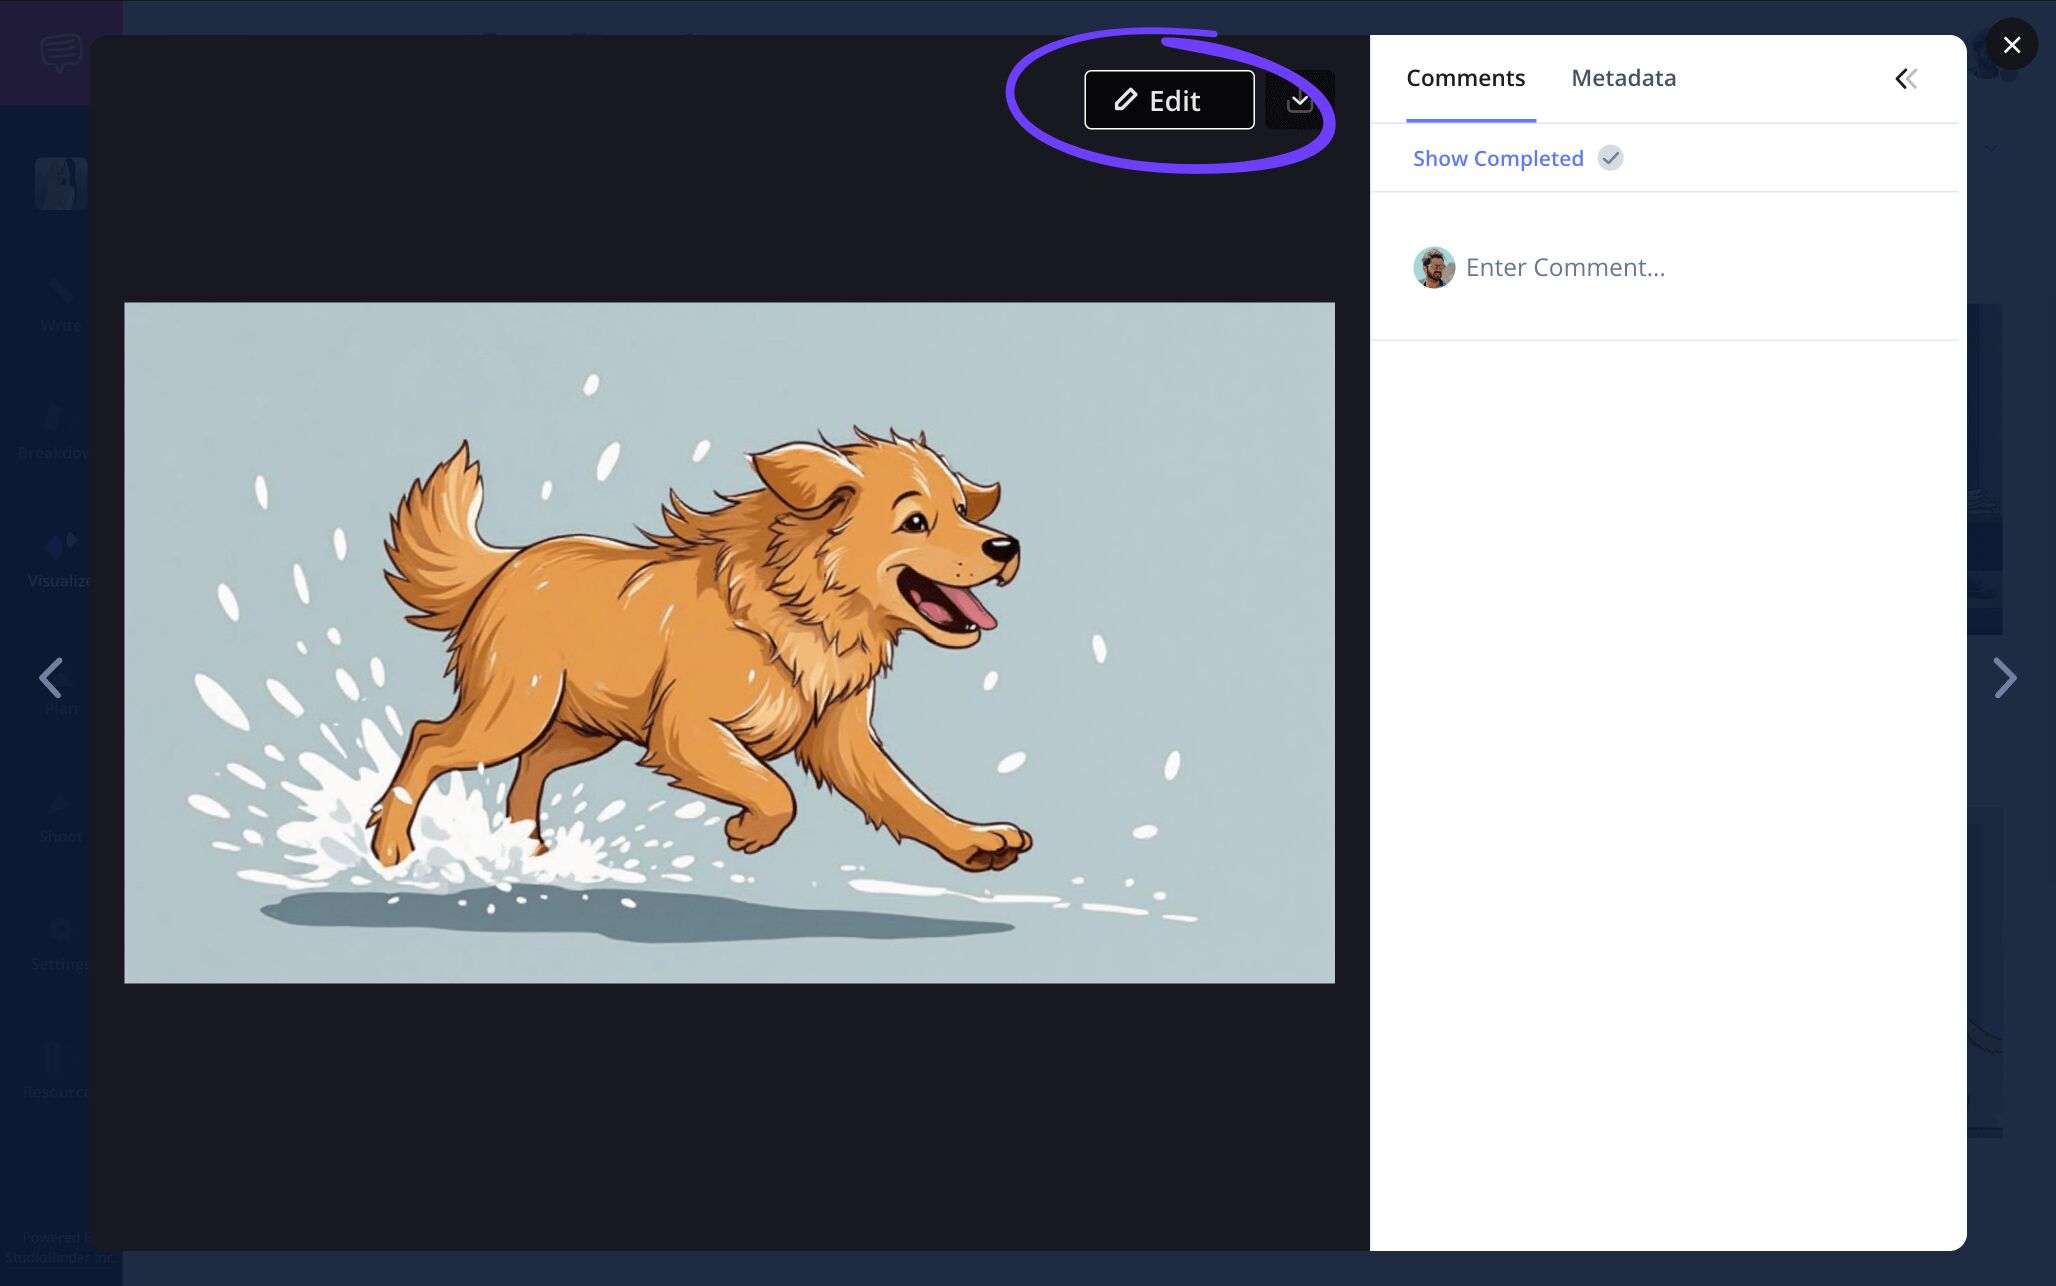
Once on the edit page, click Arrows on the left side of the page, and you'll notice an entire row of storyboard arrows on the bottom.
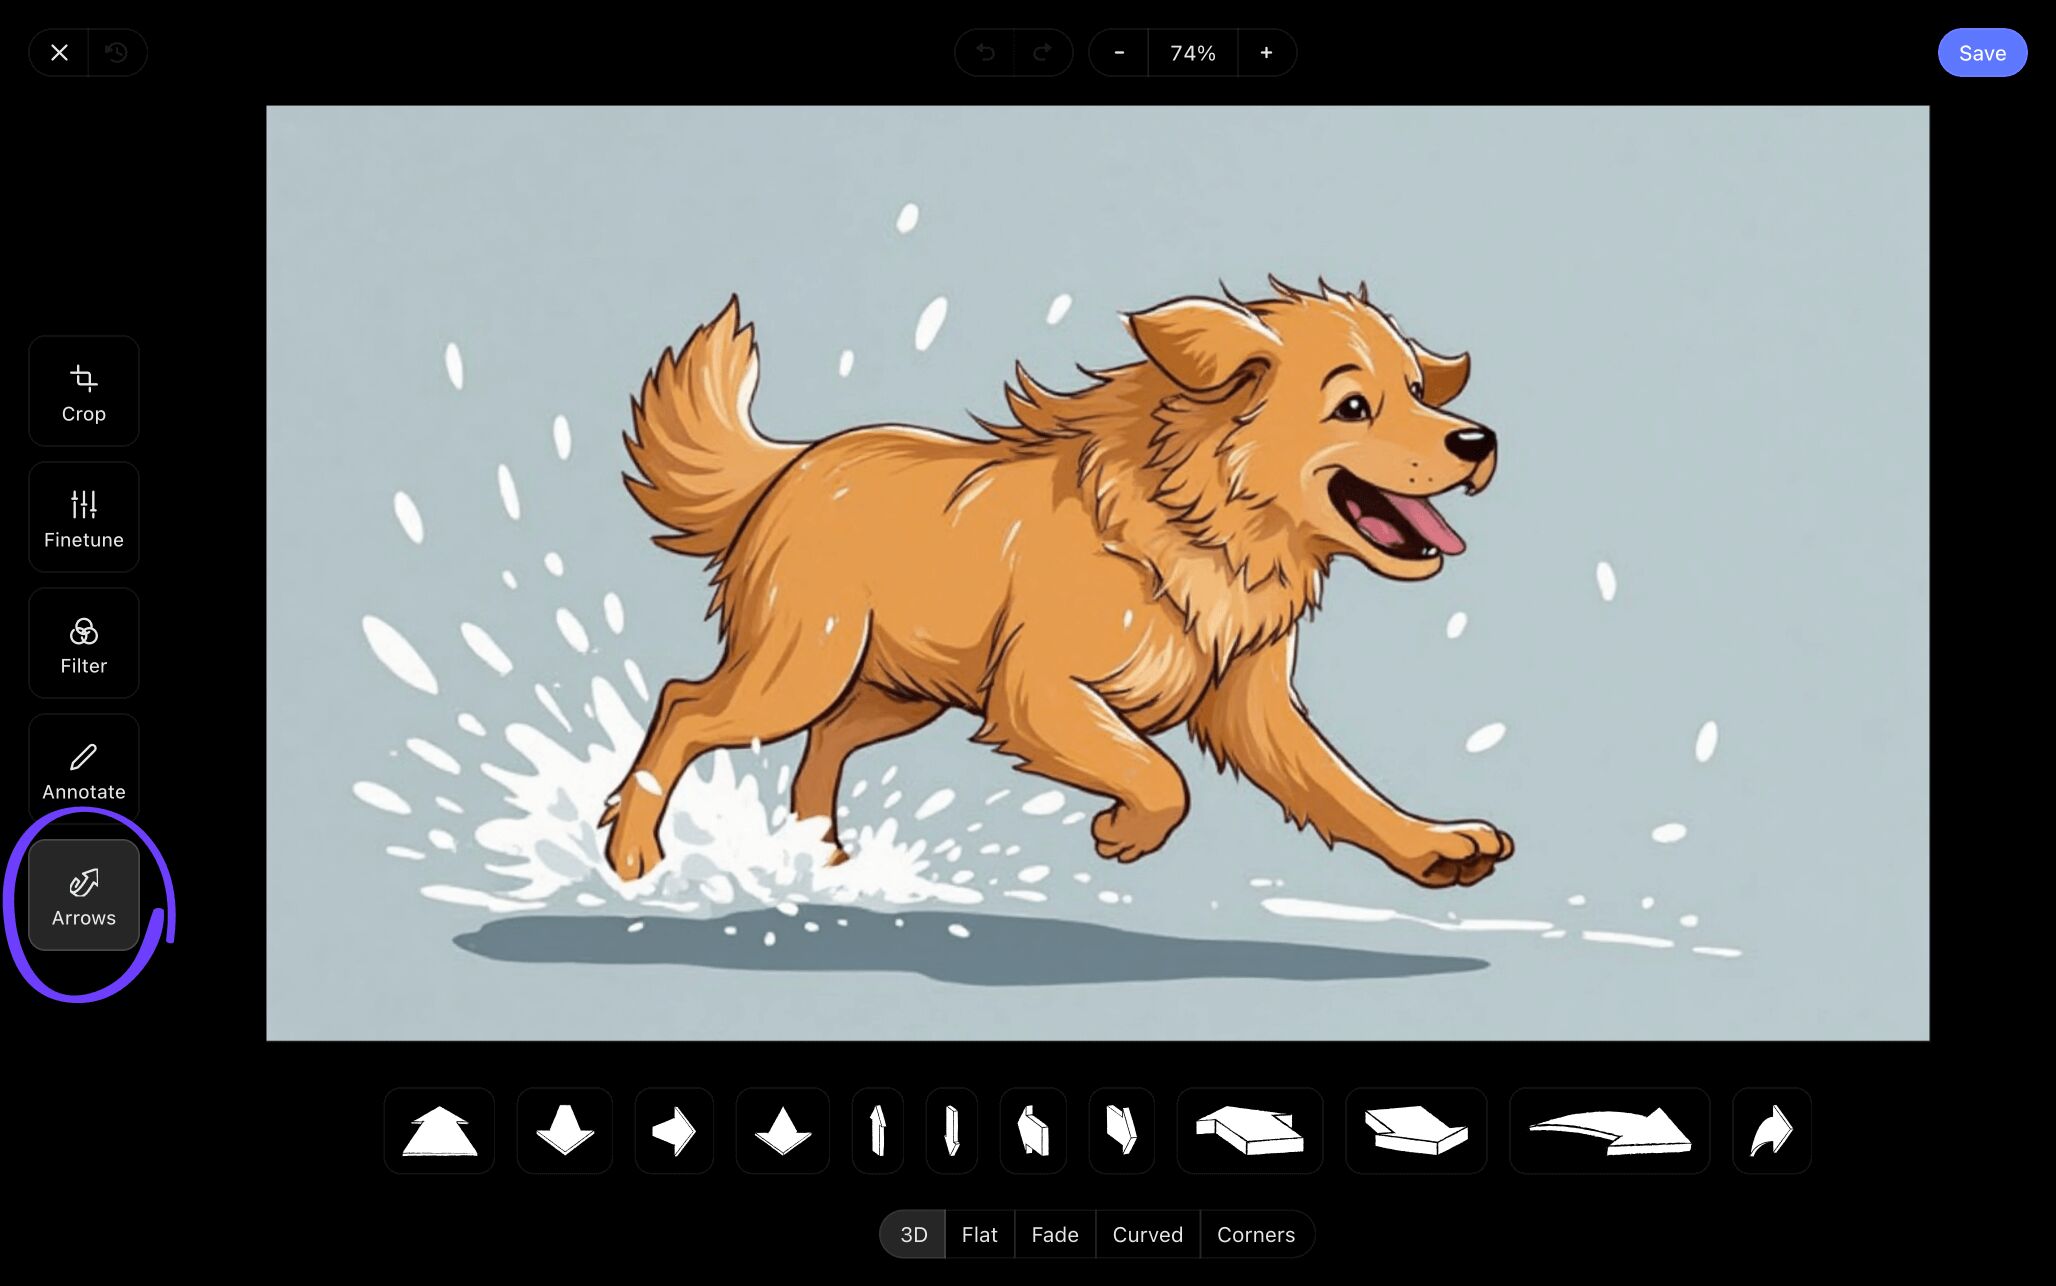
StudioBinder offers a vast array of customizable arrow shapes and sizes that can be applied to emphasize whatever action you need. In this case, one of the left-to-right arrows really drives the point home.
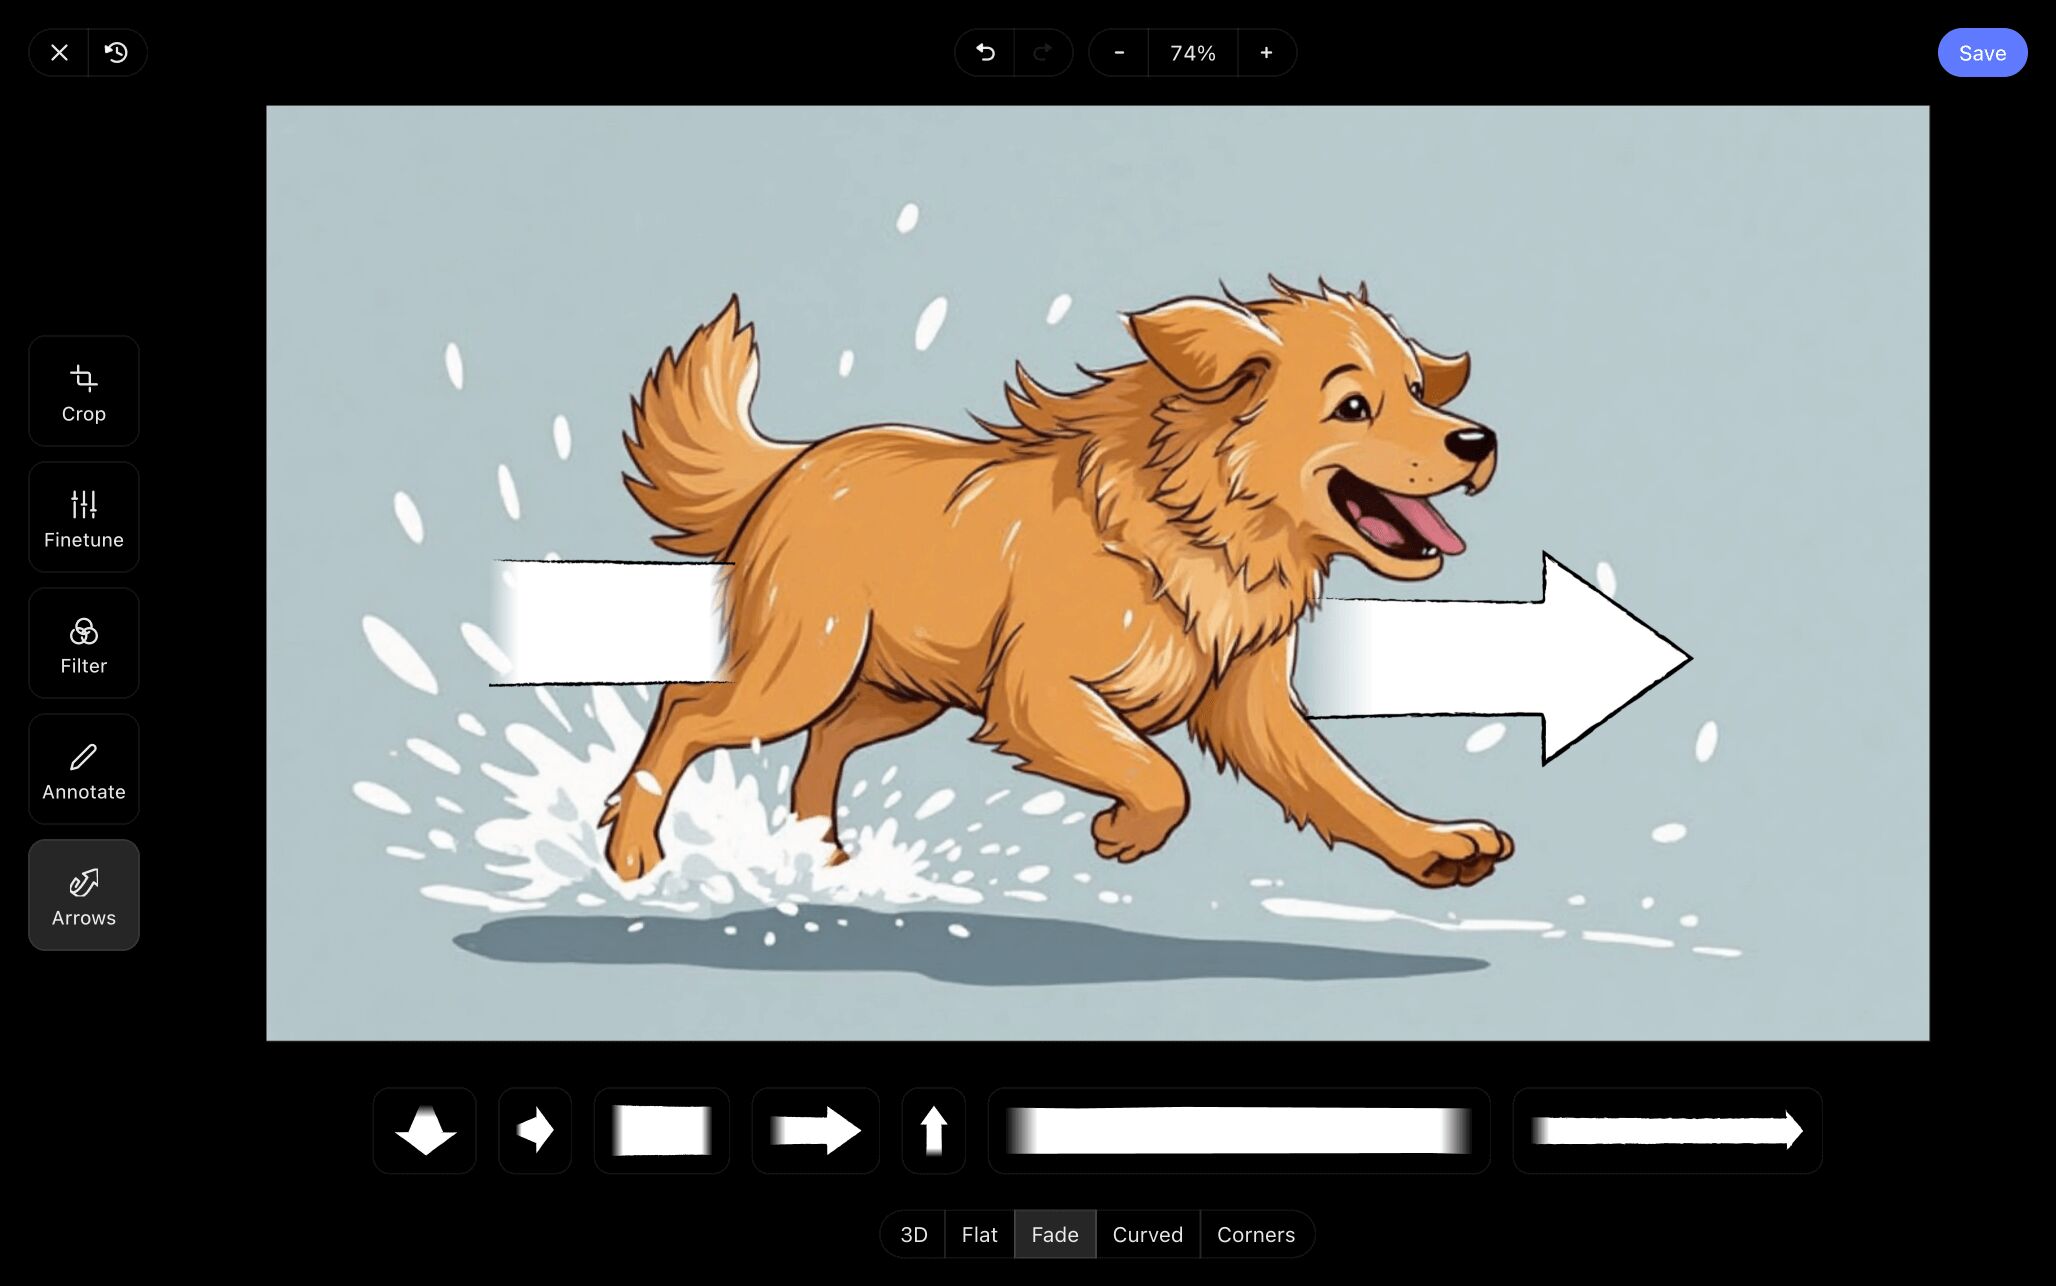
After you're done editing and annotating your image, just click Save and it will automatically be added to your storyboard.

Step 5
5. Invite your team
As you know well, an ad campaign involves input from clients, filmmakers, creative directors, and many more voices to ensure brand quality is kept at the forefront. Whatever your position, you certainly won’t be the only eyes needed on your television commercial storyboard.
Navigate to the share storyboards page icon at the top right of your storyboard page to start wrangling everyone in as needed.

The view-only link option is perfect for anyone requesting to see progress without a need for any interactive permissions.
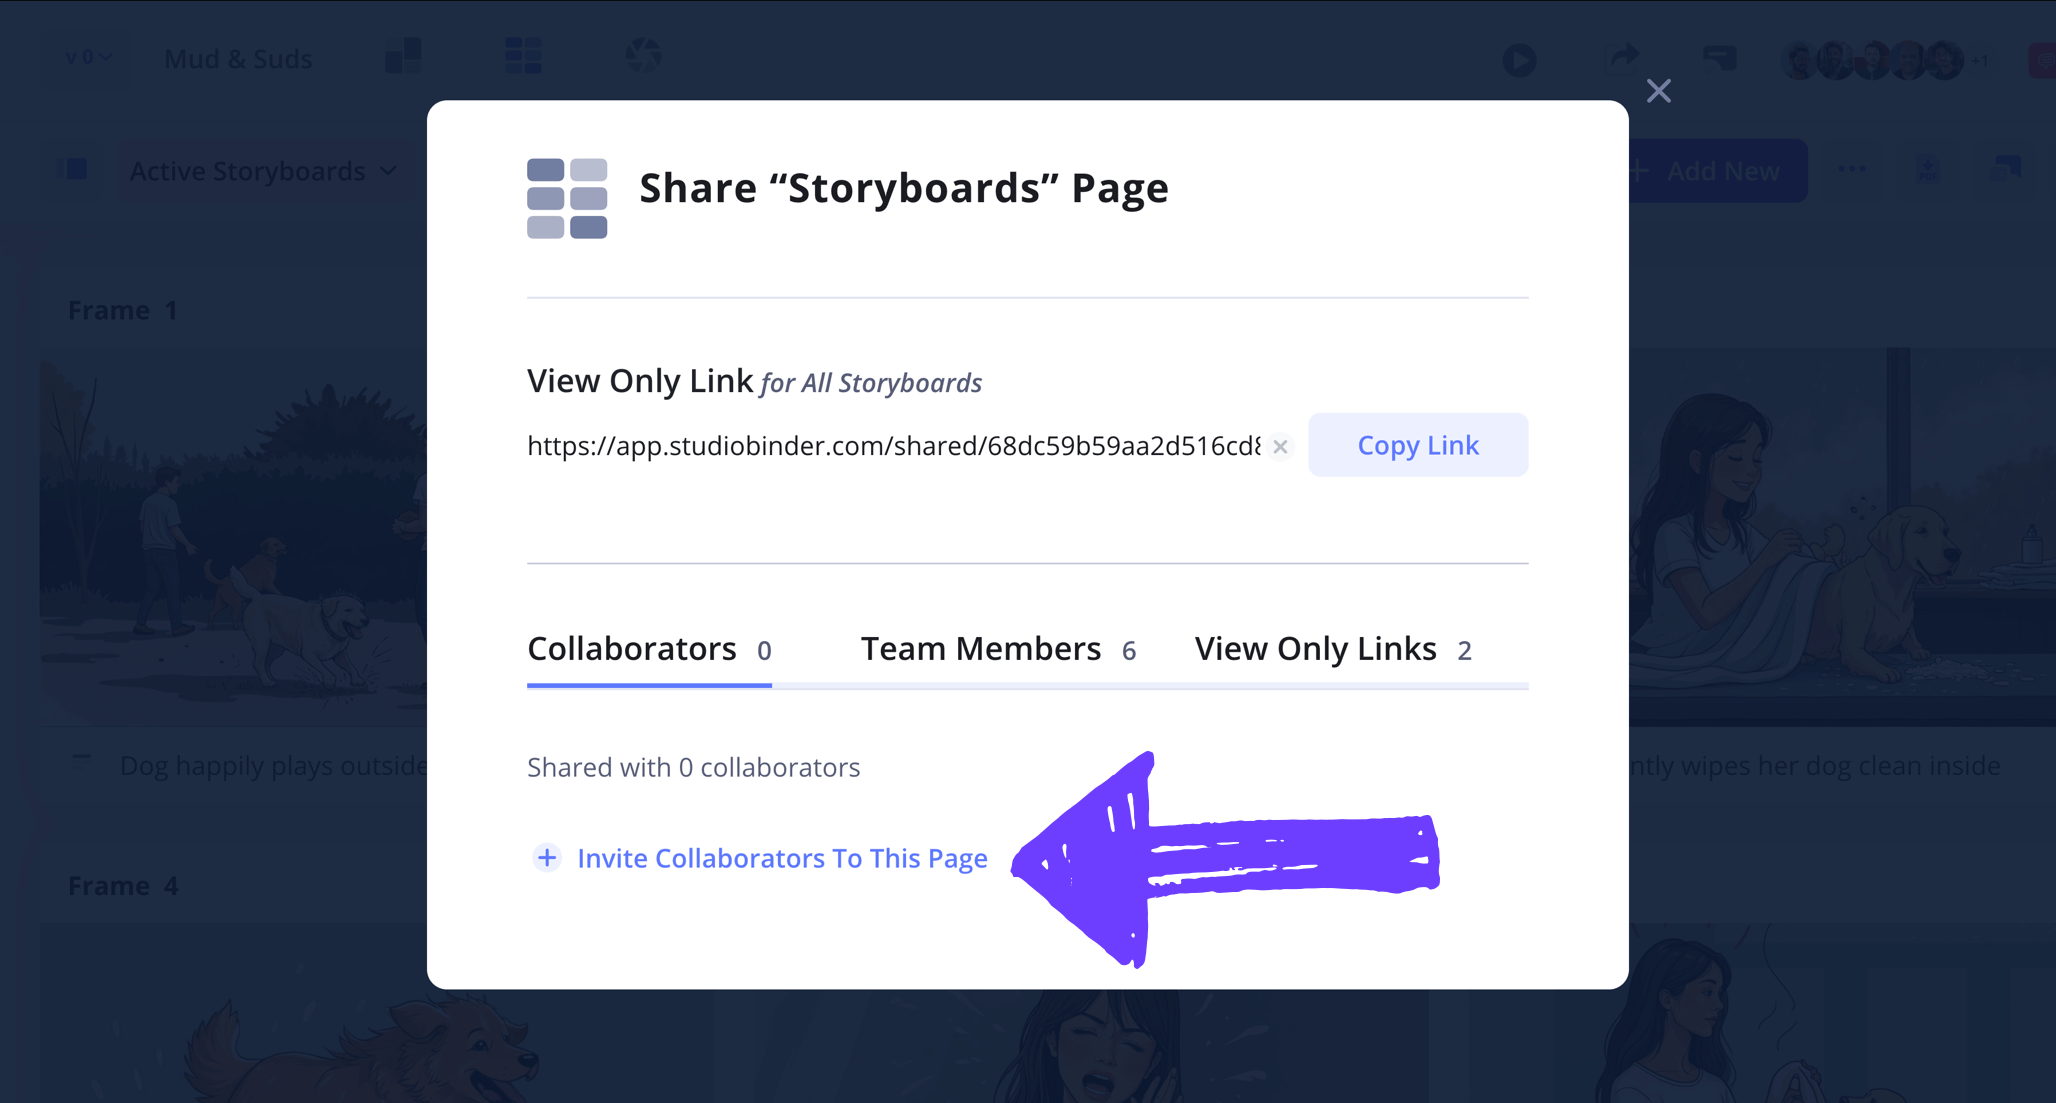
For a deeper level of collaboration, enter contact info and role permissions (viewer, commenter, or editor), then click Invite Collaborator on the bottom of the pop-up.

When collaborators are invited, they can add comments in the sidebar with any feedback or suggestions. You can reply directly to the thread and click simply click Comment.

After adding your comment, you can simply mark the entire comment as resolve by clicking the checkmark icon. This will keep the queue clear with only outstanding comments for easier tracking.
Conclusion
You're finished!
Now that you have a TV commercial storyboard fit to meet all your needs throughout the script to television programming process, you won’t miss a single beat on the road to top-tier broadcast advertising.
Whether you’re collaborating to create a ten-second spot or a two-minute Super Bowl-worthy spot, StudioBinder’s storyboard creator is ready to provide you with all the tools you and your team need.
Frequently Asked Questions
Your questions, answered
A commercial storyboard visually outlines a television commercial's short narrative. It encompasses all the camera movements, audio, and description of what will be captured on screen while promoting a brand.
First and foremost, when making a storyboard for a commercial, brand identity needs to be at the forefront. How does this storyboarded narrative highlight what’s great about this product? How does my storyboard tell a visual story that feels familiar to the customer? Once you’re through brainstorming, follow these general guidelines:
- Start with a finished script
- Ensure the brand in question is front and center of the narrative
- Lay out and customize a blank storyboard template
- Begin adding visual sketches or images to each frame
- Annotate details beneath each frame
- Convert the storyboard into a hard document for the shoot
The most important aspect of a commercial storyboard is ensuring you and your production crew are immersed in the brand’s mission and identity. Once everyone involved in the pre-visualization process understands this, the below steps will become a cake walk:
- First, you must ensure the script speaks profoundly to the brand’s identity.
- Format a commercial storyboard template that fits your visual narrative.
- Establish your visuals through sketches or reference images that showcase camera movement with precision.
- Collaborate with your team and brand clients to ensure the product in question is represented and expressed meaningfully.
Microsoft Word doesn’t directly offer a storyboard template, but there are external sources that will provide you with free online templates to add into Word. StudioBinder’s website is a great source for storyboard templates.
Mastering the storyboarding process can be challenging. Thankfully there are 7 essential steps you can follow to make that storyboard in your imagination a reality:
- Establish a format and immerse yourself in the script
- Sketch or use reference images
- Add edits and annotations to images, including arrows to communicate action
- Write detailed descriptions under frames
- Download and print your storyboard
Storyboarding requires a meticulous eye with a passion for detail. But when it comes to the most important elements to keep in mind, it’s always safe to consider these five fundamentals:
- Descriptions
- Dialogue
- Images/sketches
- Directional arrows
- Shot references
Steps in this guide
