home → TEMPLATES → Storyboard
Movie Storyboard Template
Movie storyboard template
During the pre-production filmmaking process, having a reliable movie storyboard template is crucial. This is one of the first tools you’ll be using to communicate to your production crew what the narrative vision in your head should look like on screen. In a way, making storyboards for movies is like creating a comic book version of your film before you start filming, each panel showcasing the basic set up of the shot and action in frame.
Maybe you’re new to the moviemaking process and looking for a movie storyboard template to start organizing and mapping out your rough sketches, or maybe you’re an industry veteran looking for new ways to approach and configure a storyboard for a movie. No matter your need, this guide will take you through the most important steps of storyboarding using StudioBinder’s storyboard creator.
Step 1
1. Apply the script
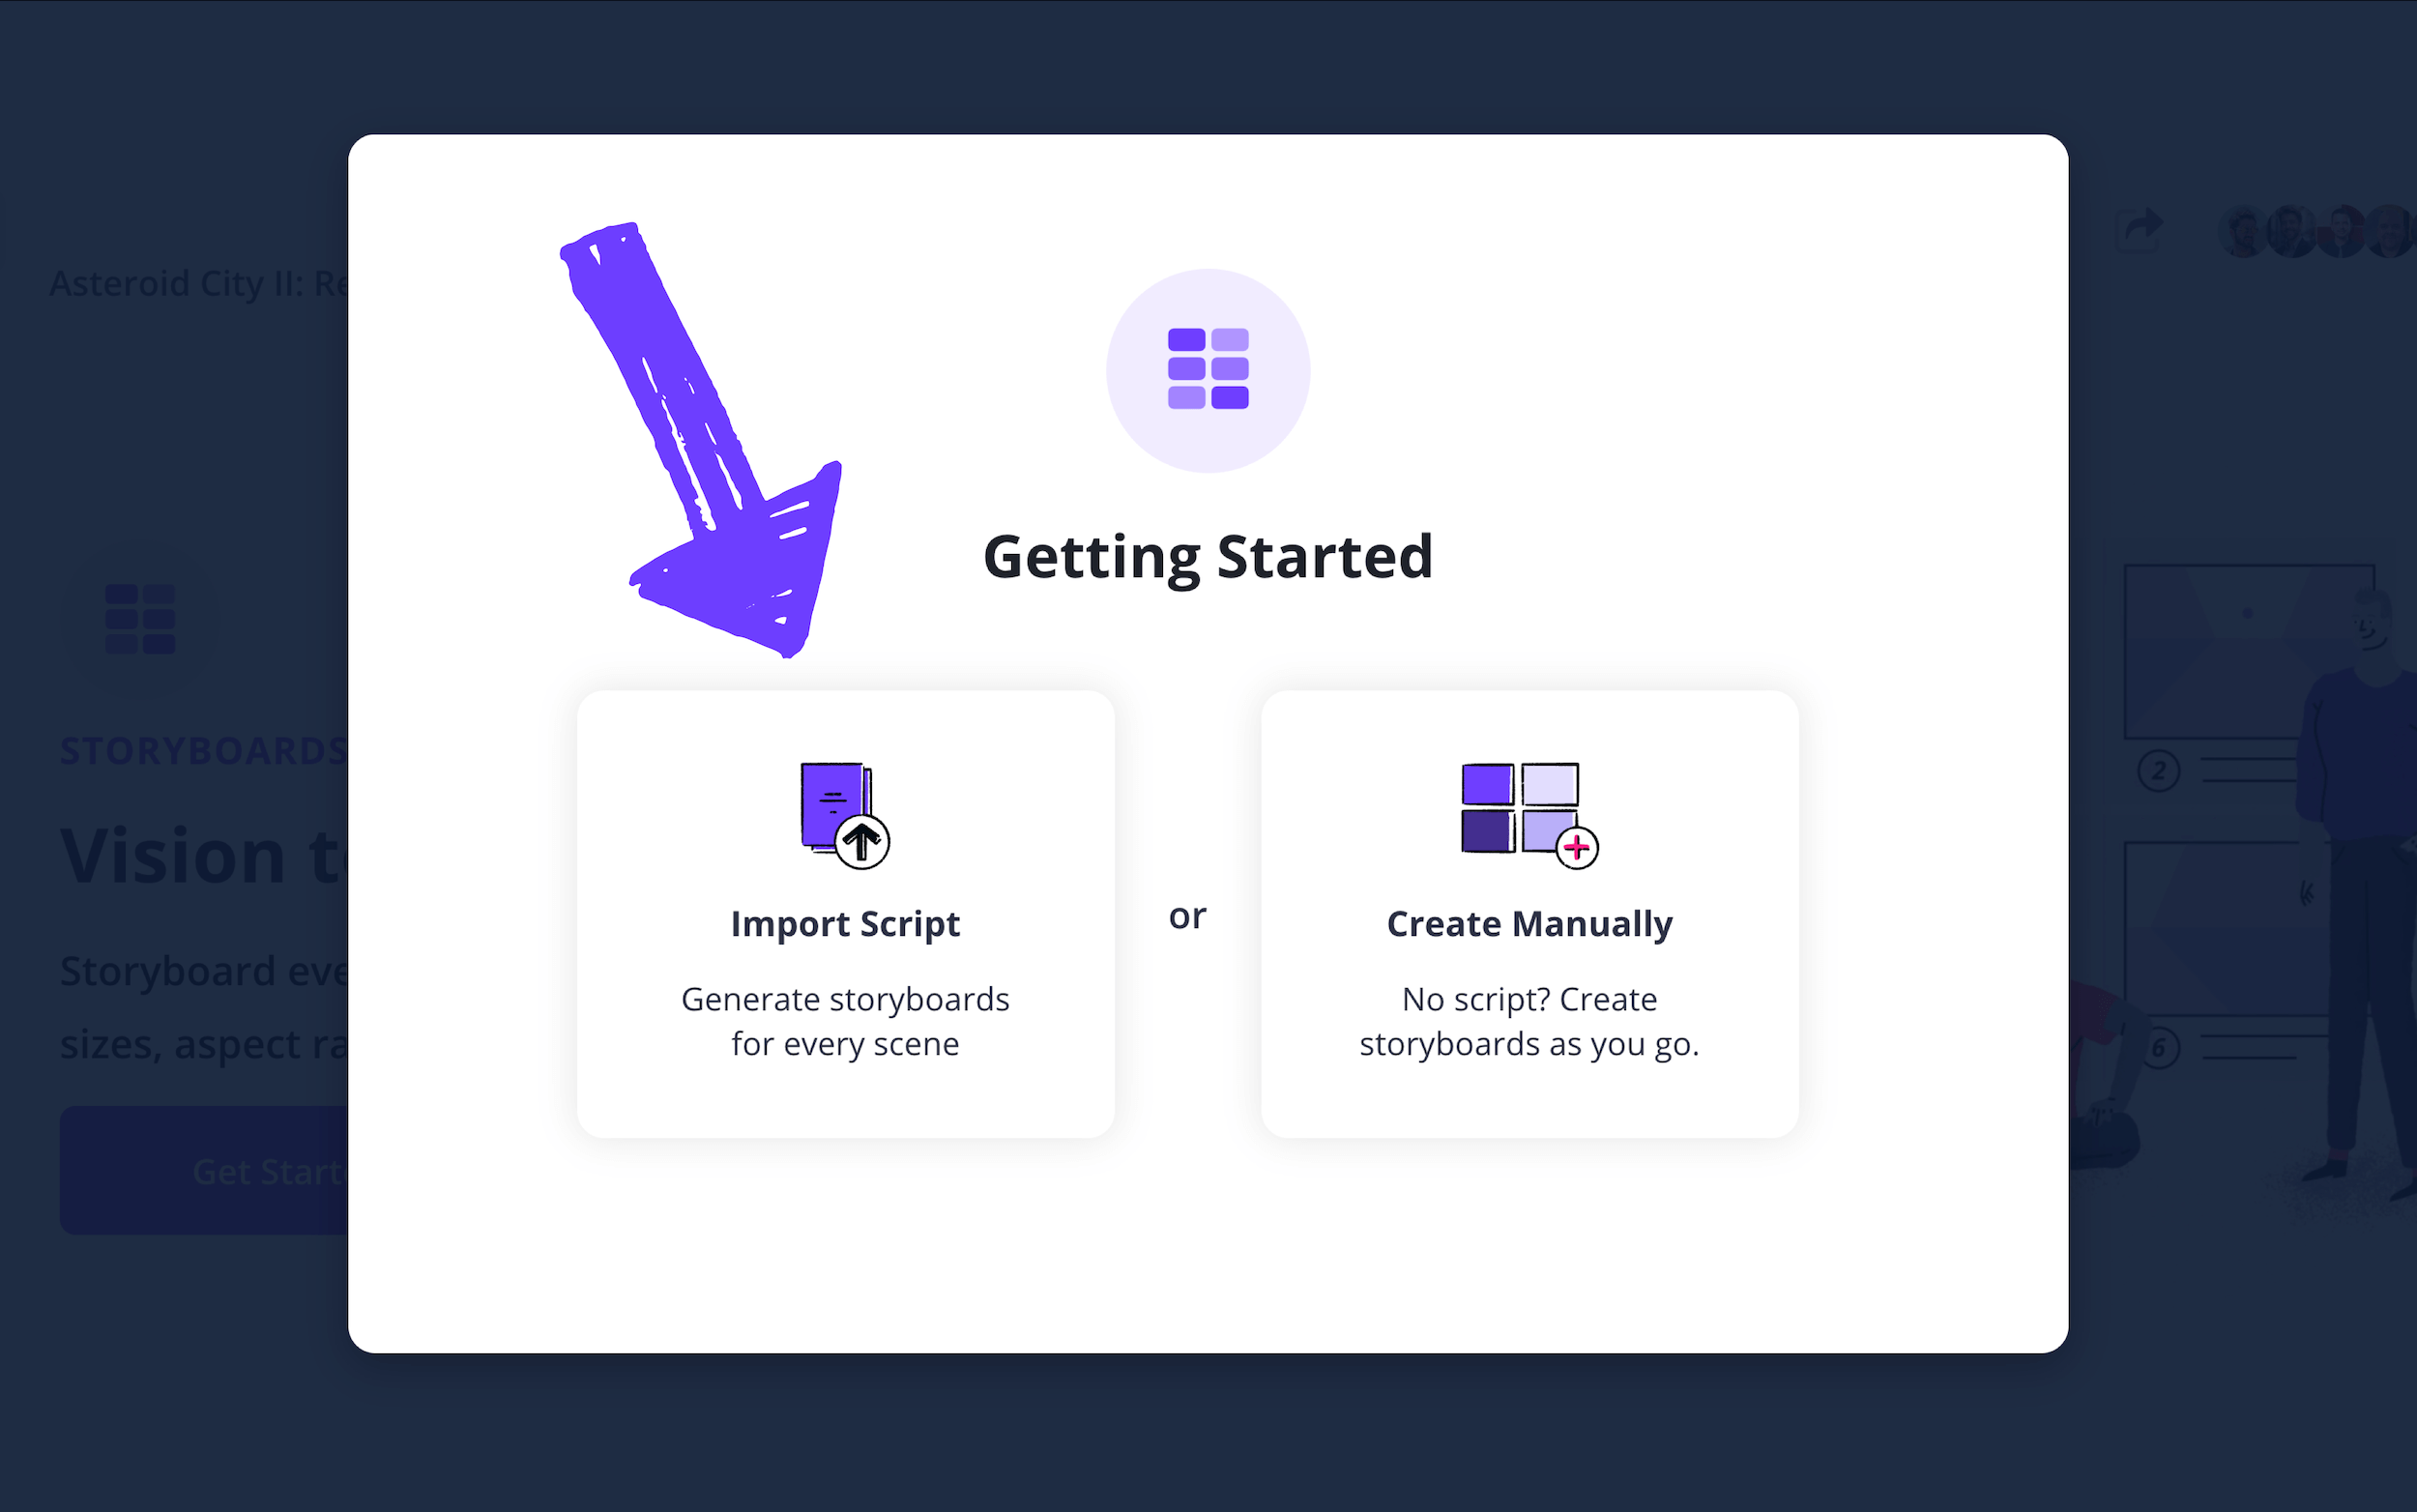
There’s no rule that says you need to have a finished script to begin setting up your movie storyboard template. But most typically, pre-visualization runs smoothest when there is one available. Either way, StudioBinder provides options to either create your storyboard manually or import a script upon starting a new storyboard project.
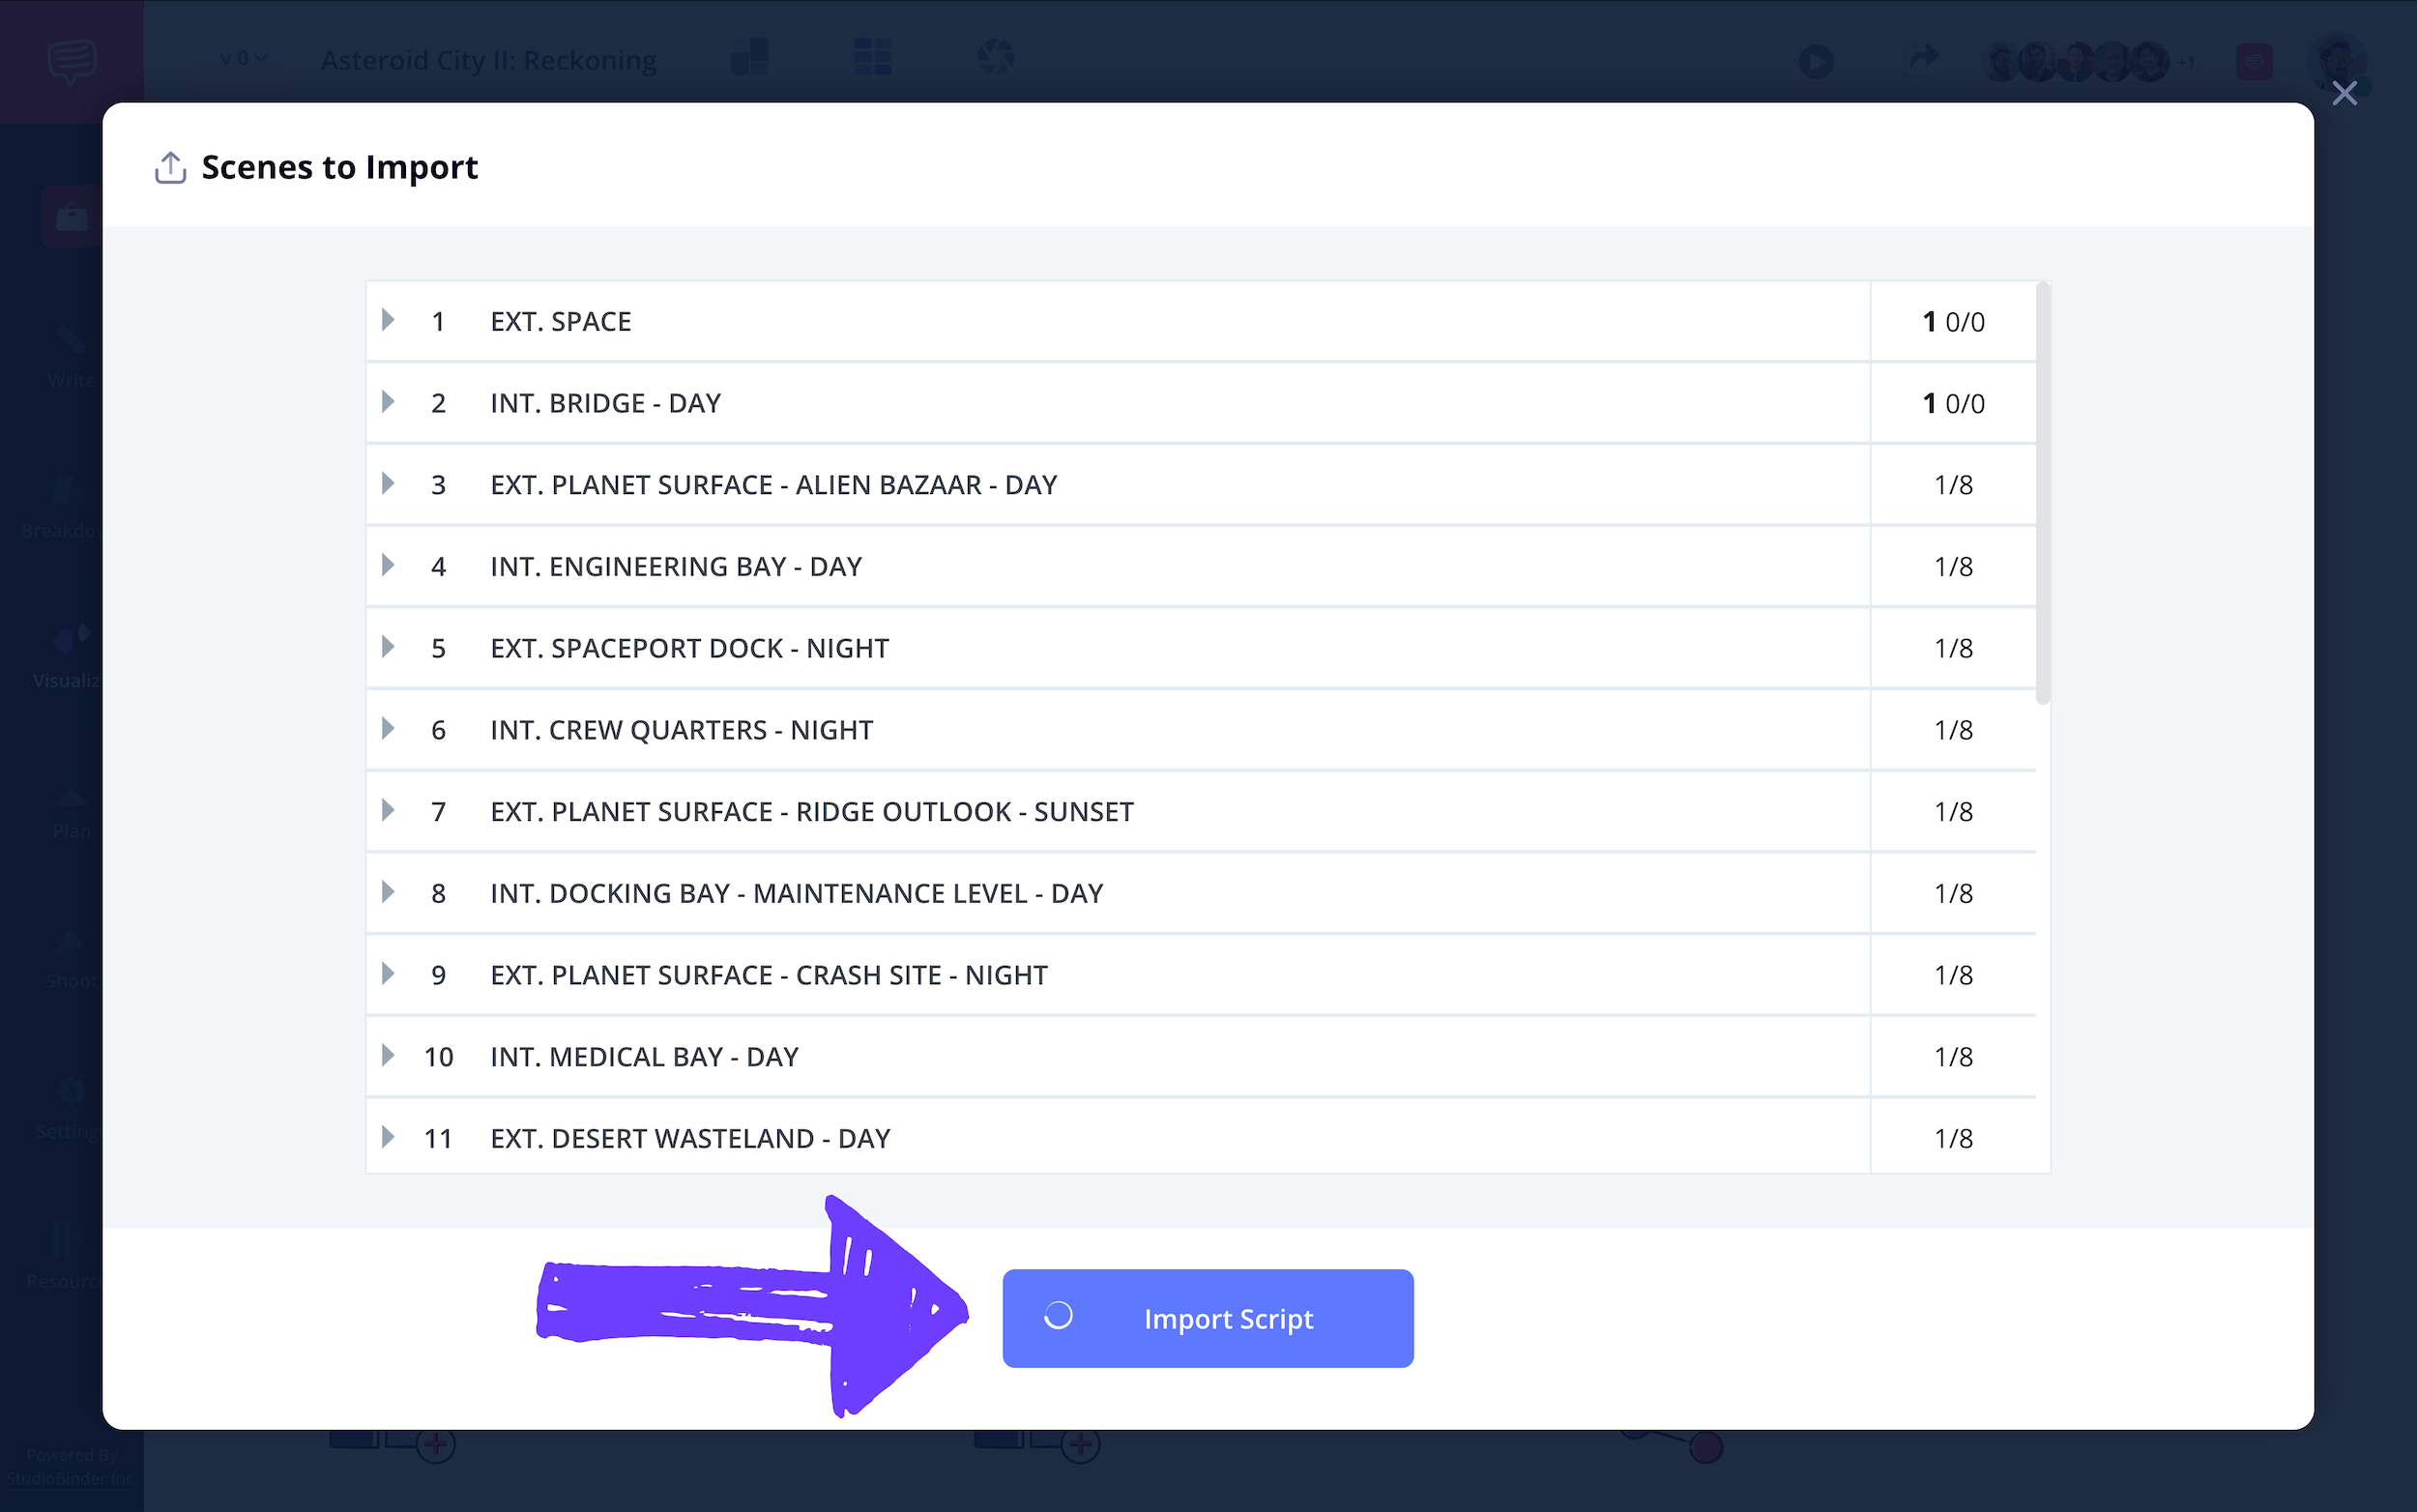
If you choose to import a script, you can drag & drop, or select browse to ingest your script file. After inputting a screenplay name, you’ll see all your script scenes organized in the scenes to import screen. Now just click Import Script at the bottom.
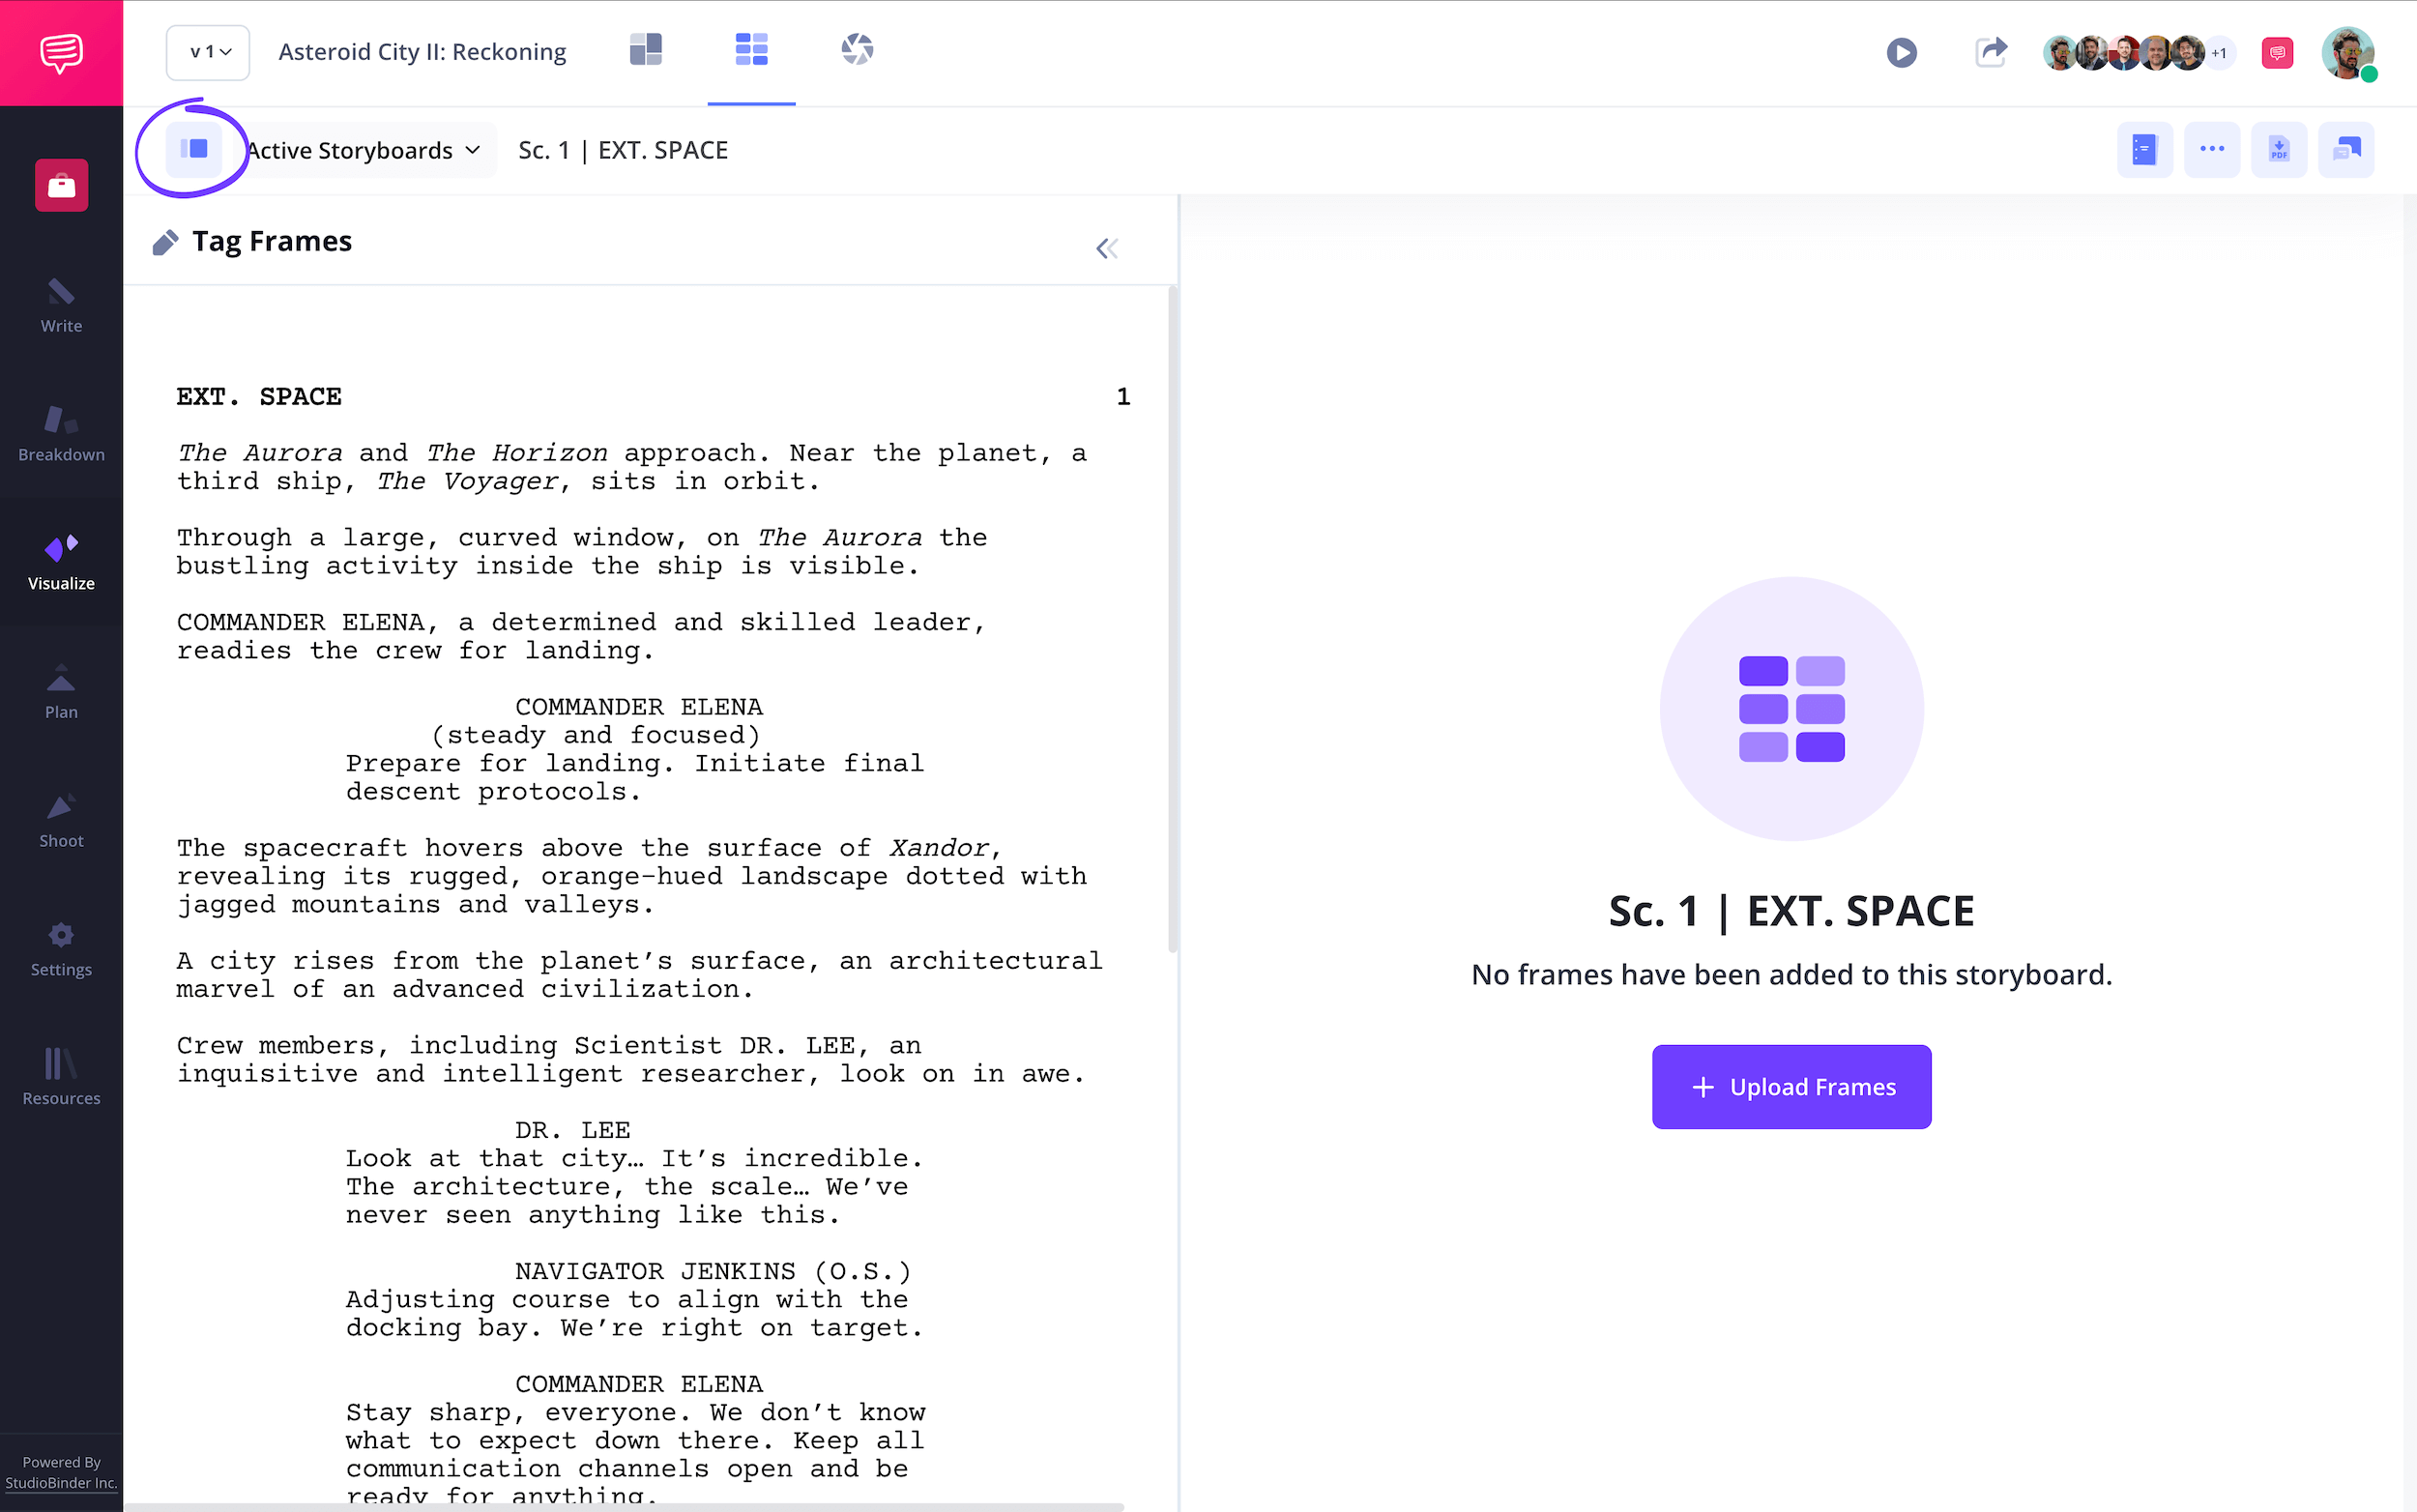
With your script now imported into your project, you can view all your organized script scenes by clicking the Toggle Sidebar icon to the left.
Step 2
2. Ready your frames
With your script cleanly broken down, you’ll want to start organizing the frames in your storyboard movie template before those lovely visuals can start being applied. In a typical film production, this task is often taken on by a storyboard supervisor or production coordinator. But depending on budget and production size, anyone including the director could jump in and complete this kind of organizational work.
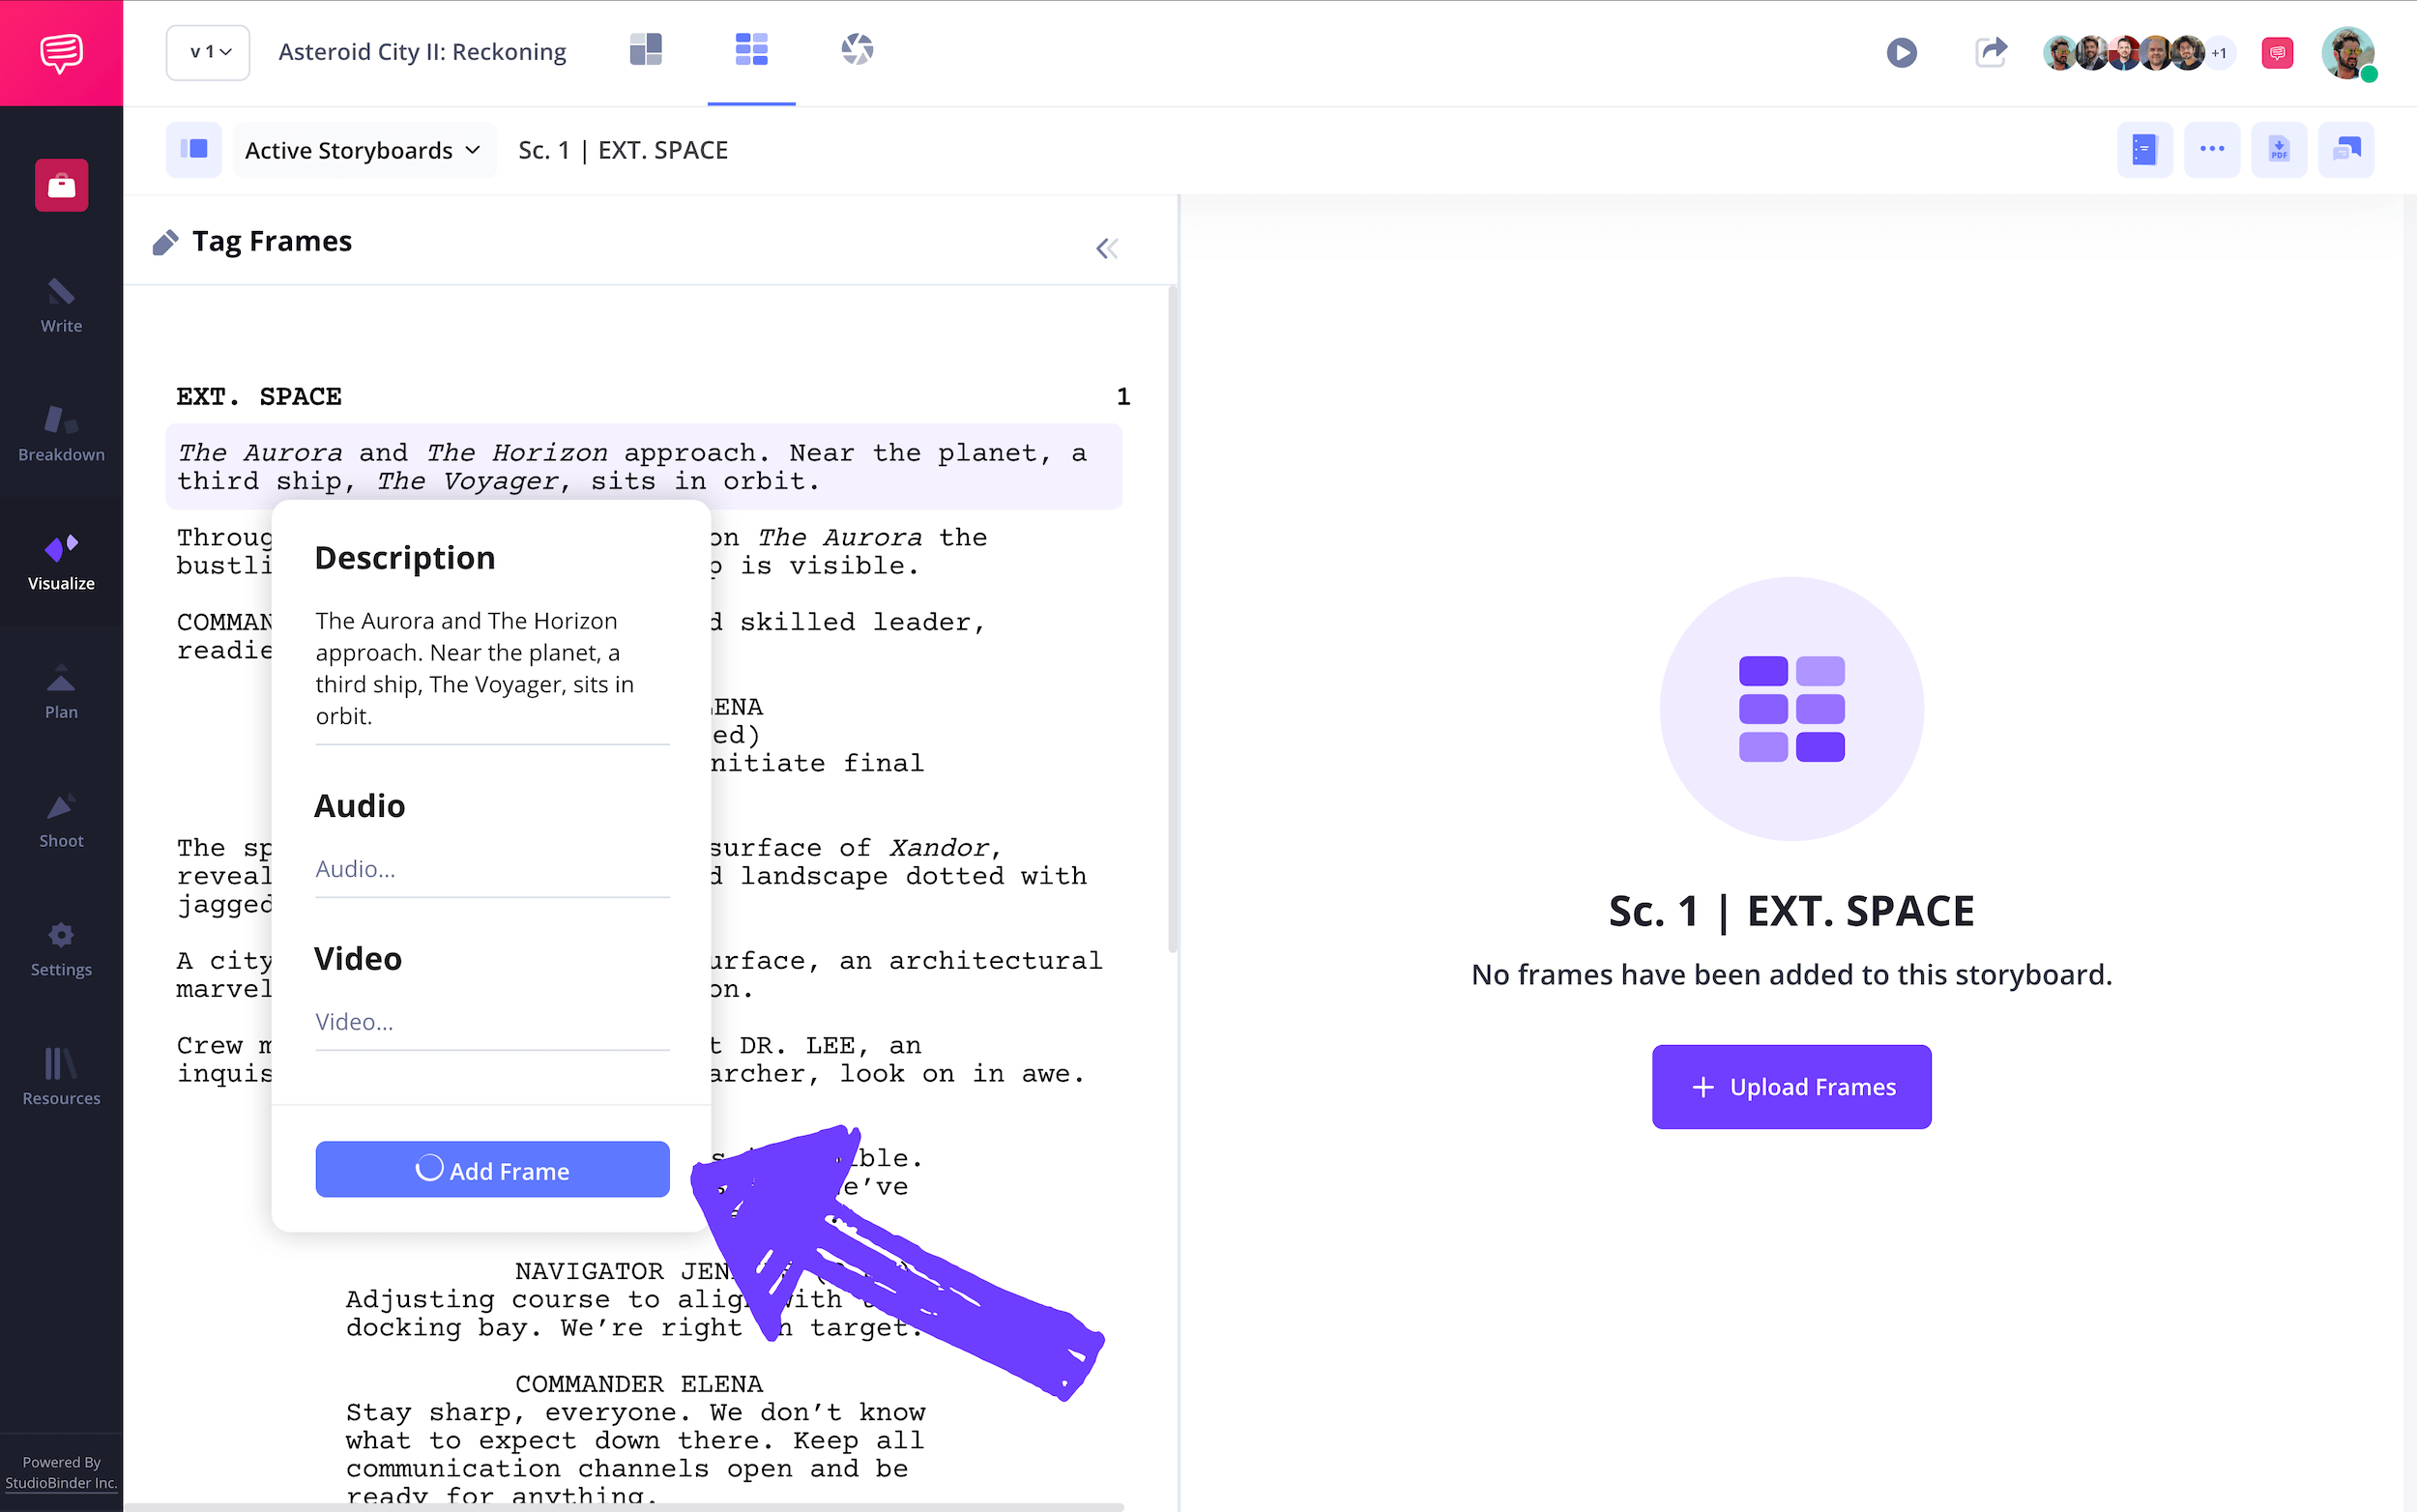
In any case, StudioBinder makes this job as easy as can be by turning script lines into frames at the click of a button. To start, click the Preview Scene icon on the top right.
From here, click on any body of text in a scene and it will automatically be turned into a frame description. Just as well, you can fill out the audio and video fields to highlight even more detail. Once ready, click Add Frame.
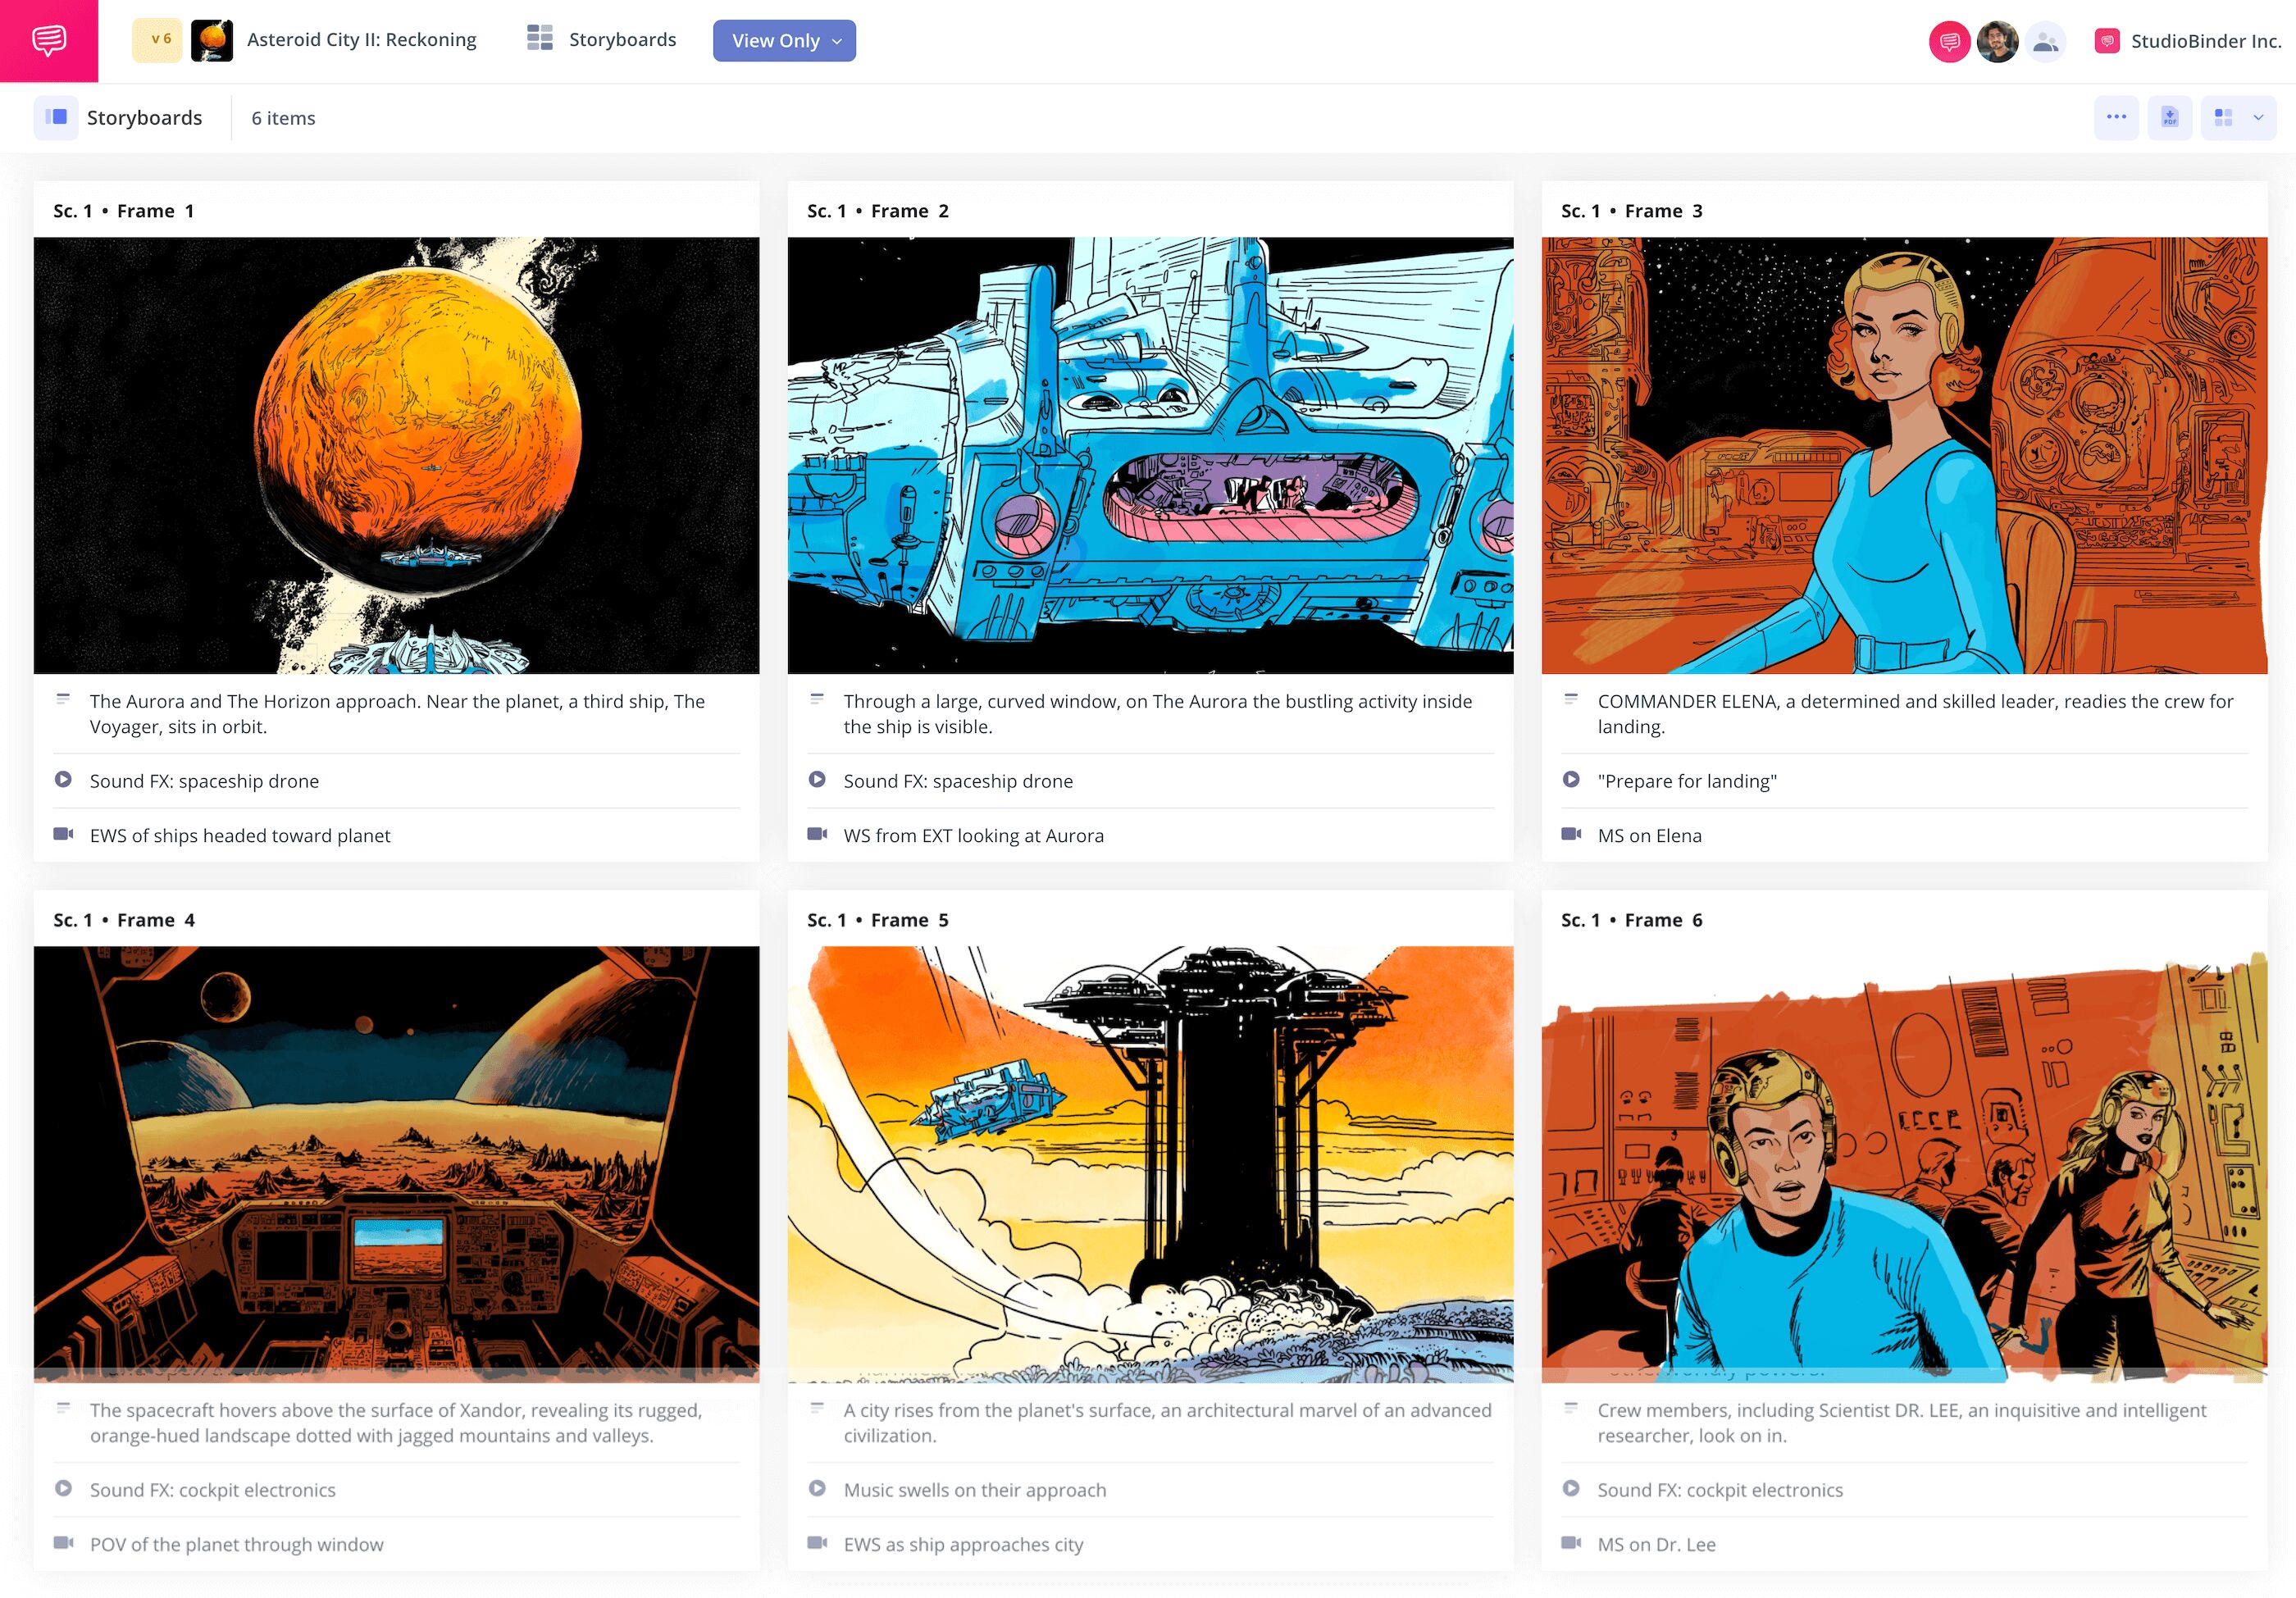
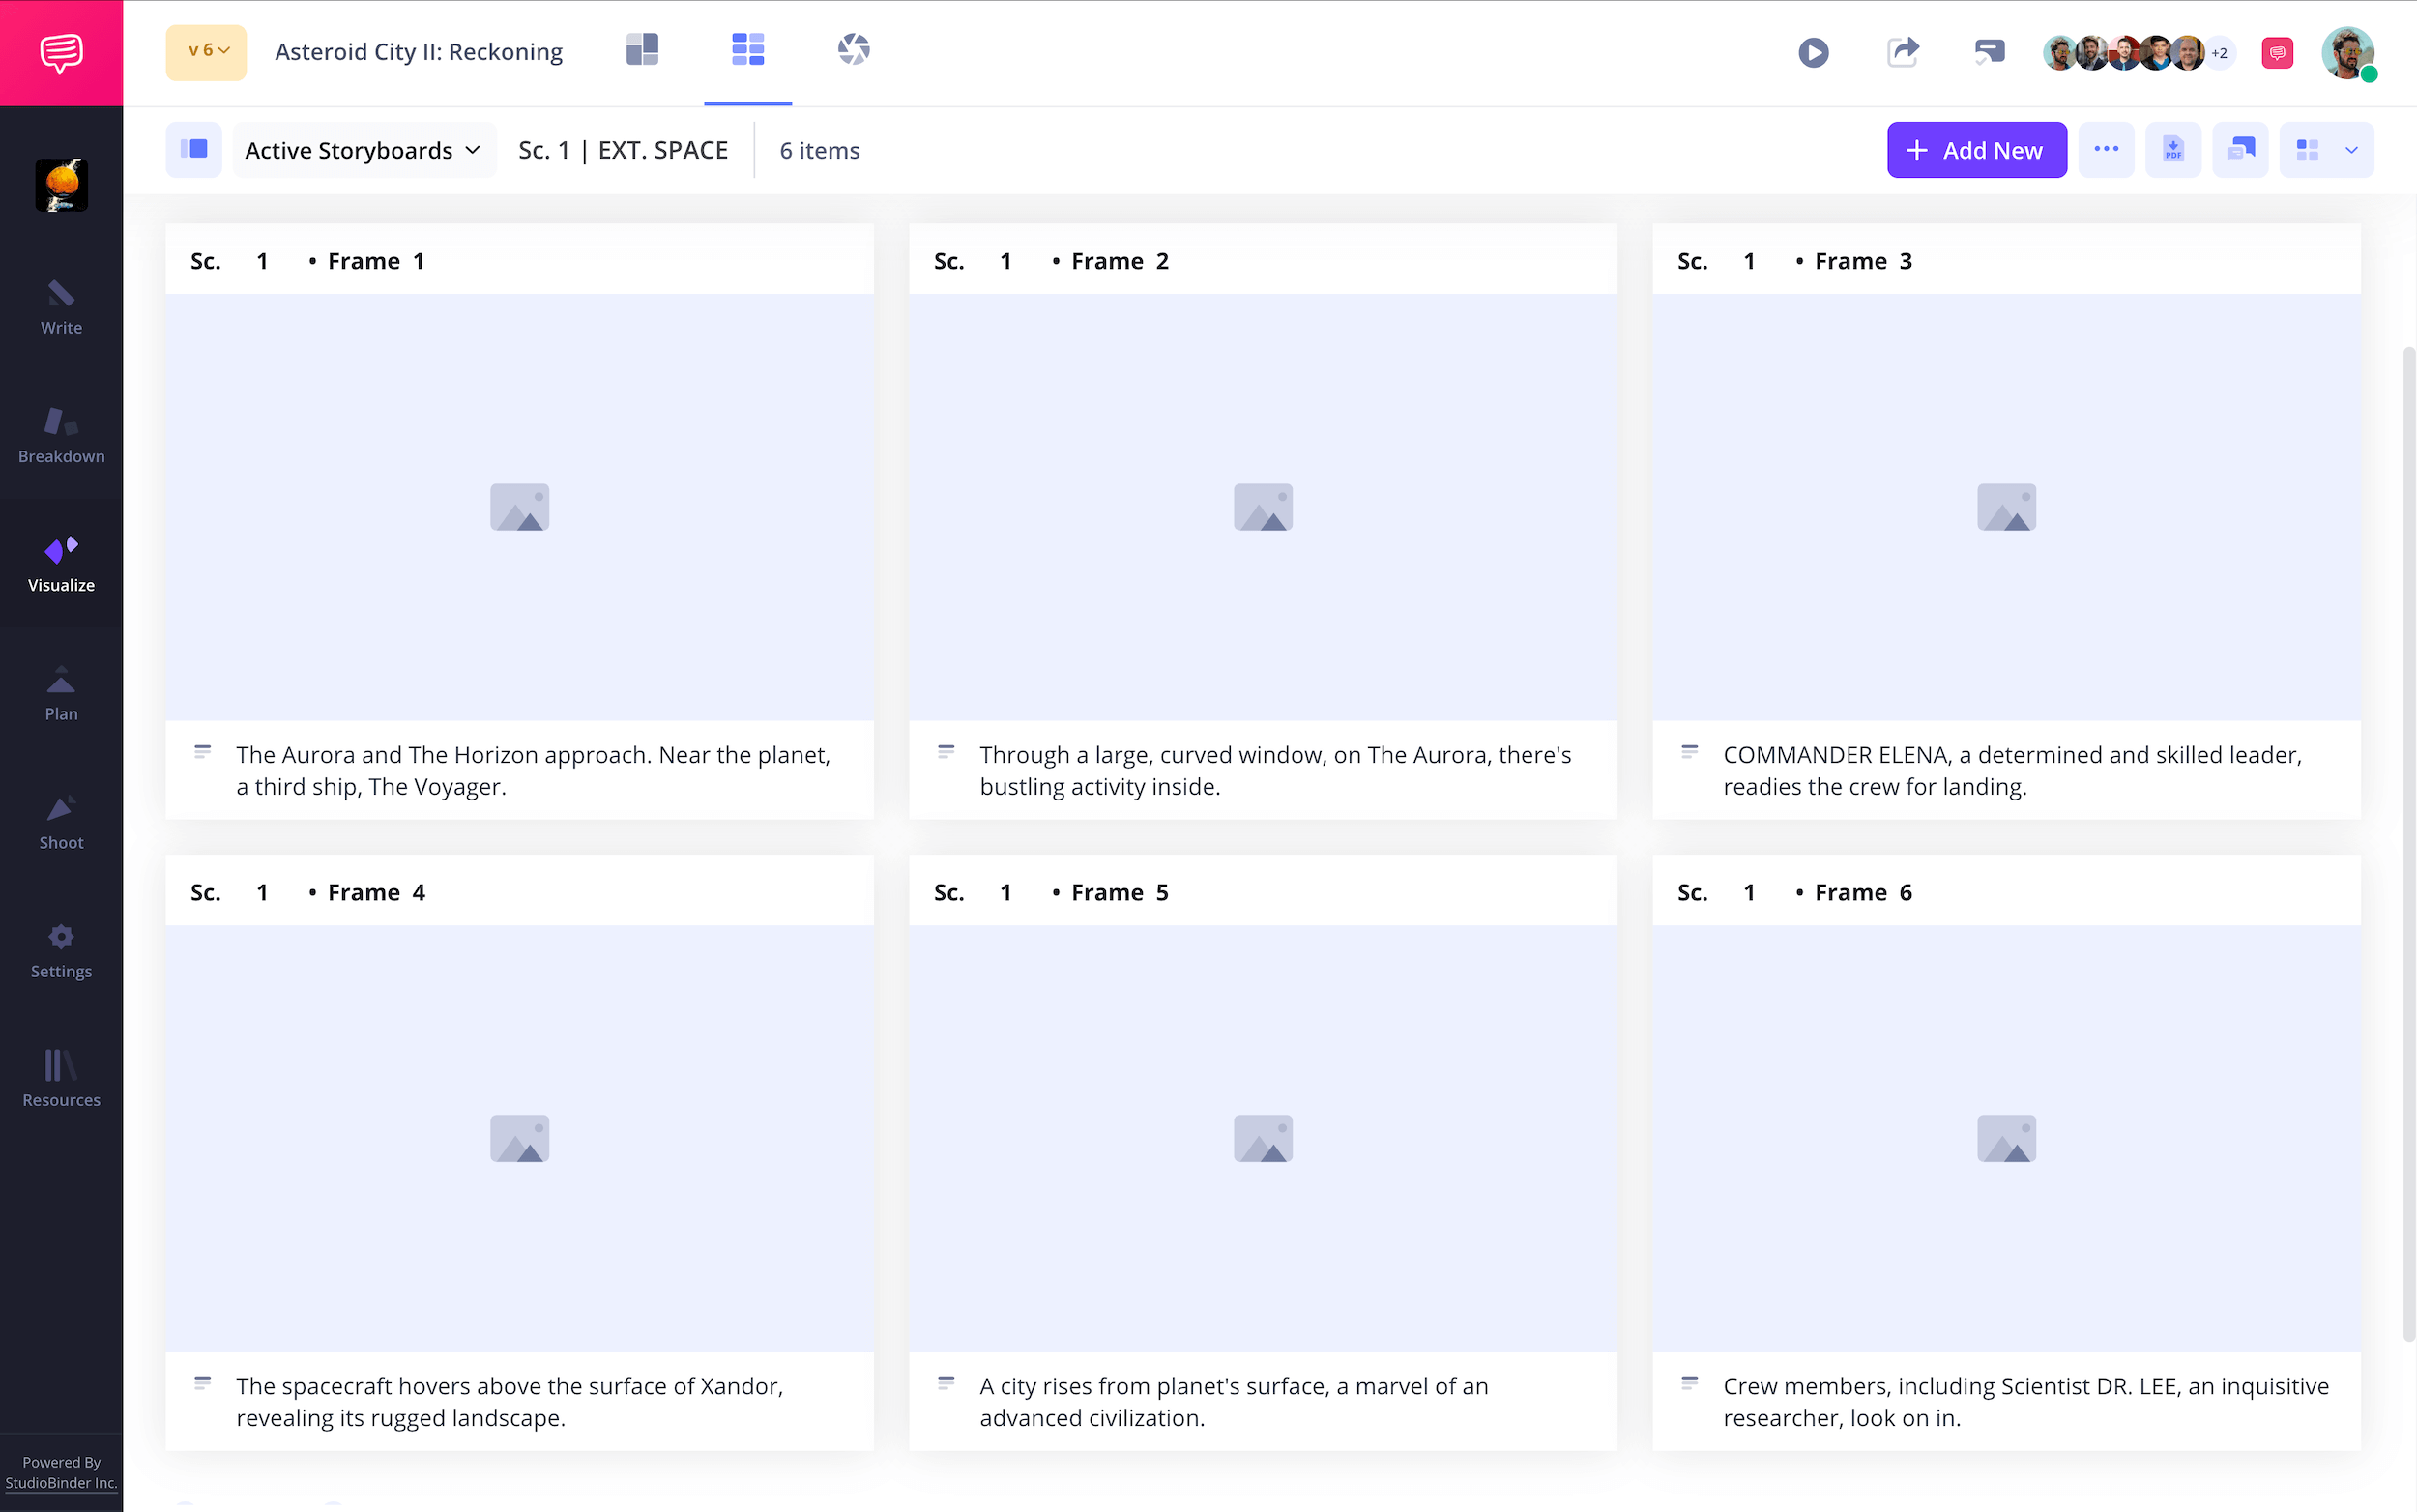
After you’ve turned all the script lines you want into frames, your storyboard movie template will look something like this.
Step 3
3. Apply images
Now you’re ready to start bringing some life to your storyboard movie project. Whether you’re a skilled storyboard artist interpreting the director’s vision, or simply working with stick figure sketches you quickly mocked up to help communicate basic camera movement and character positioning, you’re going to want to start laying those images out on your storyboard movie template.
To add images to your template, hover over any blank frame and click the Upload Image icon. Then you can drag & drop or upload the image from your files.
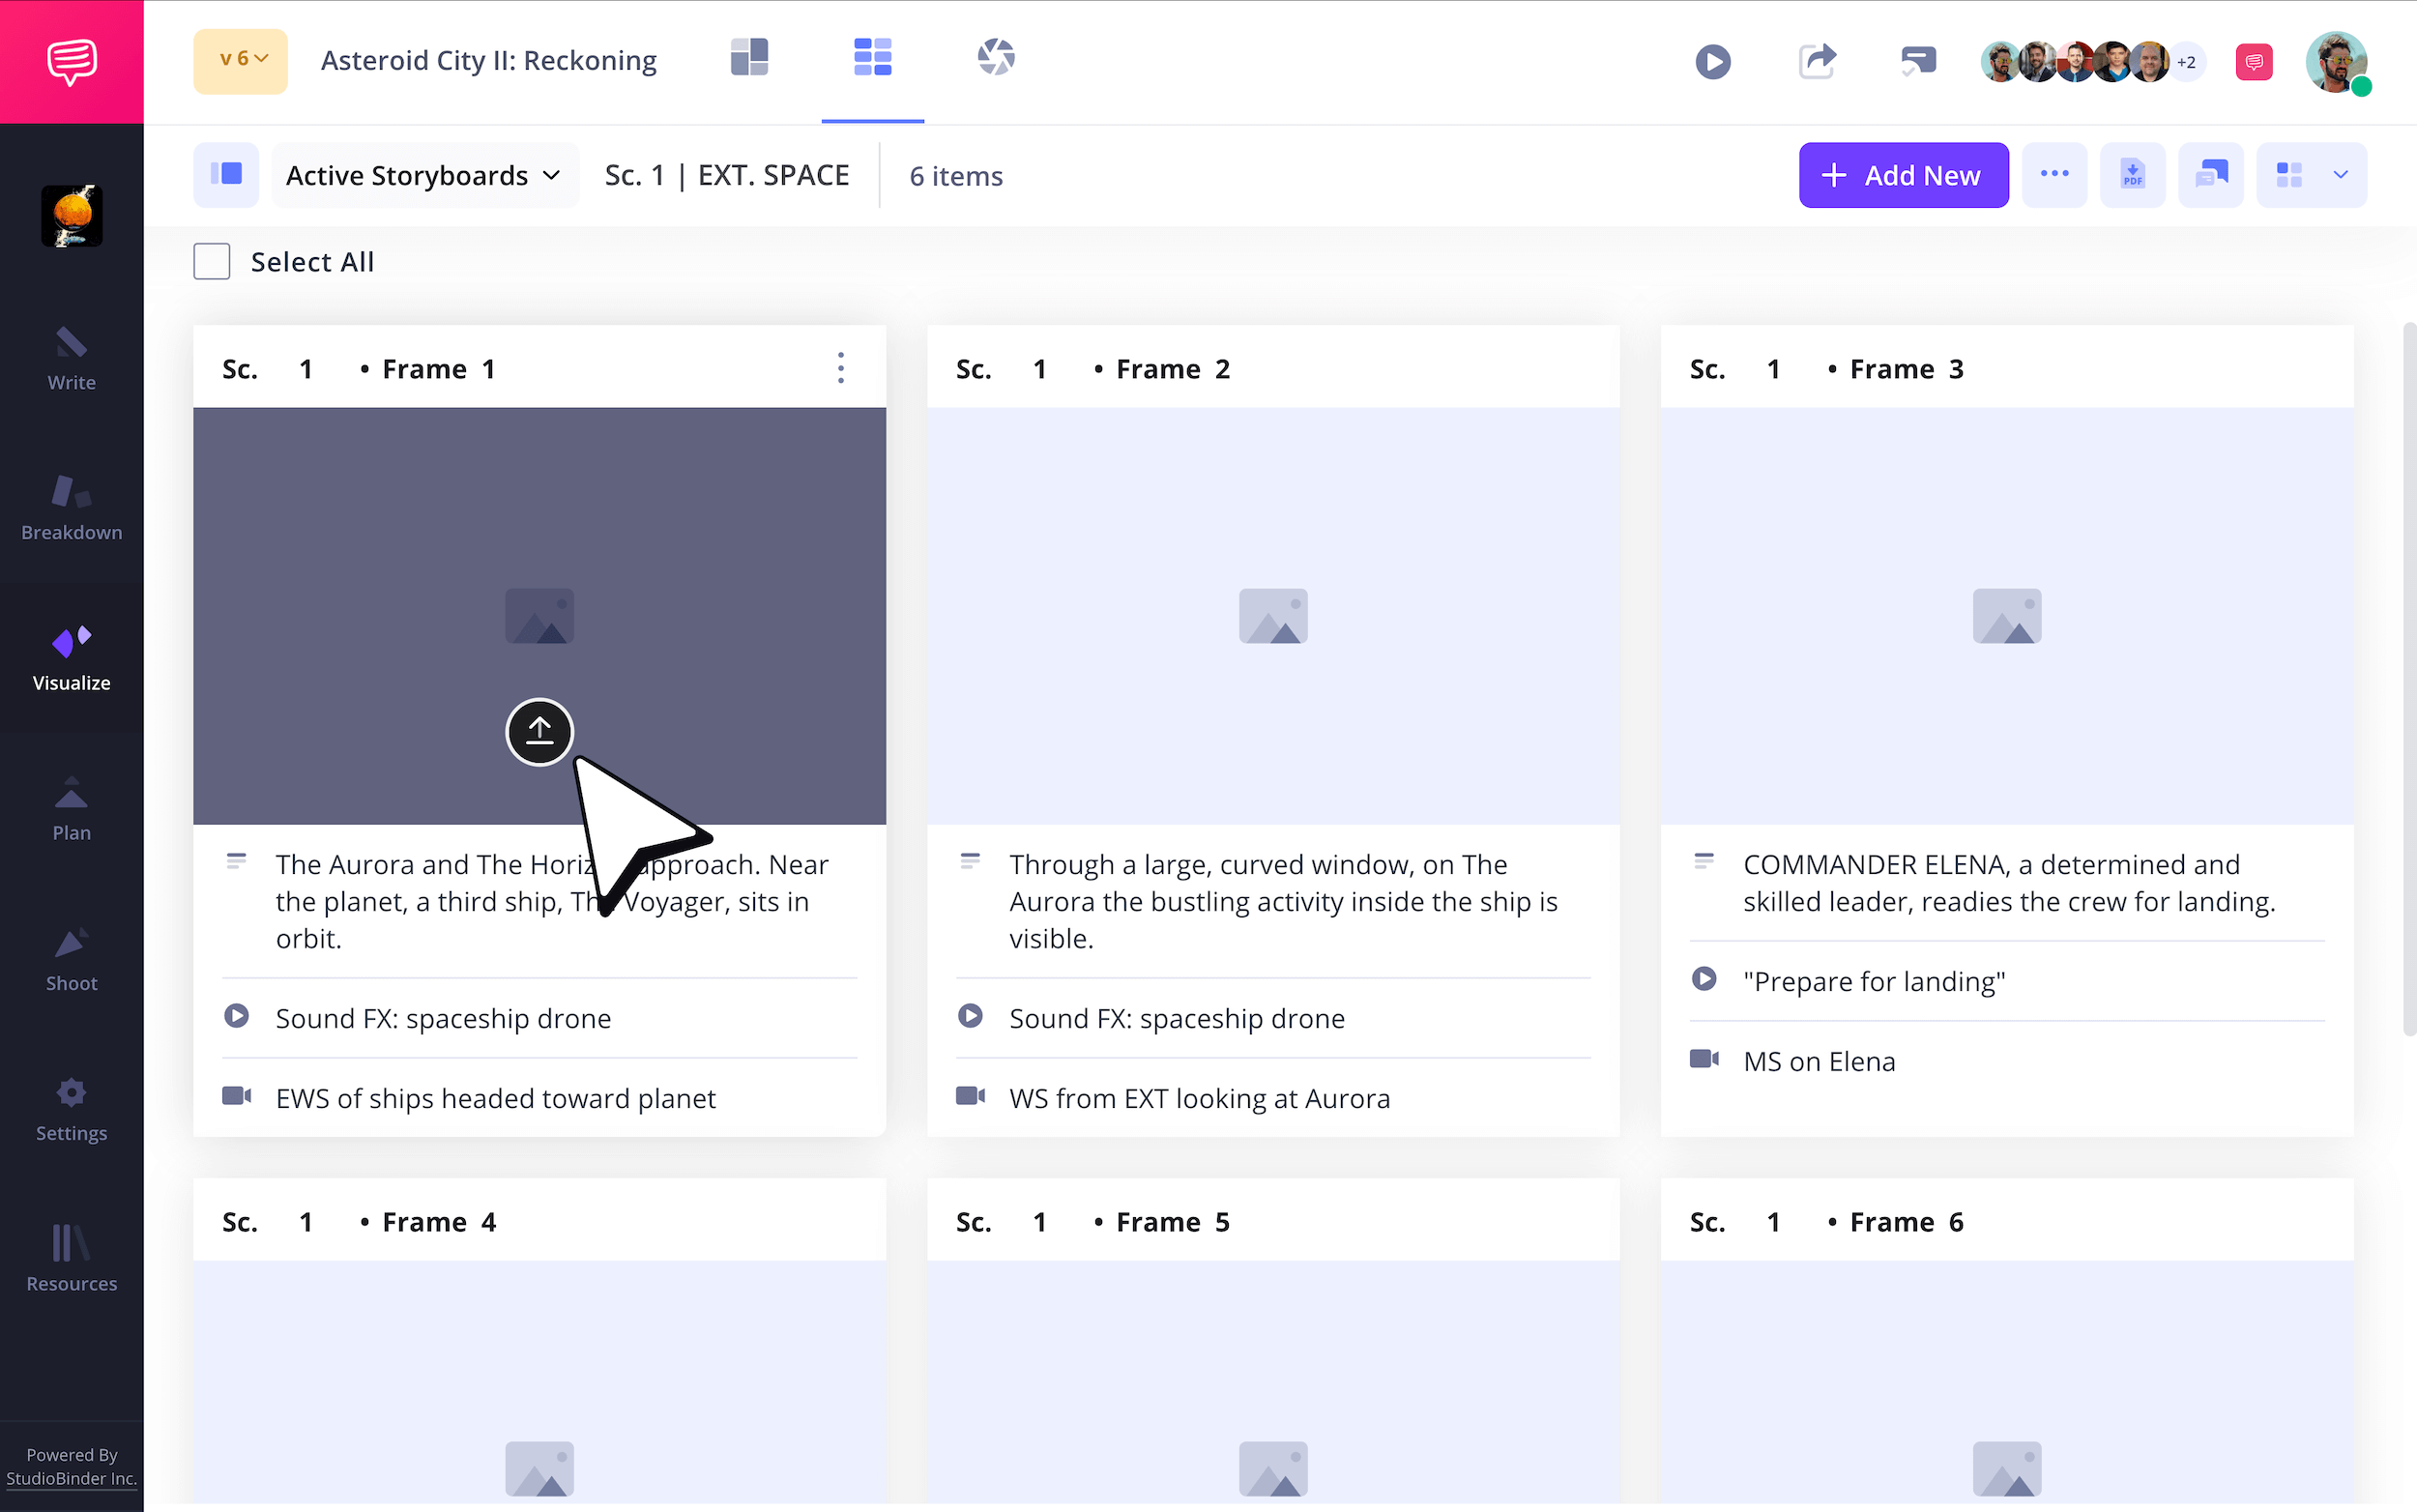
But let’s say some of your storyboard images are just sketches you’ve been drawing on a napkin, those certainly can’t be found on your computer. To apply physical images, you’ll click the Camera tab to the left in the image upload pop-up.
Now you’ll center your art and snap a picture from your webcam by clicking the Camera button on the bottom.
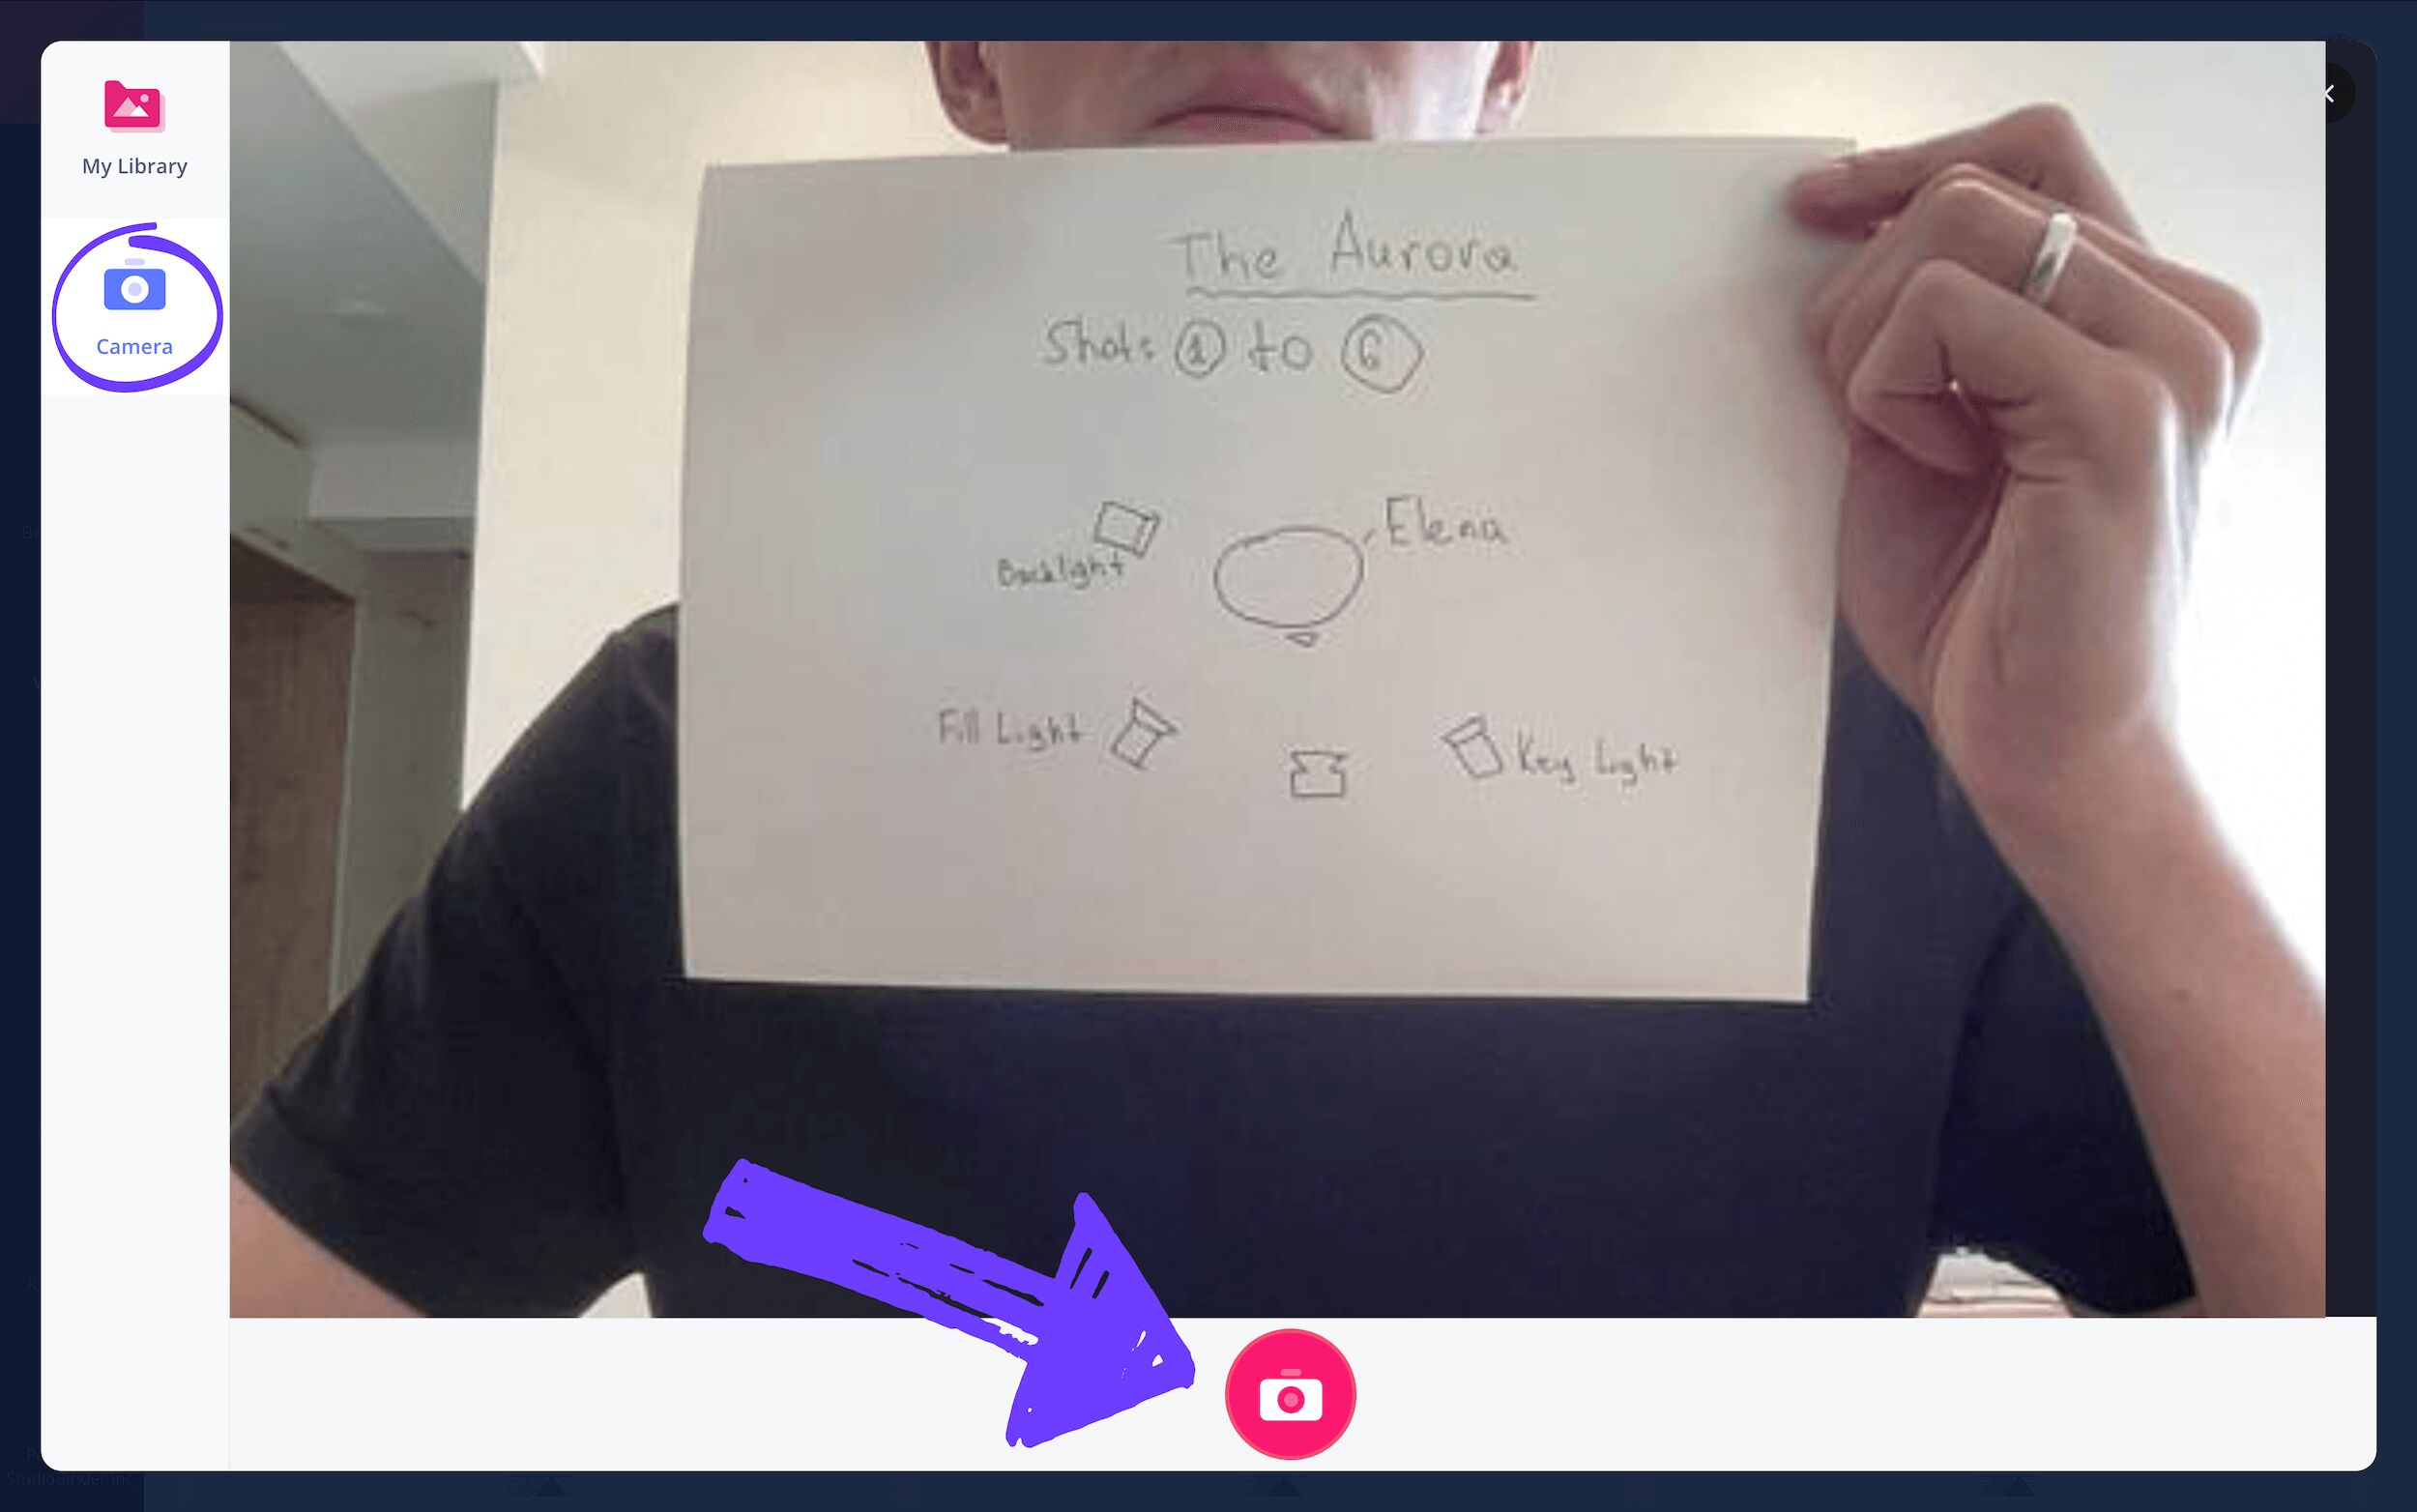
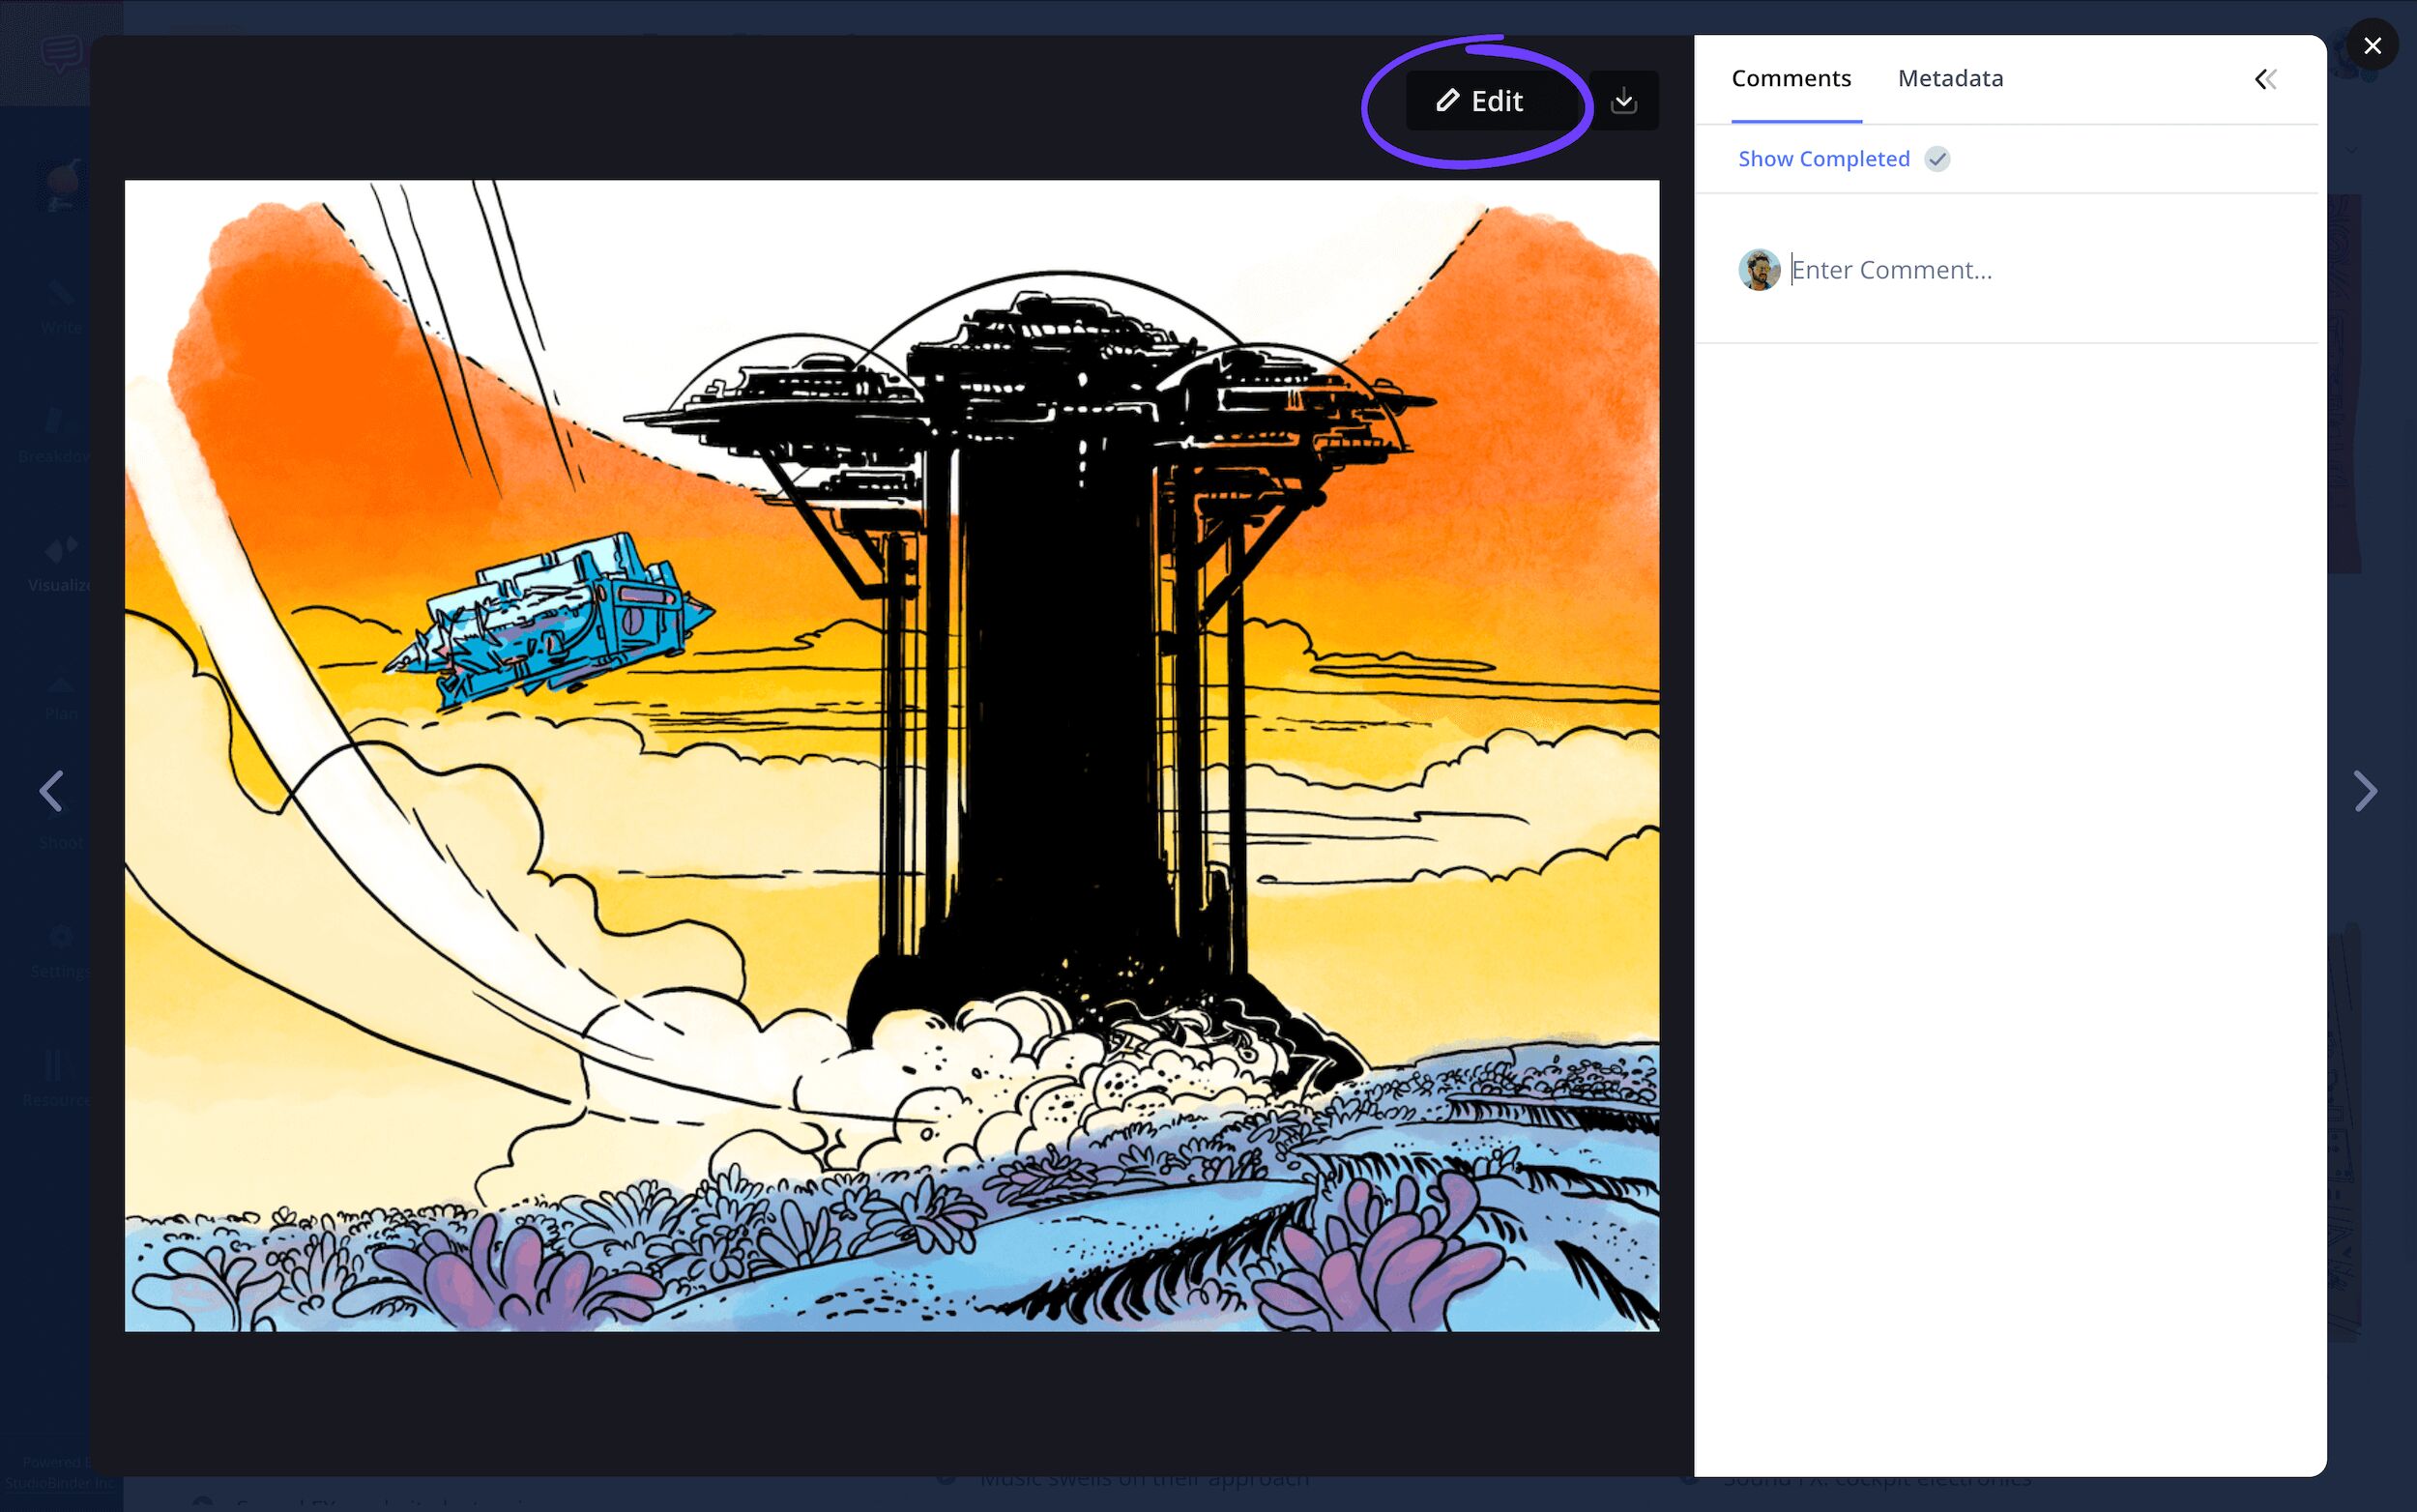
With the snapshot now uploaded into your frame, you’ll likely want to edit out everything surrounding the sketch. To do this, click on the image again. Then in the pop-up, click Edit.
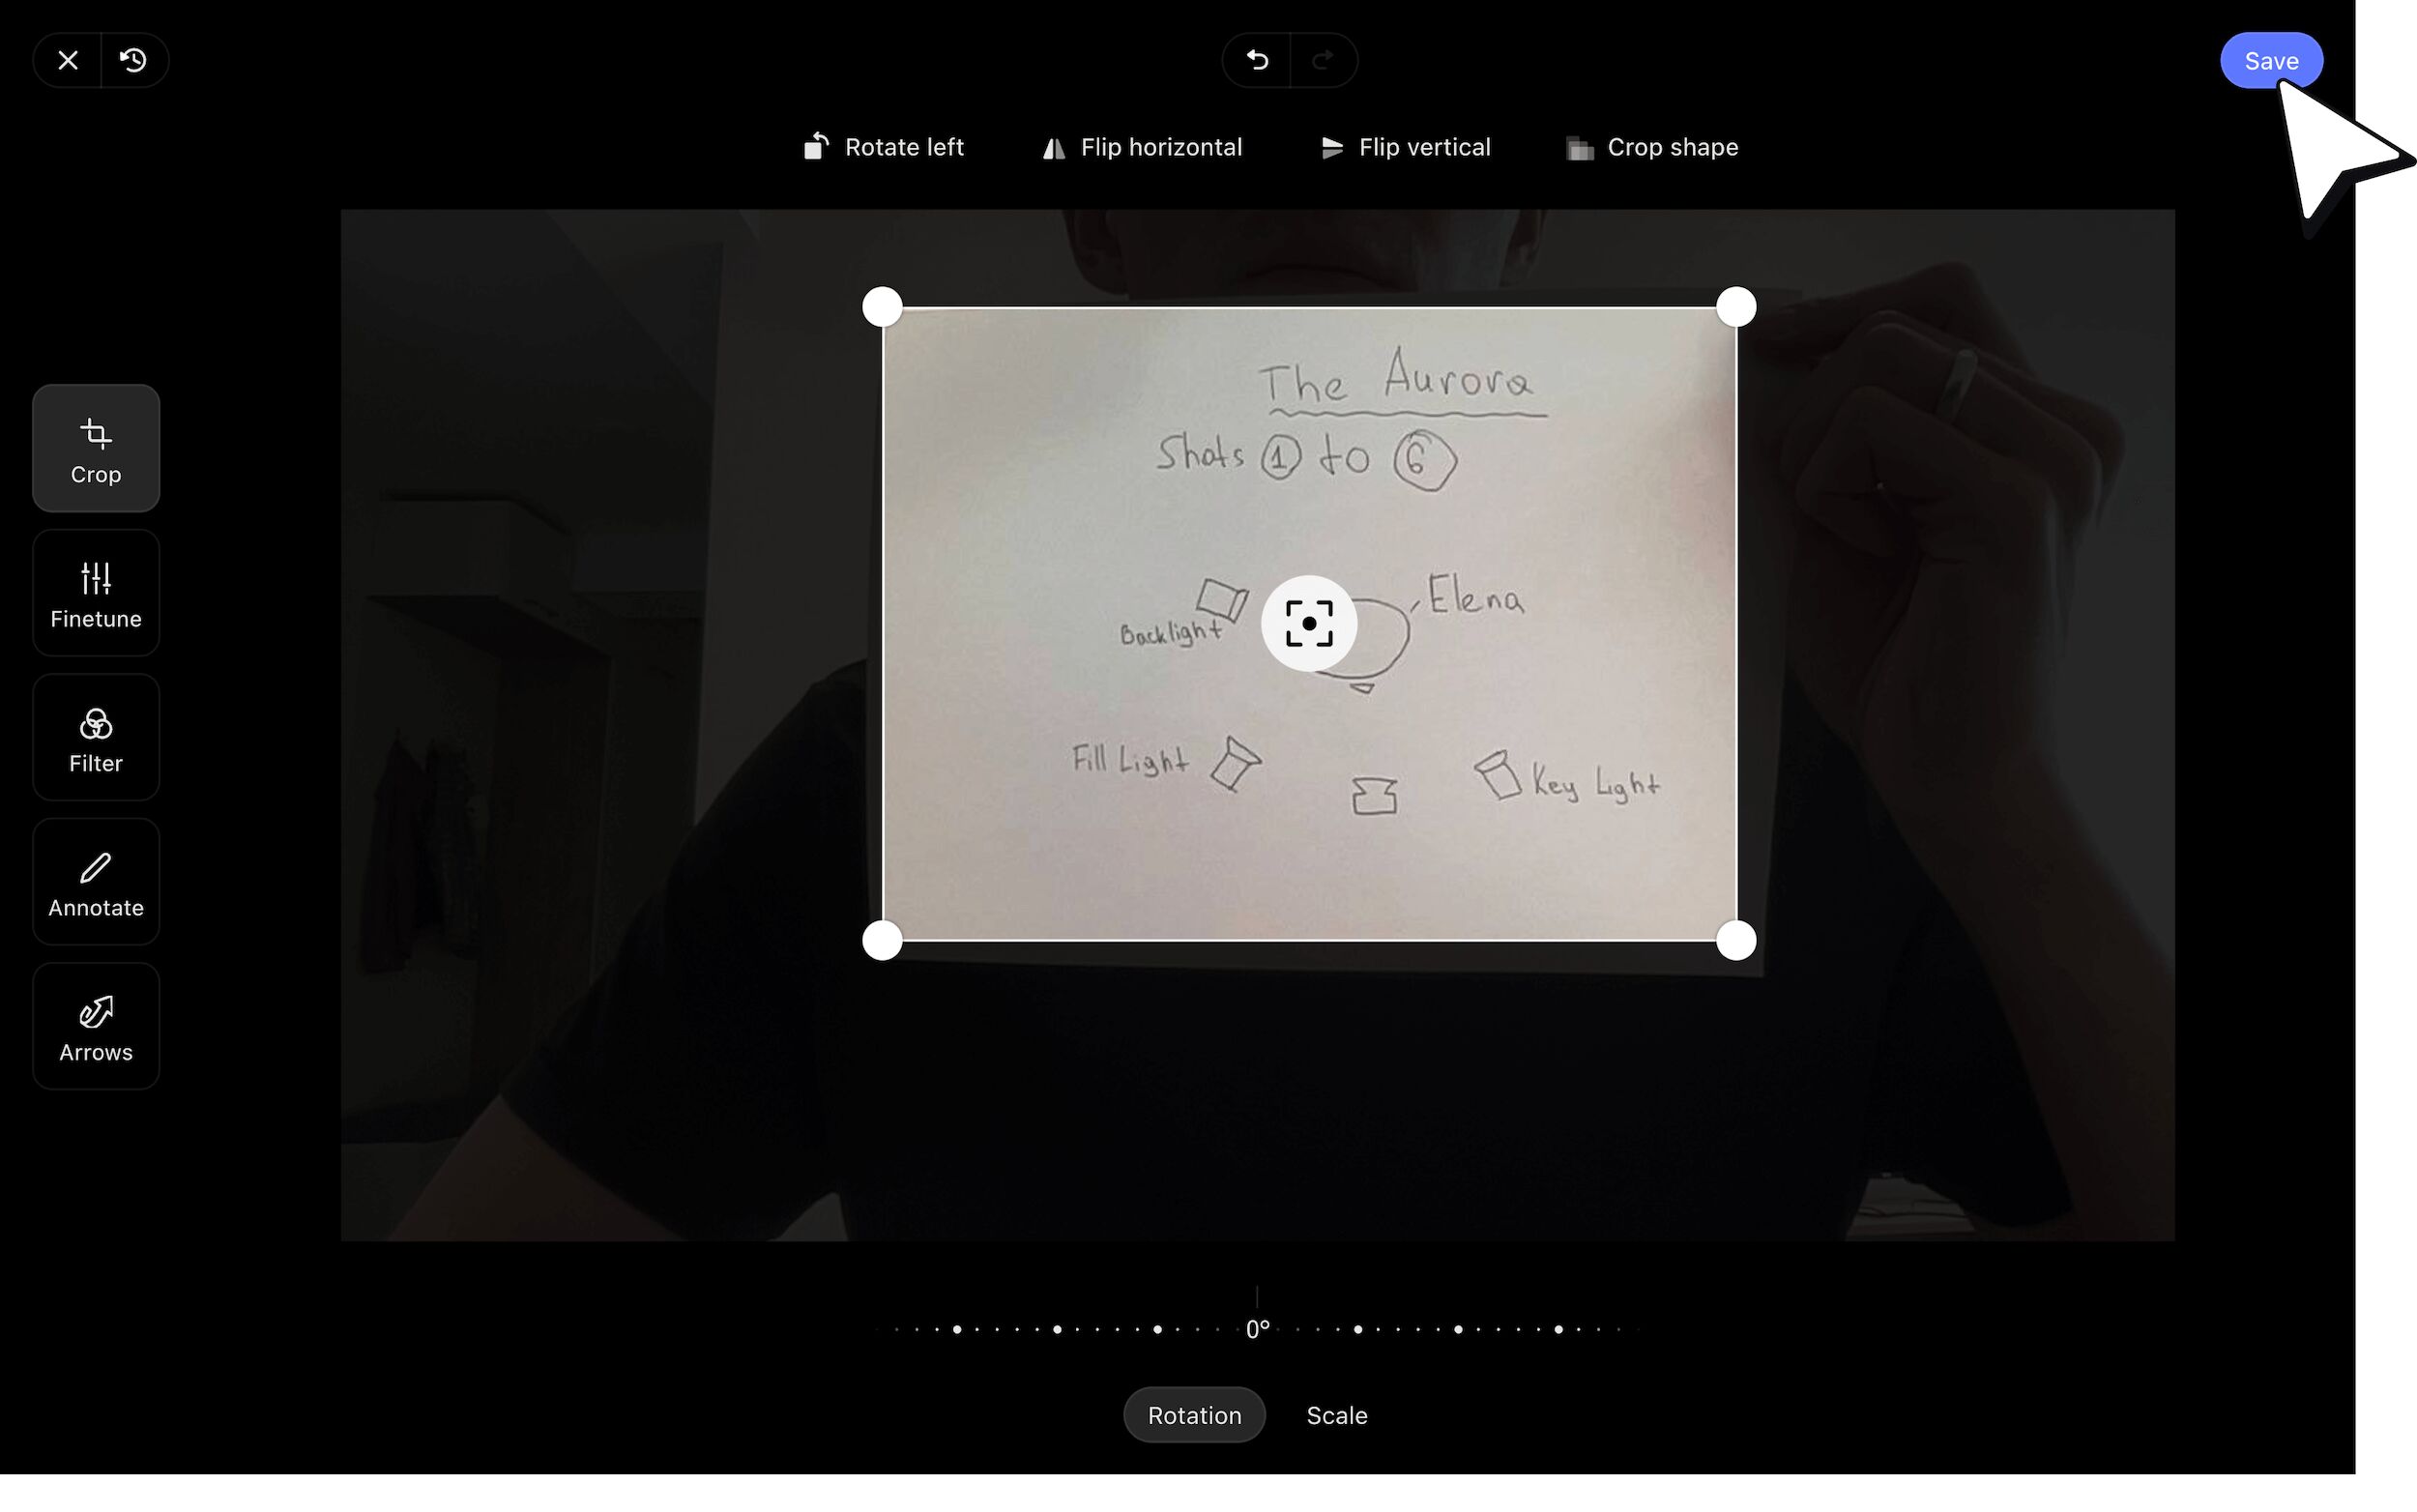
Now with StudioBinder’s built-in editor, you can choose from several customizable options on the left. In our case, the crop option provides just what we need.
Once you’ve finished editing, click Save and you’ll see your edited sketch displayed on your storyboard.
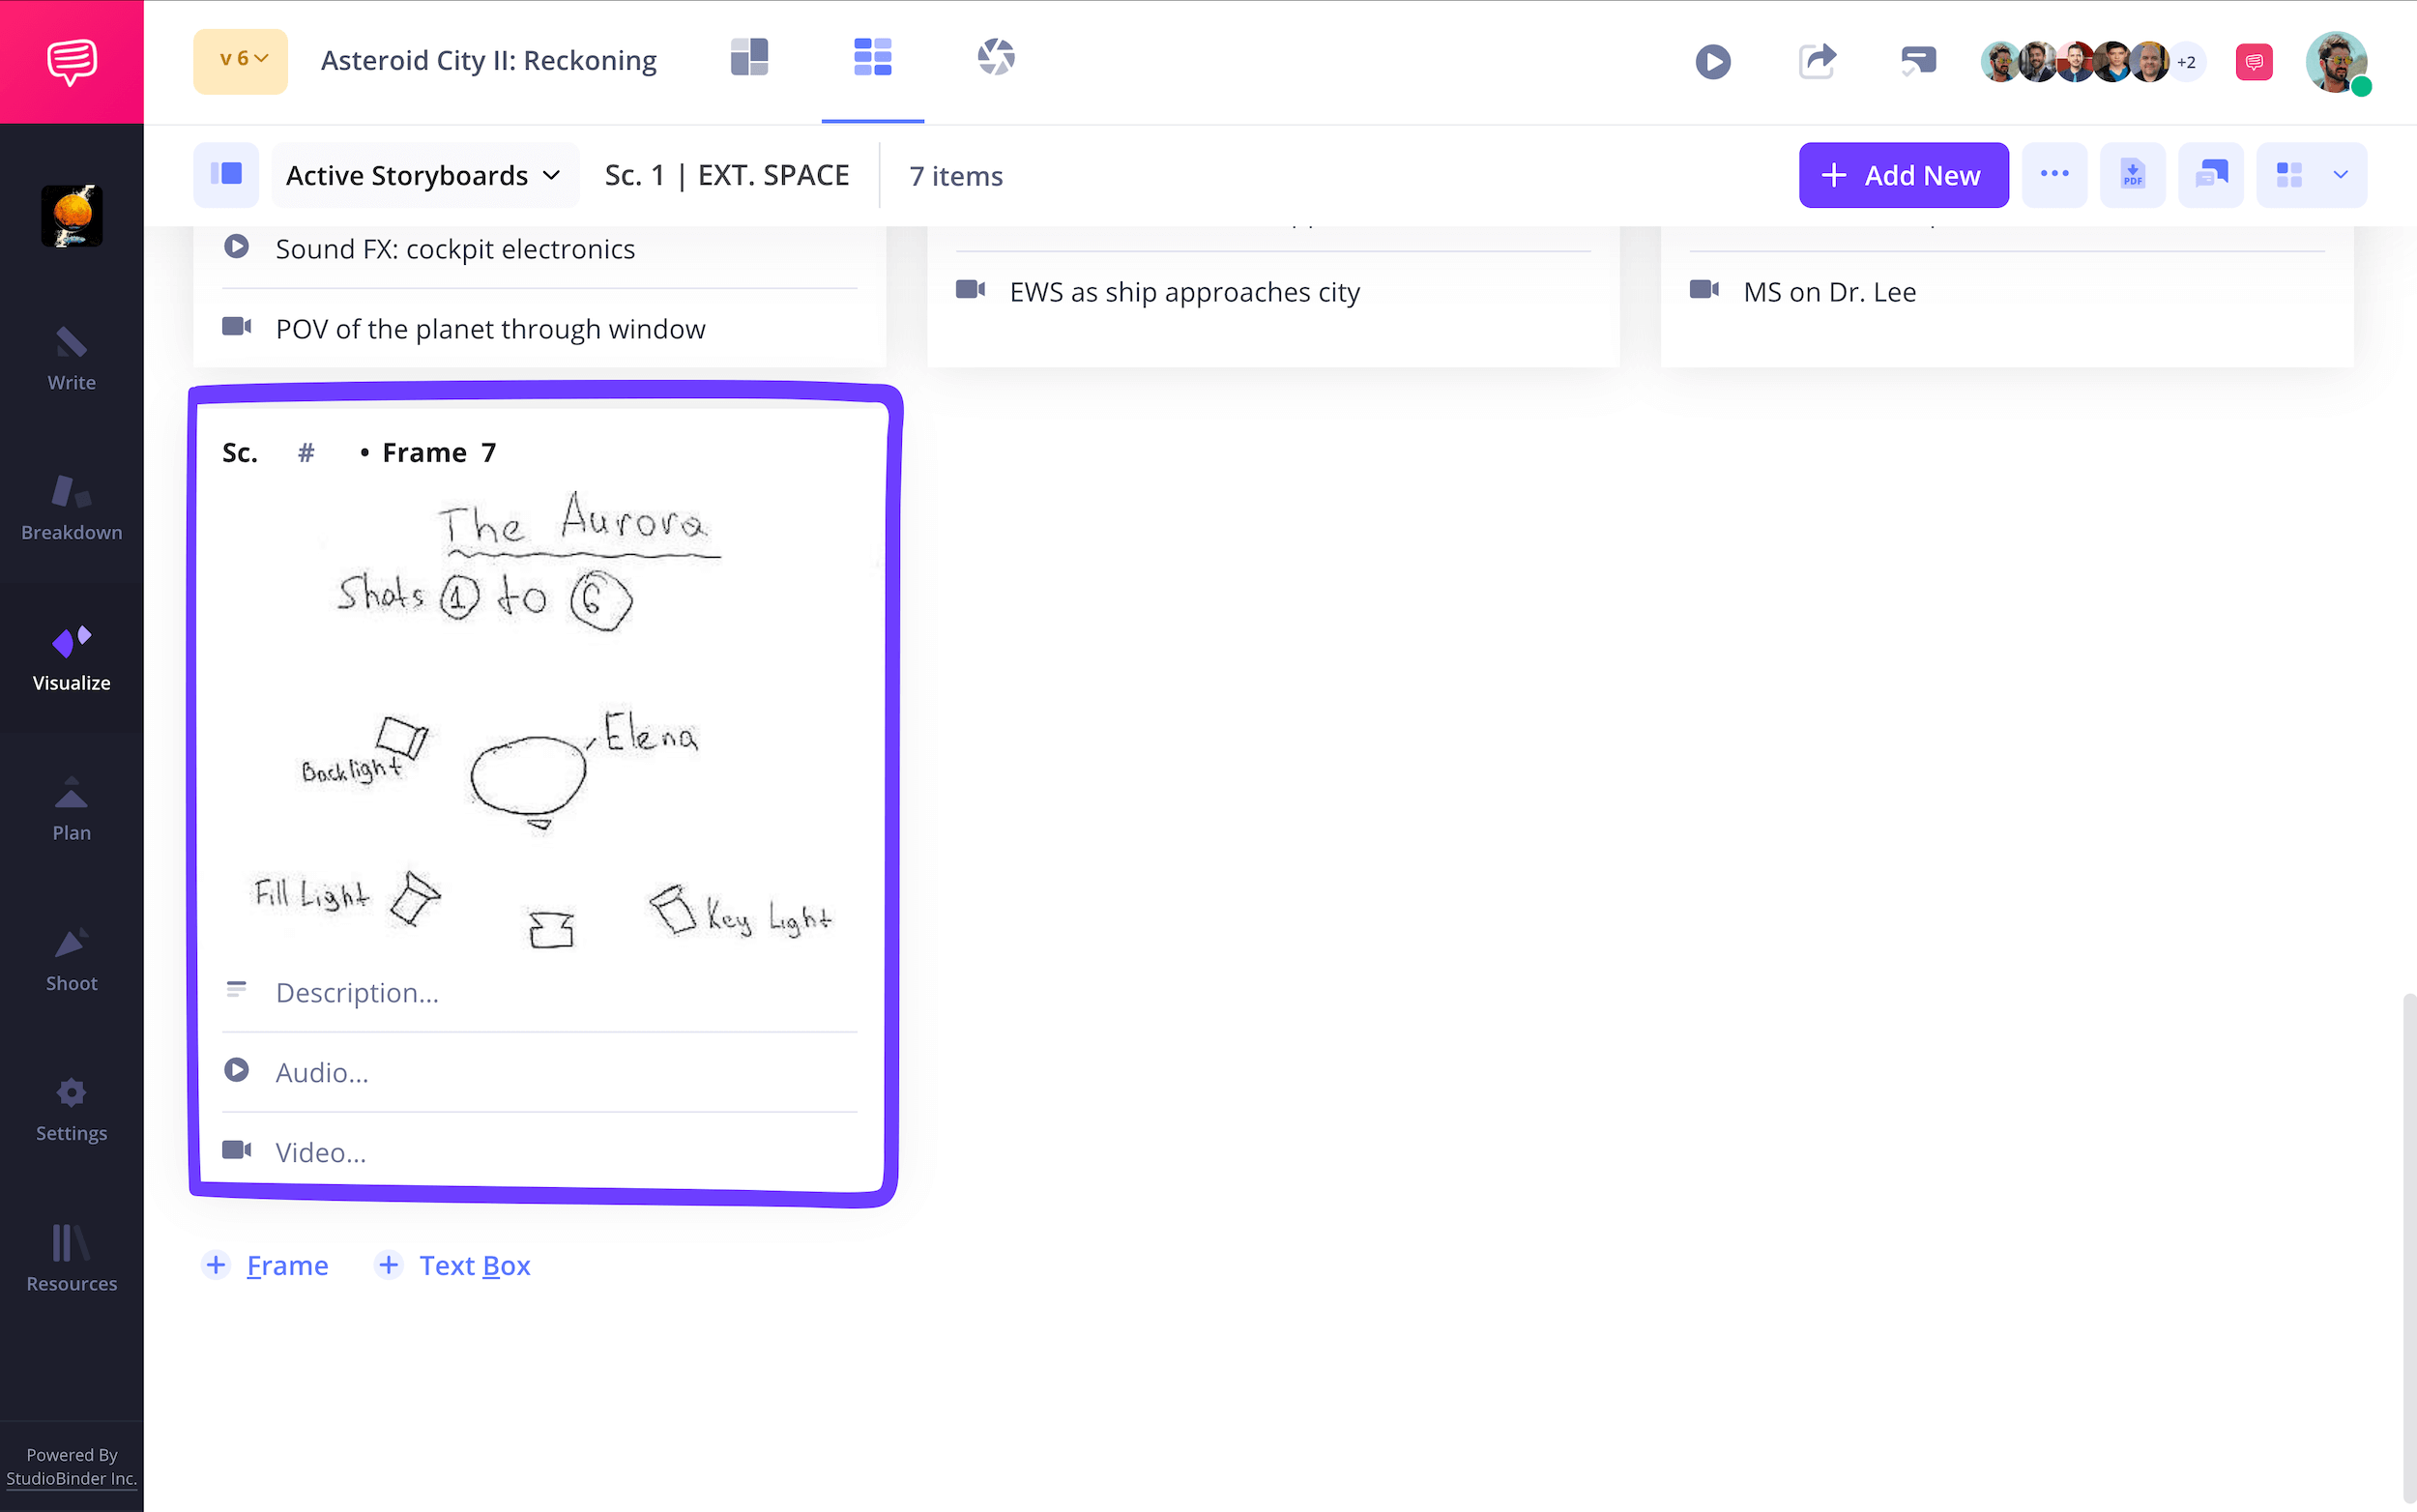
Step 4
4. Customize arrows
Let’s say you’re storyboarding a movie scene that involves a significant amount of action and movement from your characters and your environment. Since the images themselves aren’t going to get up and start moving around on their own (at least we hope not), you’ll want to have easy access to a storyboard image’s best friend: arrows.
Arrows are useful in that they signify to the viewer’s eye how things are moving through three dimensional space. You might want to indicate where the camera is panning in a shot, or that the car in the chase sequence is going to land to the left of the granny crossing the street, not on top of her.
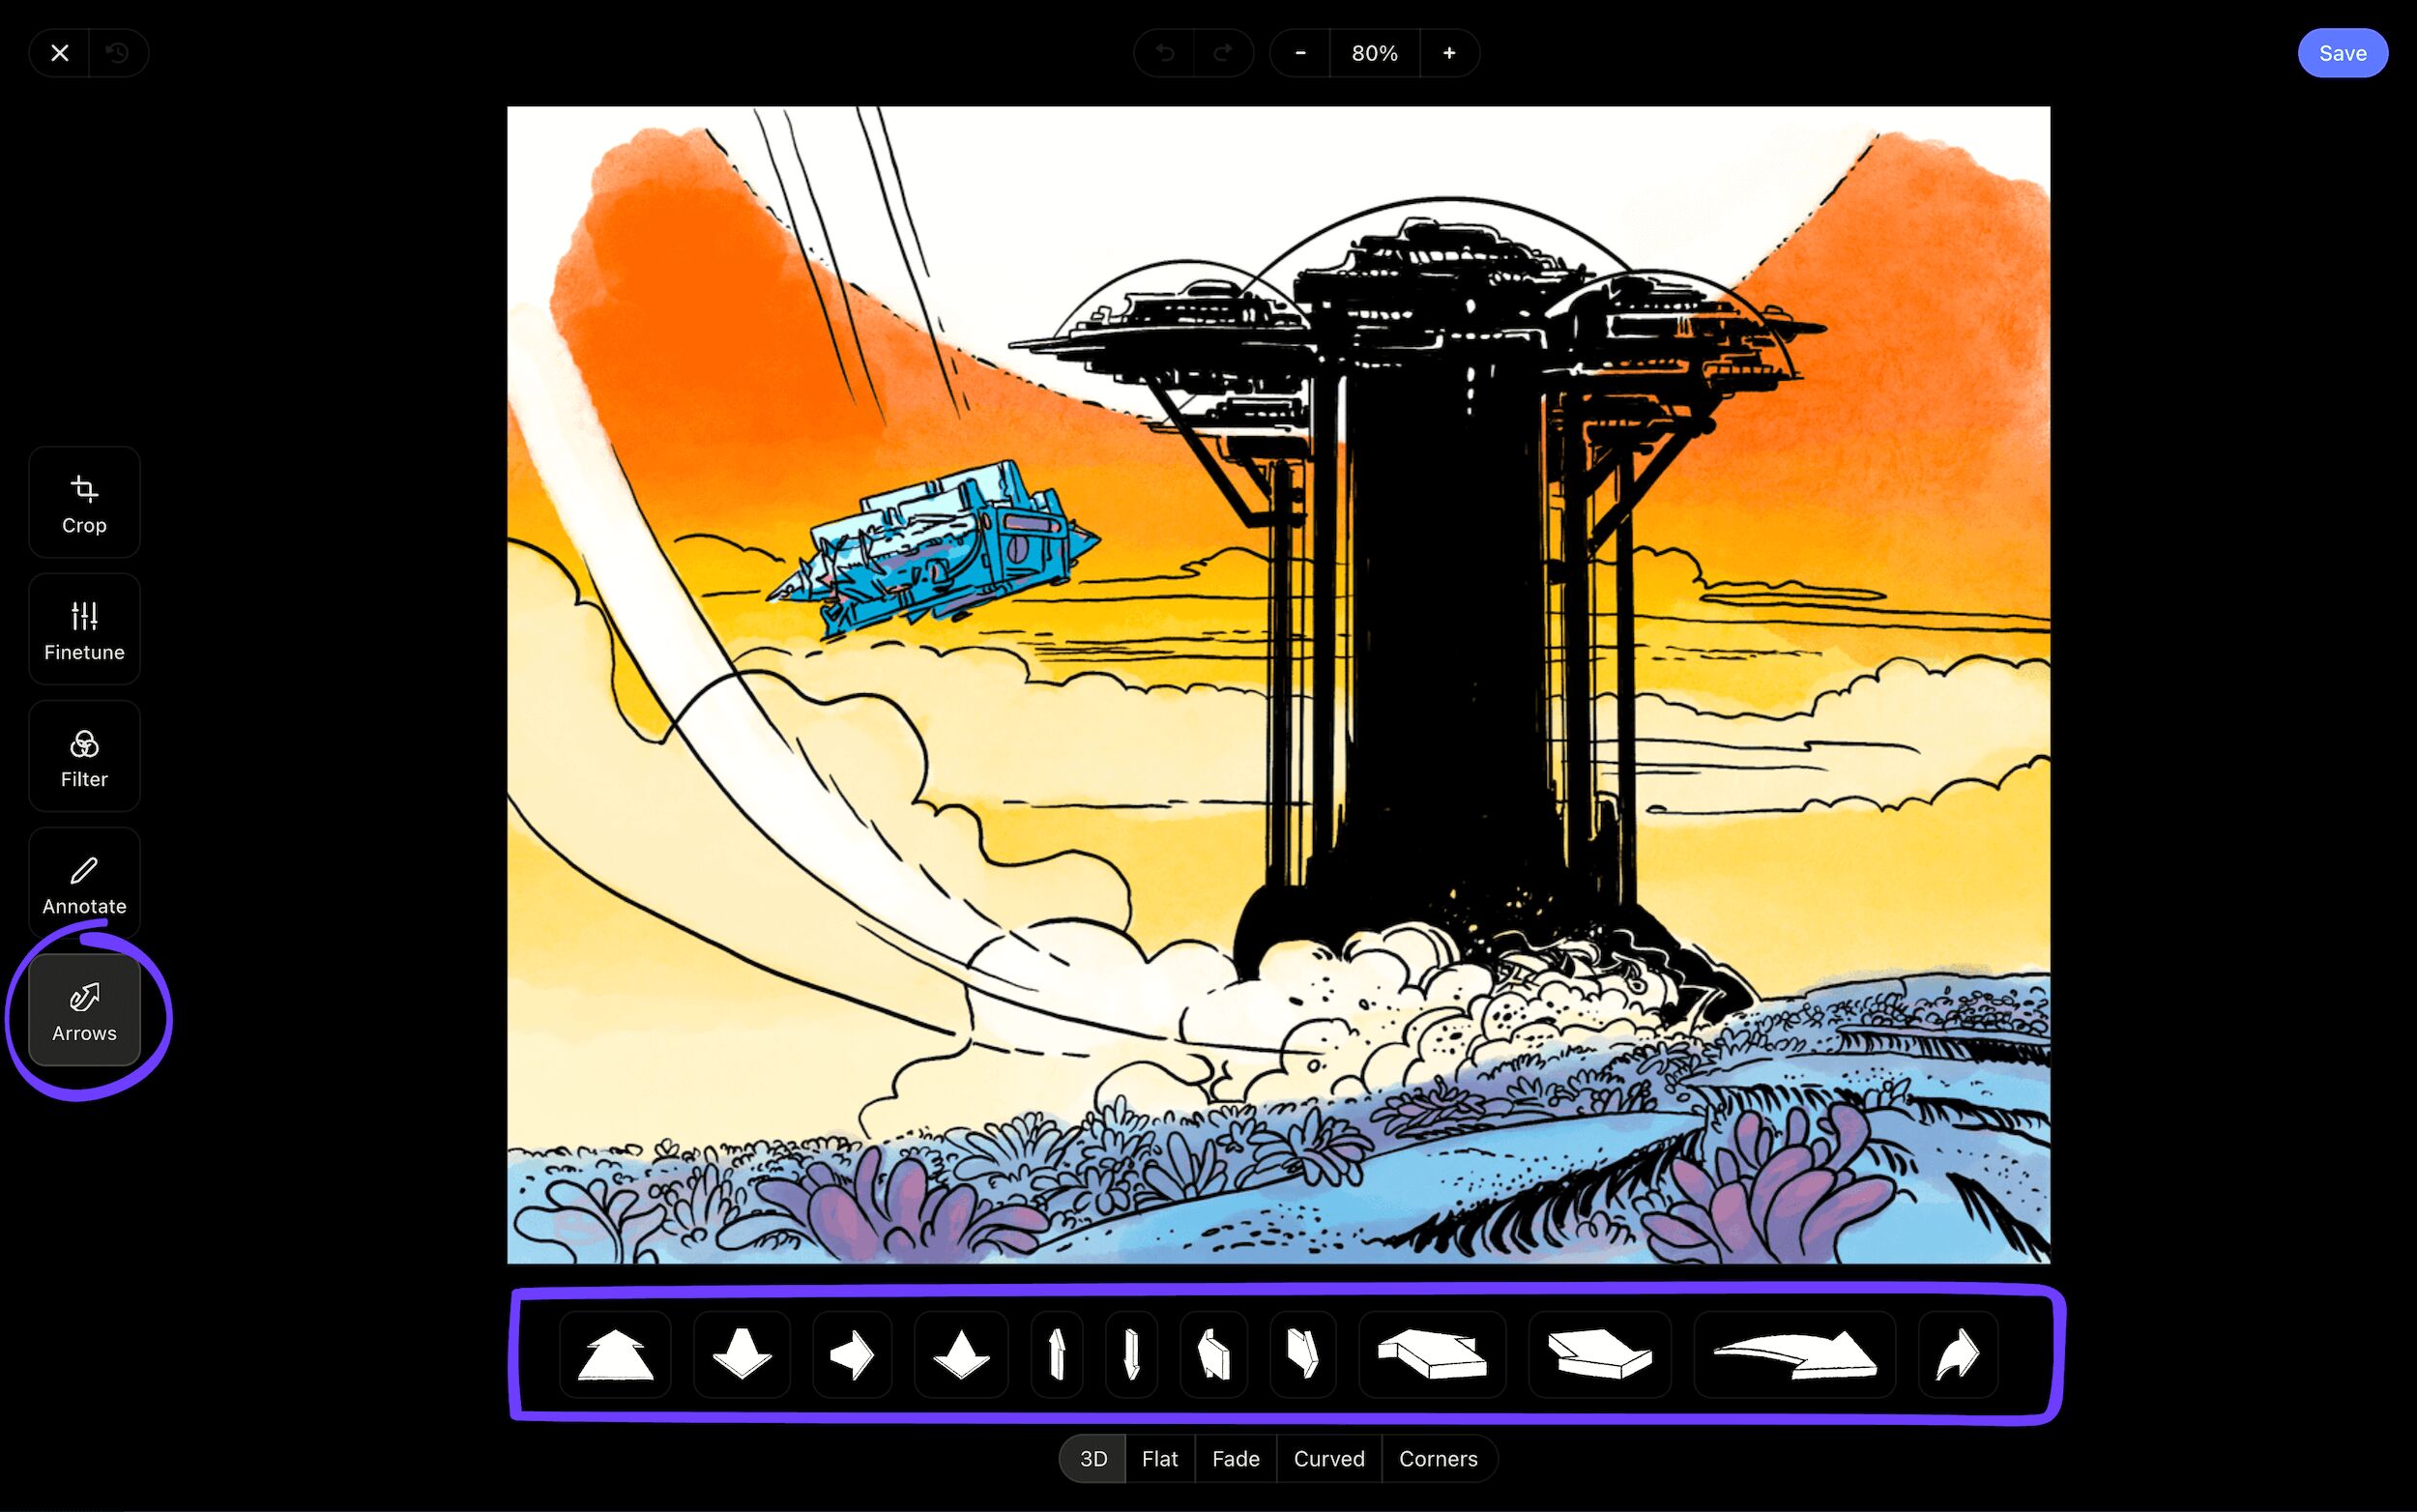
To easily indicate direction on your images with arrows, return to the image editor page from the last step and click the Arrows tab.
Using the arrow options on the bottom, you can now apply and customize your arrows by size and direction. In our case, we’ll use the Fade option to indicate our character’s quick head turn.
But we also want to add some extra emphasis to the fact that this is a visibly fast movement, so we’ll click the Annotate option next.
Now we’ll click the Text box on the bottom and apply our text onto the arrow with the font, color and text size of our choice.
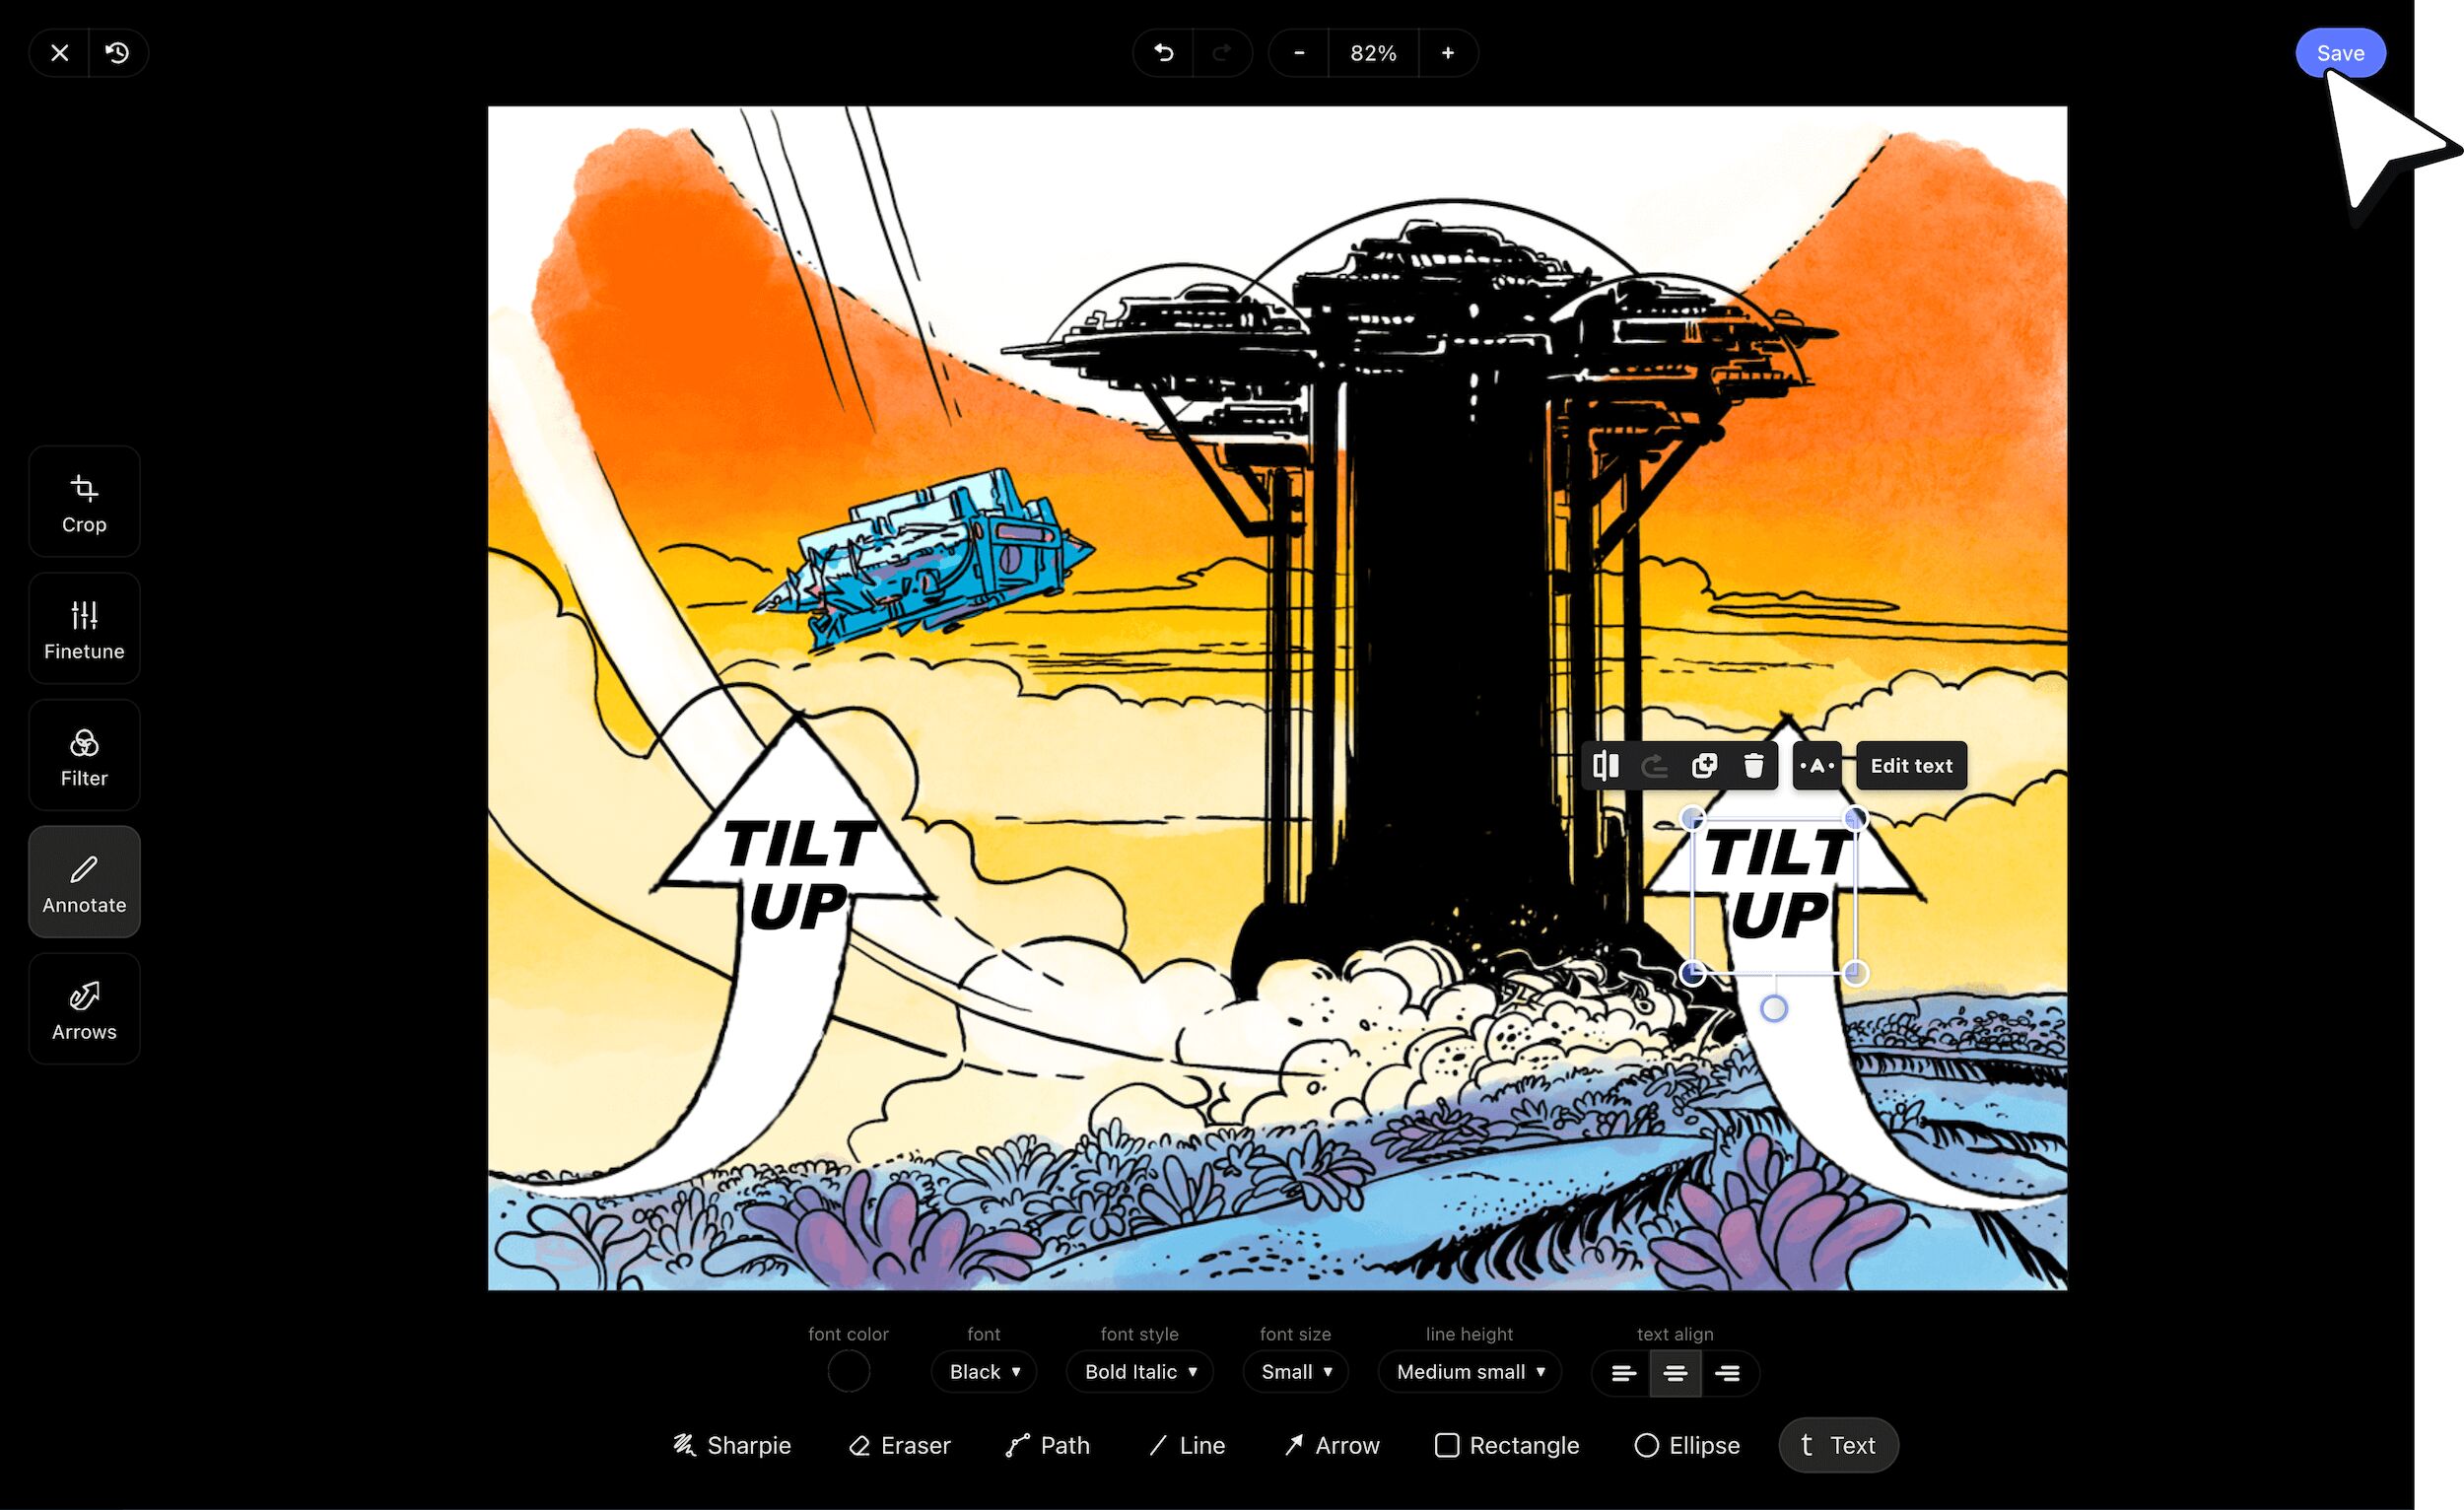
Now just click Save and your freshly edited image will be applied to your storyboard movie project.
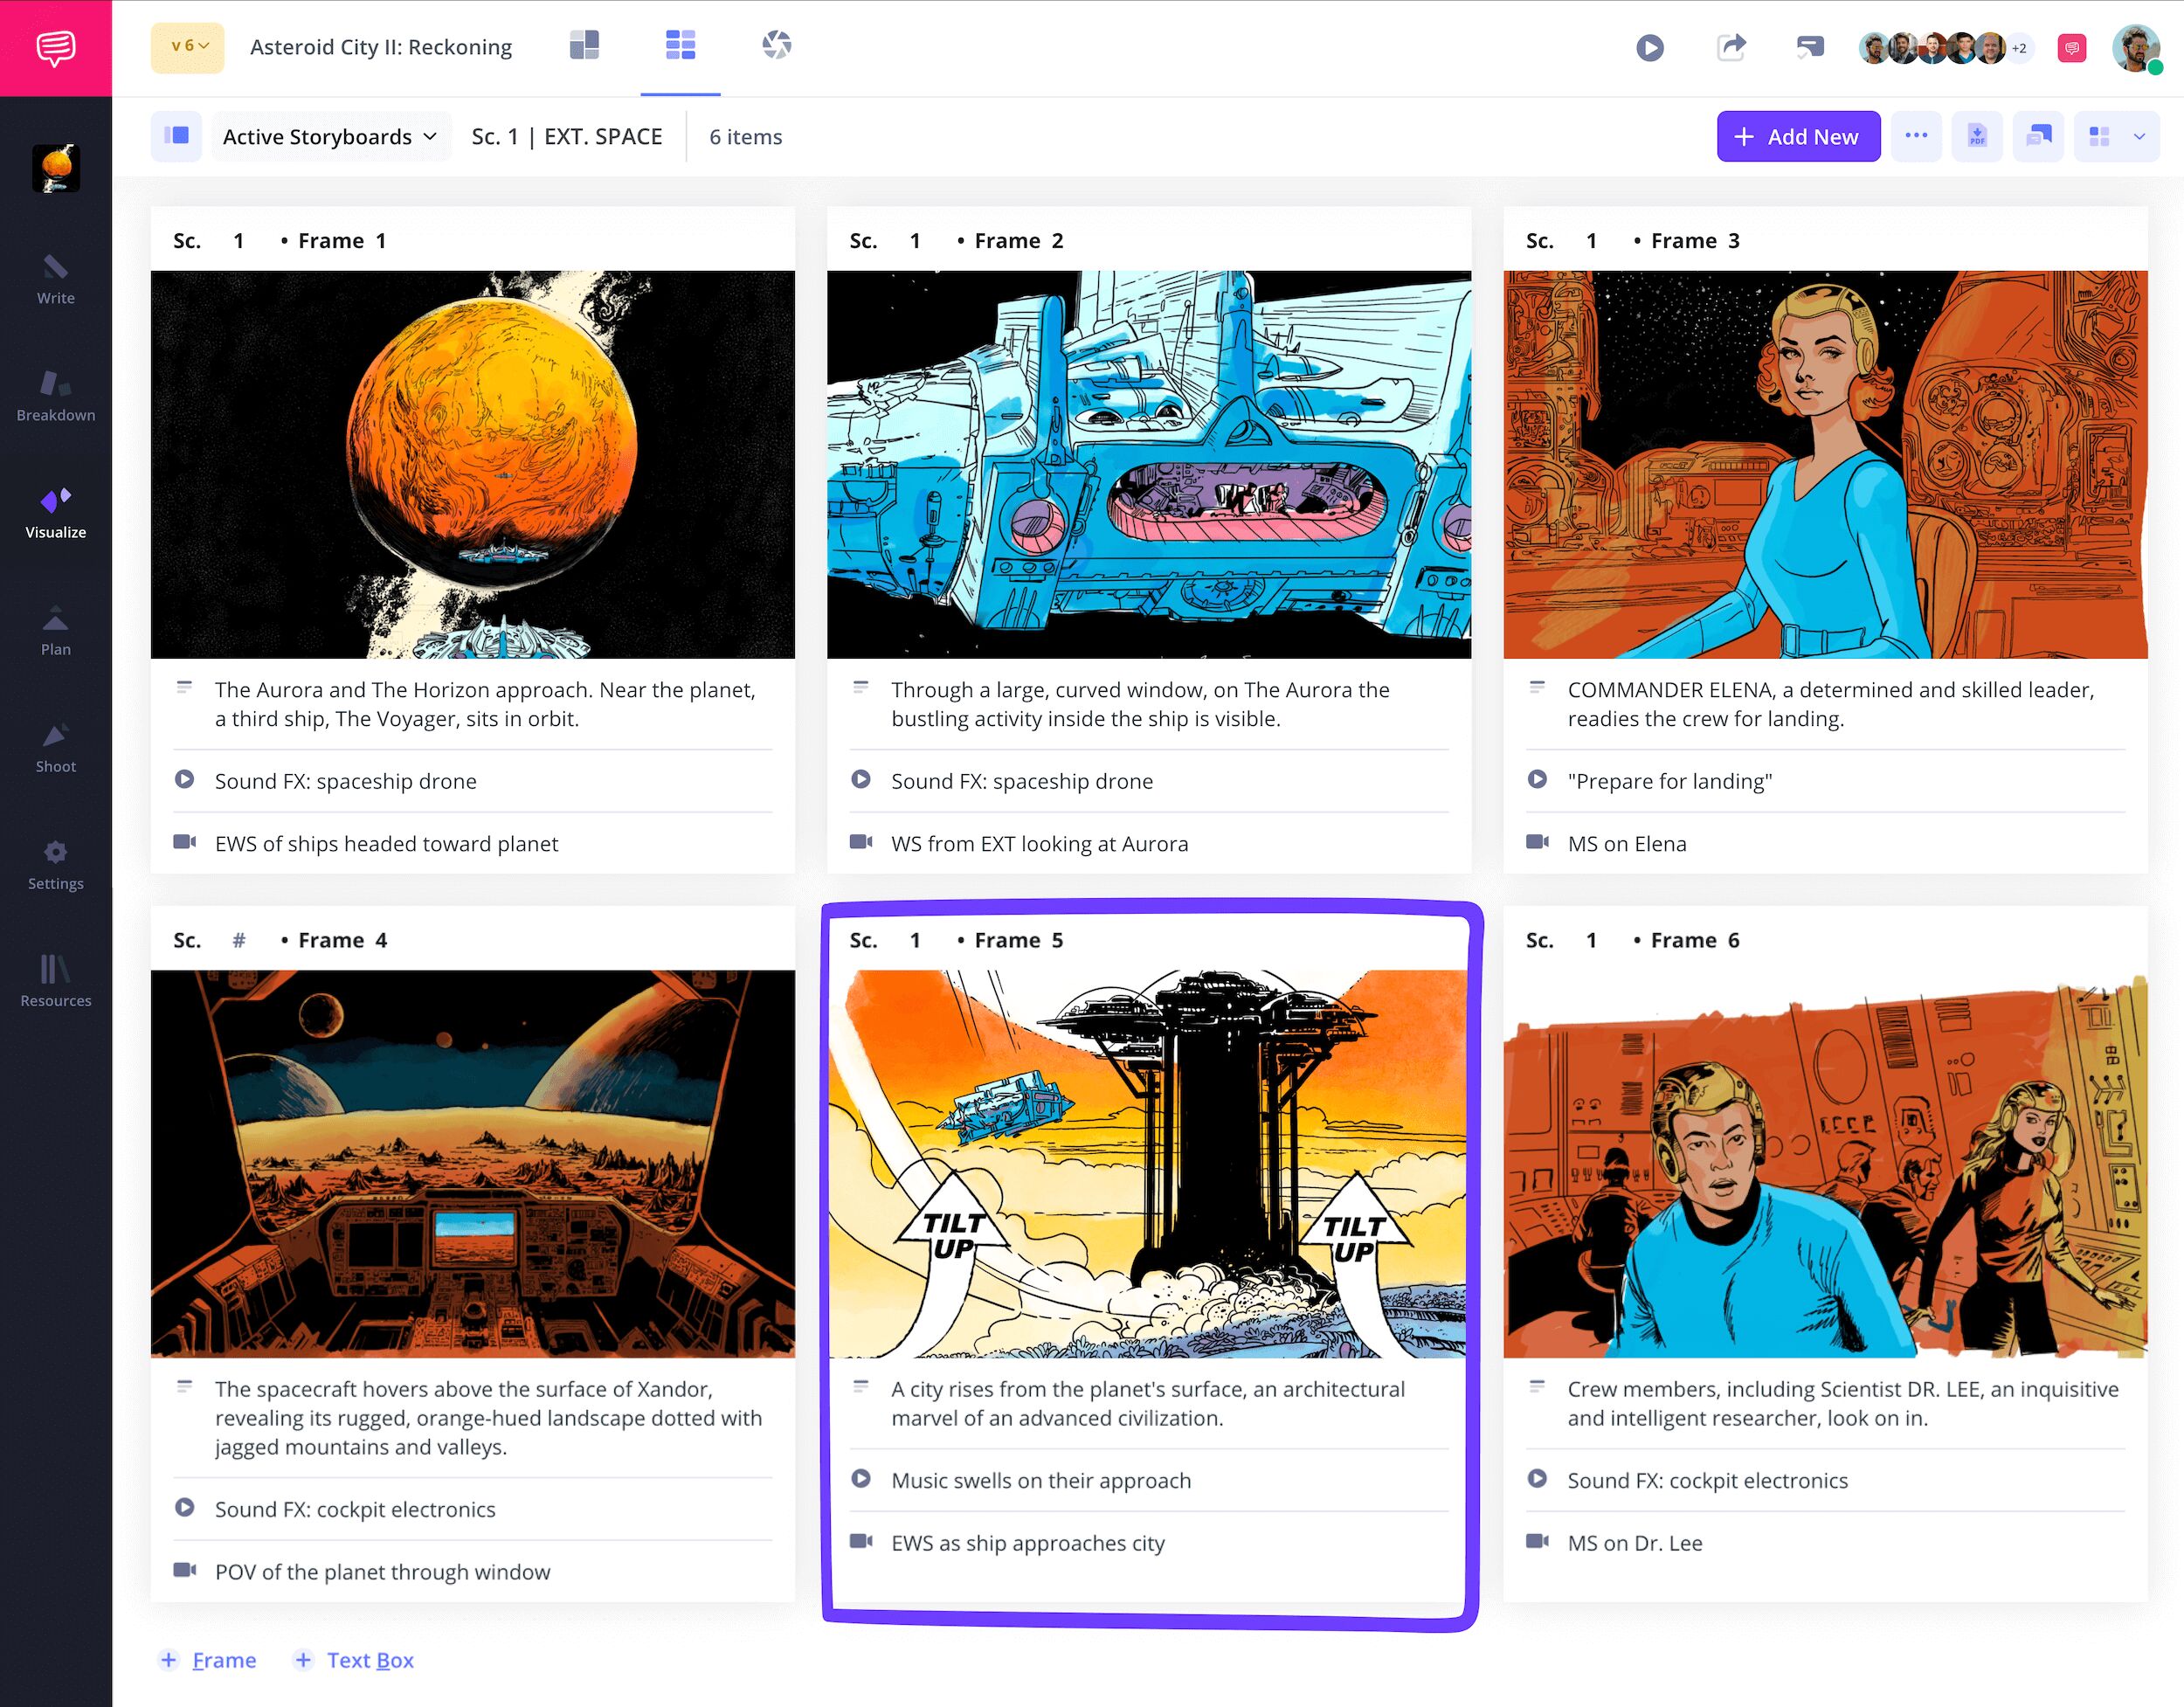
Step 5
5. Assemble your team
Next to actually building the storyboard, being able to efficiently share and receive notes on a storyboard for a movie is the most essential part of the process. Afterall, you can’t make an entire movie all by yourself, it takes collaboration and feedback from all angles of production.
To customize who gets to see your storyboard and how involved in the development process they need to be, click Share Storyboards Page at the top.
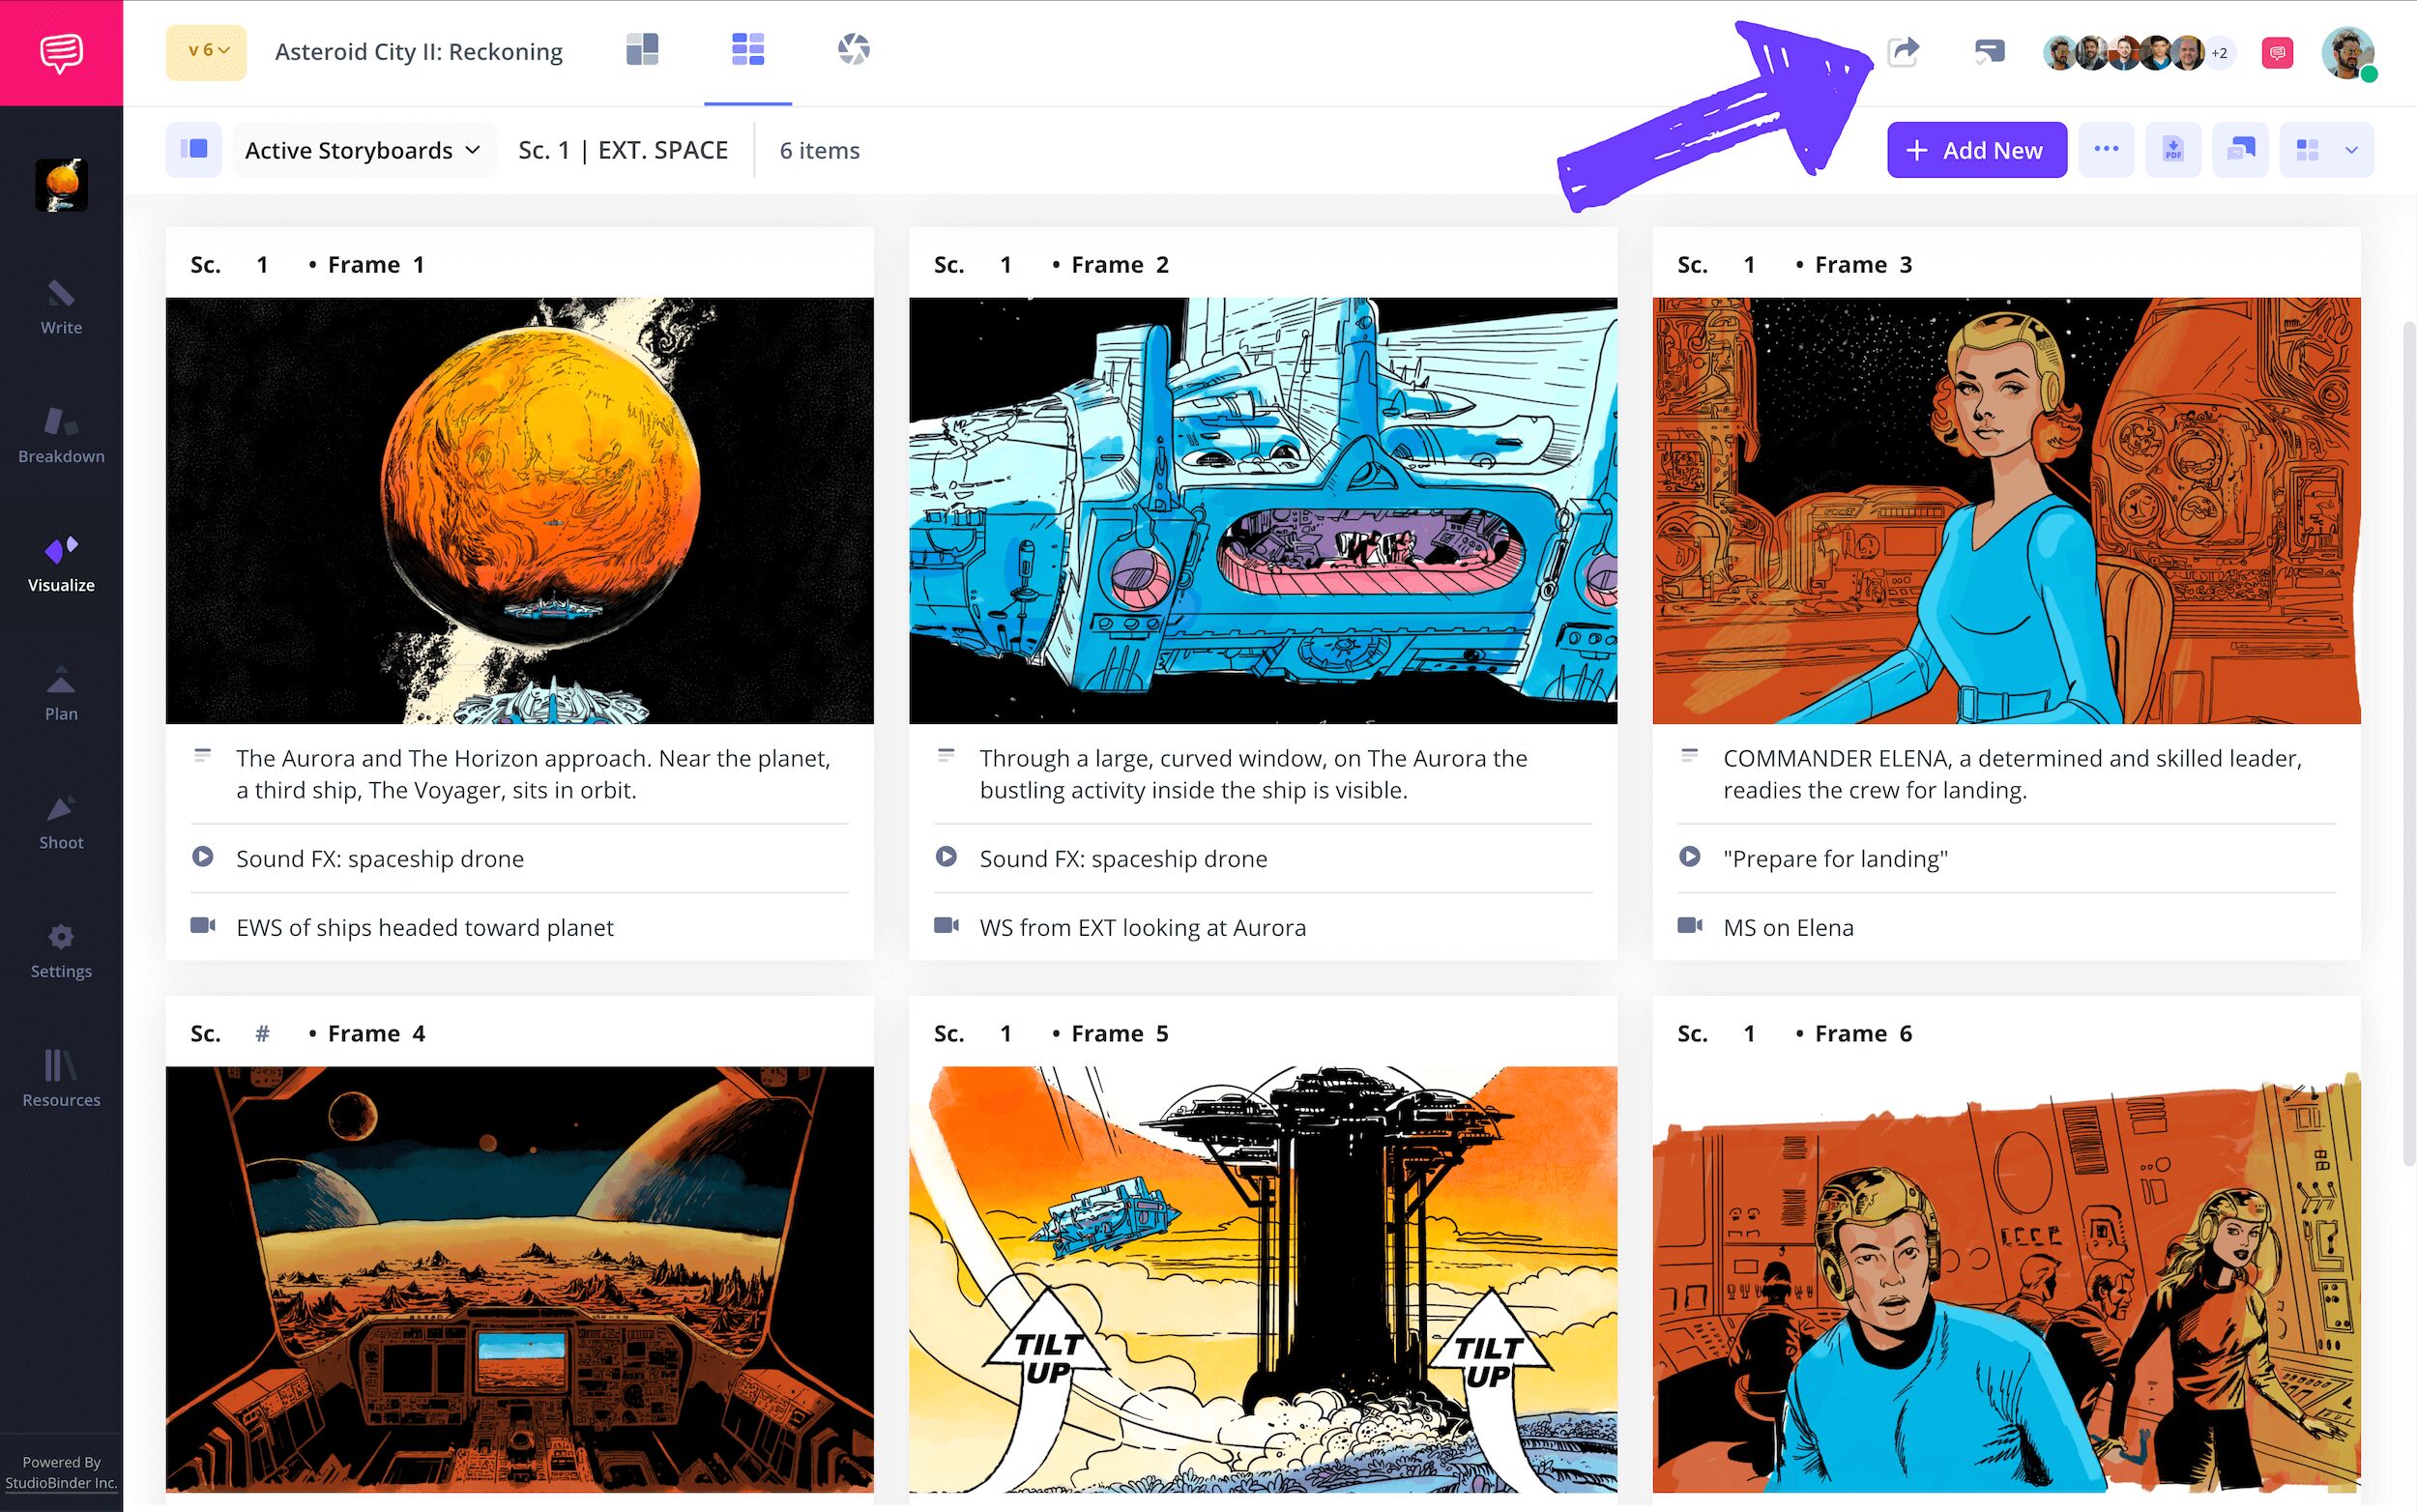
The view only link can be used to send to anyone who doesn’t need to chime in with any notes or edits. For further viewer customization, you can click the Invite Collaborators To This Page button.
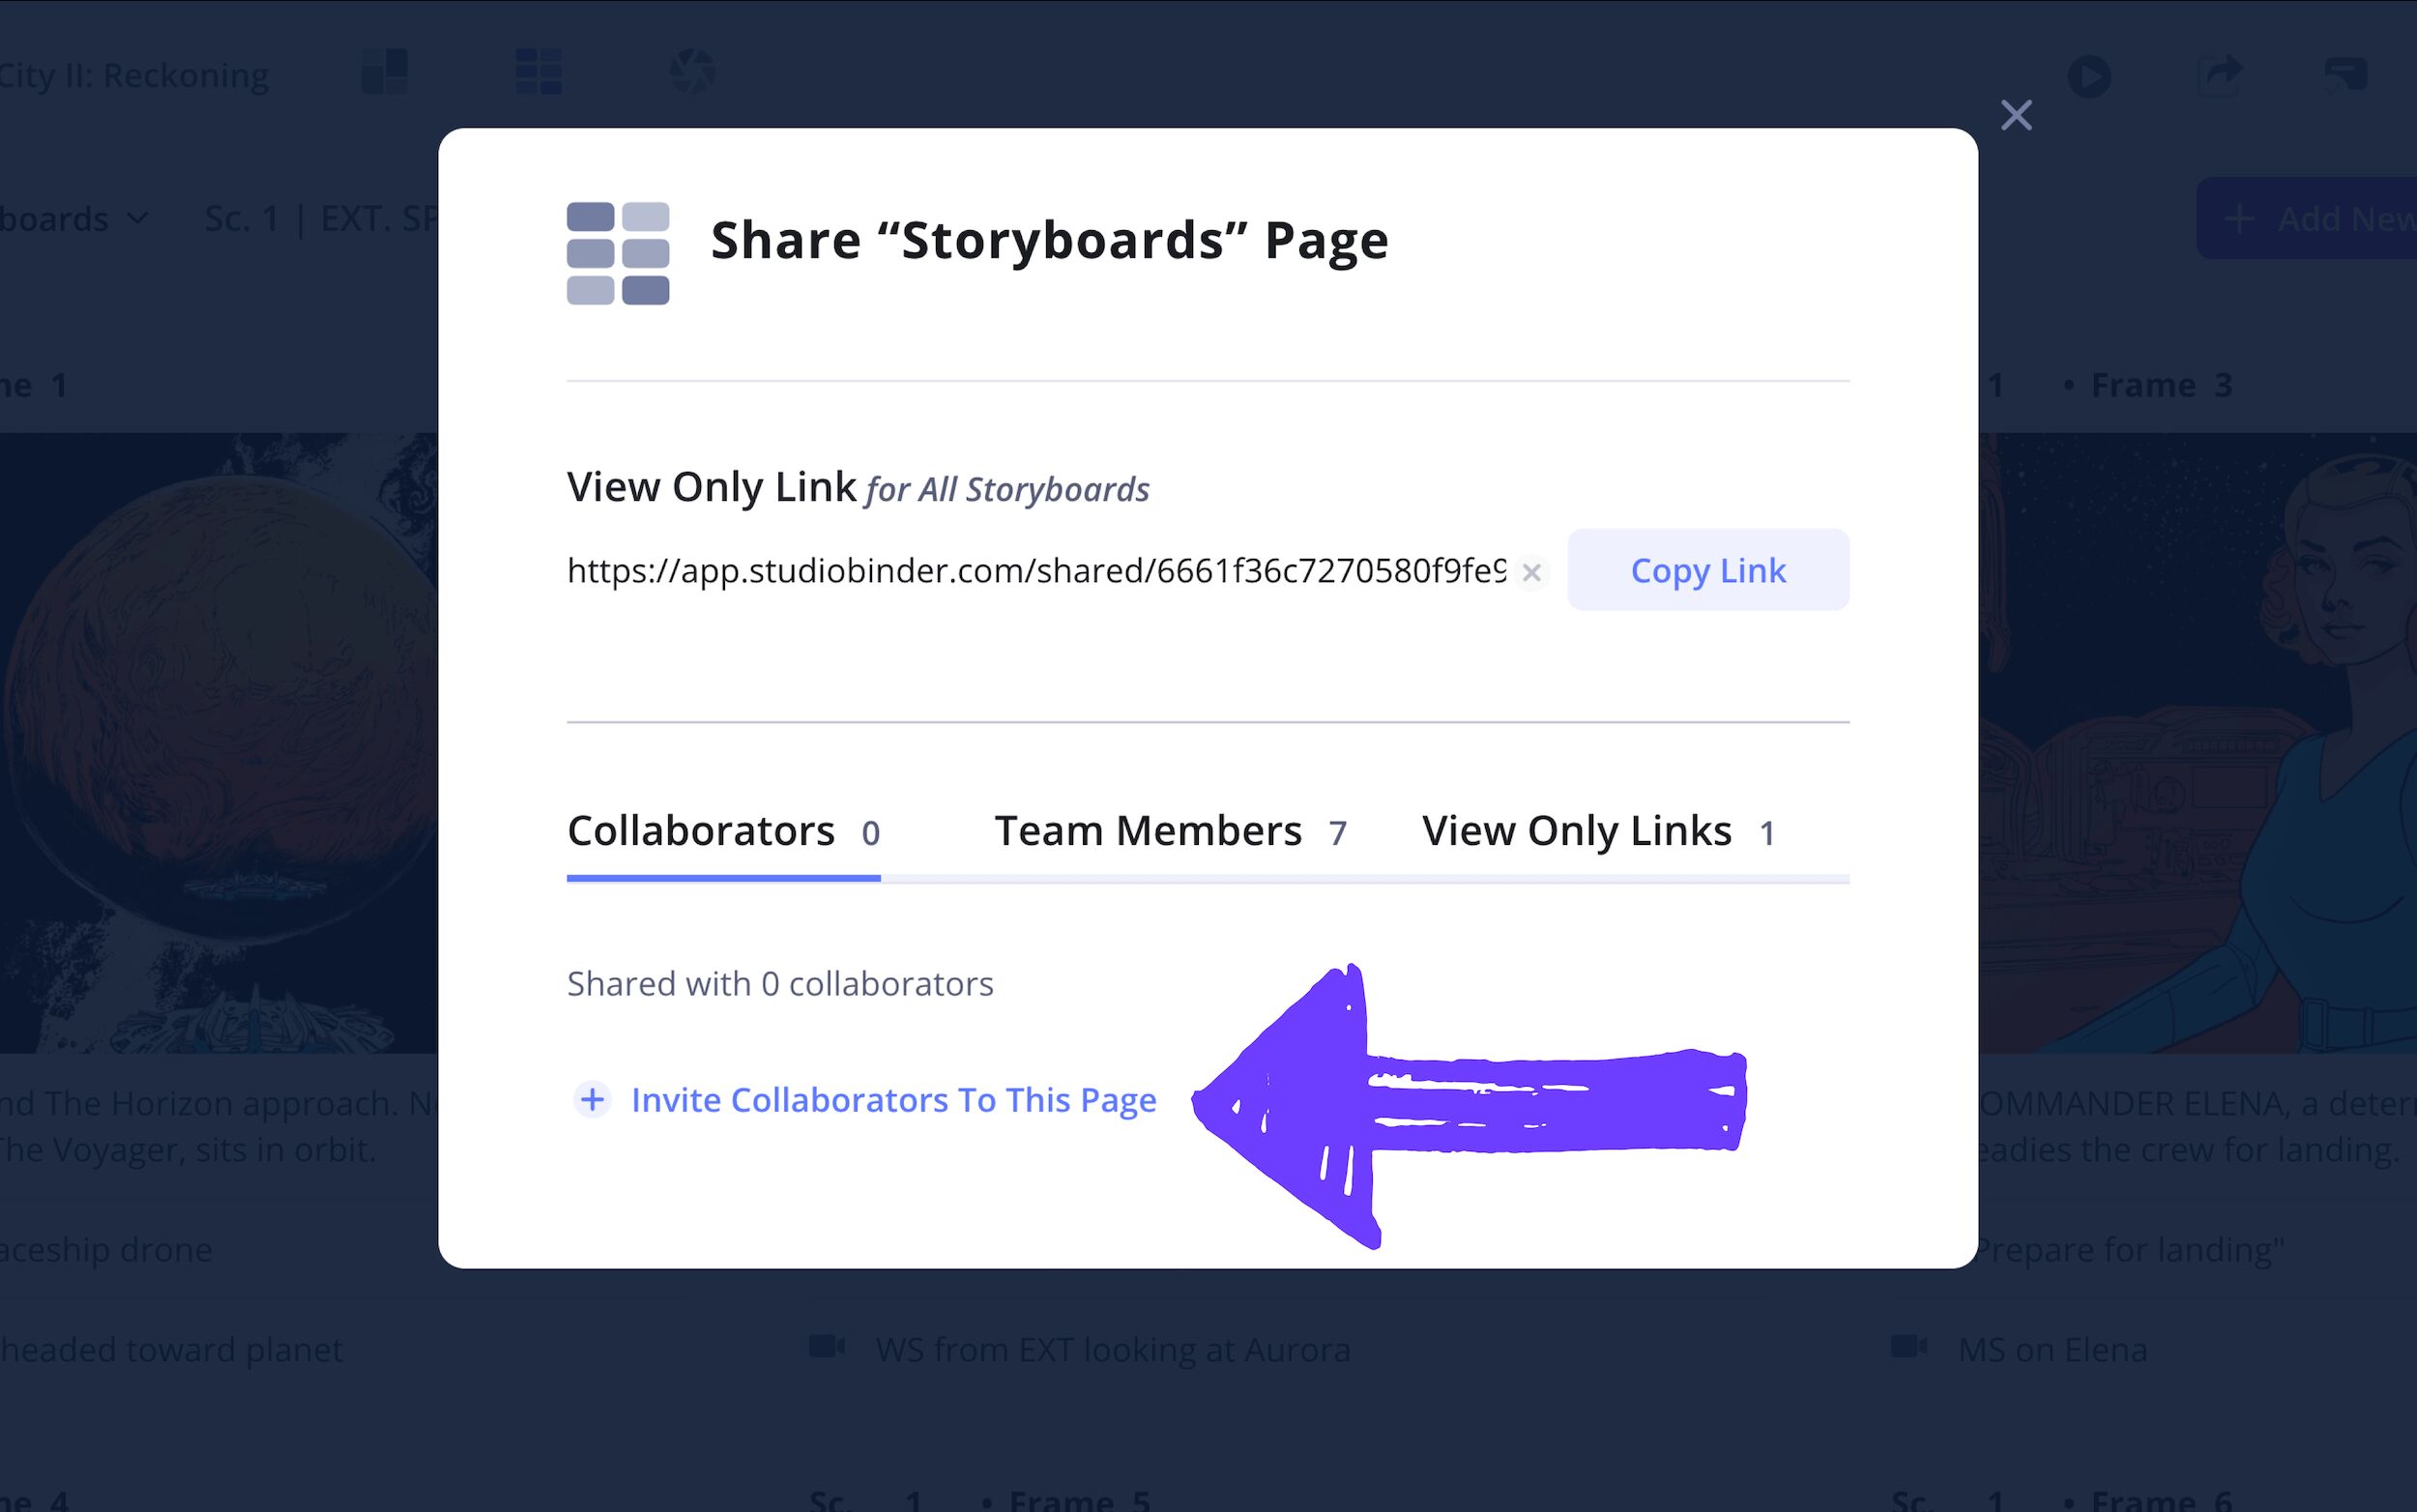
Once you’ve entered your recipient's name and email info, you can set their access permissions to either viewer, commenter, or editor. Now you’re ready to click the Invite Collaborator button.

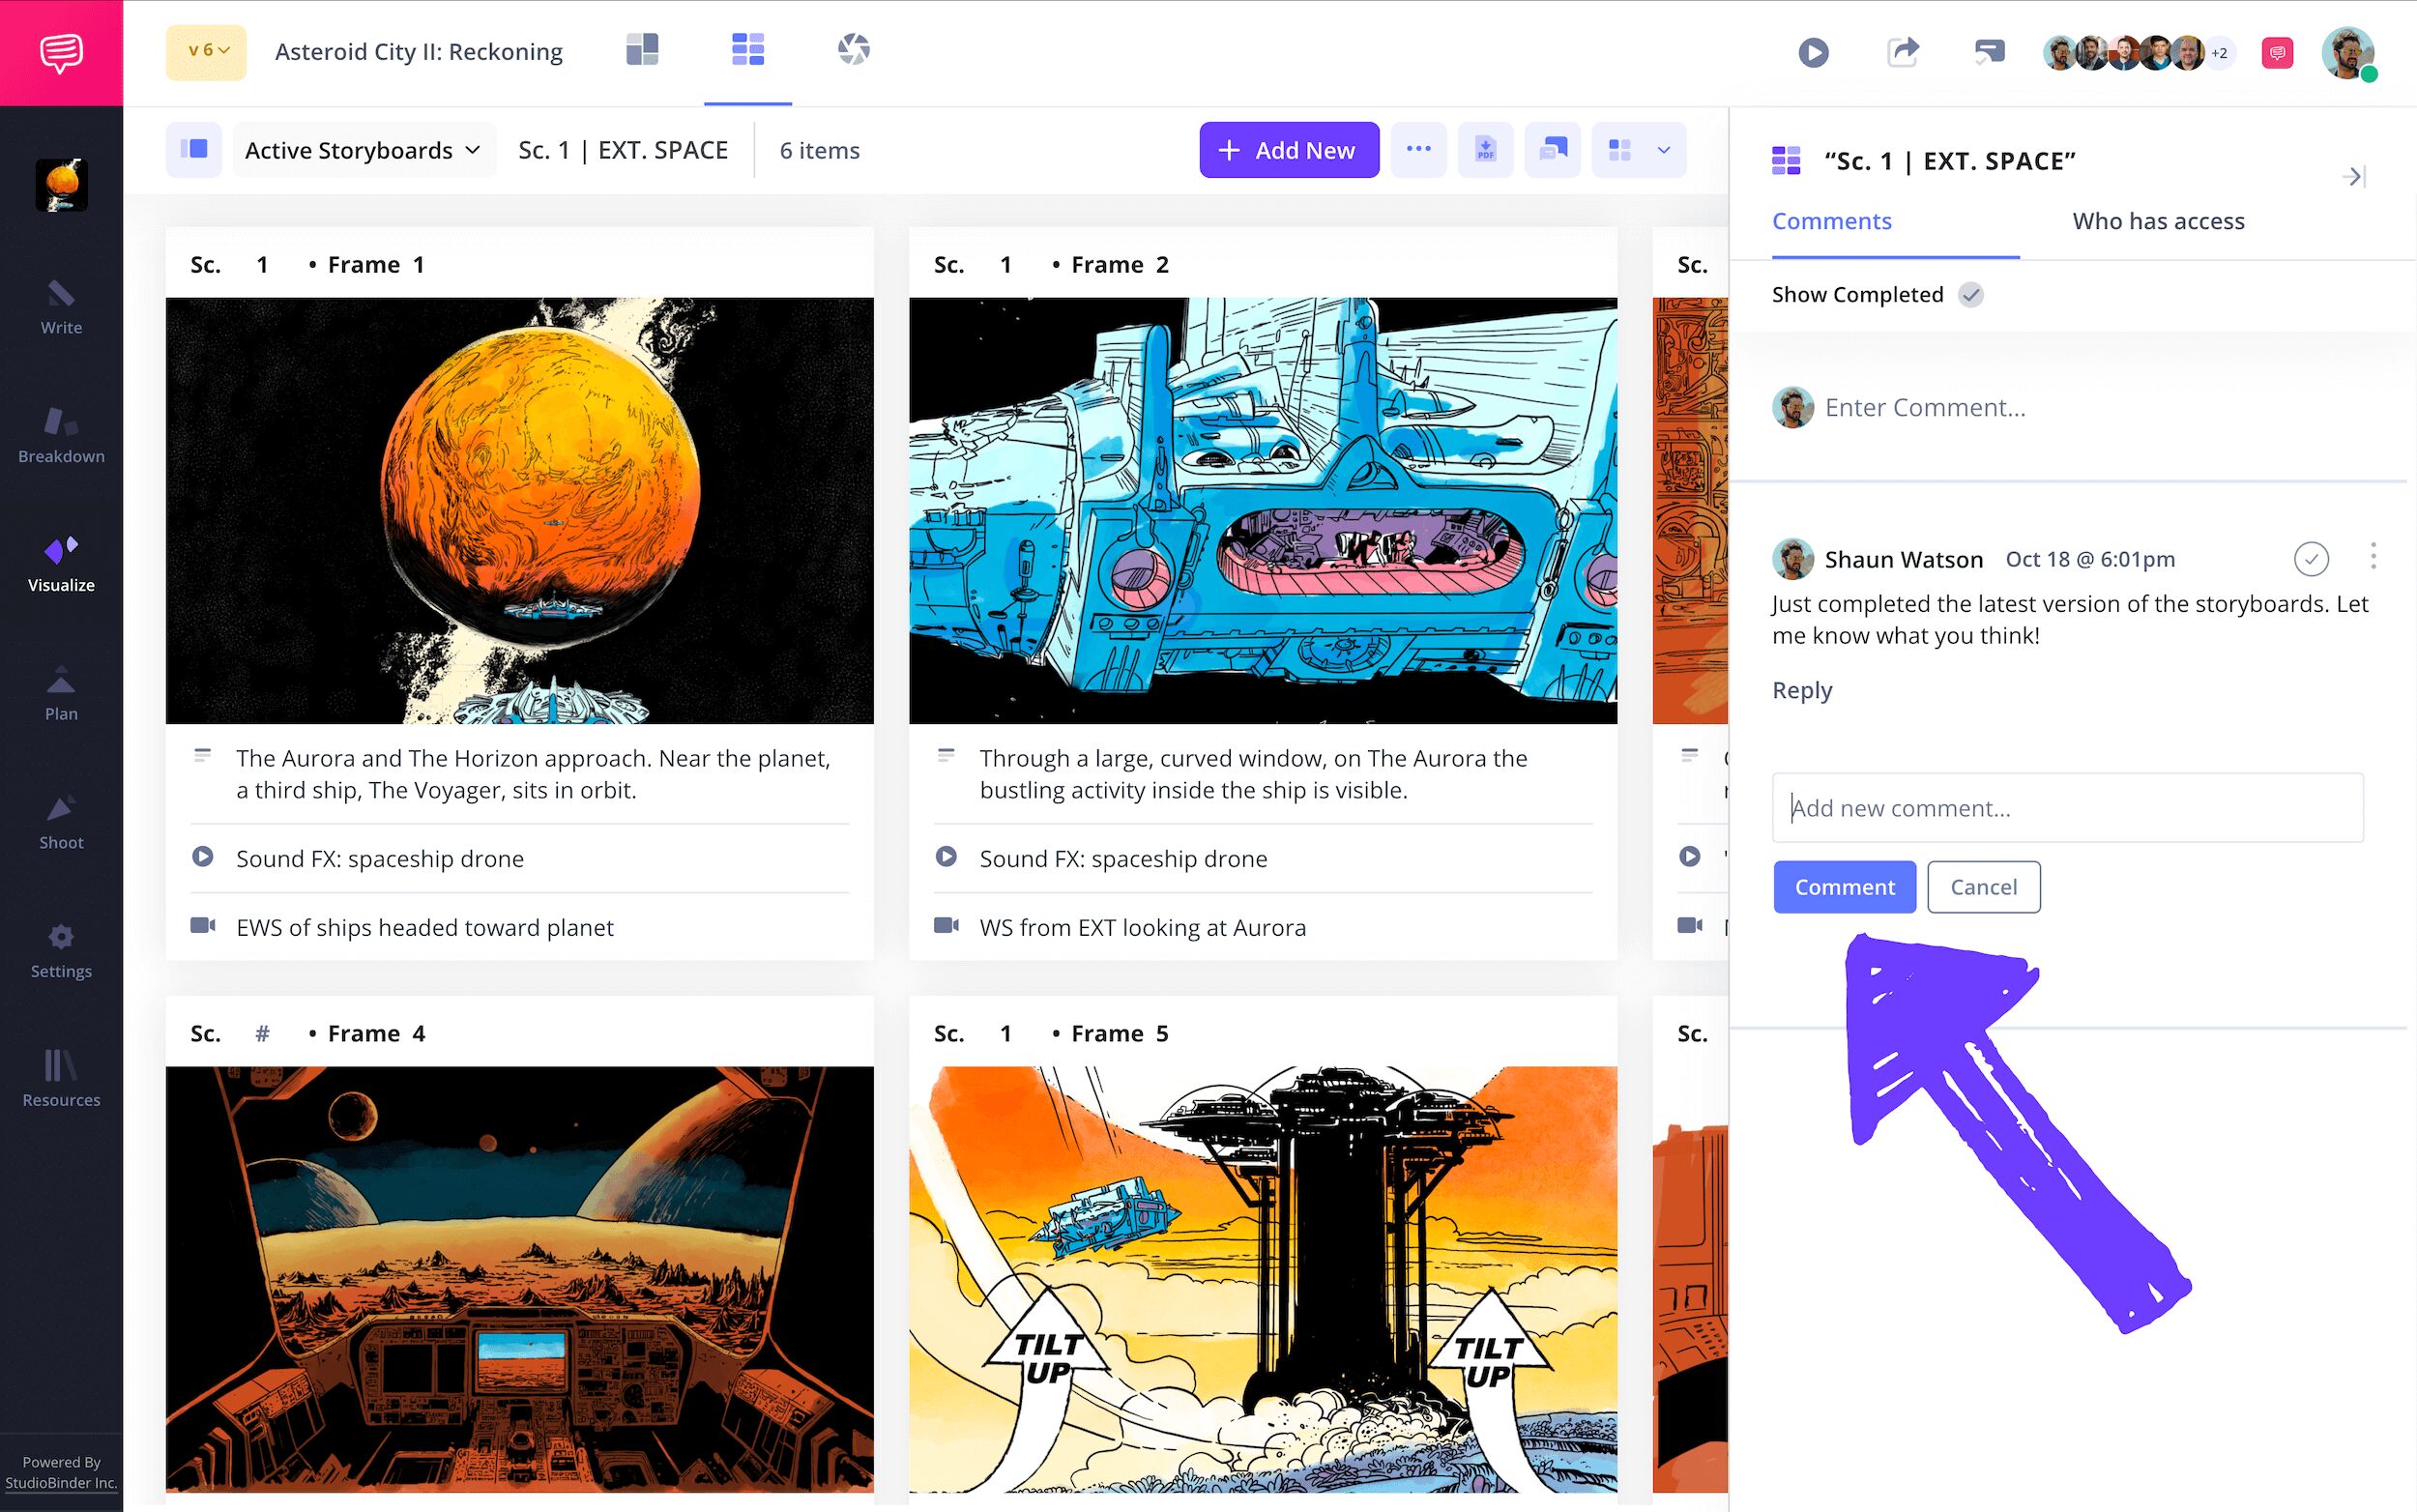
If your collaborator has commenter or editor access, they can utilize the comments sidebar for their notes throughout. You can then type your response and click the Comment button to reply.
Conclusion
That's a wrap!
Now that you’re finished running through all the steps, you’re more than ready to dive into building your movie storyboard template with confidence! Whatever your position in filmmaking, storyboards for movies are where the creative magic really starts to take shape, so have fun and bring that narrative vision to life now with StudioBinder.
Frequently Asked Questions
Your questions, answered
A movie storyboard template provides a series of square boxes laid out on a page with blank spaces for descriptions. The idea is that in pre-production, you can visually lay out with sketched images how each shot will look and the action that will unfold, frame by frame. This basically gives a filmmaking crew a guideline for how they will execute their vision while shooting the film on location.
A movie storyboard consists of a series of panels. Within those panels are illustrations or images of what the visual information of a frame in a film will look like. Oftentimes there will also be descriptions under each panel, further fleshing out what each shot will consist of. The storyboard can then be read from left to right like a comic book. Overall, this acts as a visual guide to what will eventually be shot and put to screen.
When it comes to planning out a storyboard for a movie, you must first have a detailed script ready to be put into production. From there a general guideline for storyboarding a movie would be:
- Lay out blank panels
- Under each panel, include shot descriptions
- Create and apply illustration in each panel
- Include arrows to imply action
- Share your storyboard with your team
- Edit based on input
- Print your storyboard
There’s no part of a movie storyboard that isn’t important, every detail counts. However, arguably the most important detail when crafting a movie storyboard is correctly indicating action. Most people assume it’s having well-drawn illustrations, but even stick figures will get the point across if you have thoughtfully placed arrows throughout showing where the camera, characters and environment is moving.
Storyboarding isn’t necessarily a requirement when it comes to making a film, but it’s a significantly helpful tool that really smooths out the production processes. Particularly if you’re making a low budget film, storyboarding can be helpful in reducing budget and time, because it essentially creates a guideline for how you will most efficiently execute each shot when filming.
