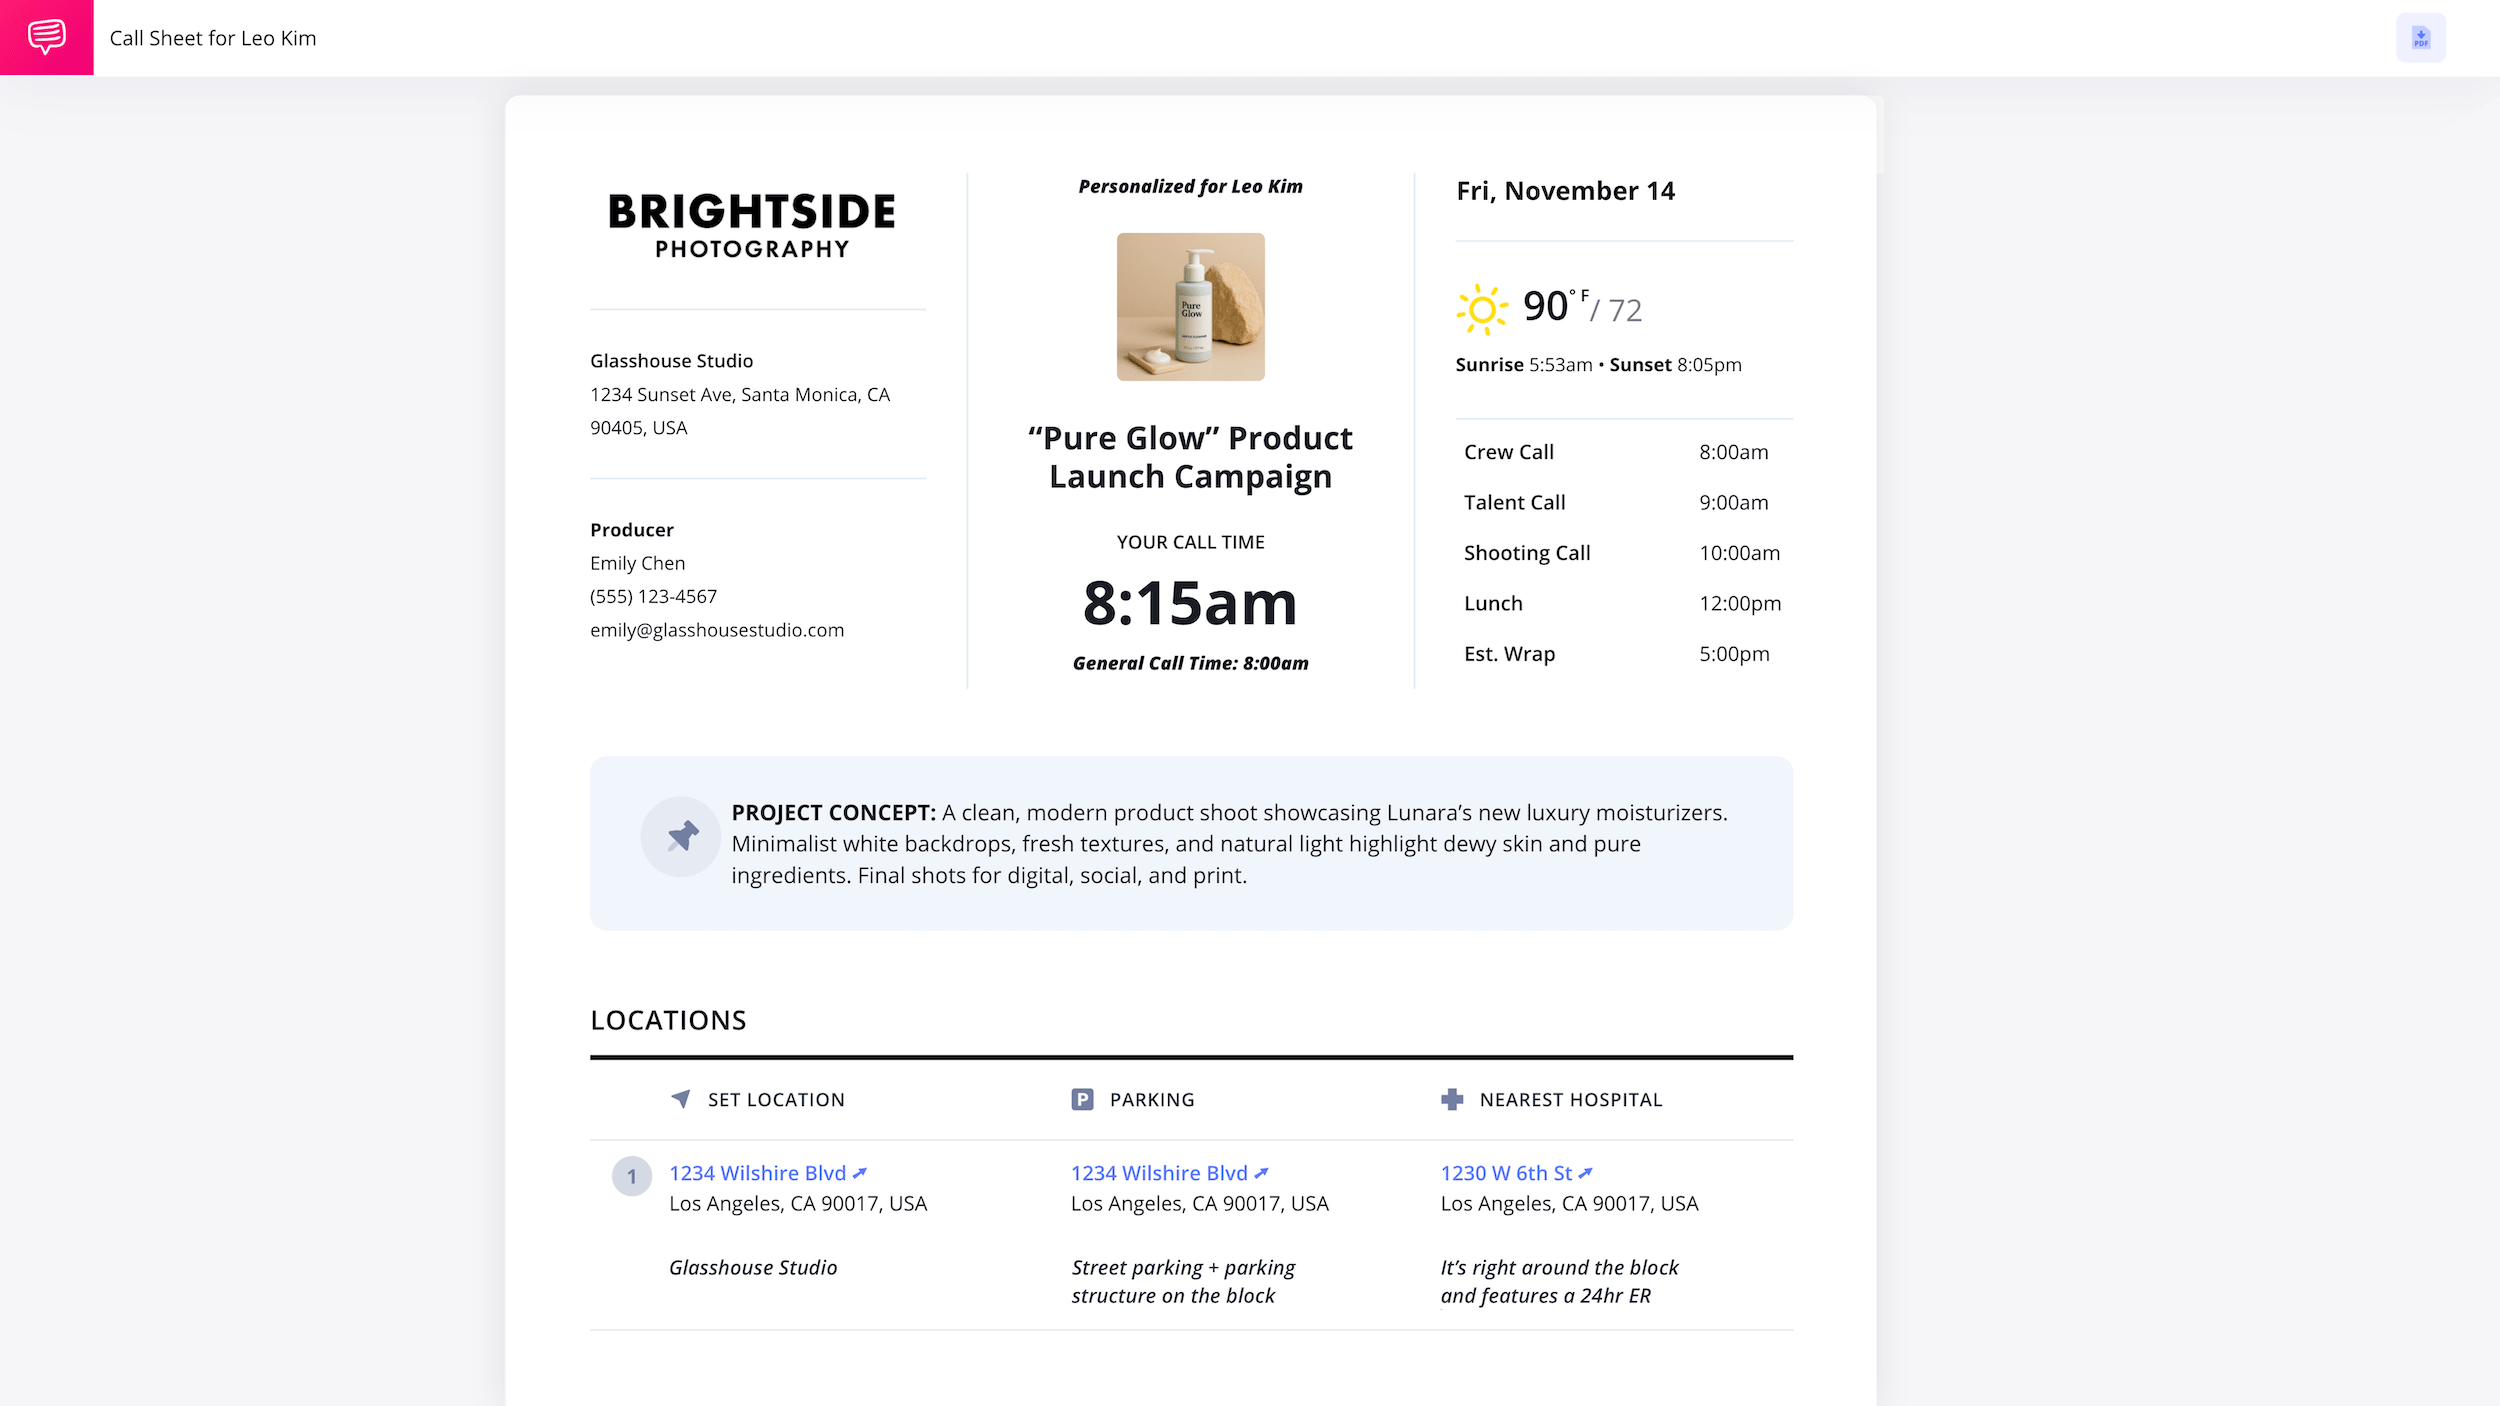
Photoshoot Call Sheet Template
What is a call sheet in photography?
A photography call sheet is a vital production document that covers key details of a photoshoot so everyone stays aligned and comes fully prepared to set.
At a minimum, a photoshoot call sheet must should include the date, call time, location, schedule, models, and crew. Many photographers may attach additional resources like shot lists, mood boards, model release forms, etc.
In this step-by-step guide, we'll break down each essential section of a call sheet using StudioBinder’s call sheet software.
1. Set your date and call time
In StudioBinder, we have already laid out the call sheet template designs so you don't lose time adjusting spreadsheet layouts or completely designing it from scratch in Excel or Word.
A call sheet is not a call sheet without a general crew call time. This is when all cast and crew are expected to be on set, unless otherwise noted.
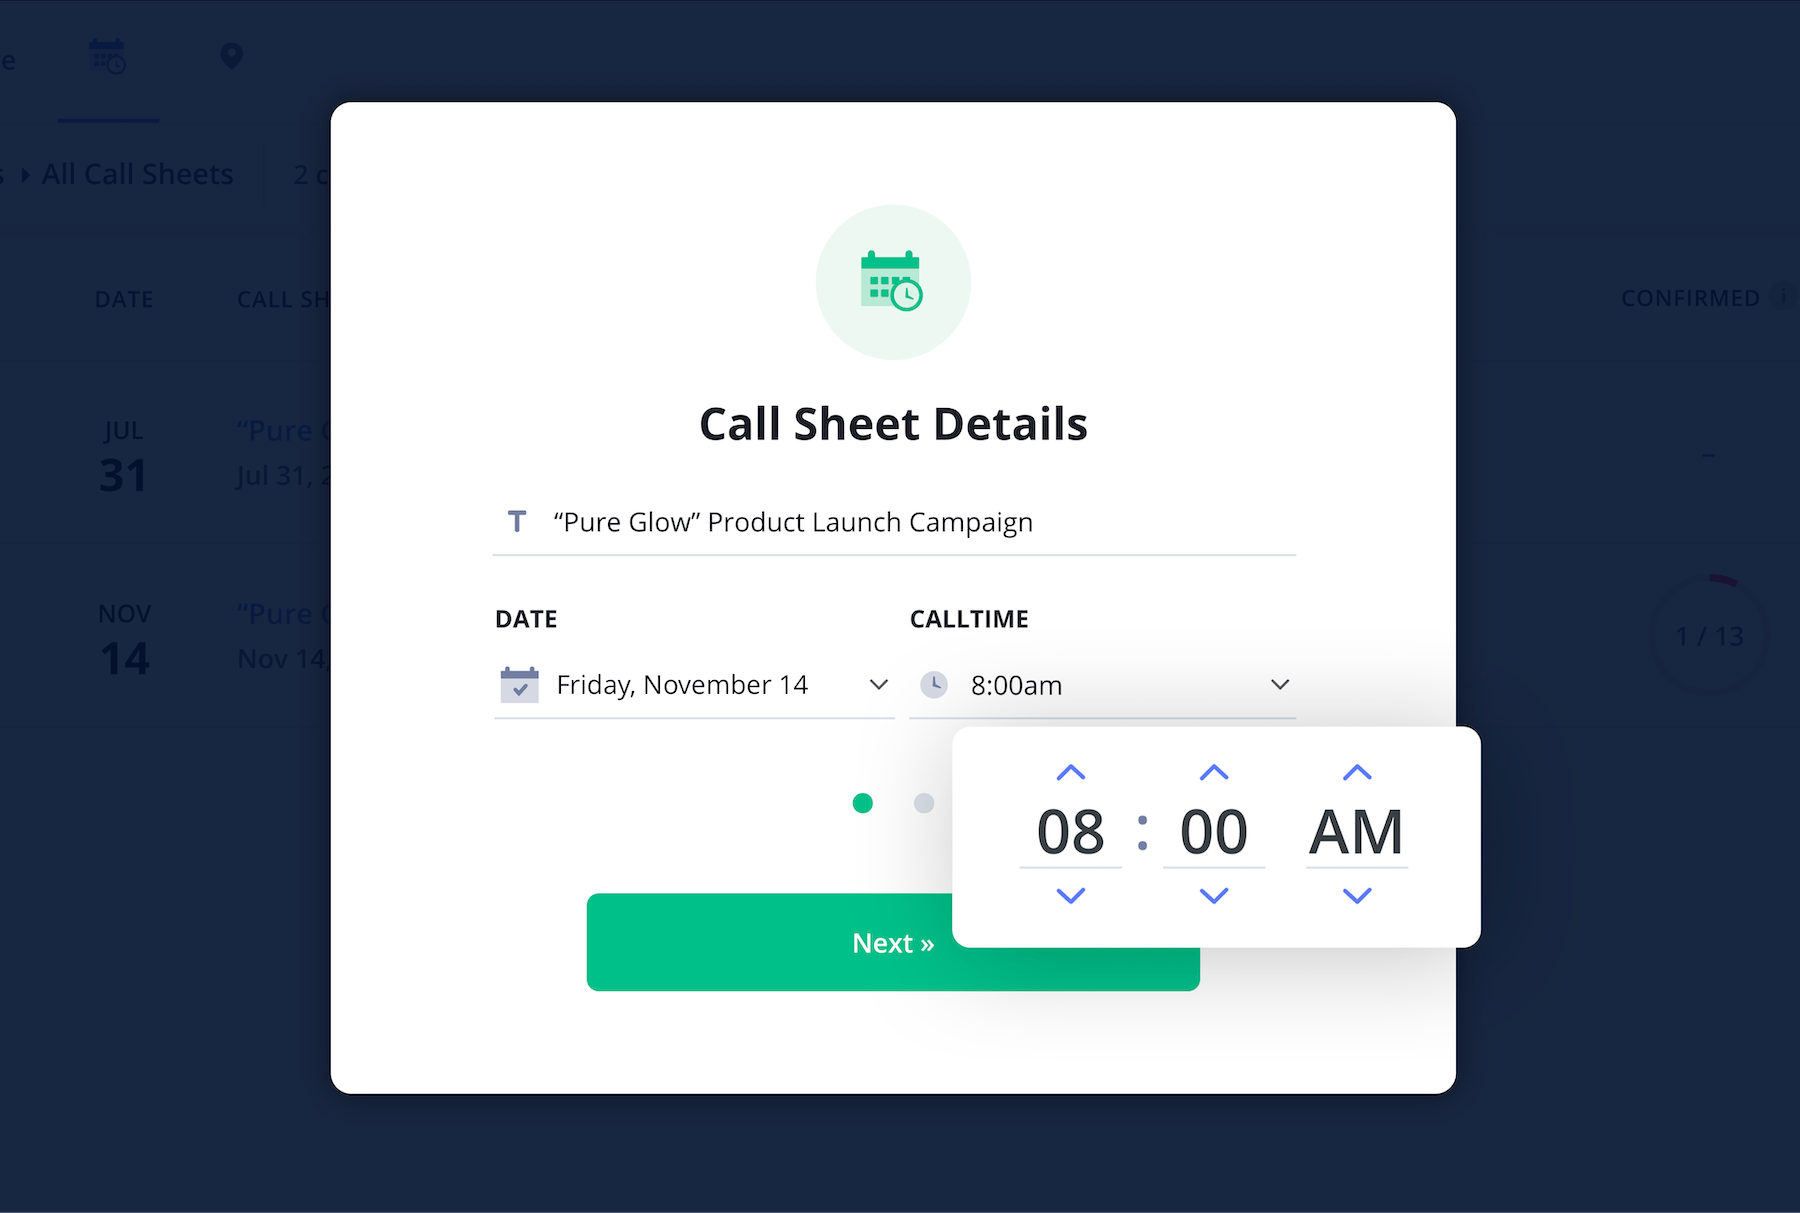
Once you add a date and call time as seen above, a new call sheet photoshoot template will be generated. After it's been created, you can begin customizing the call sheet for your photoshoot.
2. Add header details
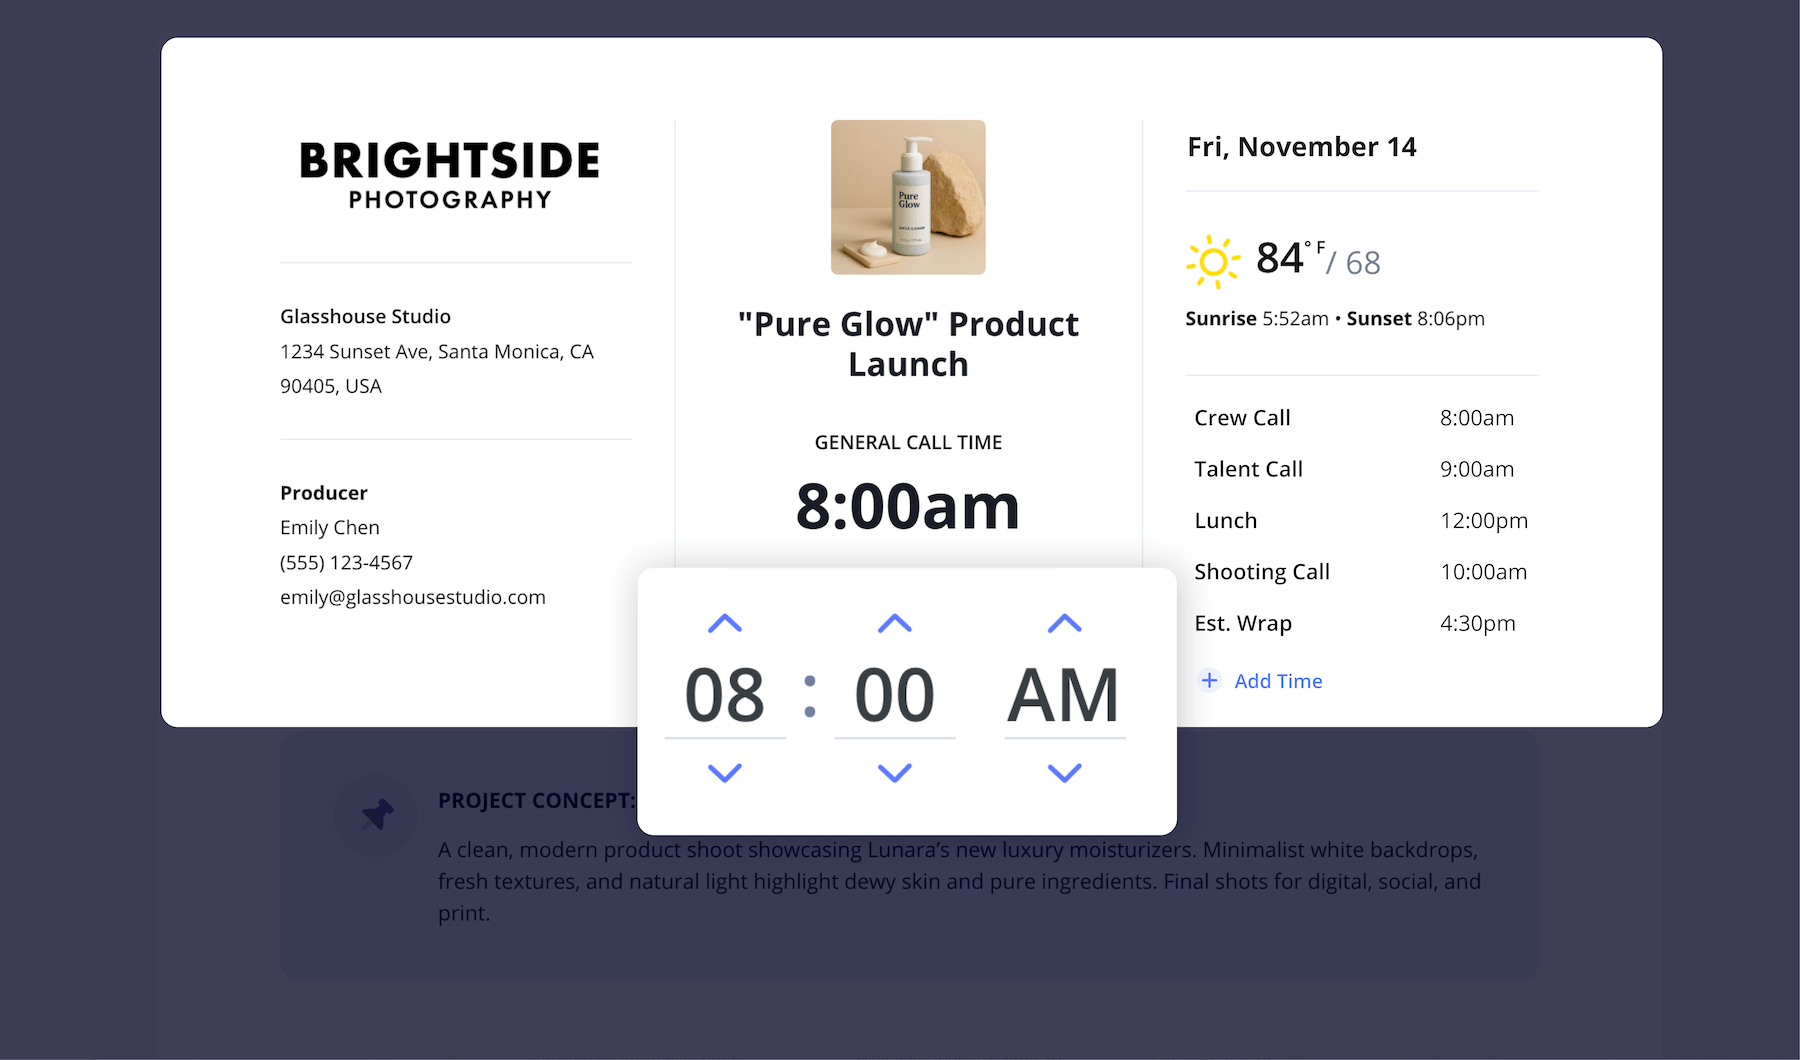
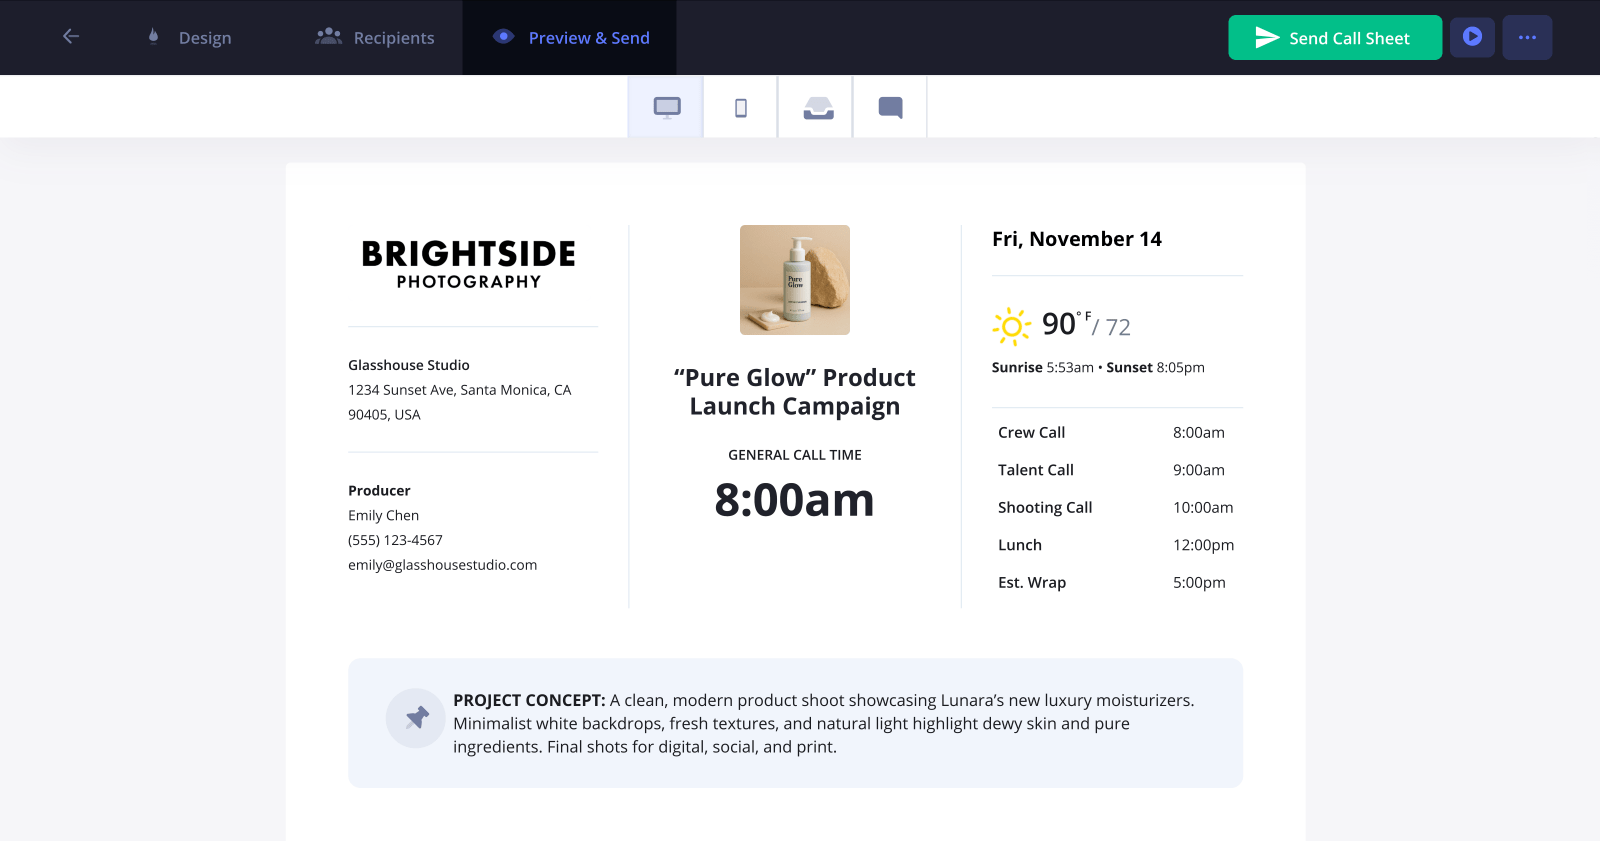
The top portion, or header section, of a photography call sheet displays key production details at a glance, such as the production title, photo studio or production company name, date, call time, and contact information for key team members like producers or assistants.
A helpful photo call sheet template will also include weather forecast details so that models and crew members can dress appropriately. It also informs the camera department on lighting conditions (e.g. sunset).
Lastly, including a mini-schedule, or daily agenda in the header area, provides a informative snapshot of what everyone can expect for the day, including meal times and estimated wrap.
3. Add your project concept
When planning a photoshoot, it's important to get clients, talent and your crew aligned on the overall vision for the photoshoot. Often call sheets have a section for "Special Instructions" near the header. For a photography call sheet, this section is an opportunity to explain the goal of the shoot, the intended style, theme, or where the final images will be published or delivered.
In StudioBinder, enable the Bulletin block via the sidebar to the left, and reorder as needed. After that, simply write out the project concept.
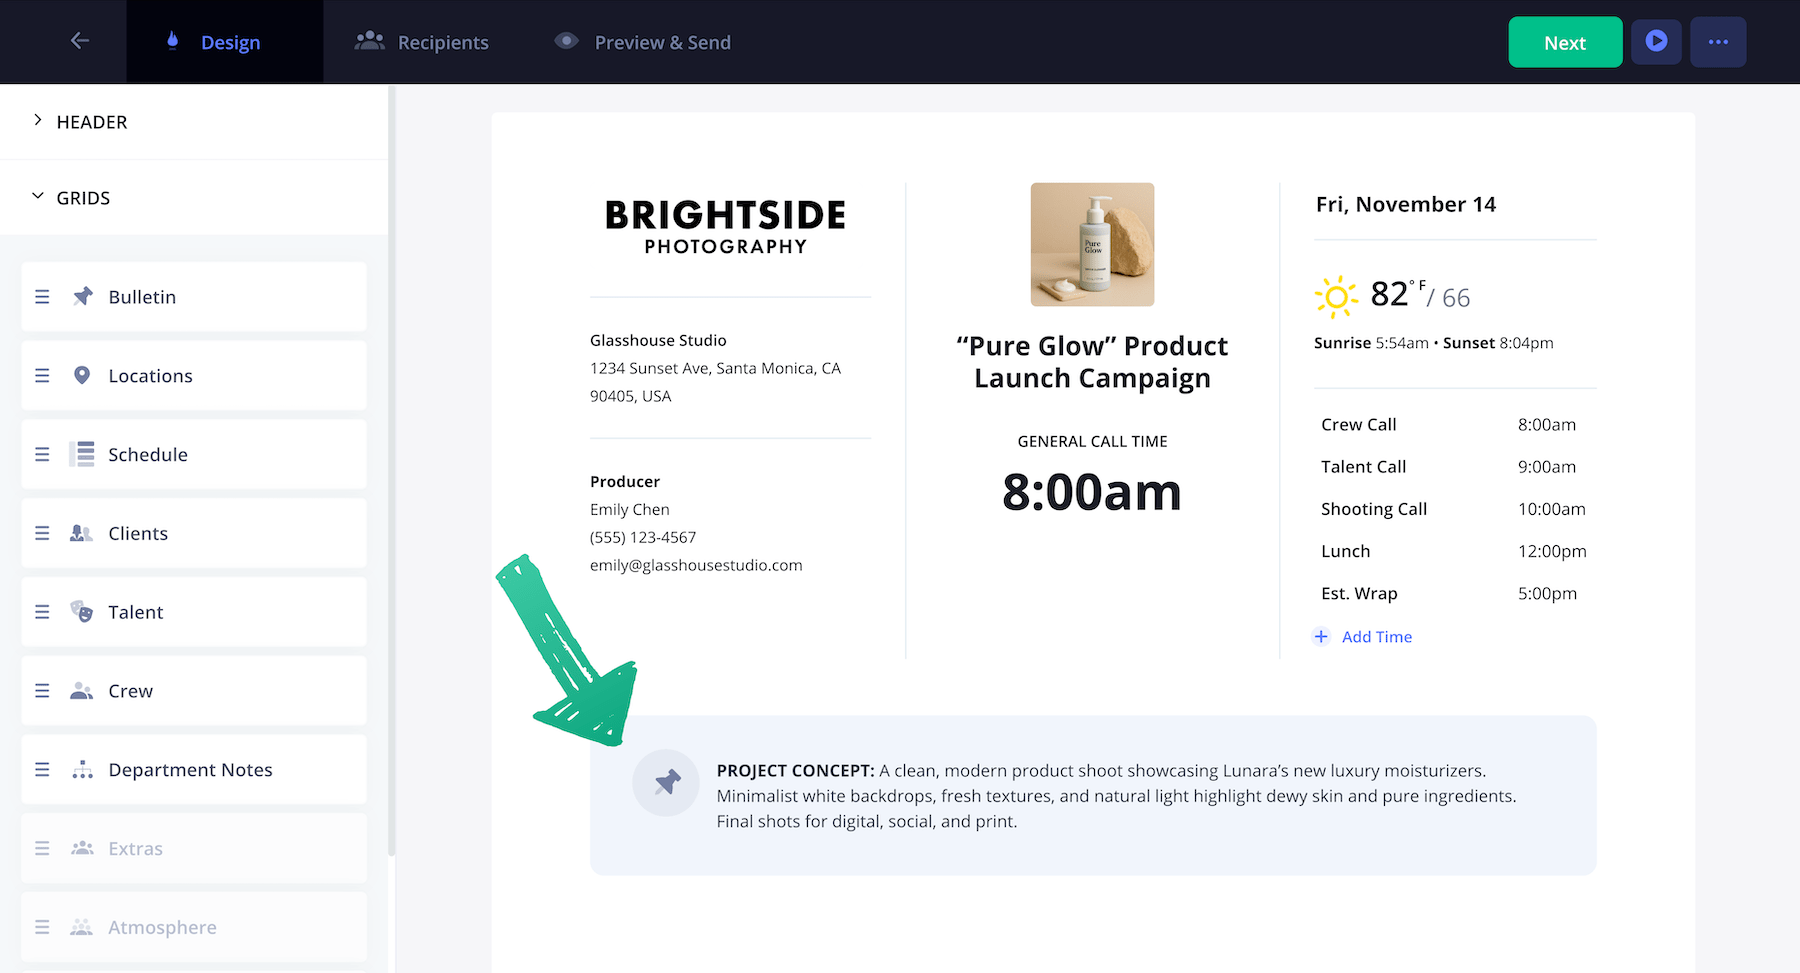
Here is a closer example of what a project concept:

4. Enter location details
After the call time, the location is the second most important aspect of any call sheet, informing models, clients, and crew where the photoshoot will be held, as well as any pertinent parking information.
Location details typically include:
- Location Name (e.g. business name)
- Location Address
- Location details such as an on-site contact person
- Parking details (especially if parking is different from the shoot location)
- Nearest hospital with an emergency room
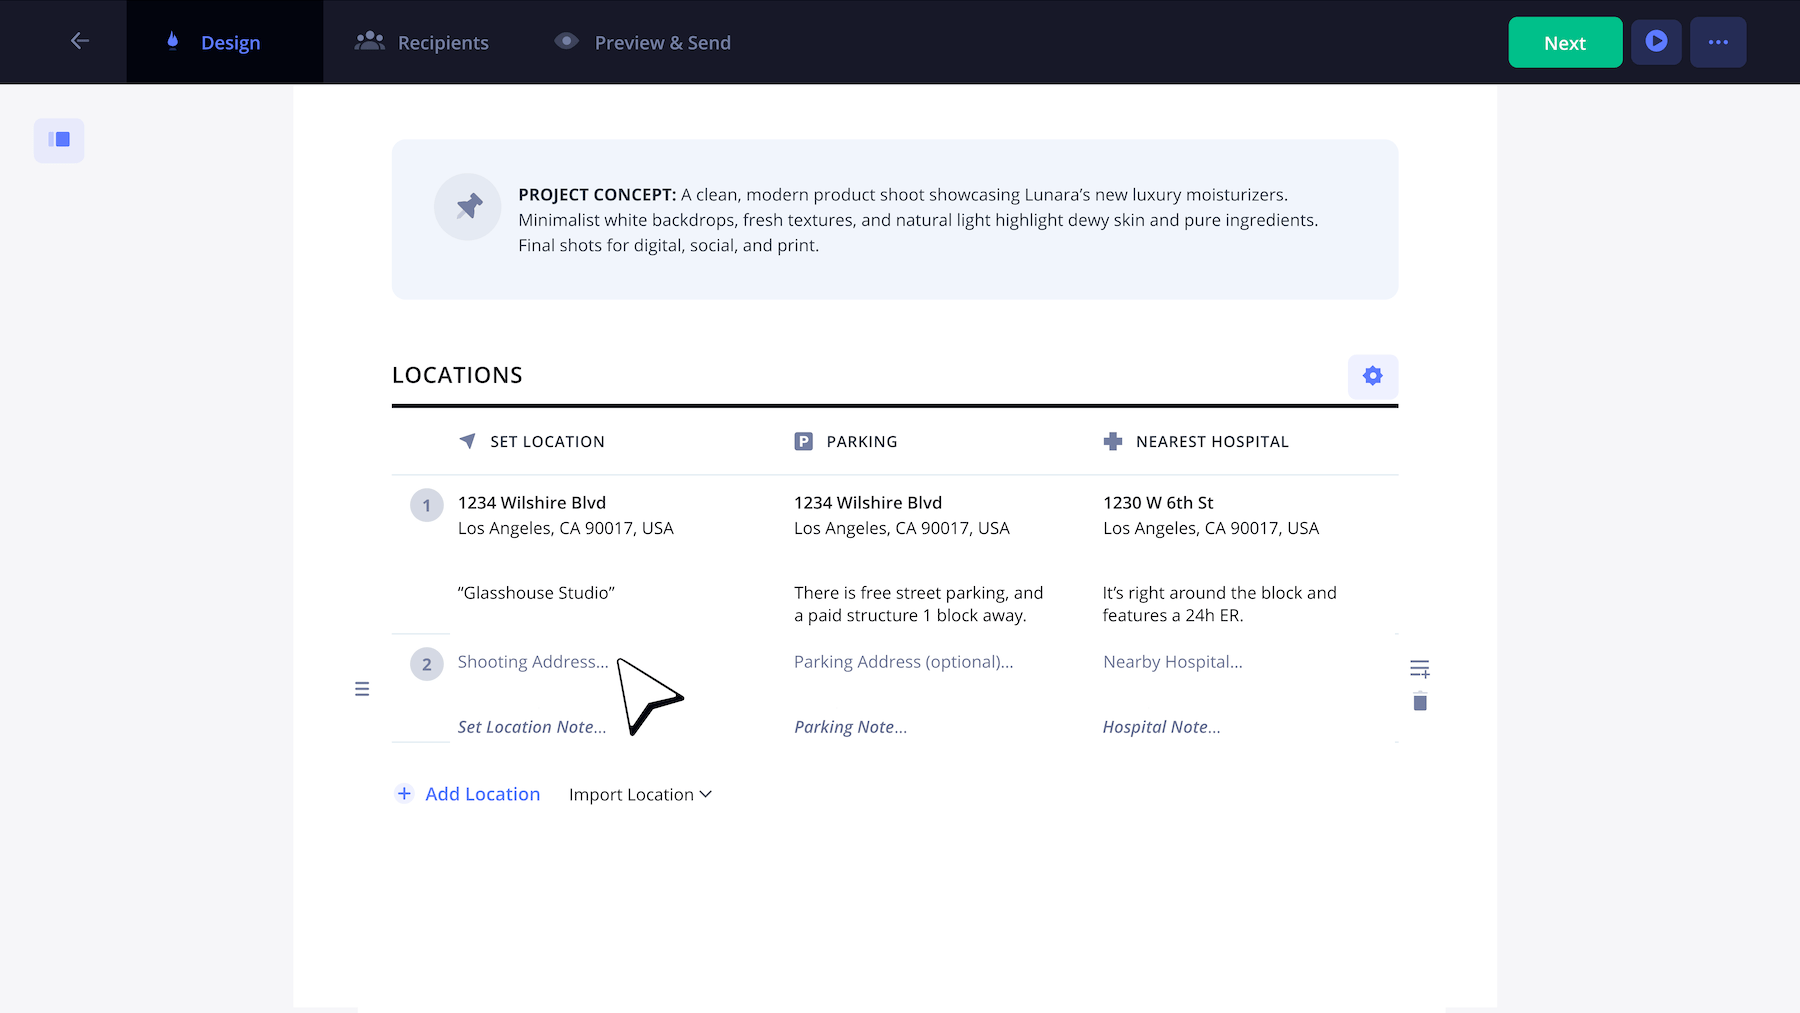
If you're shooting after hours, it's important to confirm the nearest hospital has a 24-hour emergency room.
5. Set the shooting schedule
Depending on the scope of your photoshoot, you may want to include a detailed shooting schedule for the shoot day. Identify the start time and descriptions. Here is an example of a schedule for a photoshoot may look like:
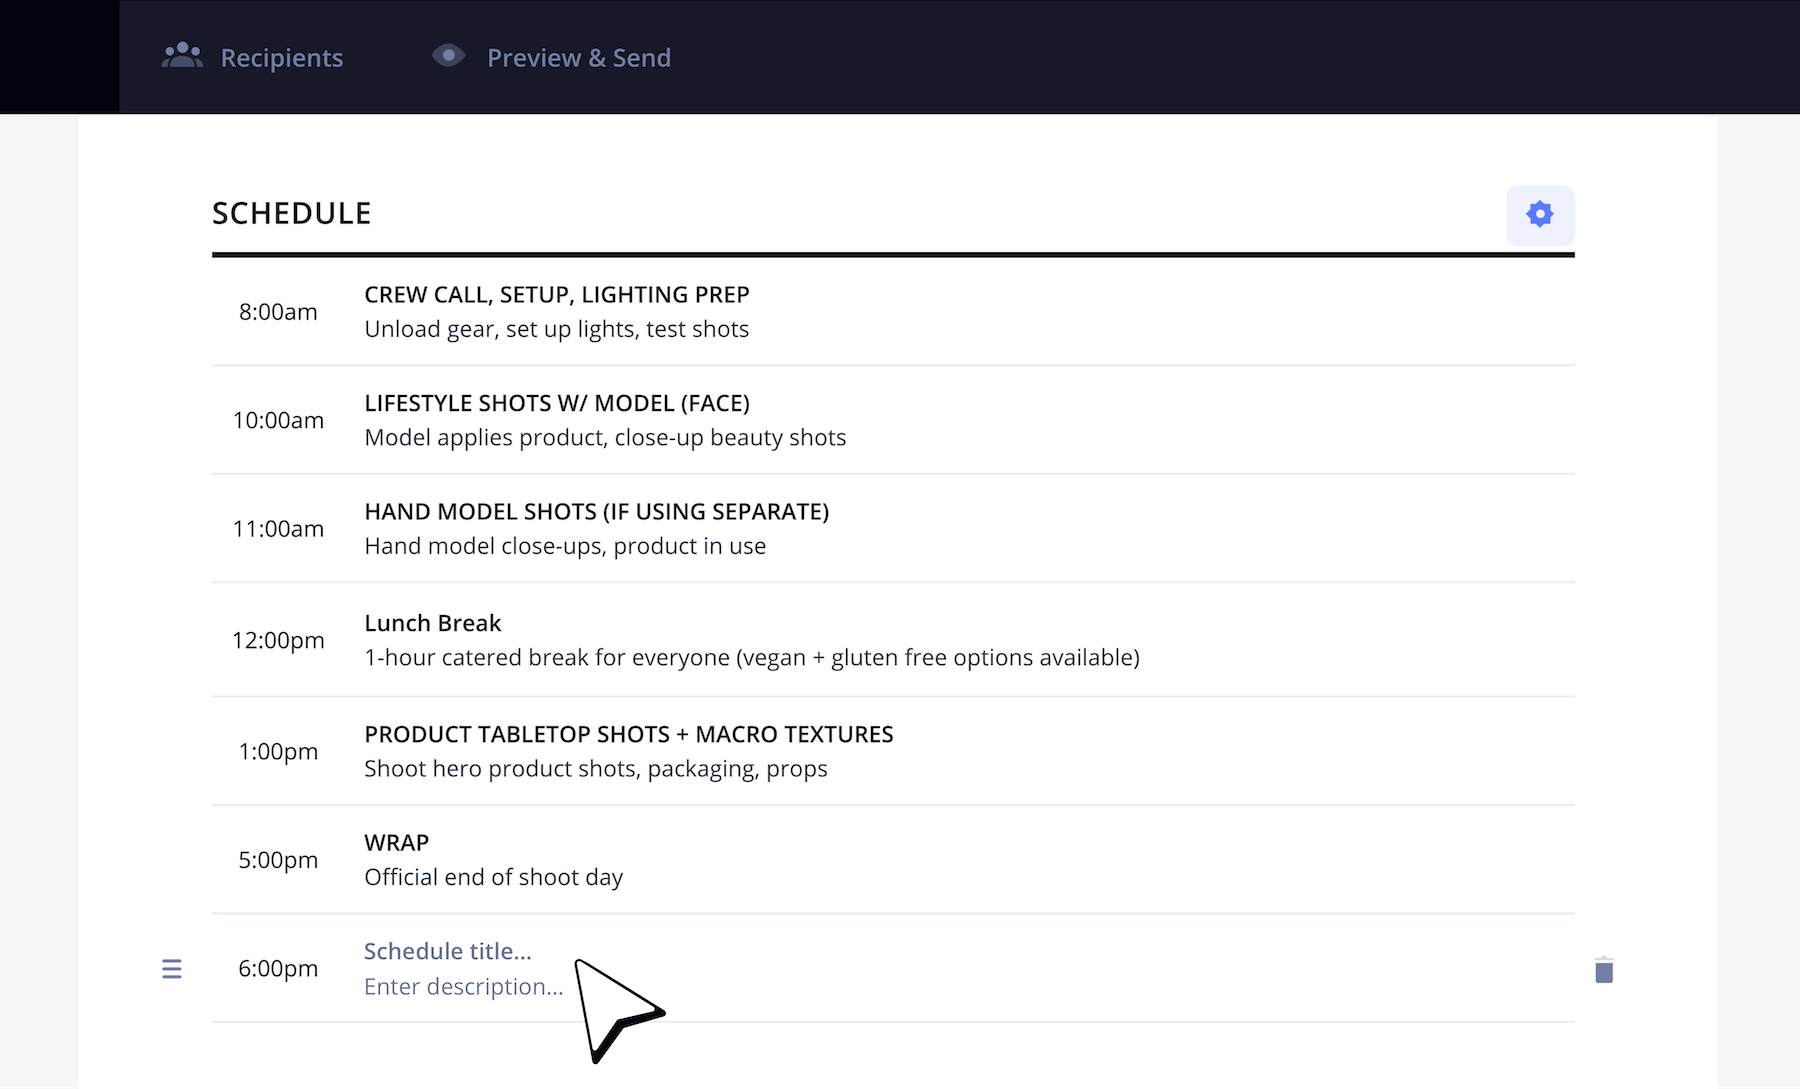
A few things you can consider adding to your schedule:
- Call times
- Prep times
- Camera setups
- Break times
- Company moves
- Estimated durations for each line item
6. Add your clients, talent and crew
Next, a call sheet will list out the recipients of the call sheet. This includes clients, models, and crew members. It's common to list the clients and models near the top of the callsheet. Models may have multiple call times listed — for example, a call time to arrive, a calltime for Hair and Makeup, and a call time to report to set.
Clients, on the other hand, may not have a call time and designated as N/C (no call) or O/C (on call). They will still receive the call sheet and be kept in the loop.
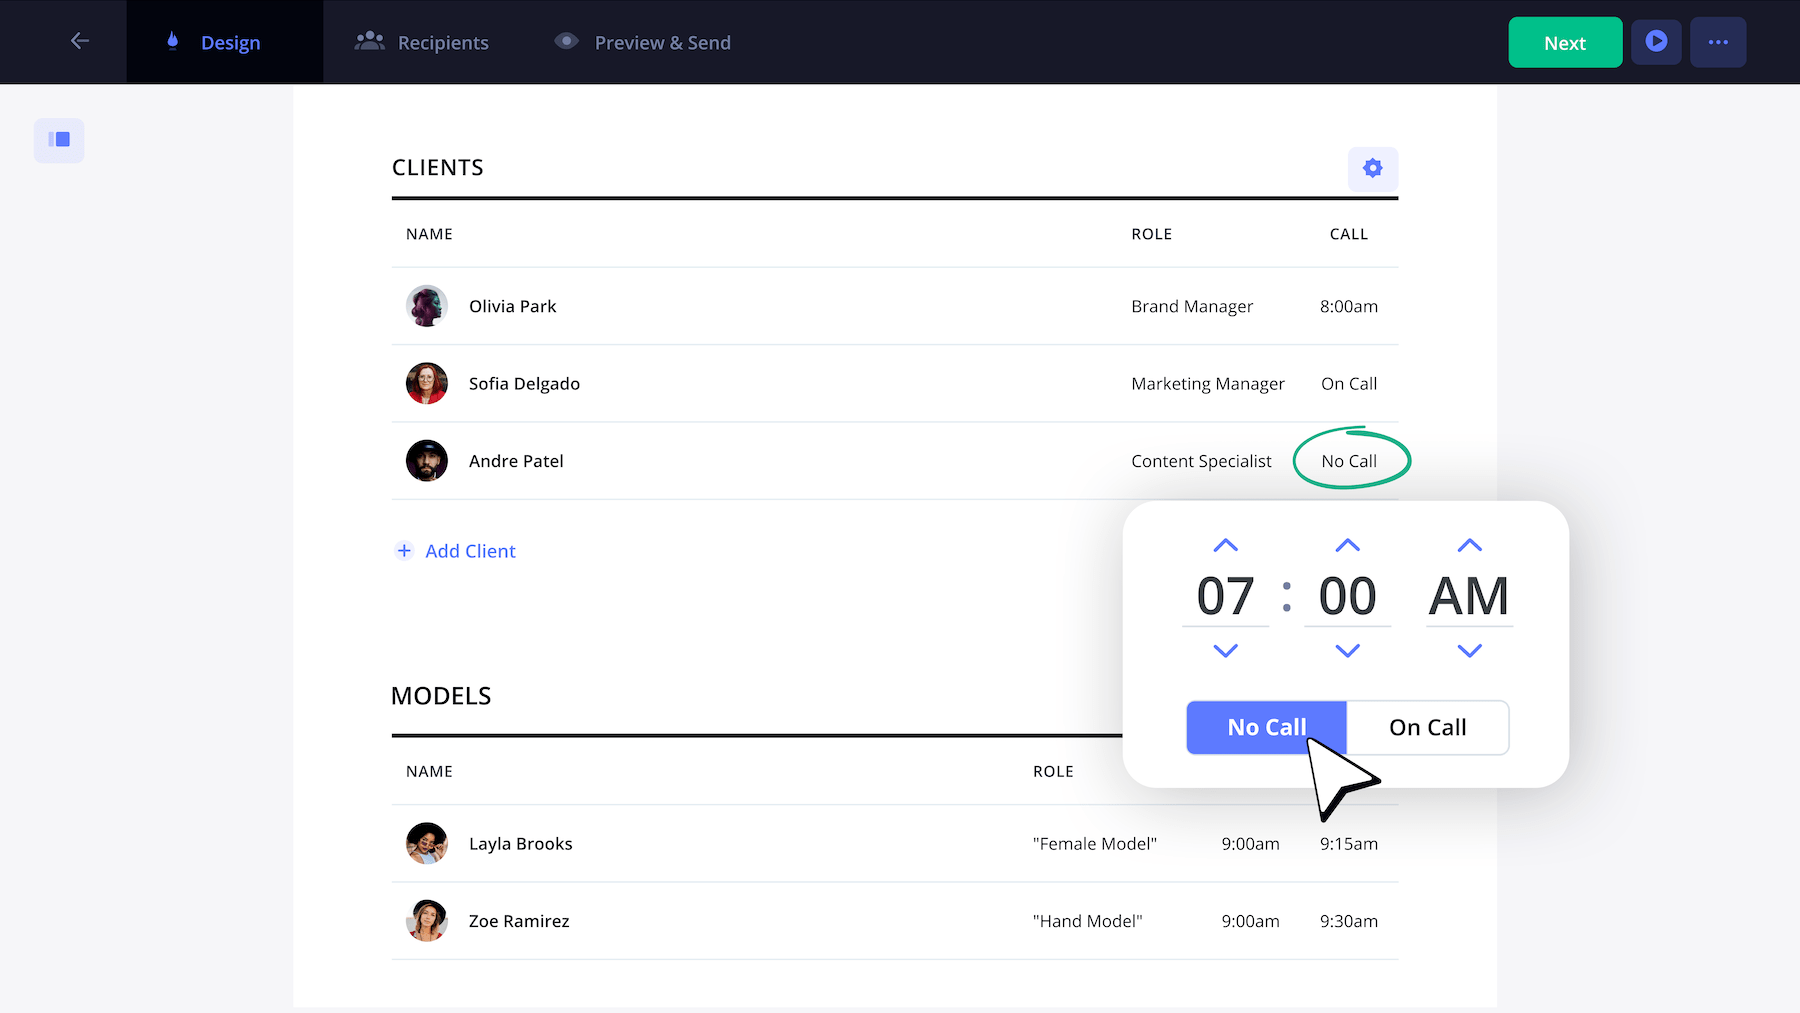
When it comes to your models, you can customize their individual call times or what time you'll want to get them ready for Hair & Makeup (H/MU).
For example, in the call sheet below, we tailored our hand model to get ready for H/MU 15-minutes after our main model because we would actually need less time for her.
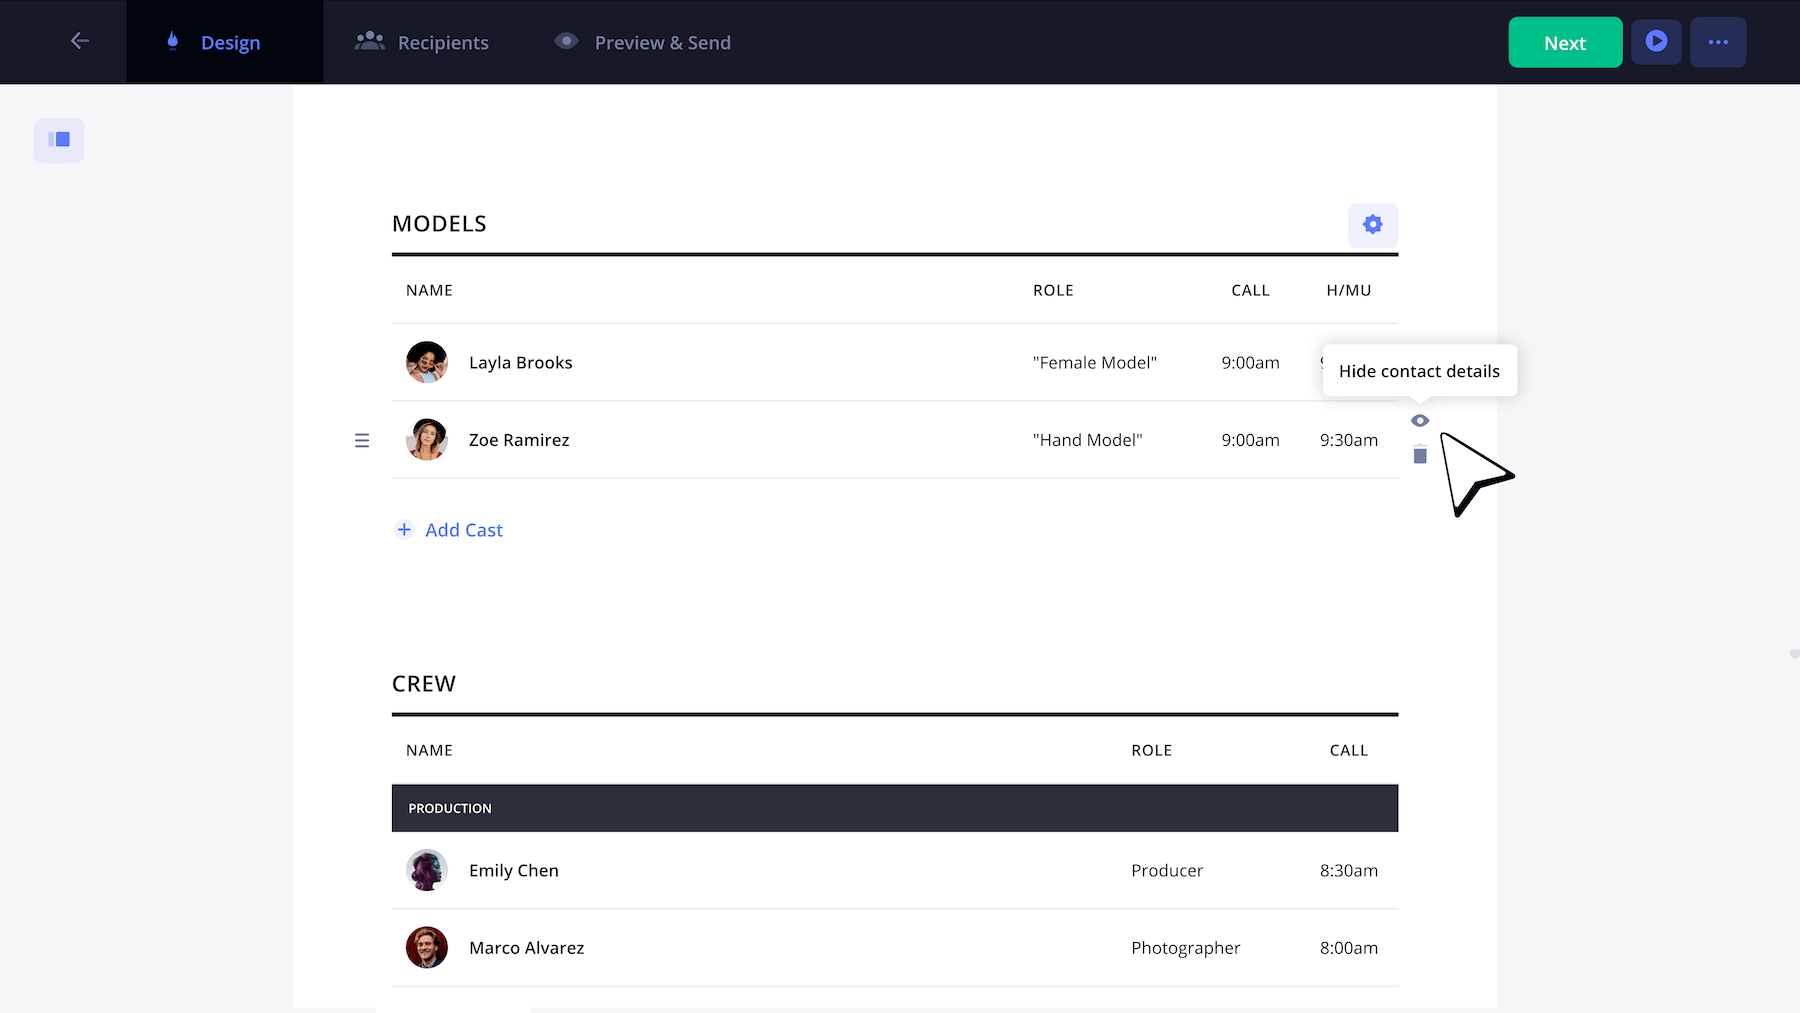
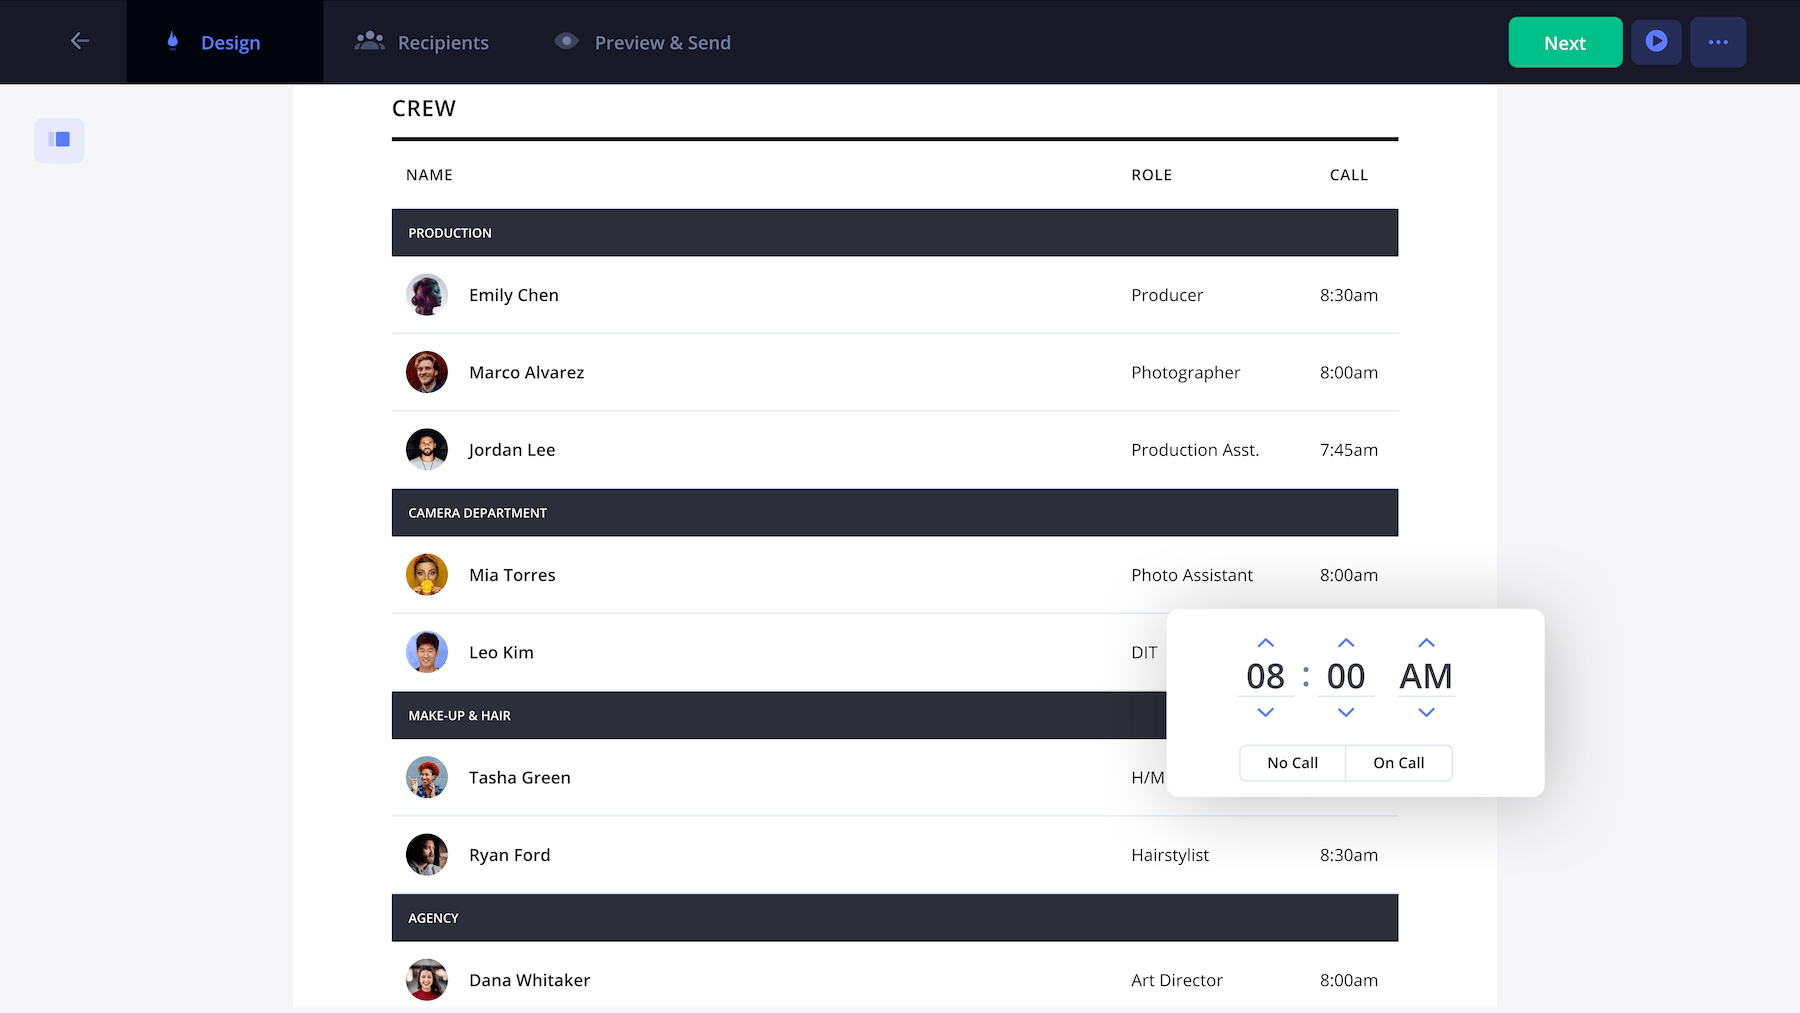
The crew list (with names and positions) are generally found somewhere below the client and talent grids. Most crew members will have the same general call time, but StudioBinder provides a simple way to make adjustments. So if you need your production assistant (P.A.) or photo assistant on set prior to other crew members, you can do that here:
7. Add department notes
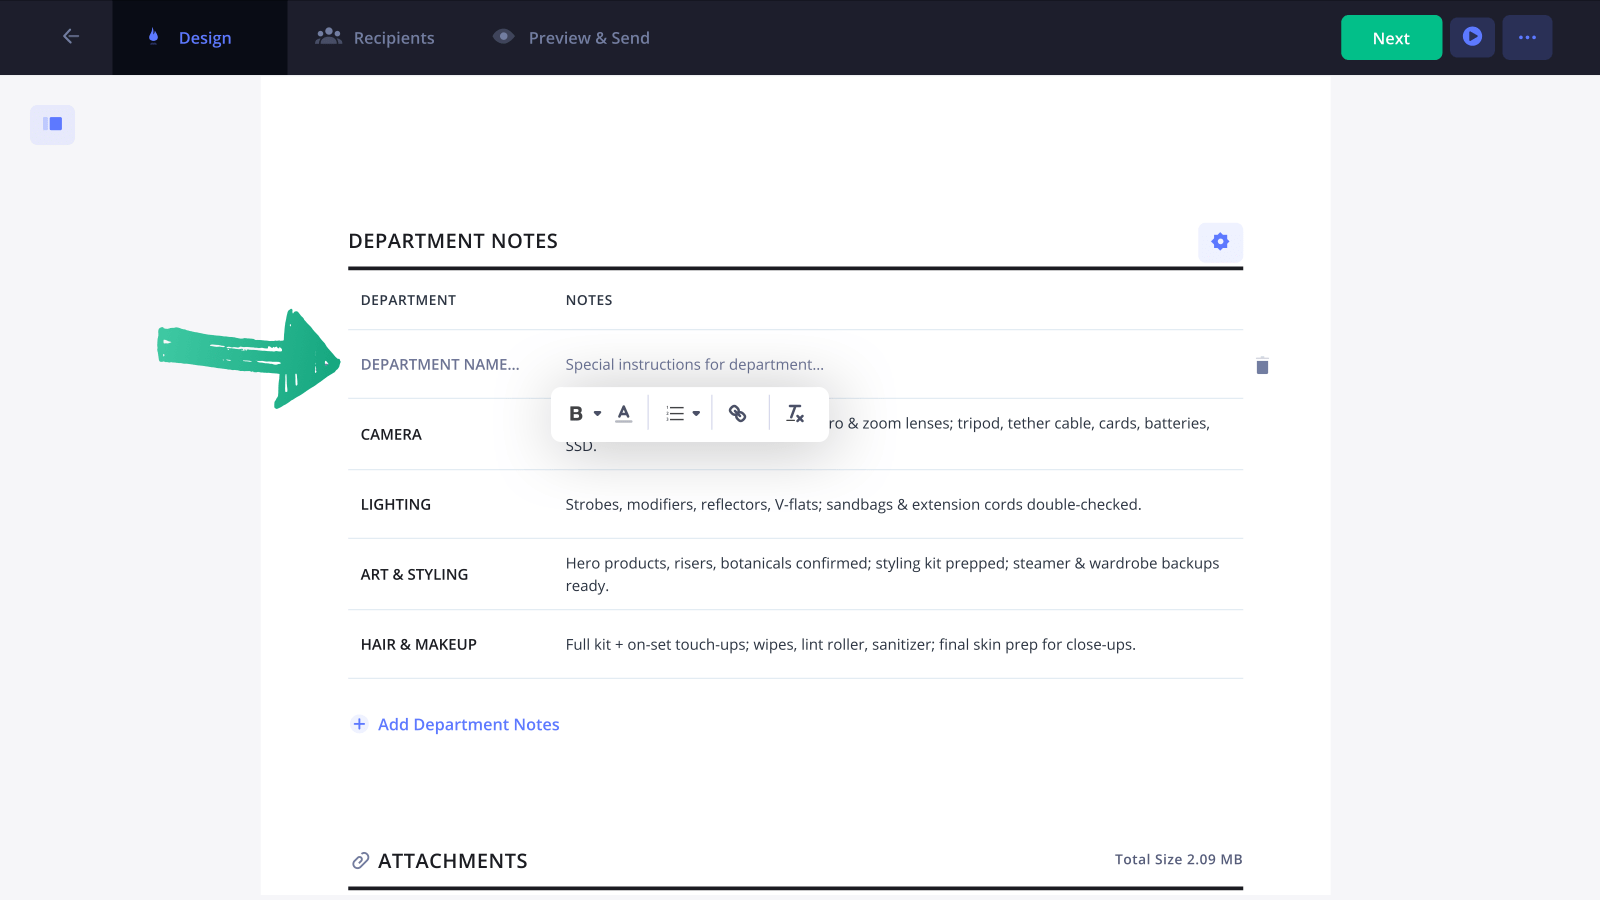
Use this section to include department-specific notes such as props, stylist, set design, wardrobe, makeup, camera equipment and more. Different types of photography will entail unique requirements for different departments, so these production notes help keep crew in key departments in the loop.
8. Upload email attachments
In addition to providing a call sheet template for photoshoots, StudioBinder allows you to upload email attachments for recipients. This could be visual references such as shot lists, mood boards or parking maps, expanded camera gear lists, creative briefs and even model release forms to be filled out in advance.
Lastly, if you have general details, inquiry contacts, or disclaimers, the footer is a great place to note them.
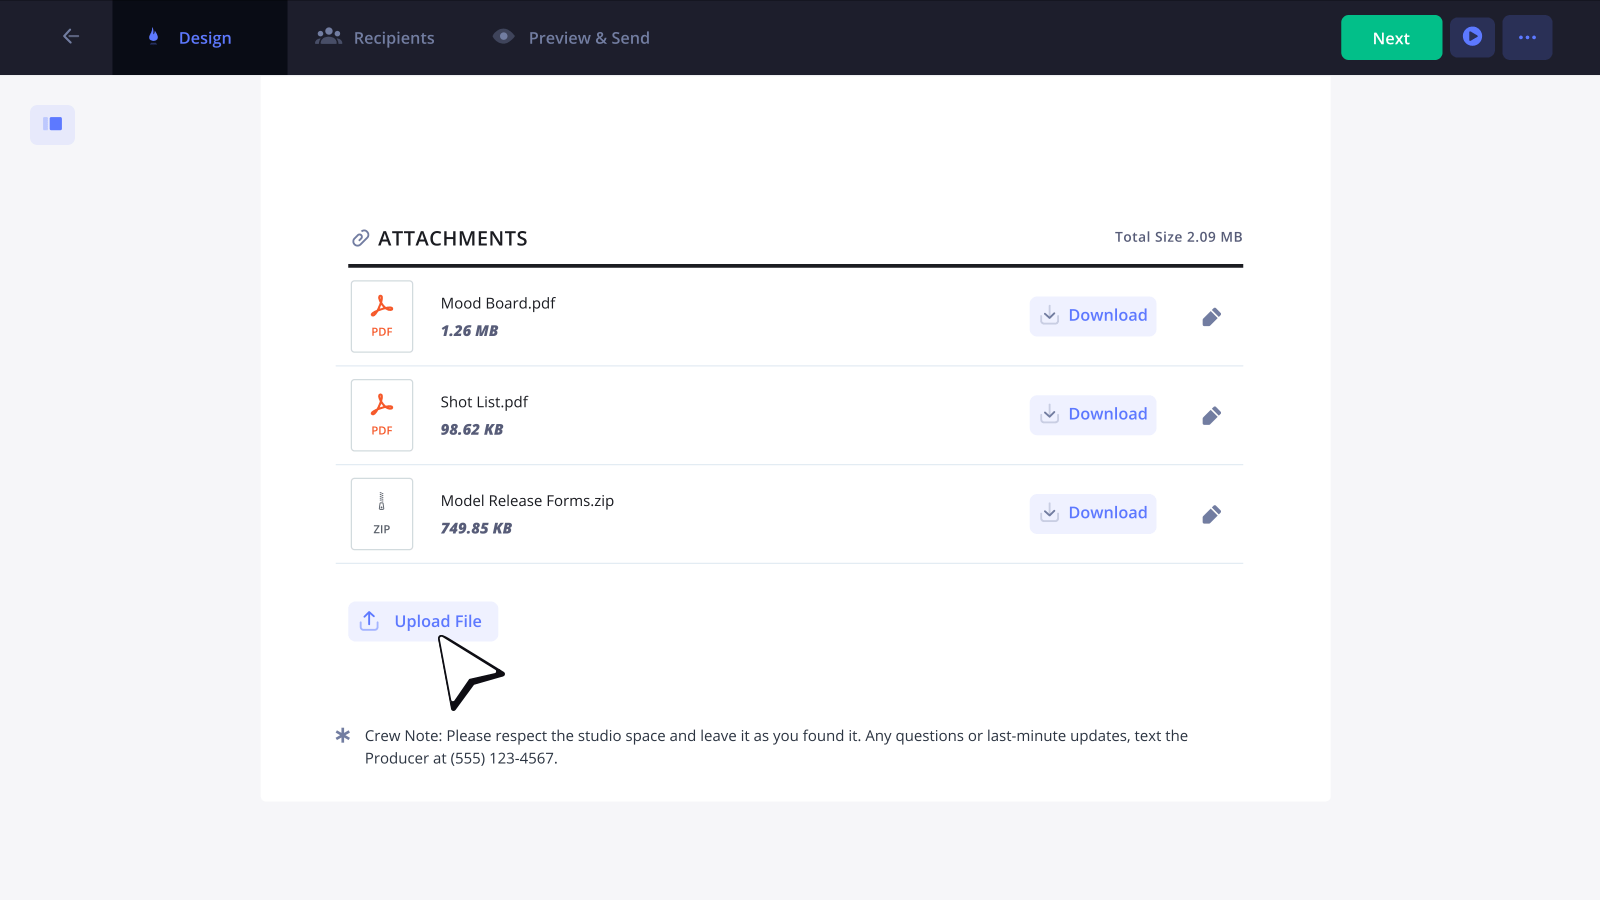
Whether it’s a photoshoot or video shoot, attaching a photography shot list can be helpful for the video team. Having a printed shot list on hand lets you check off shots as you go — so you know exactly what you’ve captured and what’s still left to get.
9. Write private messages to crew
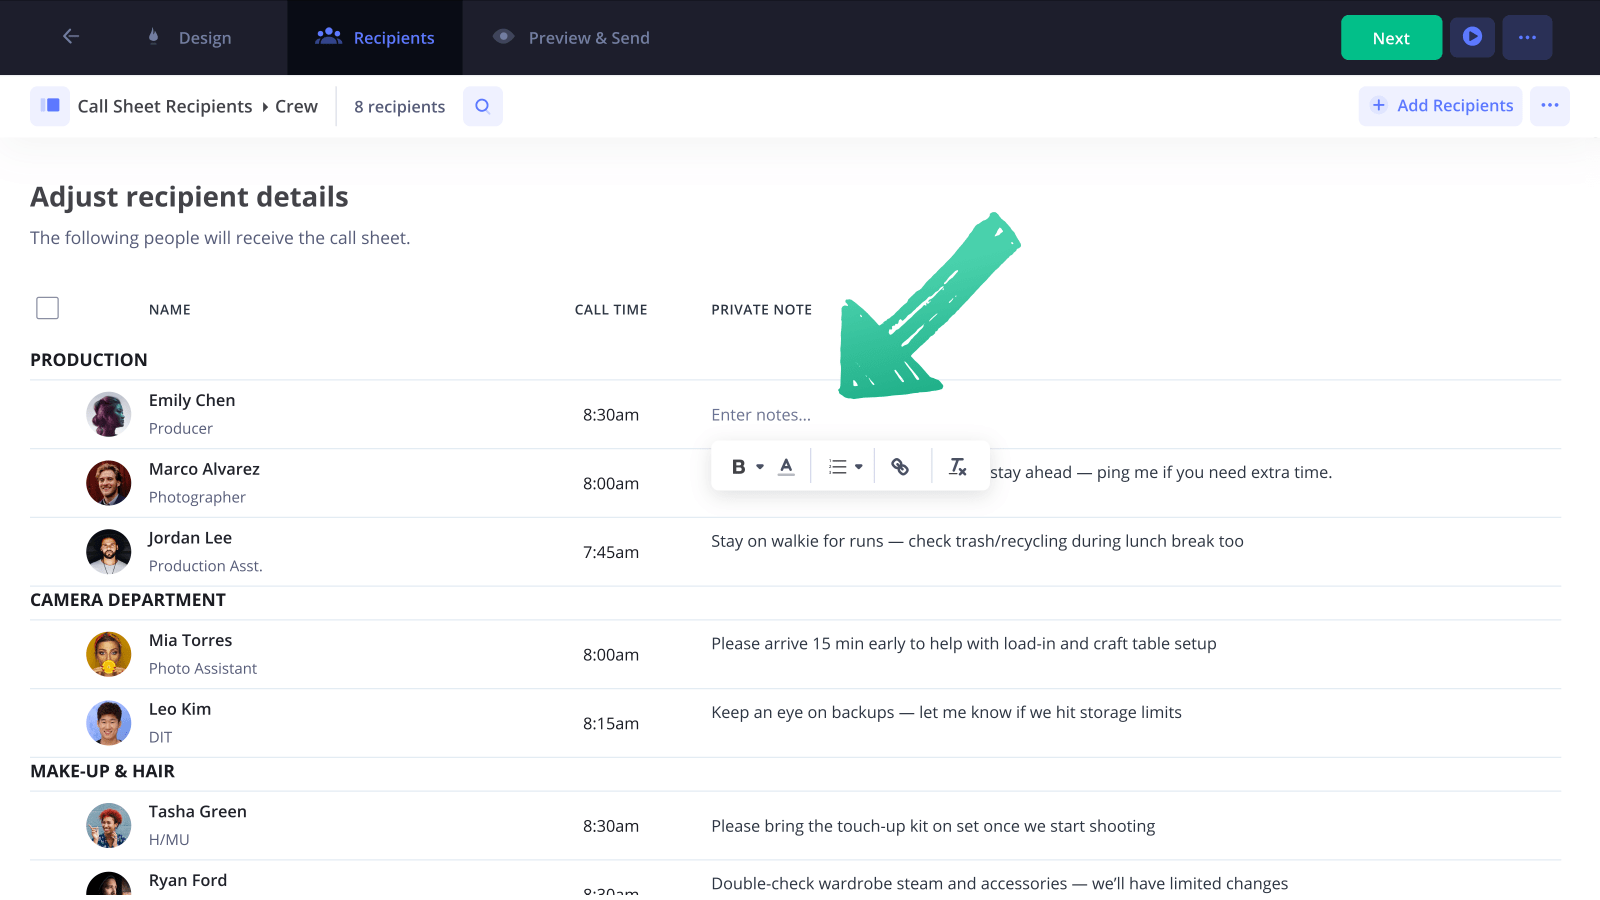
Once your photography call sheet is populated, StudioBinder includes a feature to include a private messages to be included in a recipient's call sheet email. Only the selected recipient will see that message. This is useful when you need to share something important with specific clients, models, or crew members that others don't need to see.
For example, you might remind your photo assistant to bring copies of release forms with them, or your model to bring additional wardrobe options.
The possibilities are endless.
To add a private note, just hover over the Private Note on Step 2 of the Call Sheet Creator, and start typing!
10. Preview your call sheet
Before hitting send, take a second to proof your photography call sheet. Double-check that locations are accurate, everyone's names are spelled correctly, and the schedule is solid.
You can preview how the call sheet will look on different devices for your team. The screenshot below shows you what the online version of the call sheet will appear as for your recipients:
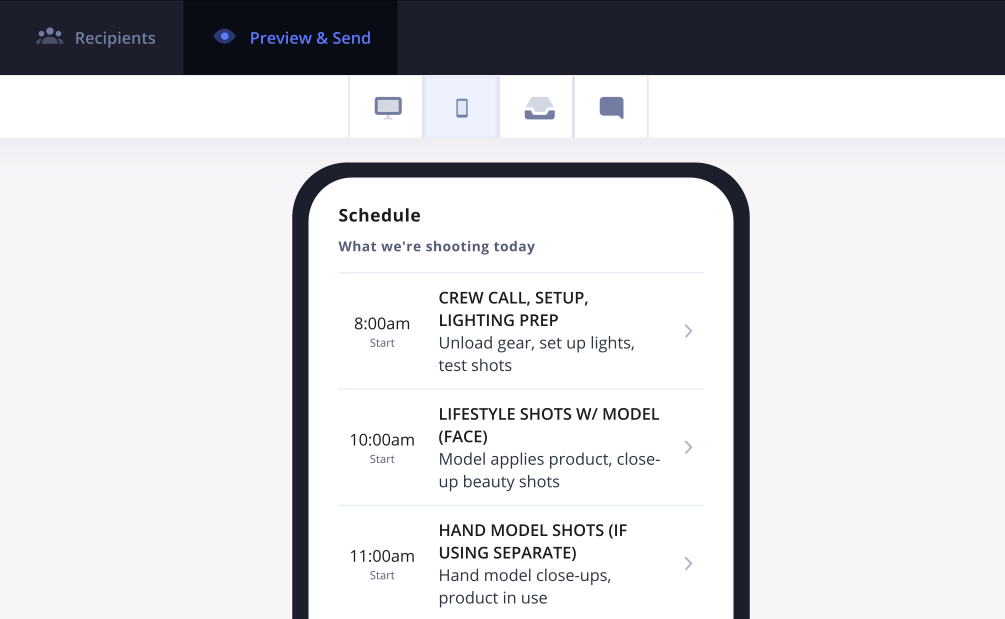
The next toggle over is the Mobile Version which is accessible when someone views the call sheet on their phone. Notice how easy it is to read the call sheet!
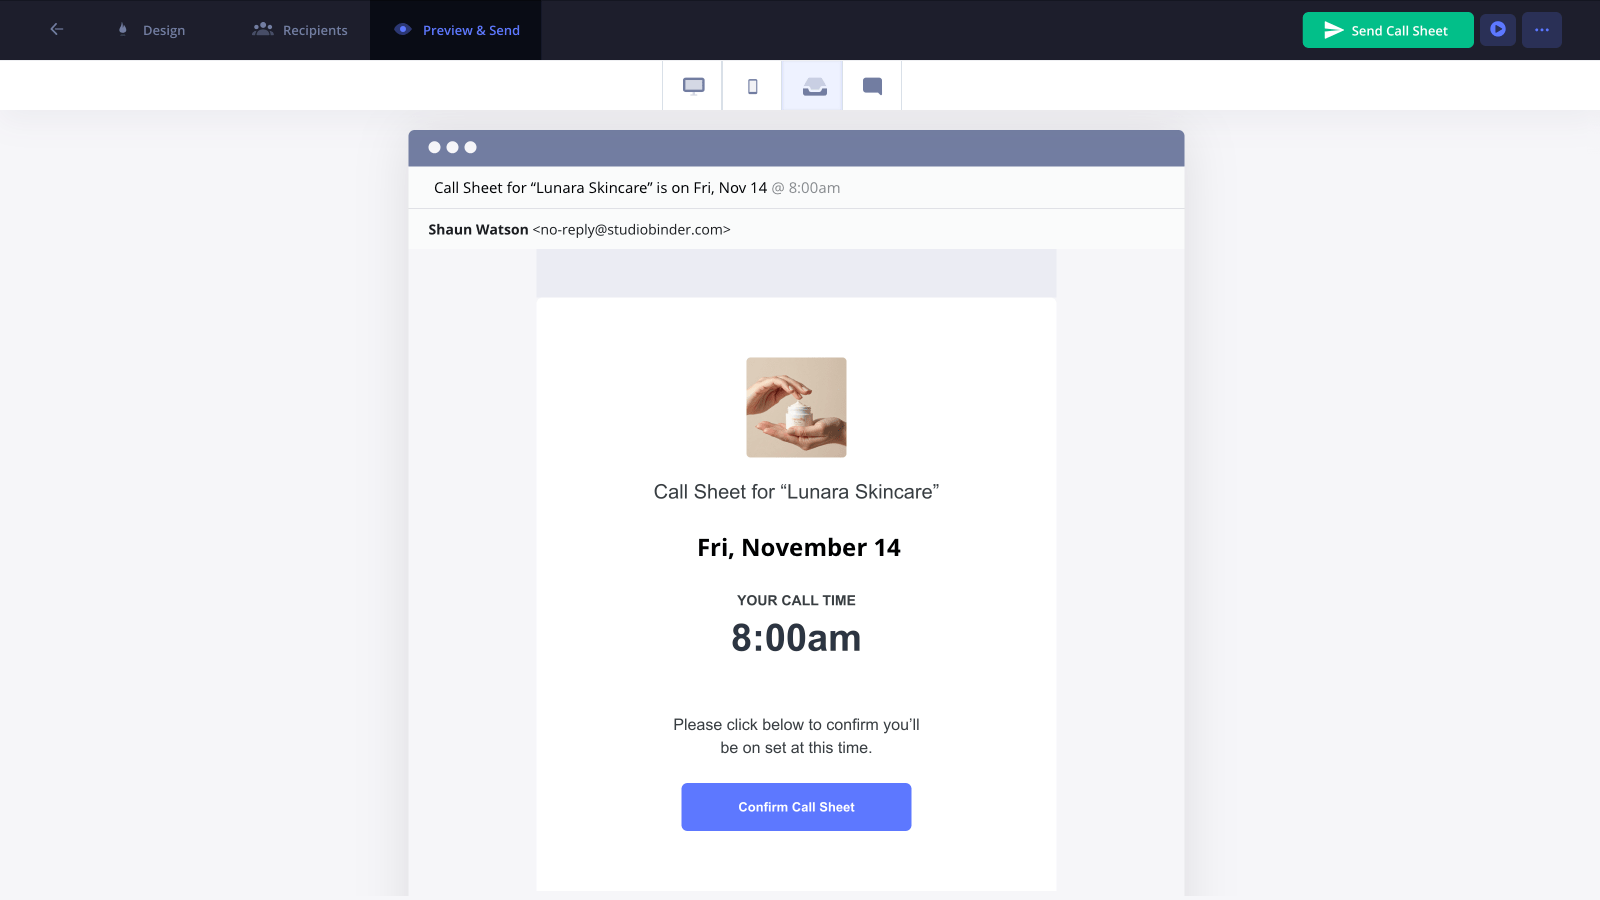
Next up is the Email Digest of the call sheet. When you send it to recipients, this is the first thing they'll see with a very clear call-to-action to confirm their call time.
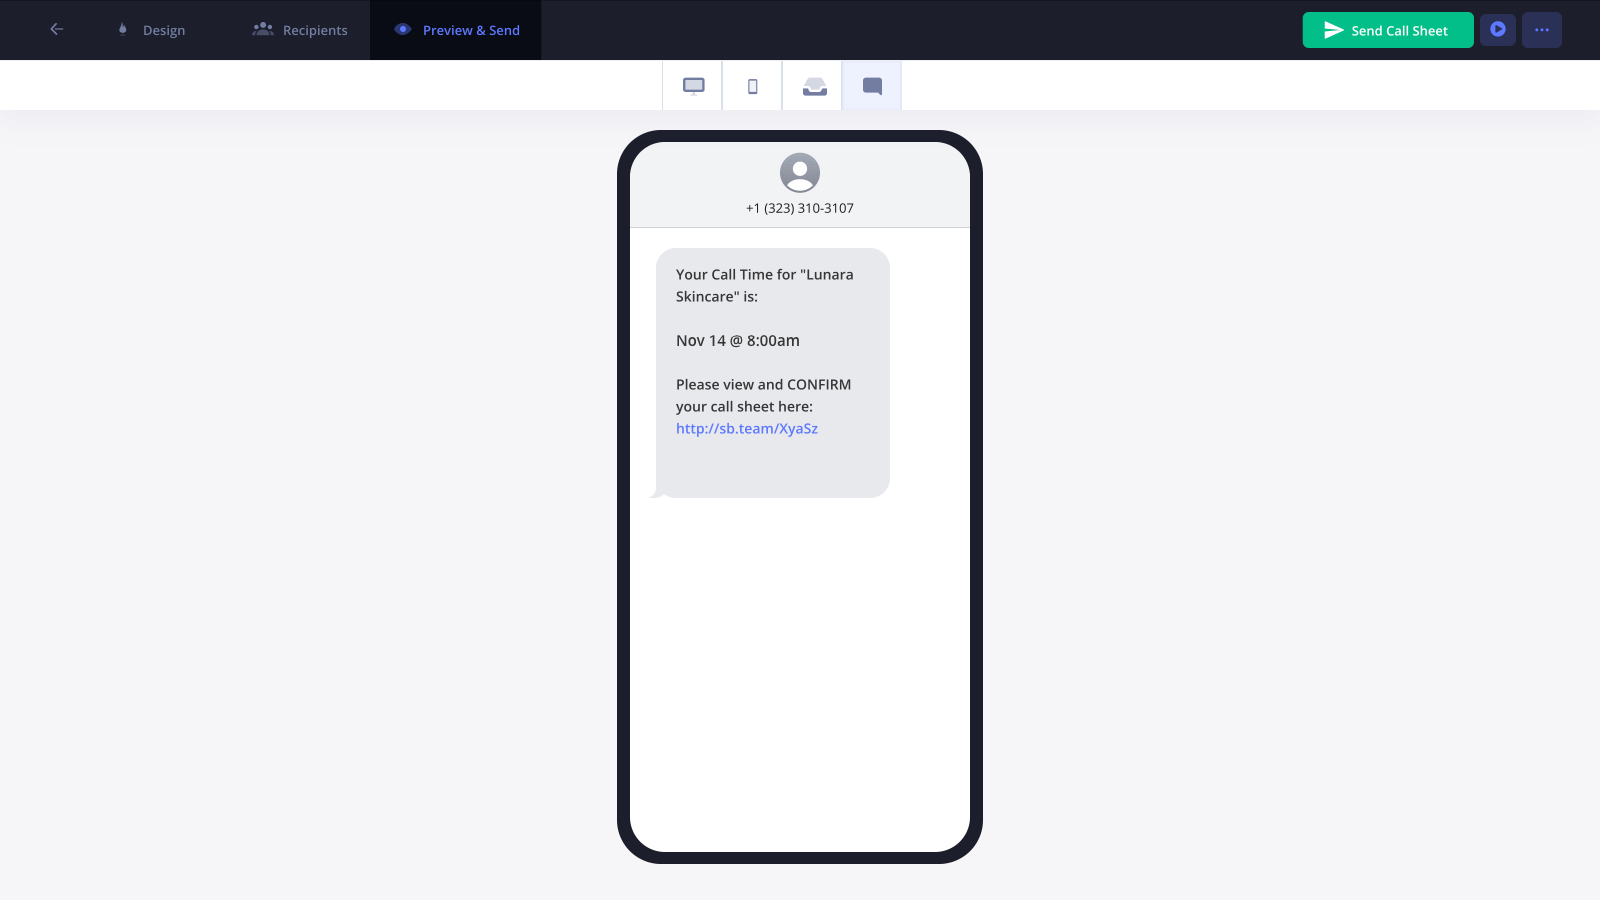
And lastly, this is what the SMS Call Sheet will appear as to recipients. We all know most people spend time on their phones so this makes call sheets incredibly accessible. When recipients tap the link, they'll be able to quickly confirm their call time.
11. Send and track your call sheet
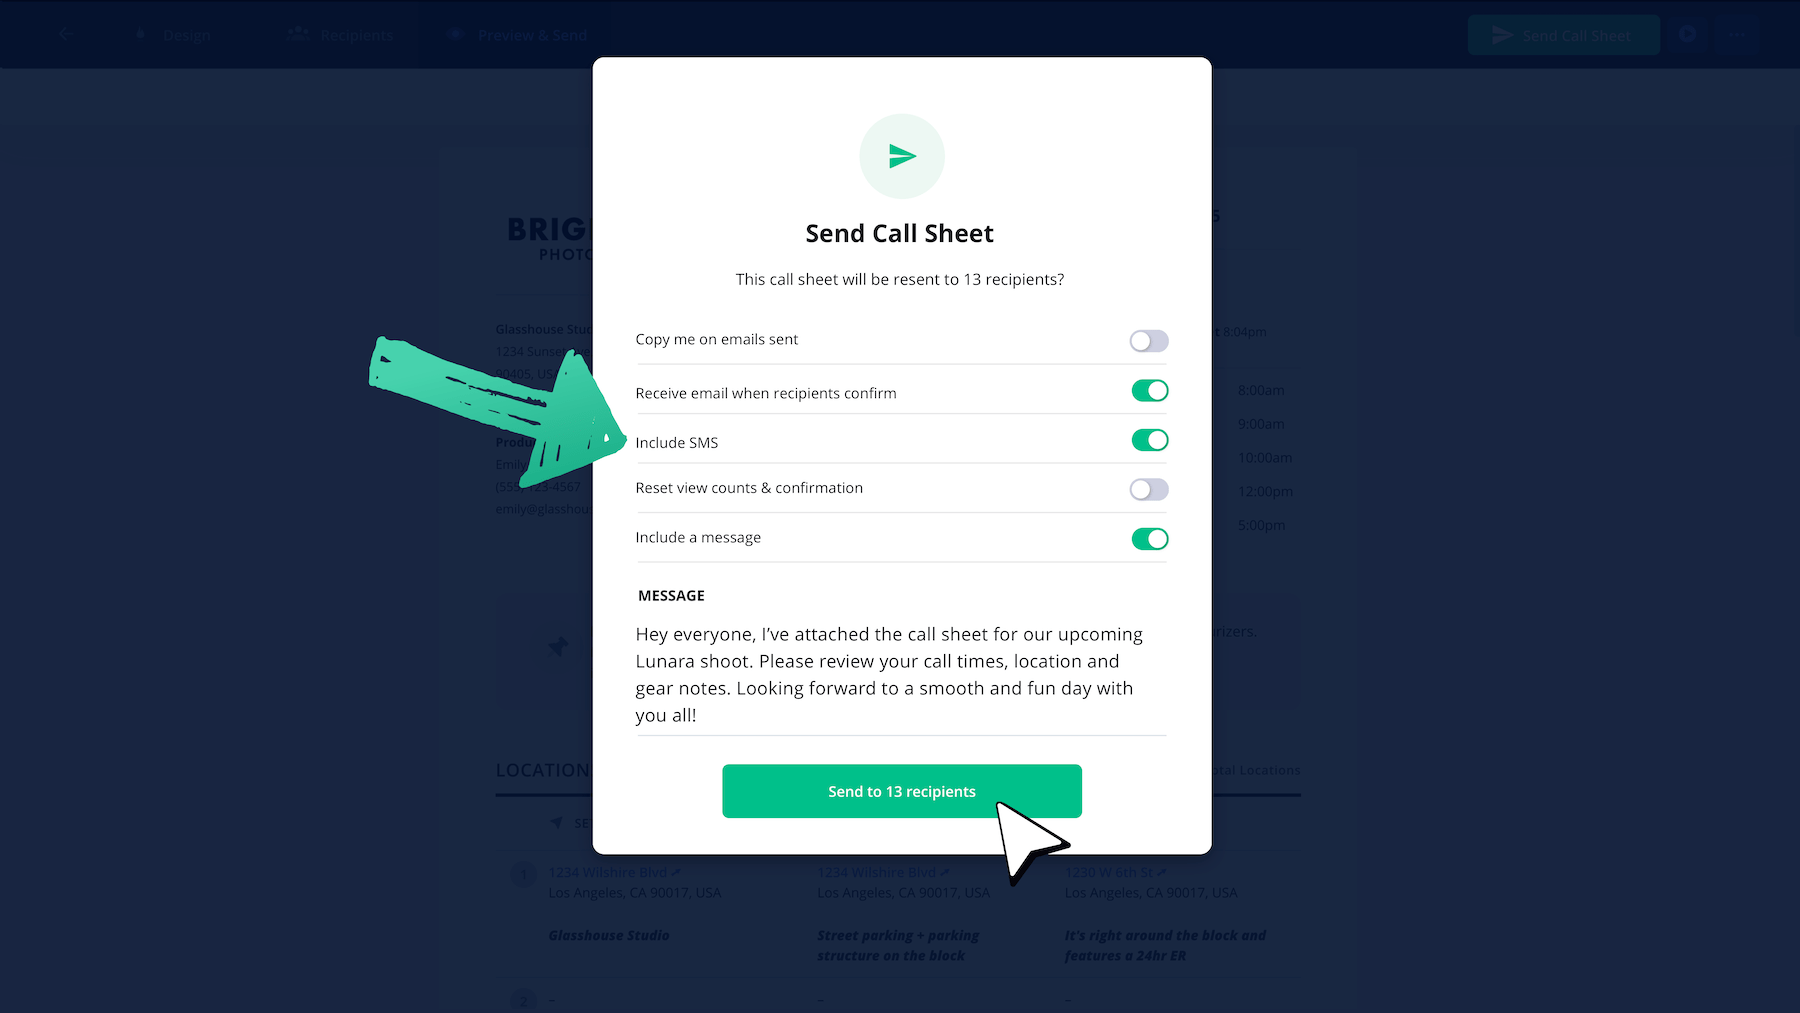
When you're ready, click Send Call Sheet and let the good times roll.
As seen above, everyone will receive an email digest with the full call sheet PDF attached, as well as a button to view and confirm their call sheet online.
Most people nowadays live on their phones, so StudioBinder also sends SMS messages to view and confirm, just in case they missed the email.
The best part is that StudioBinder tracks every call sheet email that goes out.
You'll see if an email was delivered successfully or if it bounced. If anything bounces or gets blocked, just update the email address and resend to that person only.
If an email has bounced, simply hover over it to learn why the email bounced. Once you correct it, simply update the email address and then re-send.
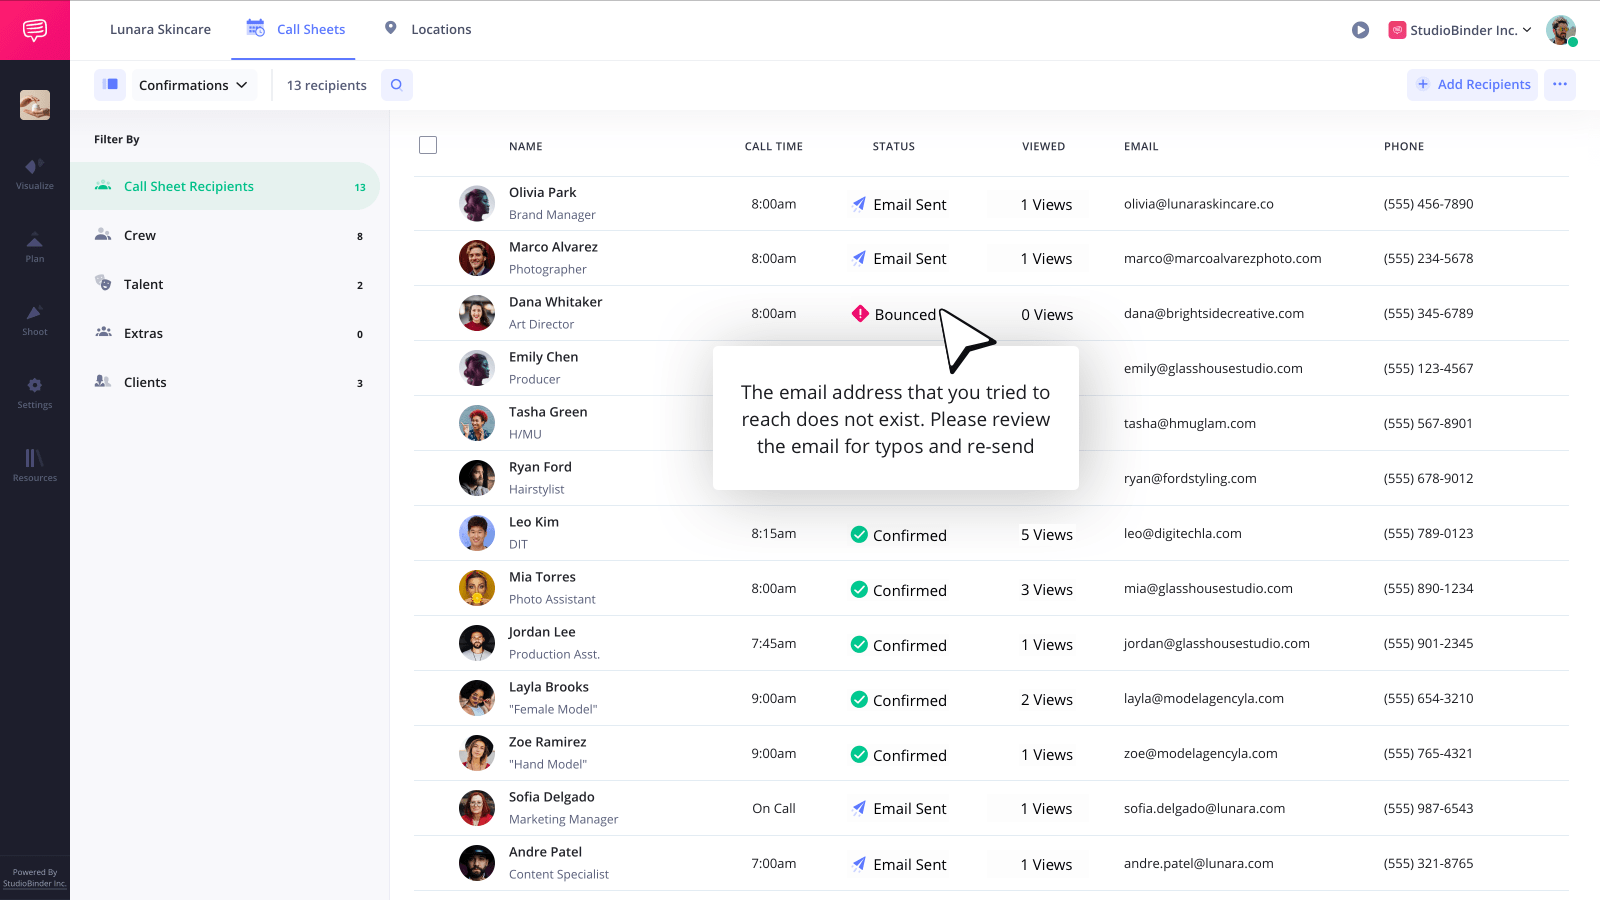
Ideally, over time, everyone should confirm they've received the photoshoot call sheet. If someone has not viewed or confirmed their call sheet, you'll know exactly who you should follow up with.
After your call sheet
Now you've got an effective photo call sheet that is easy to read, concise and has all the required info so your entire crew stays on the same page. But preparation doesn't stop there—with StudioBinder you can visualize your photoshoot with mood boards, shot lists, and even create A/V scripts for a mix of photography and videography projects.
To get started with creating your next call sheet, click Create your Free Call Sheet below to get started in minutes.
Steps in this guide
1. Set your date and call time
6. Add your clients, talent and crew
