Proper screenplay format is a necessary evil. Some rules are set in stone while others can be left up to a writer’s preference–the lack of consensus can certainly be frustrating.
So, what’s a writer to do?
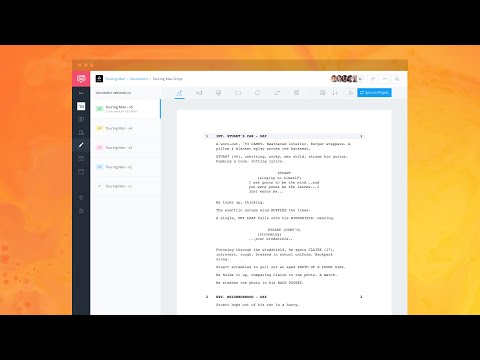
The first step is to use a screenwriting program, like StudioBinder. This ensures that most of your formatting concerns are dealt with automatically. With formatting taken care of, you can focus on the writing.
In this article, we’re going to walk through some formatting basics and how keyboard shortcuts in StudioBinder make the process even easier.

How to Format a Script with Keyboard Shortcuts

Screenplay Format
1. Why is formatting important?
The process from script-to-screen begins with a properly formatted script. While it might seem unnecessary to the quality of your script, the truth is that industry standards on format are there for a reason.
With a consistent format, each film can be scheduled and budgeted using the same rubrics. It might be a headache for writers, but it is absolutely critical to turning that script into a movie.
Consider this: Producers and Executives won’t even LOOK at your script if the formatting is wrong.
Do I have your attention now?
Lucky for you, programs like StudioBinder nearly eliminate the stress of proper formatting and your script can be integrated across the platform, making pre-production a breeze.
This article skims the surface of script elements so make sure you read our other article on how to write a movie script. There you’ll find great pro-tips and examples of screenplay format.
The next section will cover basic script format as well as the hotkeys that will eliminate “formatting” from the creative process.
How to Format a Screenplay
2. Elements of a screenplay and hotkeys
There are some basic and essential elements of script formatting. Once you learn these, and which keyboard shortcuts to use, you’ll fly through the writing process.
SCENE HEADINGS
Mac: (Option + ‘S’), PC: (Alt + ‘S’)
Scenes Headings are used to introduce each new scene. In this single line, we learn three pieces of information: if the scene takes place inside or outside of a location, the location itself, and the time of day.
ACTION/DESCRIPTION
Mac: (Option + ‘A’), PC: (Alt + ‘A’)
Alternate: Press ENTER after Scene Heading or Dialogue
This is where you can describe the scene, a character, a location or any action. It’s where the “prose” of a screenplay lives.
You can also customize your text:
Underlines: Mac: (Command + ‘U’), PC: (Ctrl + ‘U’)
Bold: Mac: (Command + ‘B’), PC: (Ctrl + ‘B’)
Italics: Mac: (Command + ‘I’), PC: (Ctrl + ‘I’)
CHARACTER CUE
Mac: (Option + ‘C’), PC: (Alt + ‘C’)
Alternate: Press TAB after Action/Description
This designates which character is about to speak. This is typically the character’s first name--make sure you’re consistent with Character Cues throughout the script.
EXTENSION
Mac and PC: (One space + left parentheses ‘(’ after Character Cue)
Extensions are added just after a Character Cue on the same line. These are where you can specify if the dialogue is from a voiceover (V.O.), if the same character is speaking again (CONT’D) or if the character is off-screen when they speak (O.S.).
PARENTHETICAL
Mac: (Option + ‘P’), PC: (Alt + ‘P’)
Alternate: Press TAB after Character Cue or within Dialogue
Parentheticals are added either between the Character Cue and the Dialogue or within the Dialogue. They give additional information about the dialogue, like how the line should be read or to which specific character they are speaking to.
DIALOGUE
Mac: (Option + ‘D’), PC: (Alt + ‘D’)
Alternate: Press ENTER after Character Cue
There’s no surprise here. Dialogue is what the character says. The same text customizations like bold, italics and underline (shown above) can also be applied.
TRANSITIONS
Mac: (Option + ‘T’), PC: (Alt + ‘T’)
Alternate: Press TAB twice from the Action/Description
Transitions are used to bridge the gap between scenes, including FADES and DISSOLVES. These are used sparingly and only when noting the transition is necessary.
GENERAL (Option + ‘G’)
Mac: (Option + ‘G’), PC: (Alt + ‘G’)
The General section is best used for sub-headers, when you want to designate a new area of the same location, or if you want to inter-cut a phone call.
Script Format Example
3. Formatting cheatsheets
Screenwriting, formatting, and hotkeys go hand-in-hand. The quicker you learn these, the sooner you can focus on the writing. It’s time to leave your concerns about screenplay format in the dust.
This first image gives you a snapshot of all the format elements you’ll encounter. You can also see a brief description of each and how they look on the page.

Script format 101
Here’s a cheat sheet for screenwriting hotkeys in StudioBinder. Once you master these hotkeys, you won’t even be aware that you’re using them.
As soon as you type “FADE IN:”, you’ll be off to the races.

Hotkeys for Mac and PC
We’ve covered screenplay formatting and the shortcuts you can use to generate them. Now there’s nothing holding you back from writing the Great American Screenplay.
Time to hit the laptop, Tarantino!
Related Posts
Up Next
How to Write Script Notes
When you’re writing a script, where do you keep your notes? On a million post-its that won’t stick anymore? In a spiral notebook that you accidentally left in an Uber? Or maybe they’re split up into emails or texts? In this article, we’ll introduce you to Script Notes in StudioBinder where you can keep your thoughts and inspirations in a single, secure location.