I
think you’ll agree that planning a shoot can be a little scary. Perhaps you know the shots you want, but still worry about everything cutting together in post.
After all, it is very hard to think of everything on a stressful shooting day.
Doing one thing will make sure you get the shots you need. Just make a simple list of shots (AKA “shot list”) to maximize your shooting day. It’s easy and will make your vision crystal clear to your crew.
Get ready to learn what a shot list is and how you can make a great one with StudioBinder’s shot list software.
How to Make a Shot List in StudioBinder
- Line a Script to plant your Shot List
- Prepare your Shot List in StudioBinder
- Creating your Shot List in StudioBinder
- Customize your Shot Size
- Use a Custom Shot Type
- Choose your Camera Movements
- Choose Equipment
- Know your Shot Requirements
- Organize your Shots
- Add Task Card as you Work
- Customize your Final Shot List Report
- Printing and Saving a Shot List
Defining a shot list
What is a Shot List?
A shot is as a single event that the camera films. A shot list is an organized list of shots that sequence together and become scenes. The director and/or cinematographer fills out the shot list and breaks down all the camera positions that the scene requires (known as “coverage”).
Learn more about the nuances of these shot list templates by reading out companion post The Only Shot List Template You Need.
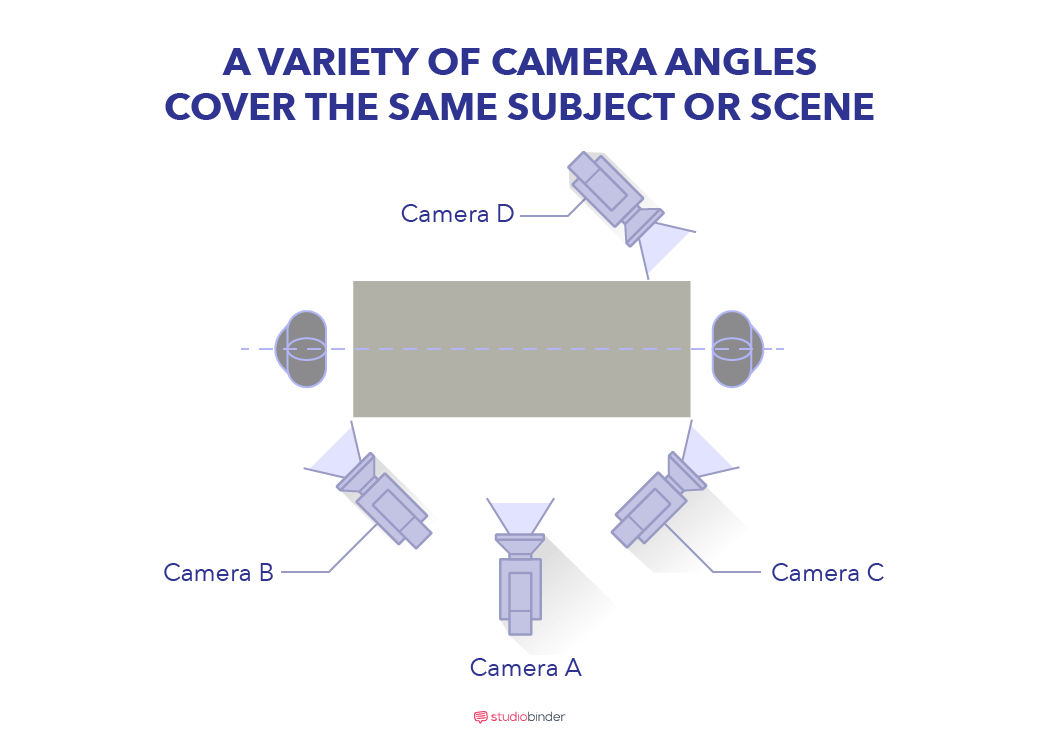
A variety of camera angles cover the same subject or scene.
It is also useful to label your camera positions on the actual script page. This is called a “lined script”. It will inform how to create a shot list from a script by highlighting where coverage is needed.
line a script to plan your shot list
How to line a script to plan your shot list?
Your script is the blueprint of your film, but it doesn’t tell you everything. One thing your script and script breakdown does not specify is where the camera will be for each set-up. So you will need to determine how many angles each scene requires.
To make a lined script, first print out your script and turn to the scene you want to break down. Let’s imagine you have a conversation between two people. One angle you’ll need is a wide shot of the two characters talking (or a “master shot”).
You will need separate angles for each character talking (known as “singles”). Draw separate lines to represent each of these angles. The lines should be parallel to each other in the left margin of the page. Number and label them as well.
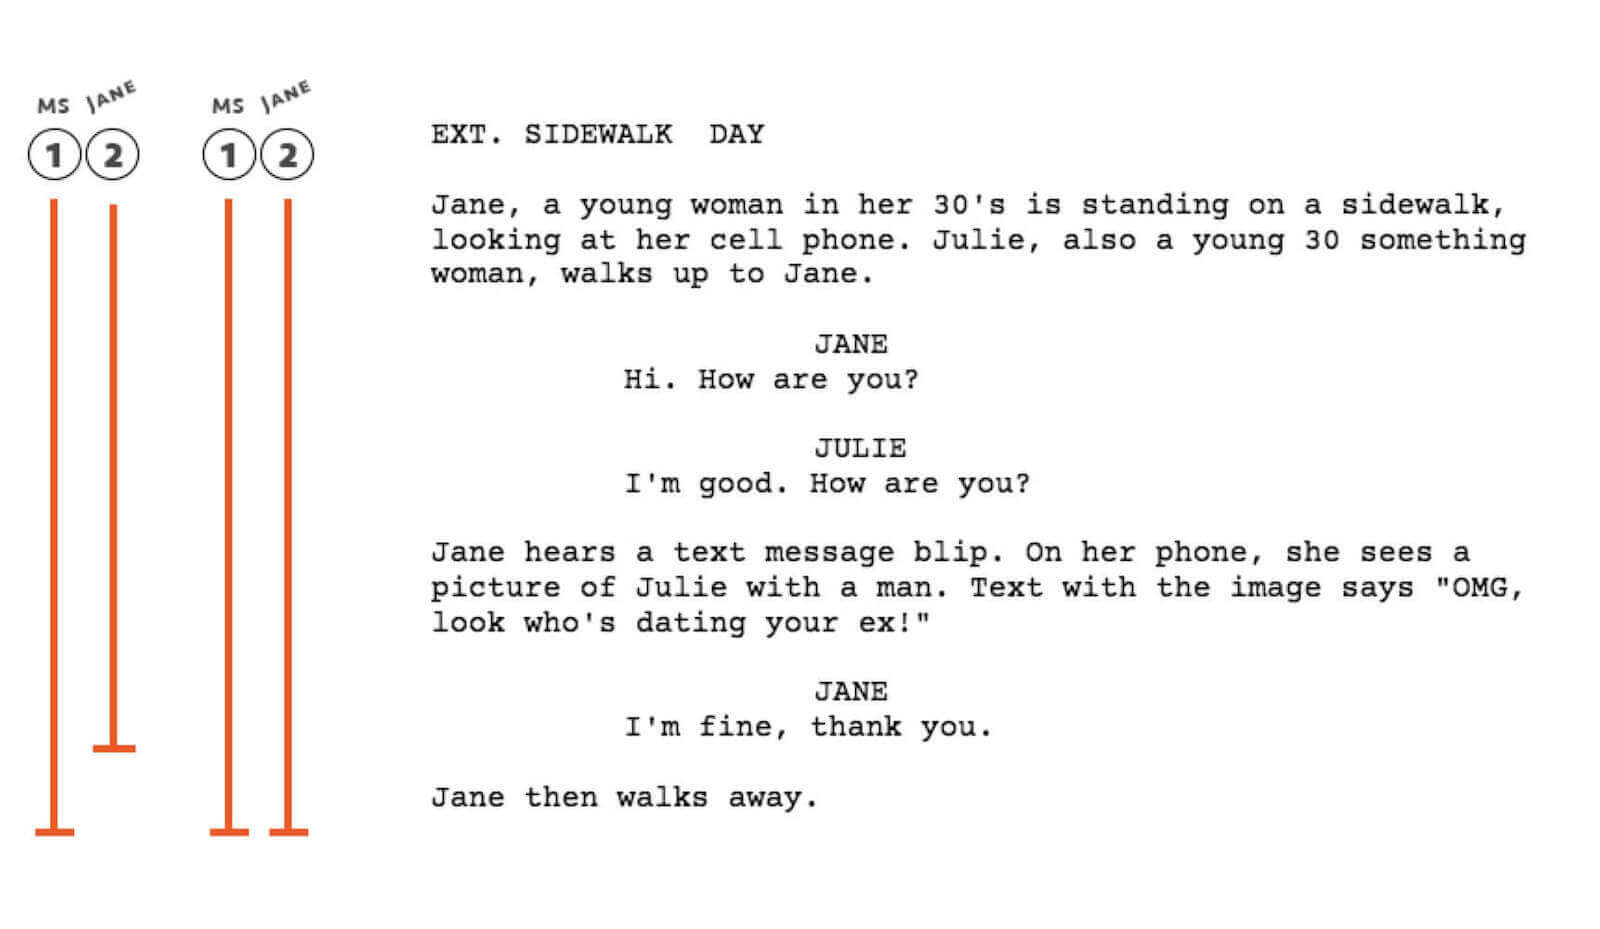
A lined script will keep all of your camera angles straight.
Do this for every scene you intend to shoot. This will help you organize the number of angles you will need.
You will refer to your lined script when using StudioBinder’s shot list software. Another alternative is the Shotlister shot list app.
However, StudioBinder’s shot list software is connected with more of your production tasks -- from breaking down your script to sending out your callsheets.
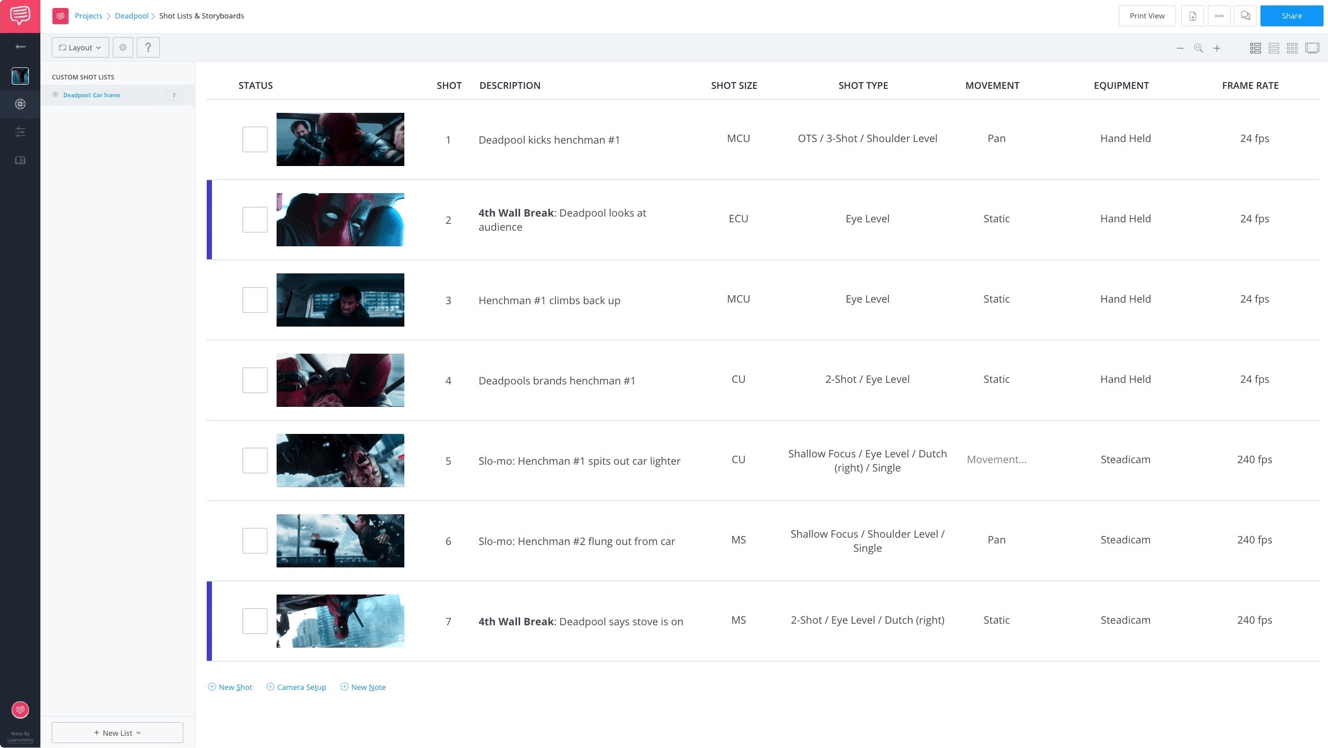
Here's a shot list from Deadpool to give you an example:
Prepare your Shot List in StudioBinder
How to prepare your shot list in StudioBinder?
Now that you have a sense of how many set ups each scene will need, it’s time to format your shot list document.
A good shot list template lists many details from your script and script breakdown. This will include scene numbers, locations, shot descriptions, and characters.
You can fill them in manually in a blank shot list template. However, it will require a good deal of document scanning and manual input.
A shot list app like StudioBinder will extract scene metadata from your Final Draft script. Then you can create your individual shots within the imported scenes. This allows for easy organization as you go.
How to Create a Shot List like Paul Thomas Anderson
To upload your script in the StudioBinder shot list app, use the Import Script button.
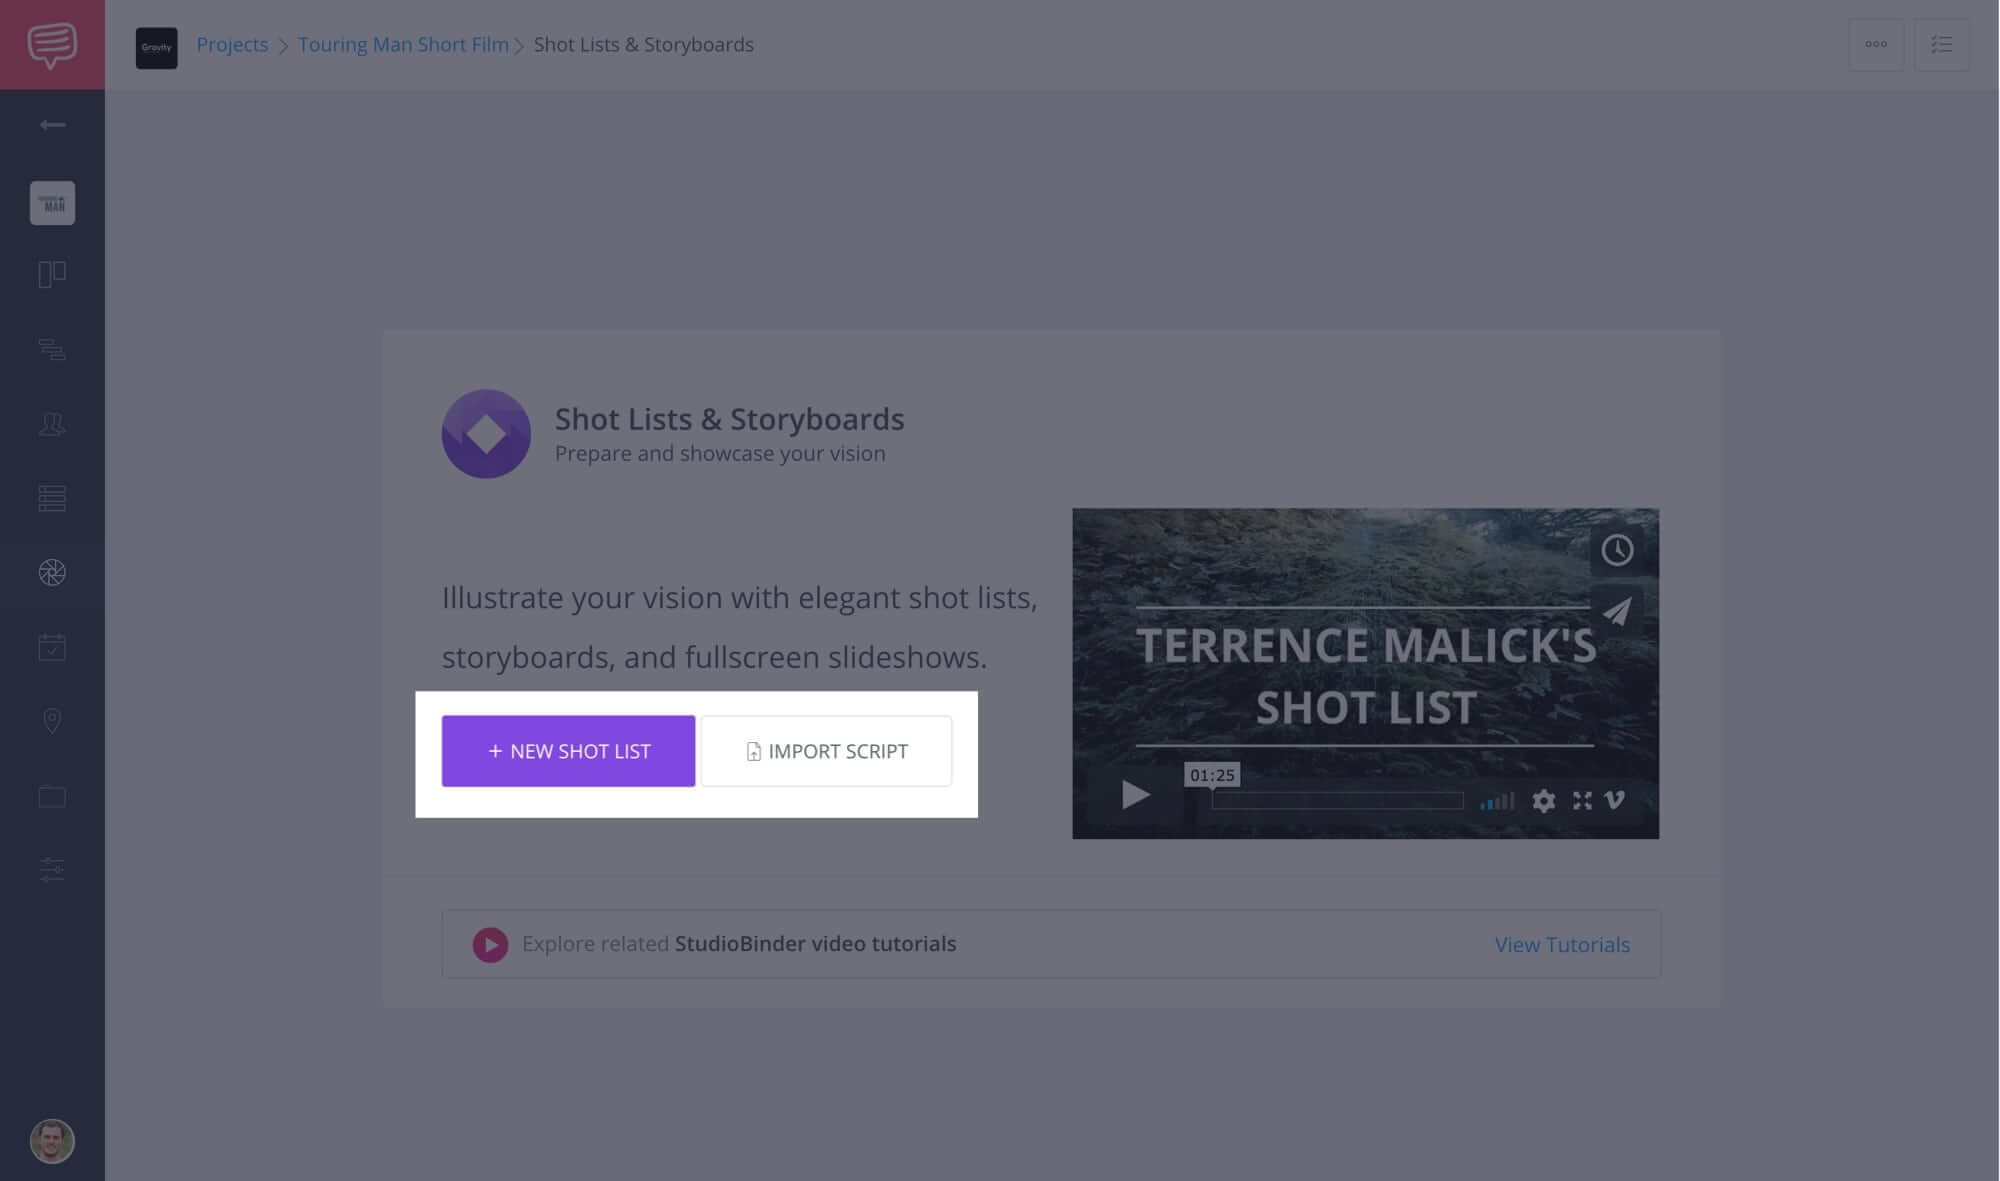
Import your script to start creating shots for your scenes.
This will populate all of your scenes in your Scenes sidebar to the left.
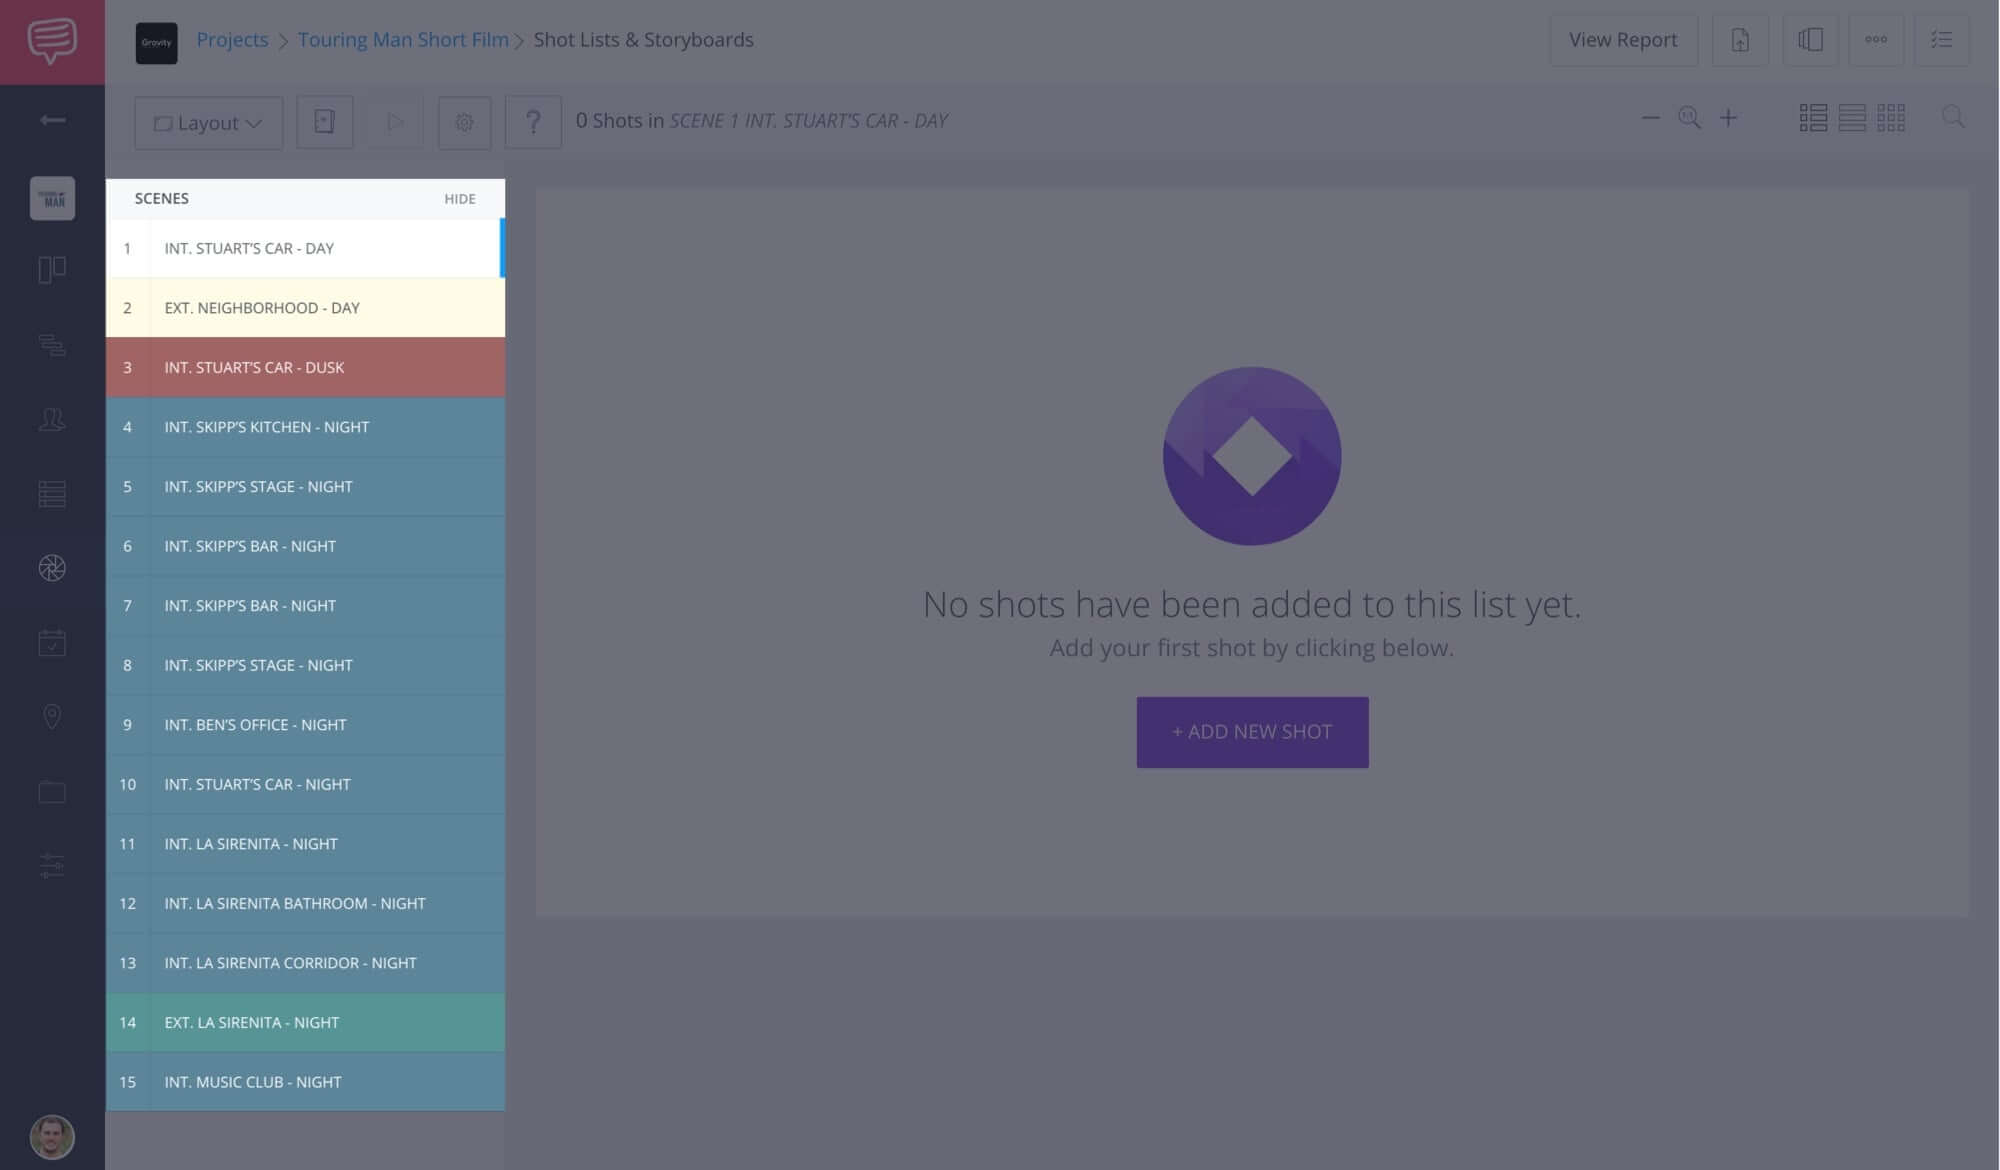
Jump between scenes with the Scenes sidebar.
Or, if you don’t have a script yet (or the project is a photoshoot or an unscripted video like a music video), click the +New Shot List button. This will create a custom shot list to add your shots into. Create additional custom lists if you’re making more than one sequence or scene.
Pro Tip: You can also use custom lists for additional sequences not in your script. A good example of this is if you want to shoot an extra scene to play during your opening titles.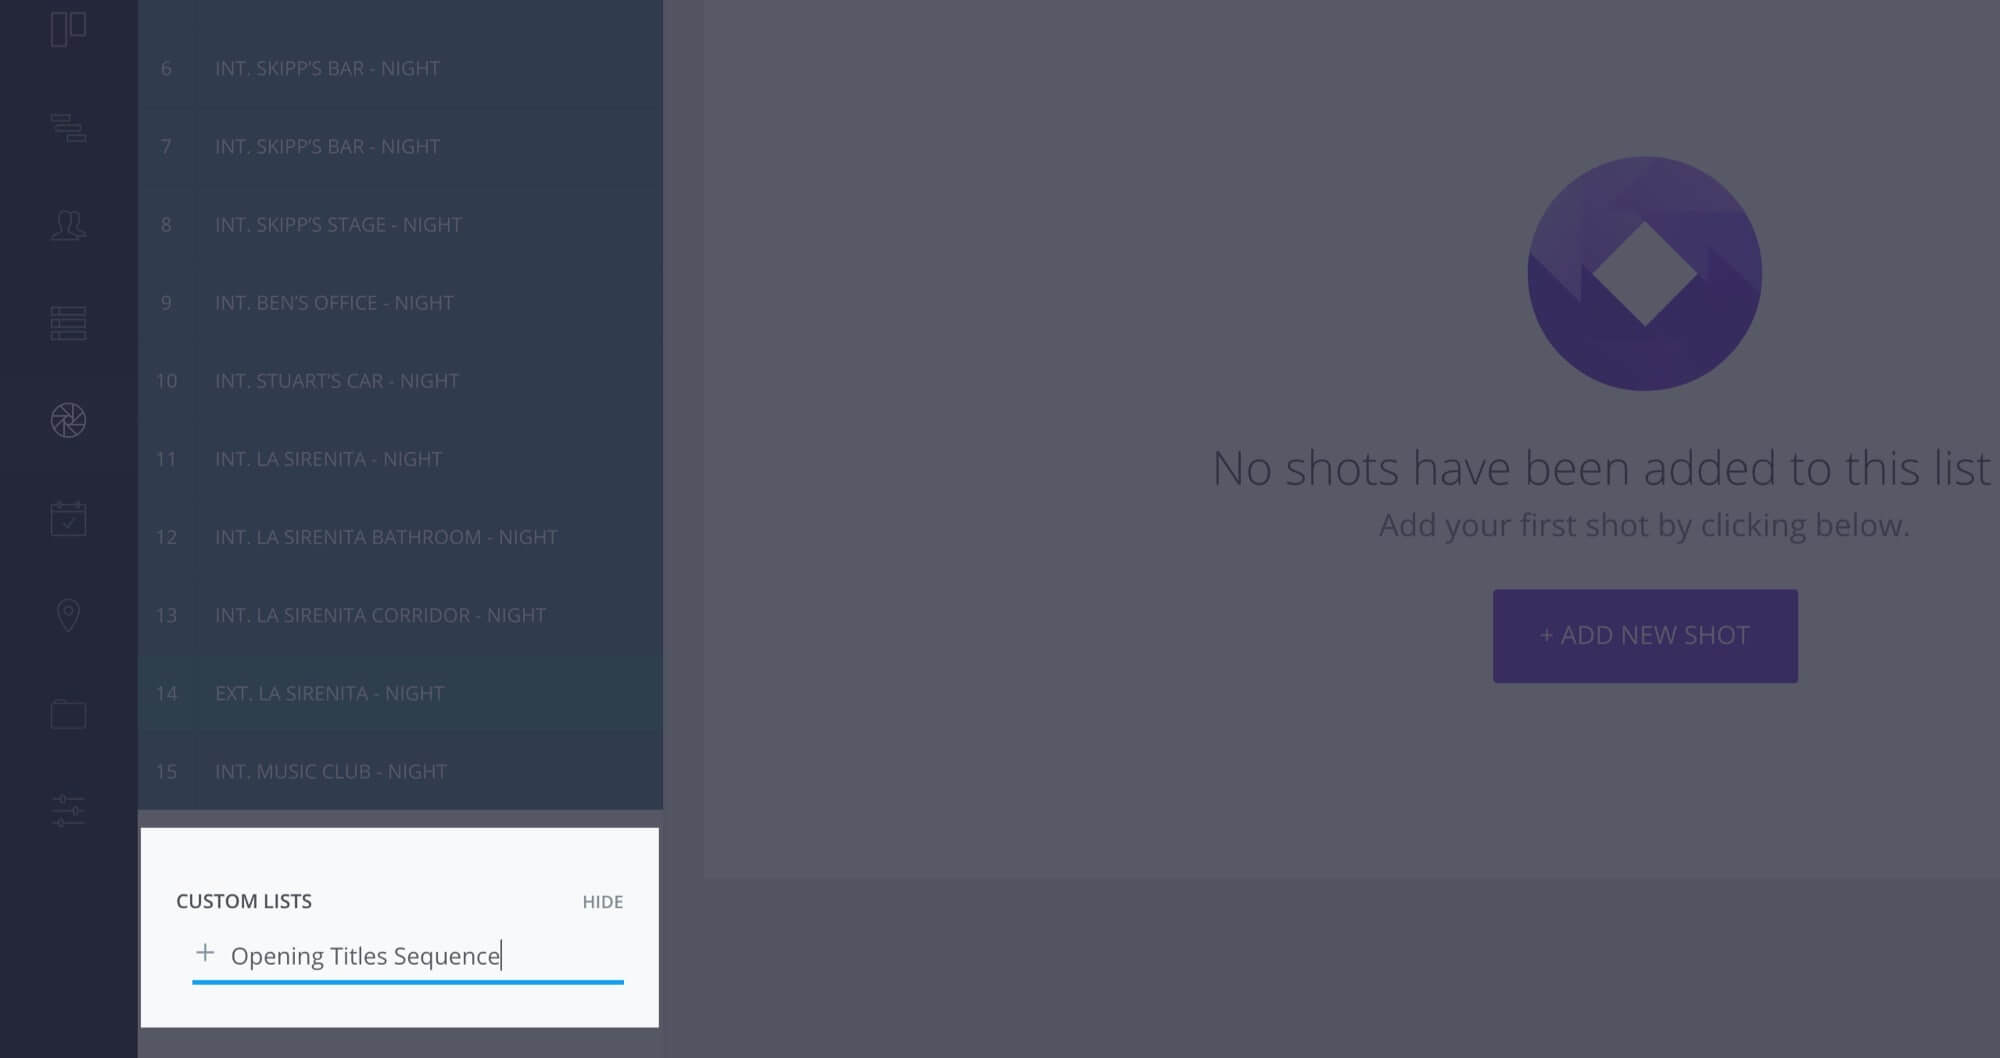
Use custom lists to add an additional shotlist that is not in your Final Draft script.
Creating your shot list in StudioBinder
How to Create your shot list in StudioBinder?
Now you’re ready to build your shot lists. First, navigate to your Shot Lists & Storyboards dashboard.
Use your lined script as a guide for what shots you need. Each line you identify will inform how to make your shotlist. You can also click on the Preview Script feature to read through your imported script at any time.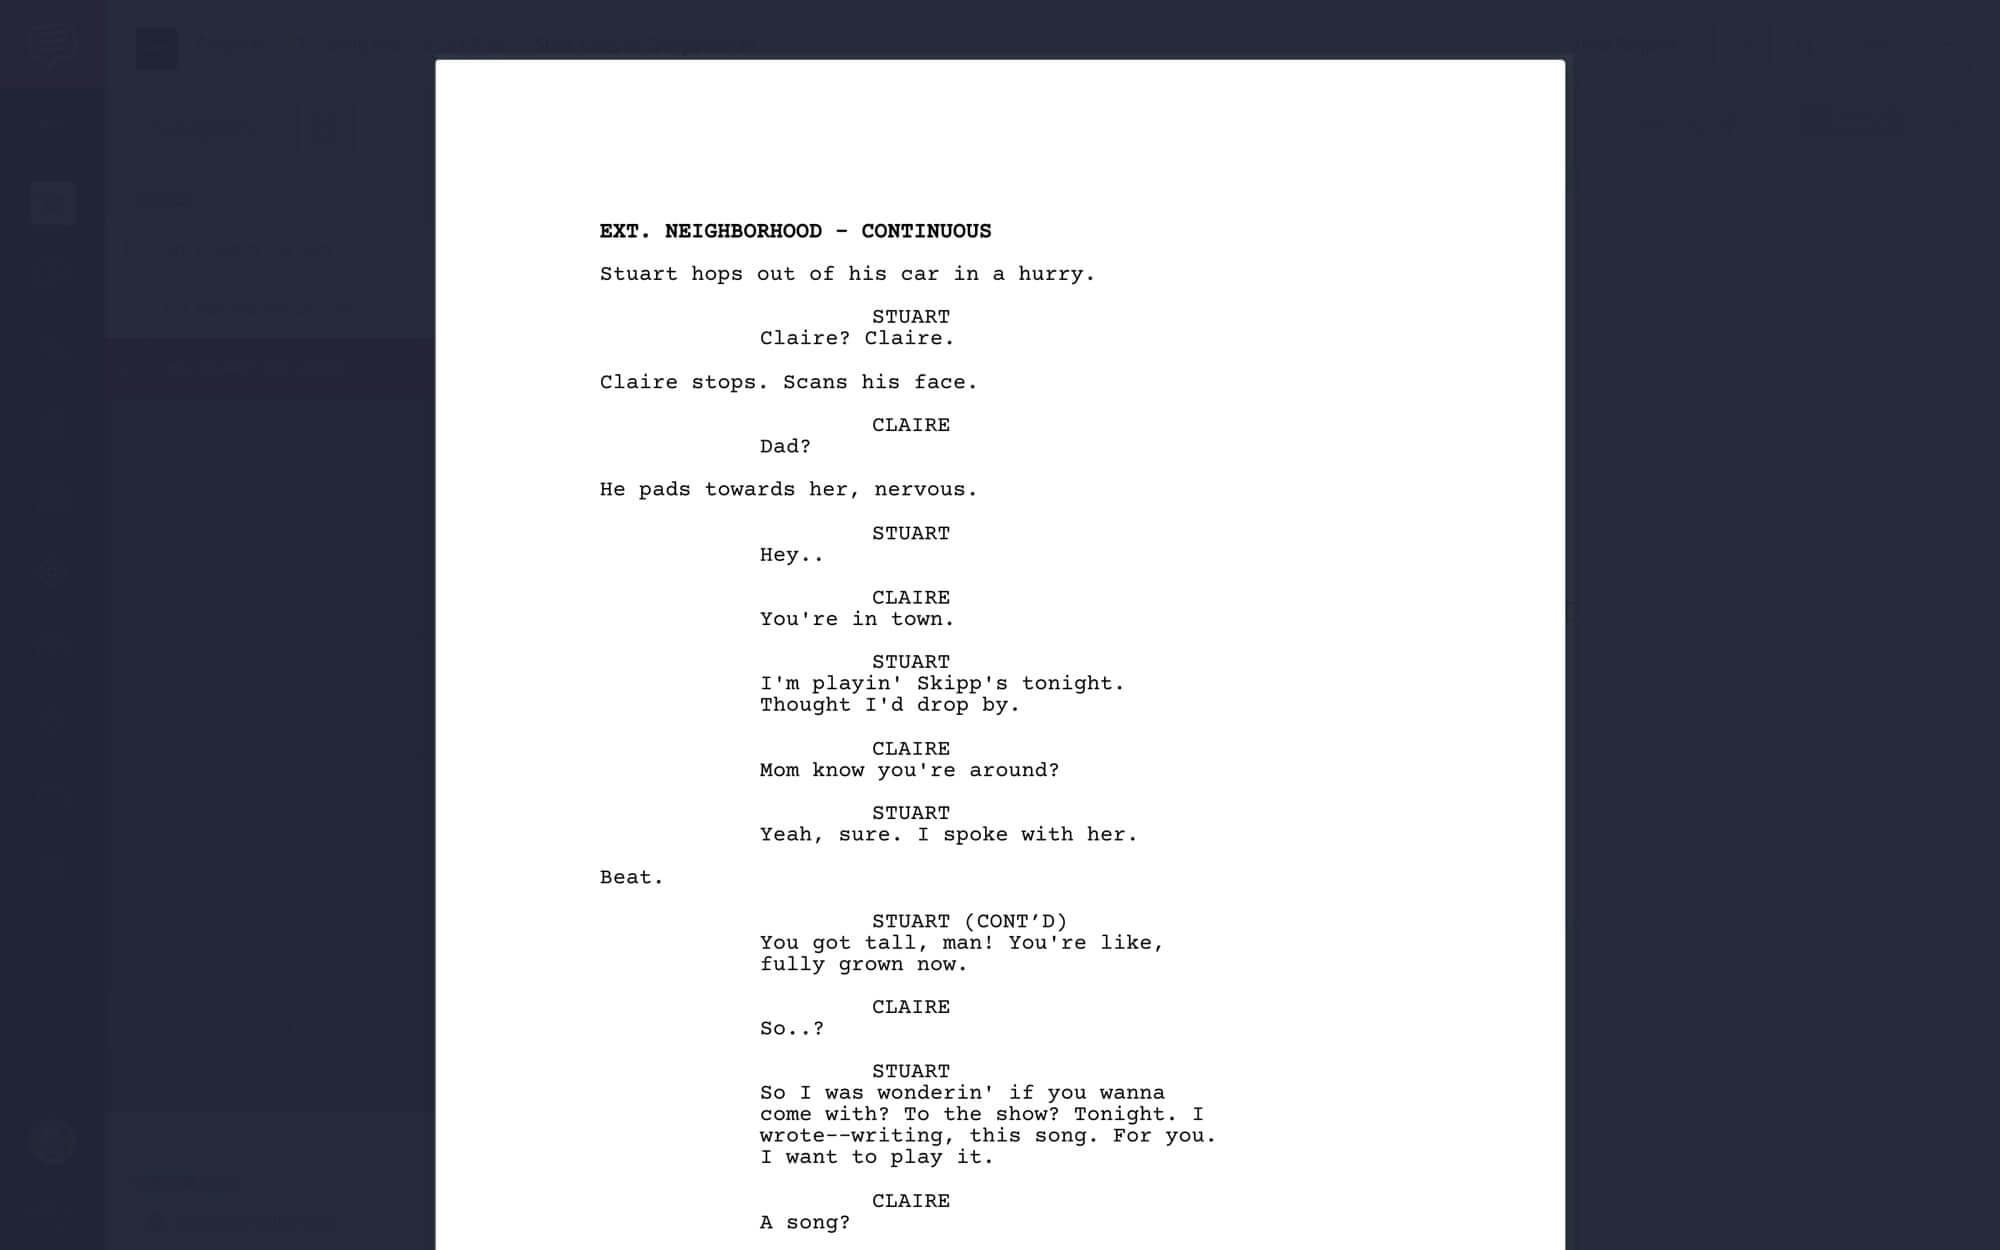
Creating your shot list in StudioBinder
Click on “Add New Shot” to get started. This will trigger a pop-up with many options for customizing your shot. You will see that the first field is for a short description. Use this to summarize the content of your scene. Be brief and concise here.
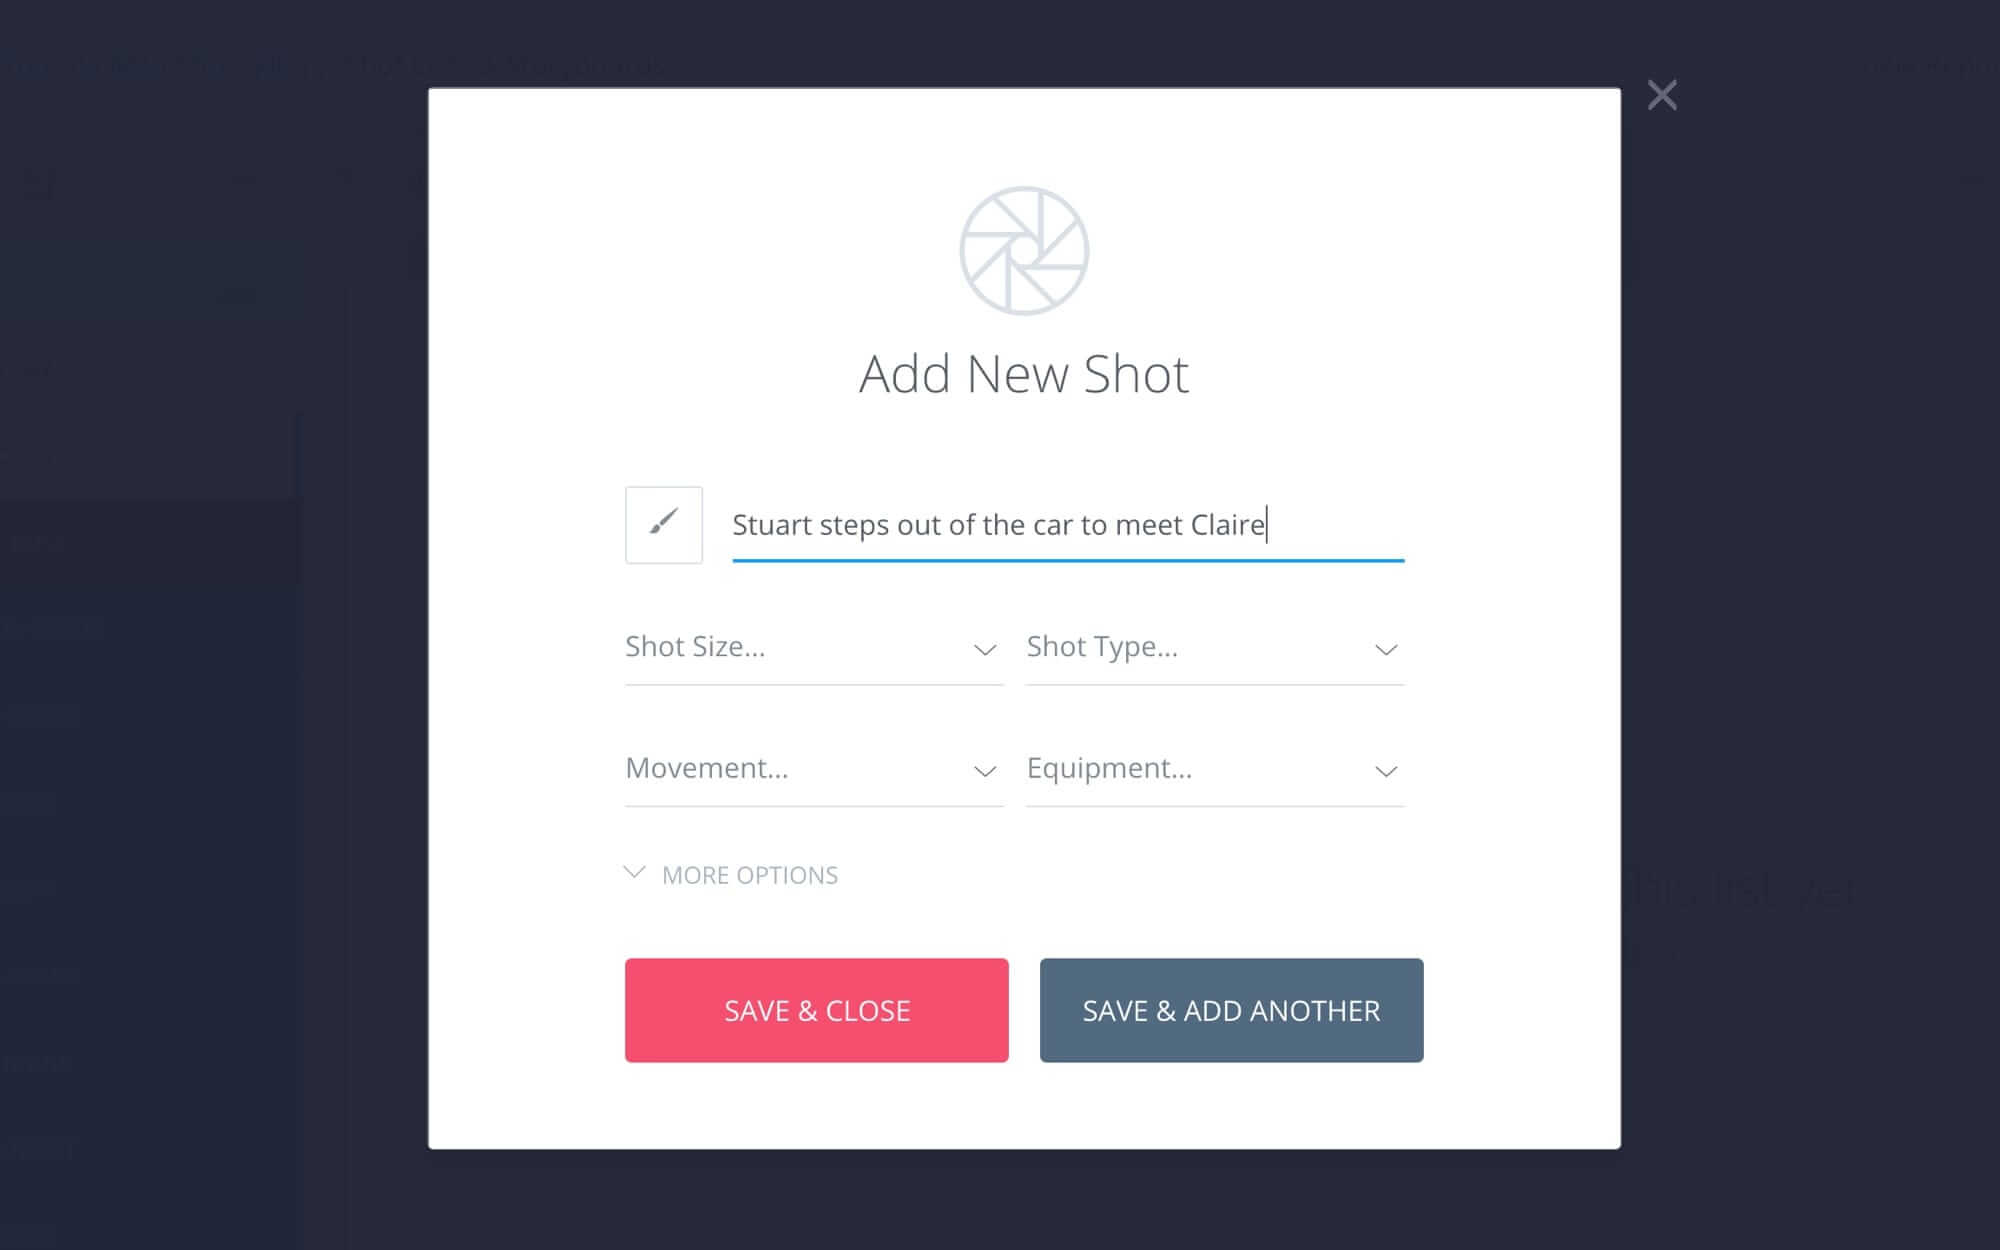
Add New Shot - StudioBinder
Now consider this shot list example.
This is a conversation scene with separate angles. It should start with a wide (or establishing) shot of the two people talking (the “master shot”). So this is the first shot you should create.
Customize your Shot Size
Choosing what shot size to use
The shot size is the distance your camera is from your subject. Think of where this shot will be sequenced. Generally you should advance from long (wide) shots into closer shots. The idea is to establish your subject relative to his or her location first and then get closer from there.
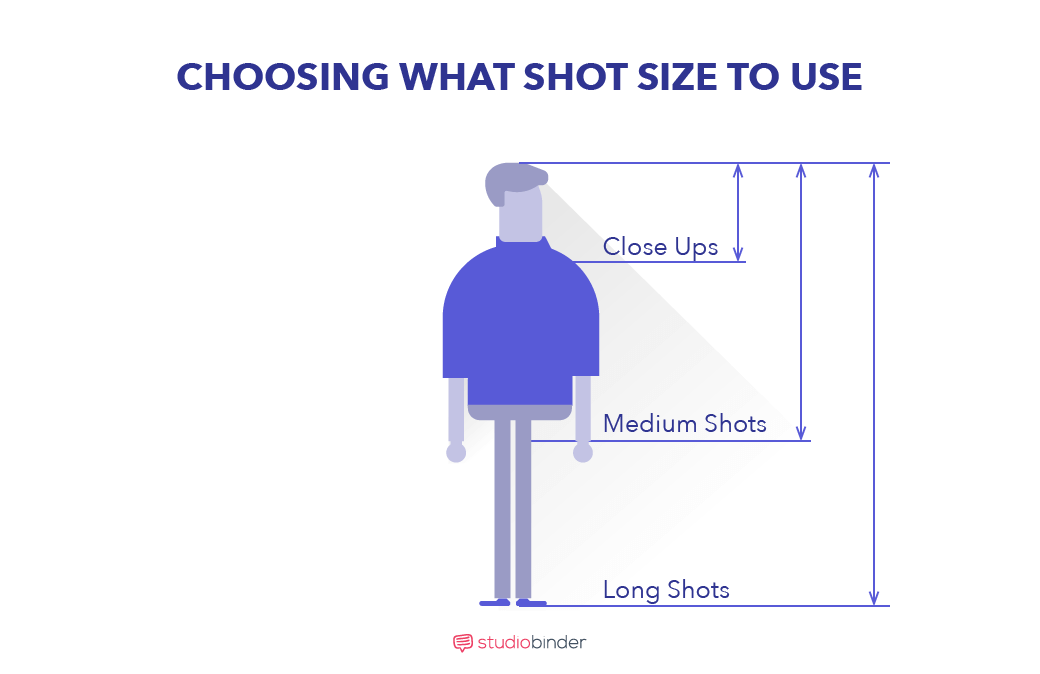
Choosing what shot size to use
Think about it like meeting someone for the first time. Odds are you won’t declare your political beliefs before telling them your name. You need to build familiarity first. Shot sizes work the the same way: use them to make your subject familiar or distant as the story moment requires.
Here, I used a long shot for my master shot of the two characters.
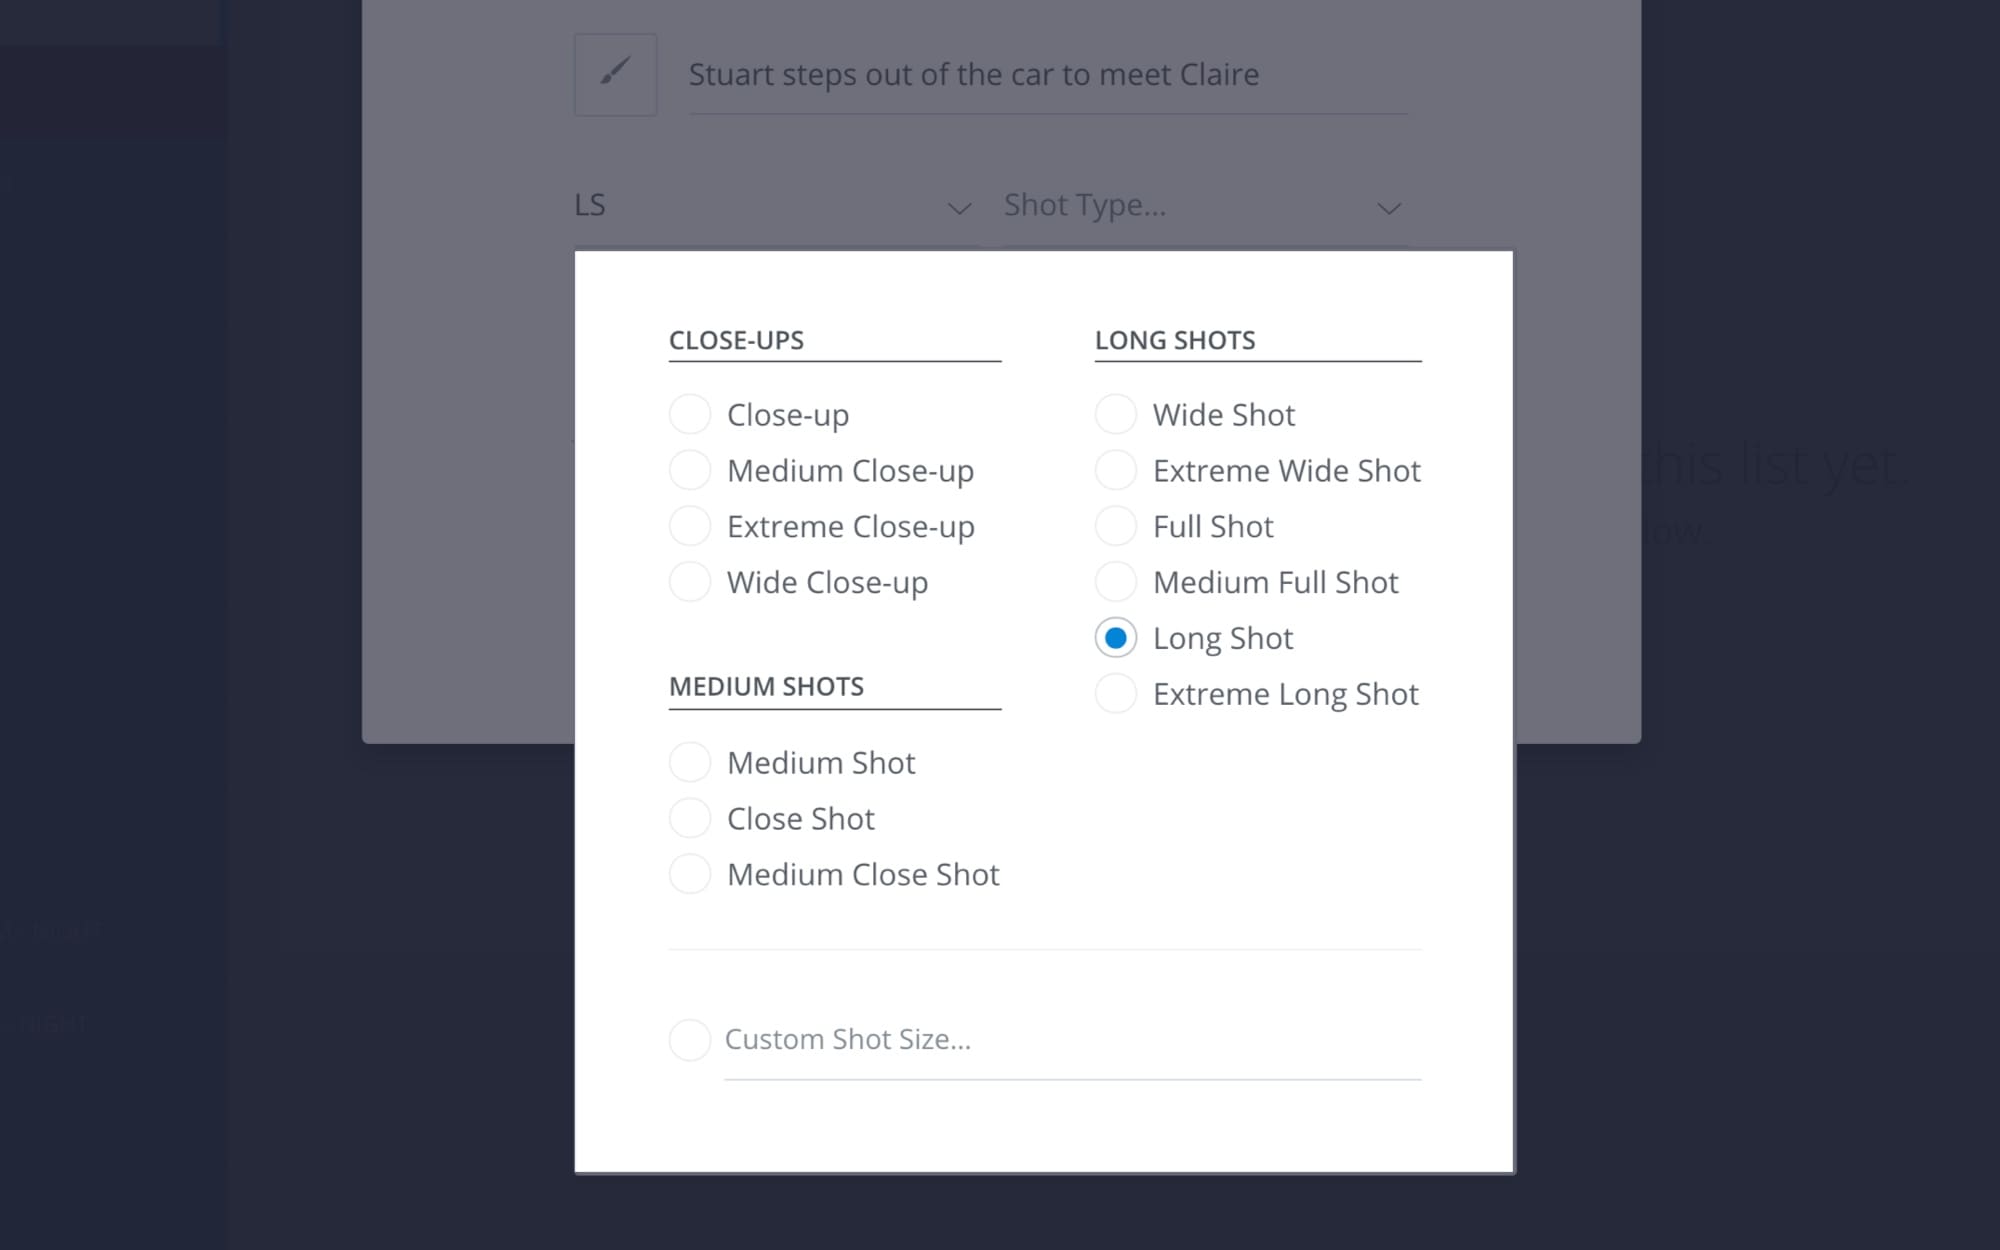
Choosing Camera Shot
I would then use closer medium shots for the singles of each character talking.
Pro Tip: You might want to be uber-specific about shot size. Maybe you want to go so close-up that your subject is indistinguishable. Use the “Custom Shot Size” to manually type this instead.
Use a Custom Shot Type
Choosing what shot type to use
A shot type identifies your camera’s height, angle, framing and focal length. There are tons of options when selecting a shot type. Where should the camera be? How many people are in your shot? What’s in focus?
There are many great resources to guide your thinking on this. But it all boils down to what your audience should learn through each shot.
Back to my two-person conversation scene. Assume these two are old friends discussing an old memory. How to best convey this? Consider my shot choice:
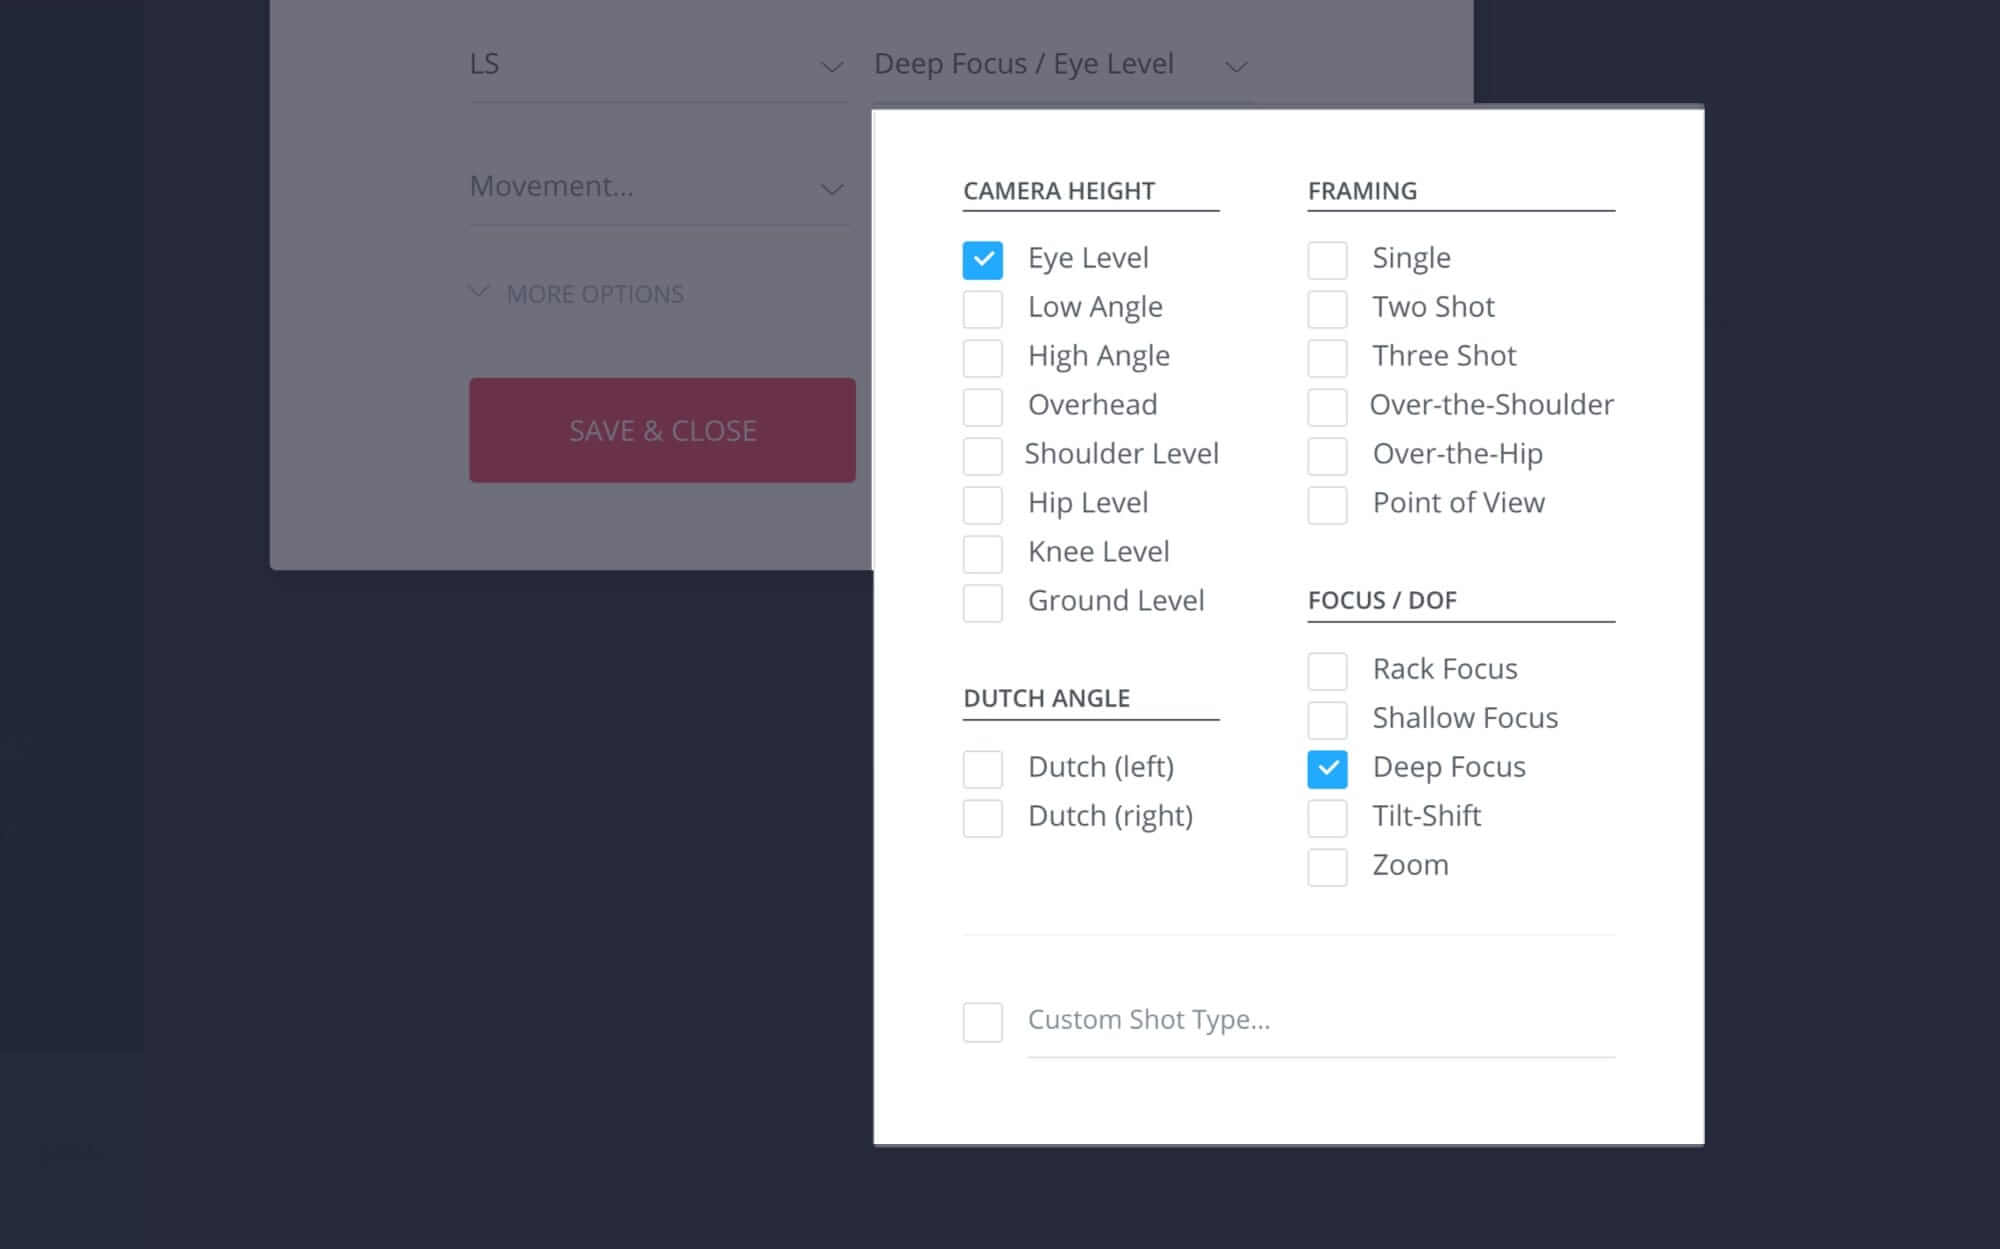
Choose your shot type to put your audience into your subject’s shoes.
I already used a long shot size to establish the two friends. I used eye-level shot types for both to make the characters seem balanced and connected. I also used deep focus to make the room feel defined and familiar.
Pro Tip: Use a Custom Shot Type if you have something more specific in mind.Choose your Camera MOvements
Choosing what Shot Movement to use
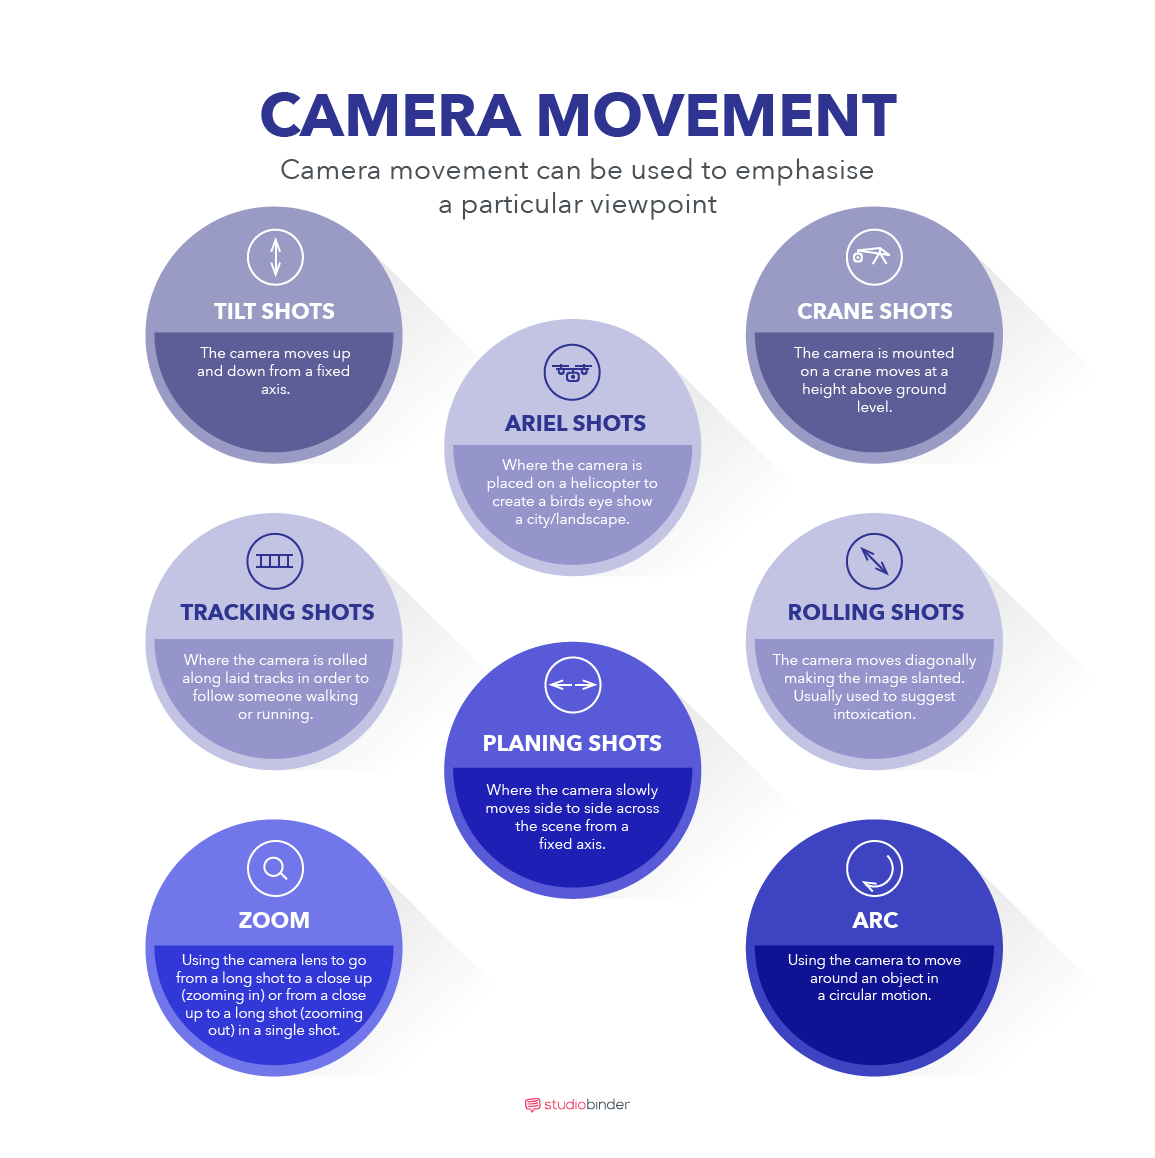
quiCamera movement is just as important as your shot’s framing. A camera can move in four different ways:
- Static stays in one place
- Tilting moves up and down
- Panning moves side-to-side
- Tracking moves with your subject
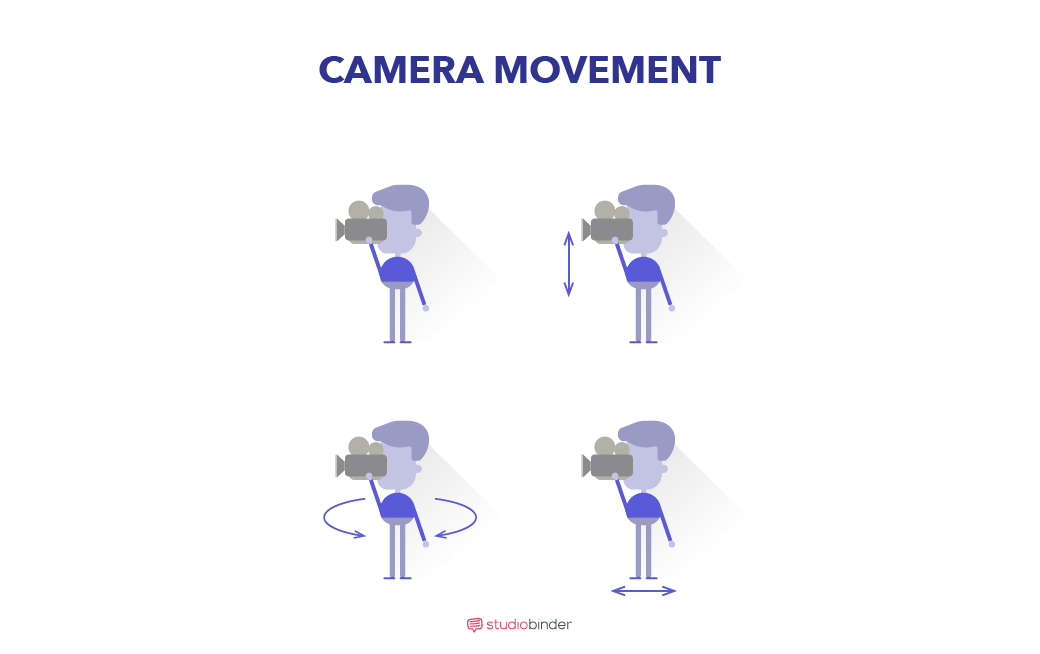
Camera Movements
Each movement communicates something different. But don’t get overwhelmed. Just base your shot decisions off what your audience needs to know.
Consider my conversation scene again. I framed my two characters in a long two shot, from an eye-level angle in deep focus. But how should the camera move?
I went with a static shot. I thought anything else would be distracting.
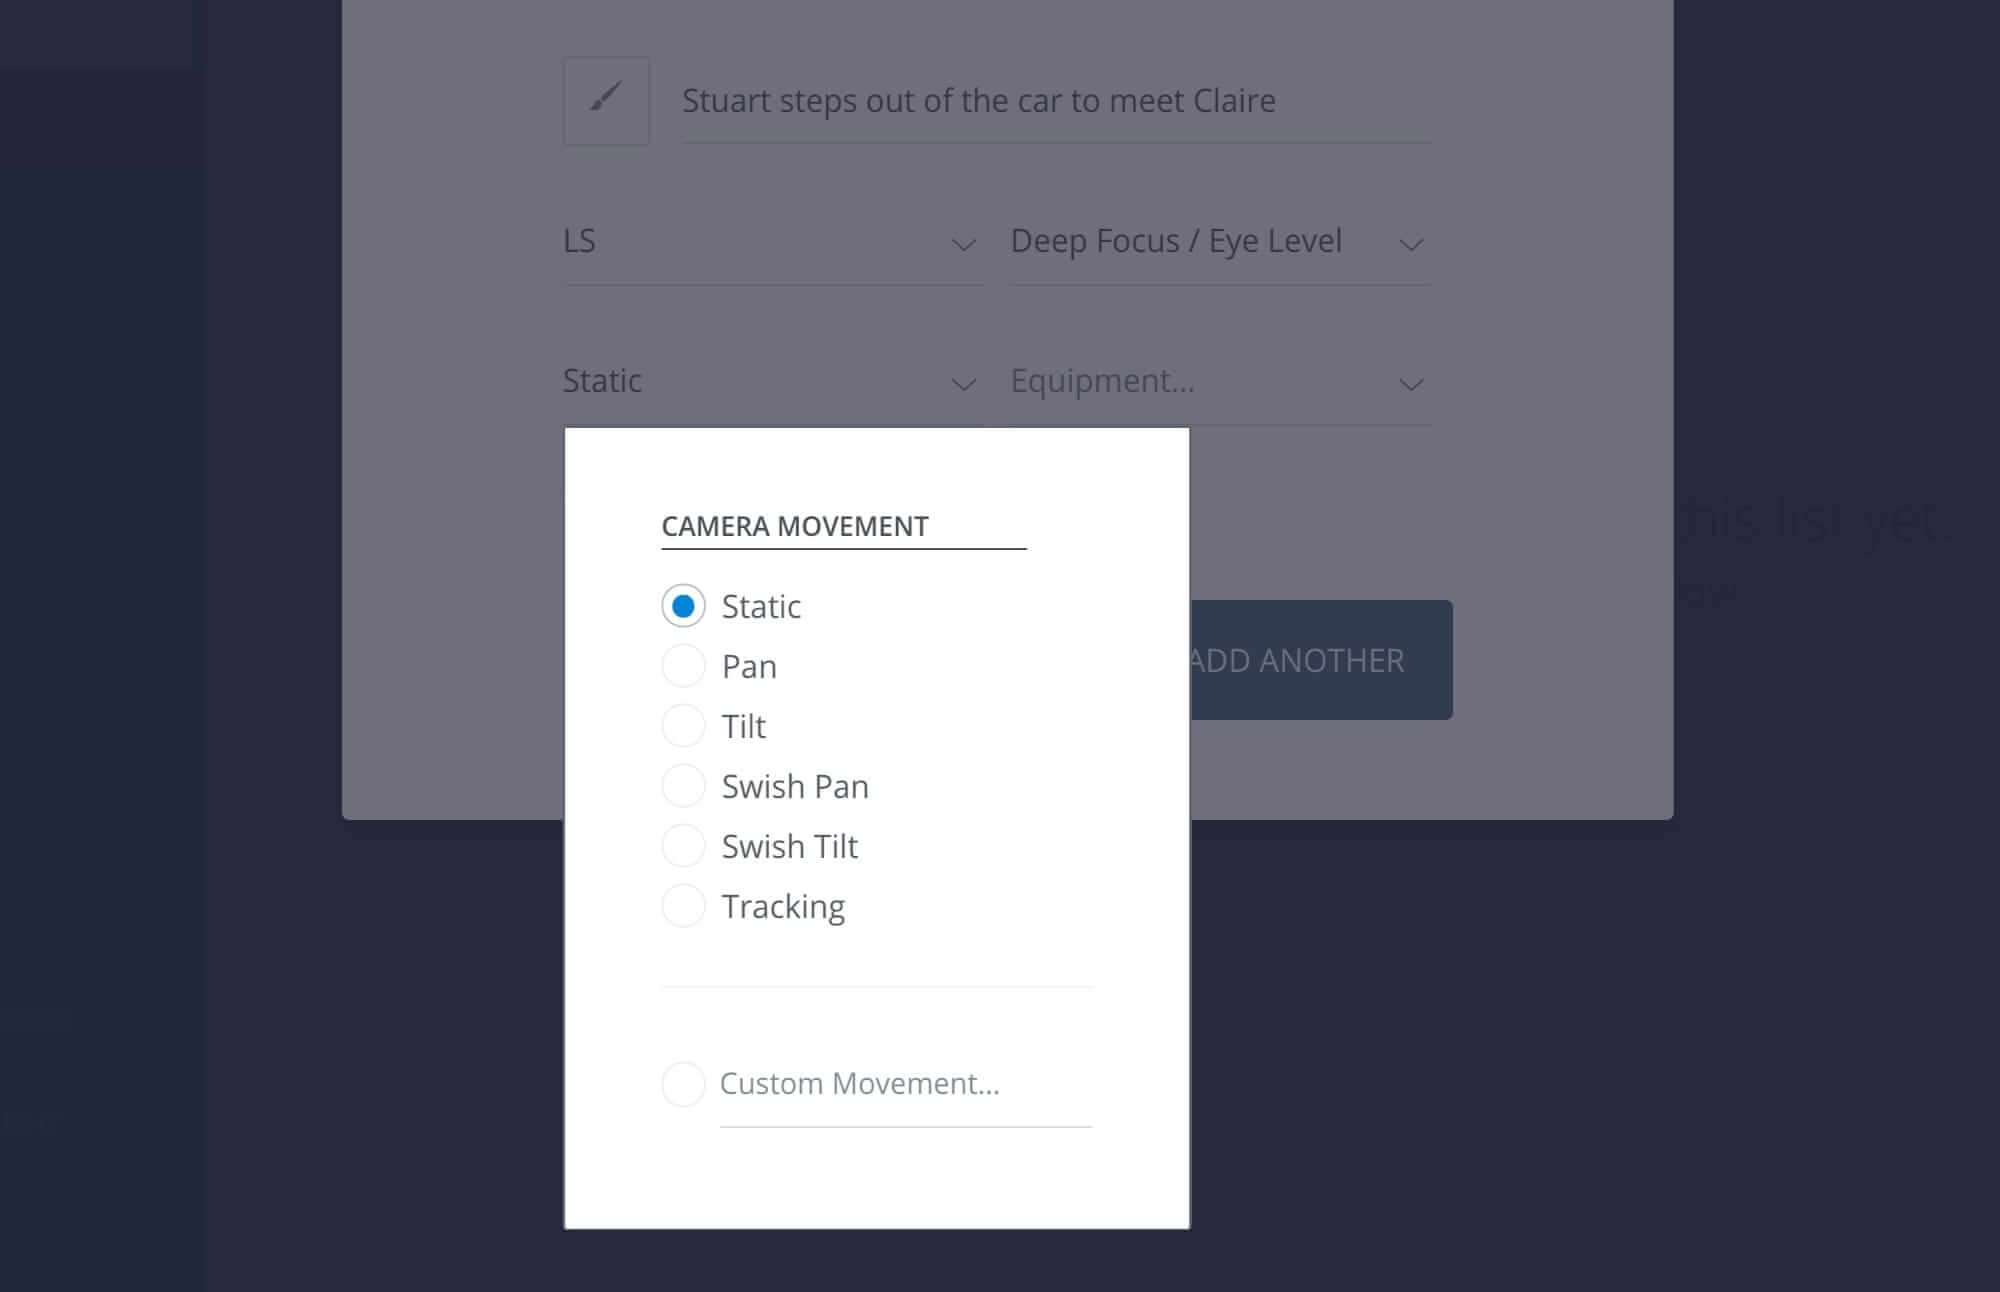
Choose your shot type to put your audience into your subject’s shoes.
Choose Equipment
Choosing what equipment to use
The equipment you use impacts how your movement is executed. Your choice of mechanism will serve the meaning of your shot.
Camera Movements
Use sticks, steadicams, or dollies to carry out smooth camera moves. If bumpy is what you want, then you’ll choose gimbals or hand-held shots. For my wide shot, I’m going with sticks to maximize the feeling of stability between the friends.
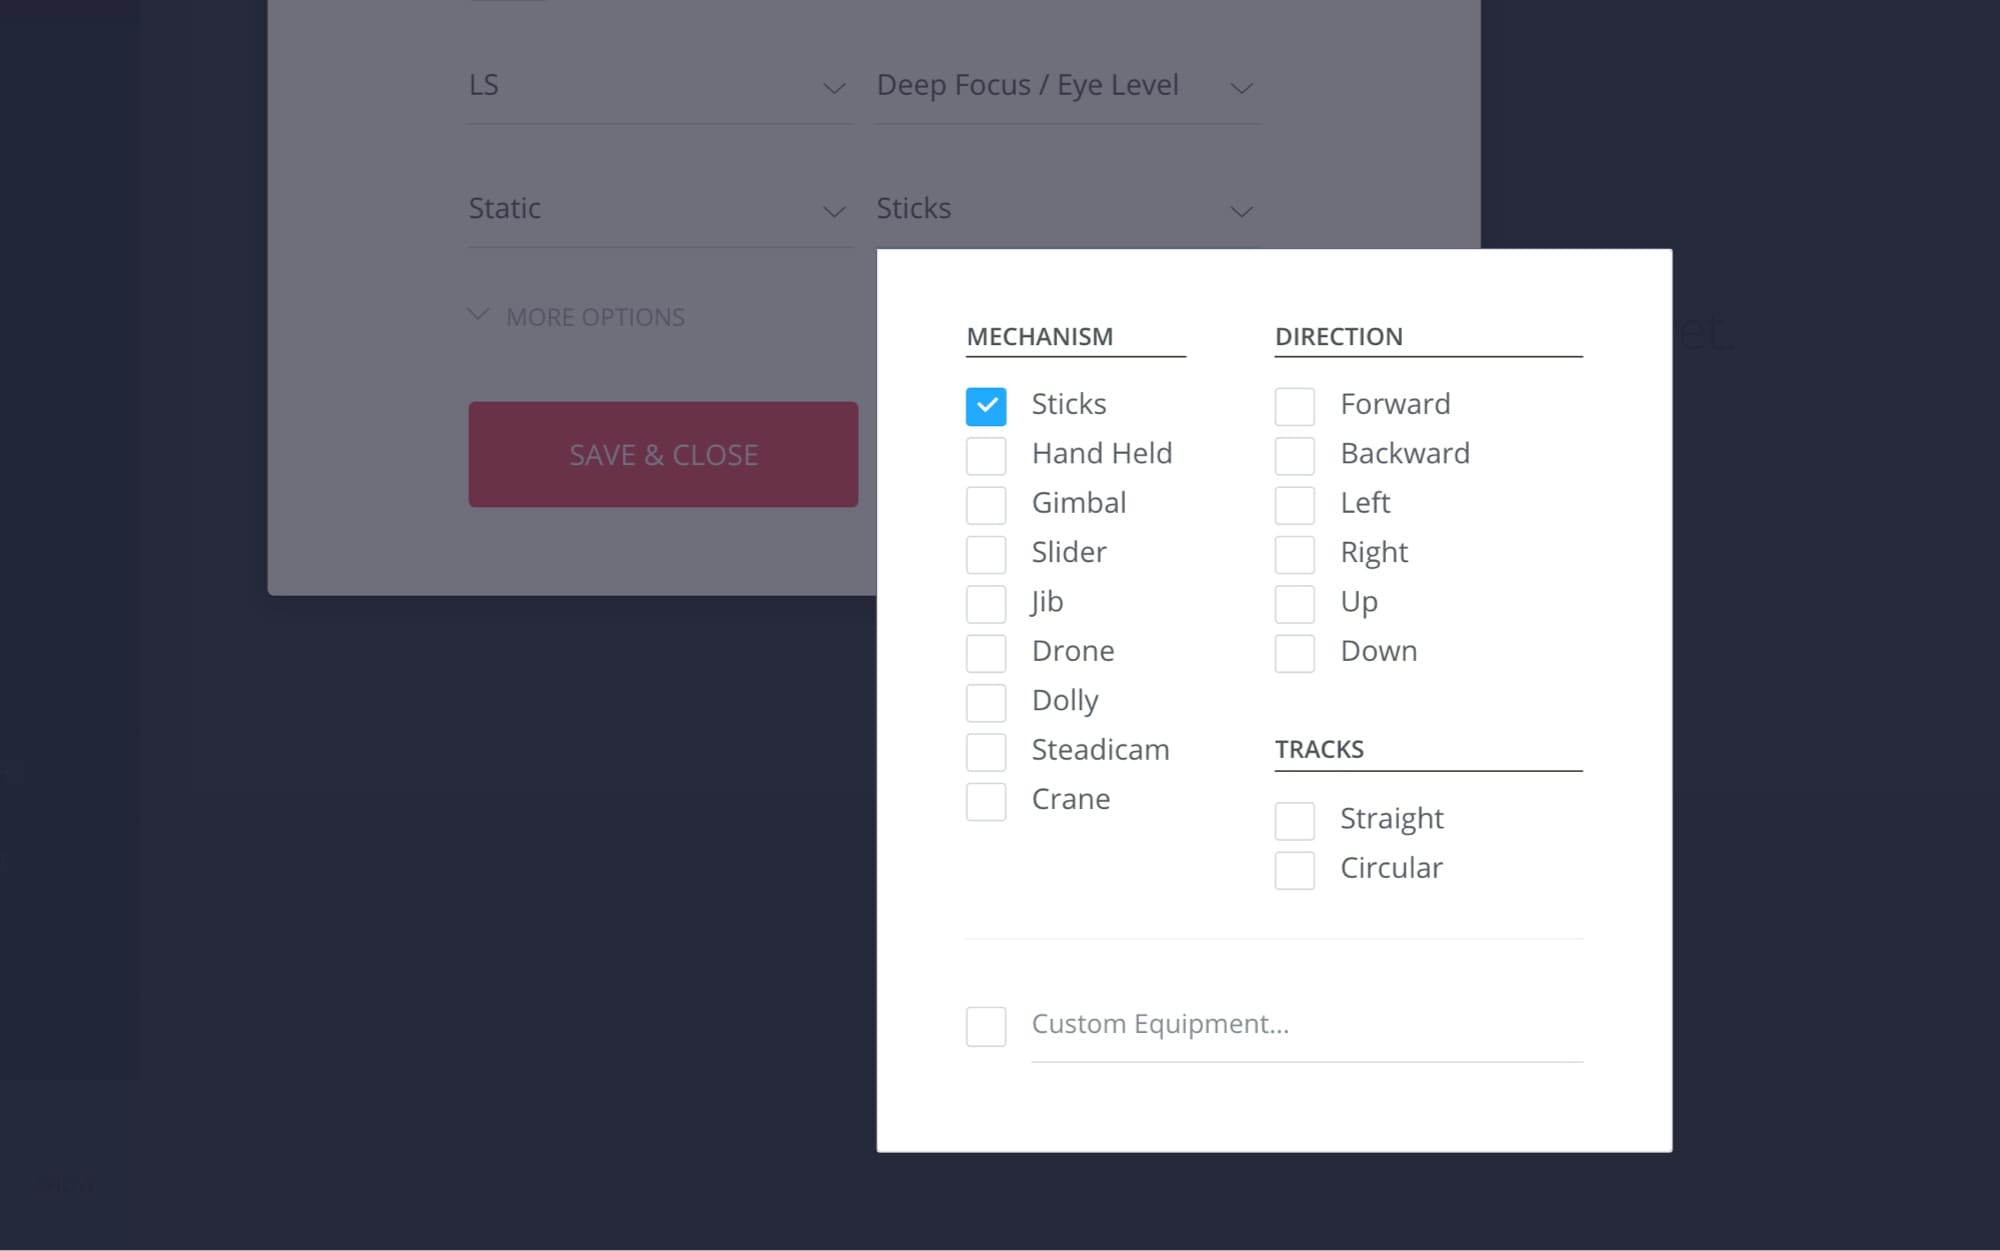
Choose equipment to add texture to your choice of movement.
Know your Shot Requirements
Be specific when defining your shots
Be as specific as you need when creating your shot list. This is your chance to tell your crew what your shot is and what it requires. To do this, click on the More Options button in the pop-up.
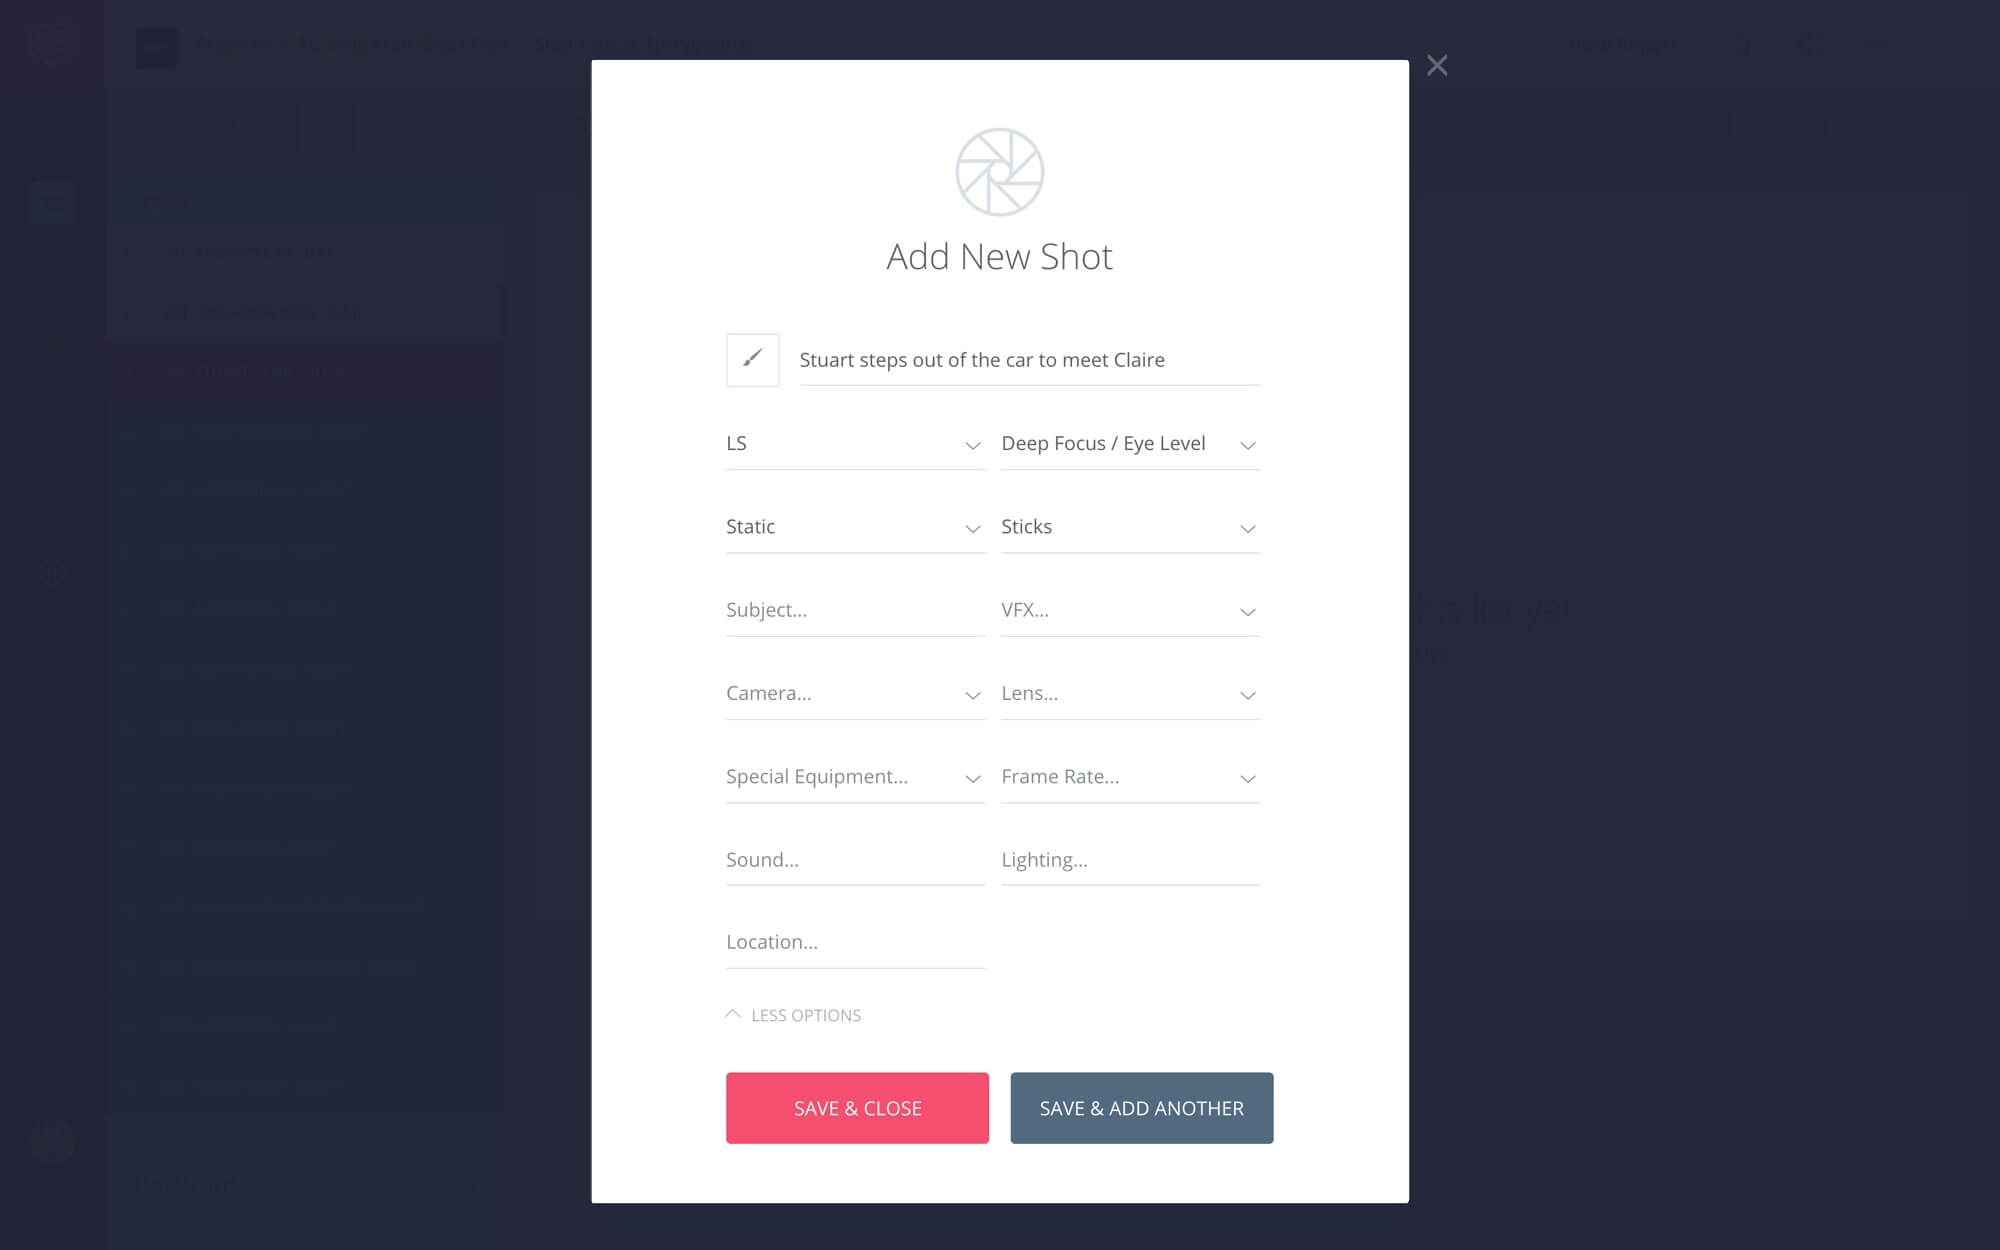
Get as granular as you need when communicating your shot’s requirements.
Here you can better identify your shot’s subject, if it needs VFX, specialty gear, audio & lighting notes, etc.
Organize your SHots
Manage your shots as you go
When you’re done making your shot, click Save & Close and return to your shot list. If you want to make a bunch of shots on the quick, click Save & Add Another.
Here's what a newly created shot will look like:

Manage your shots as you go
If you click on the ellipses near the right edge of every row, a dropdown will provide further actions for that shot.
Click on Edit Shot to go back and make changes. Duplicate Shot saves time when you need to create different but similar shots. In these instances, just duplicate your shot then change it to fit. You can also add a shot or note under any shot, or remove the shot from the list.
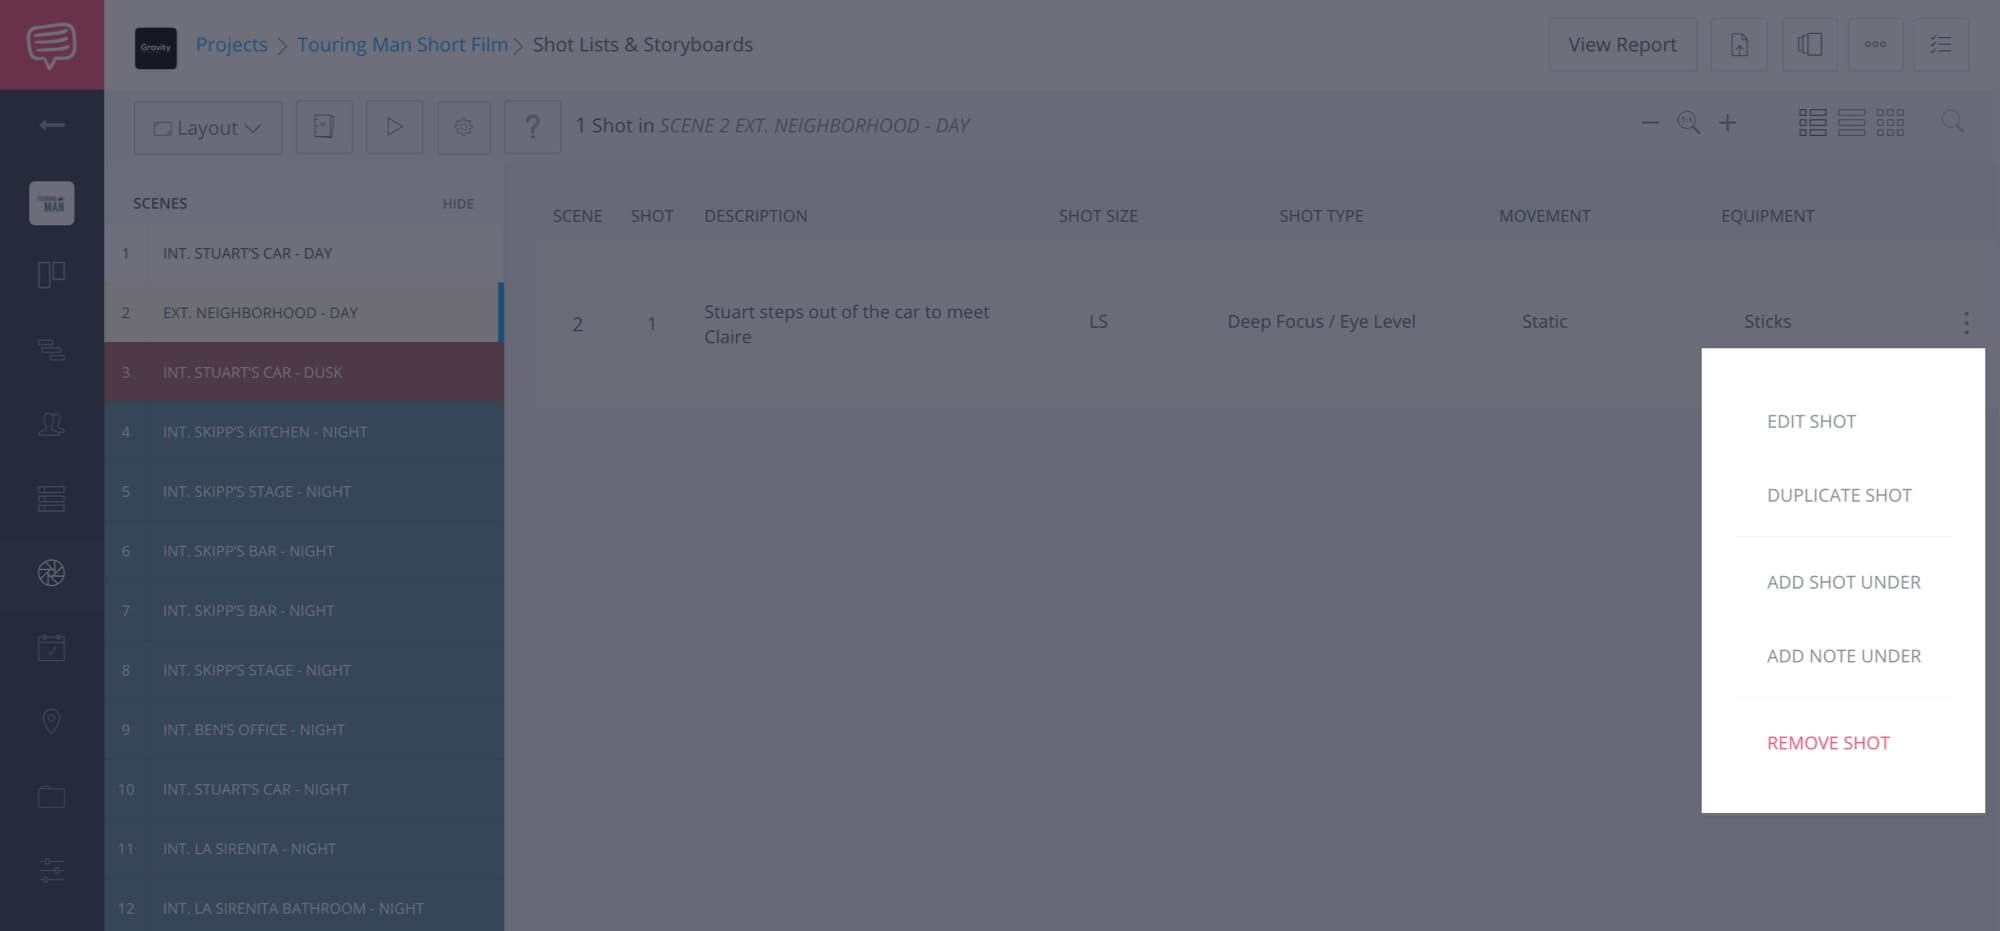
StudioBinder gives you tools to organize your shots as you go.
Be generous with notes. Use them to anticipate your day. Since you’ll look at your shot list a ton on your shooting day, clarify as much as you can. Can you strike those singles and shoot everything in a master if you need? Maybe those insert shots can be left for another day?
You get the idea.
You don’t have to create your shots in sequence. Just click on the triple bar to move them around as you go. This will allow you to create freely and worry about sequence when convenient. Shots will auto-renumber themselves as you move them around.
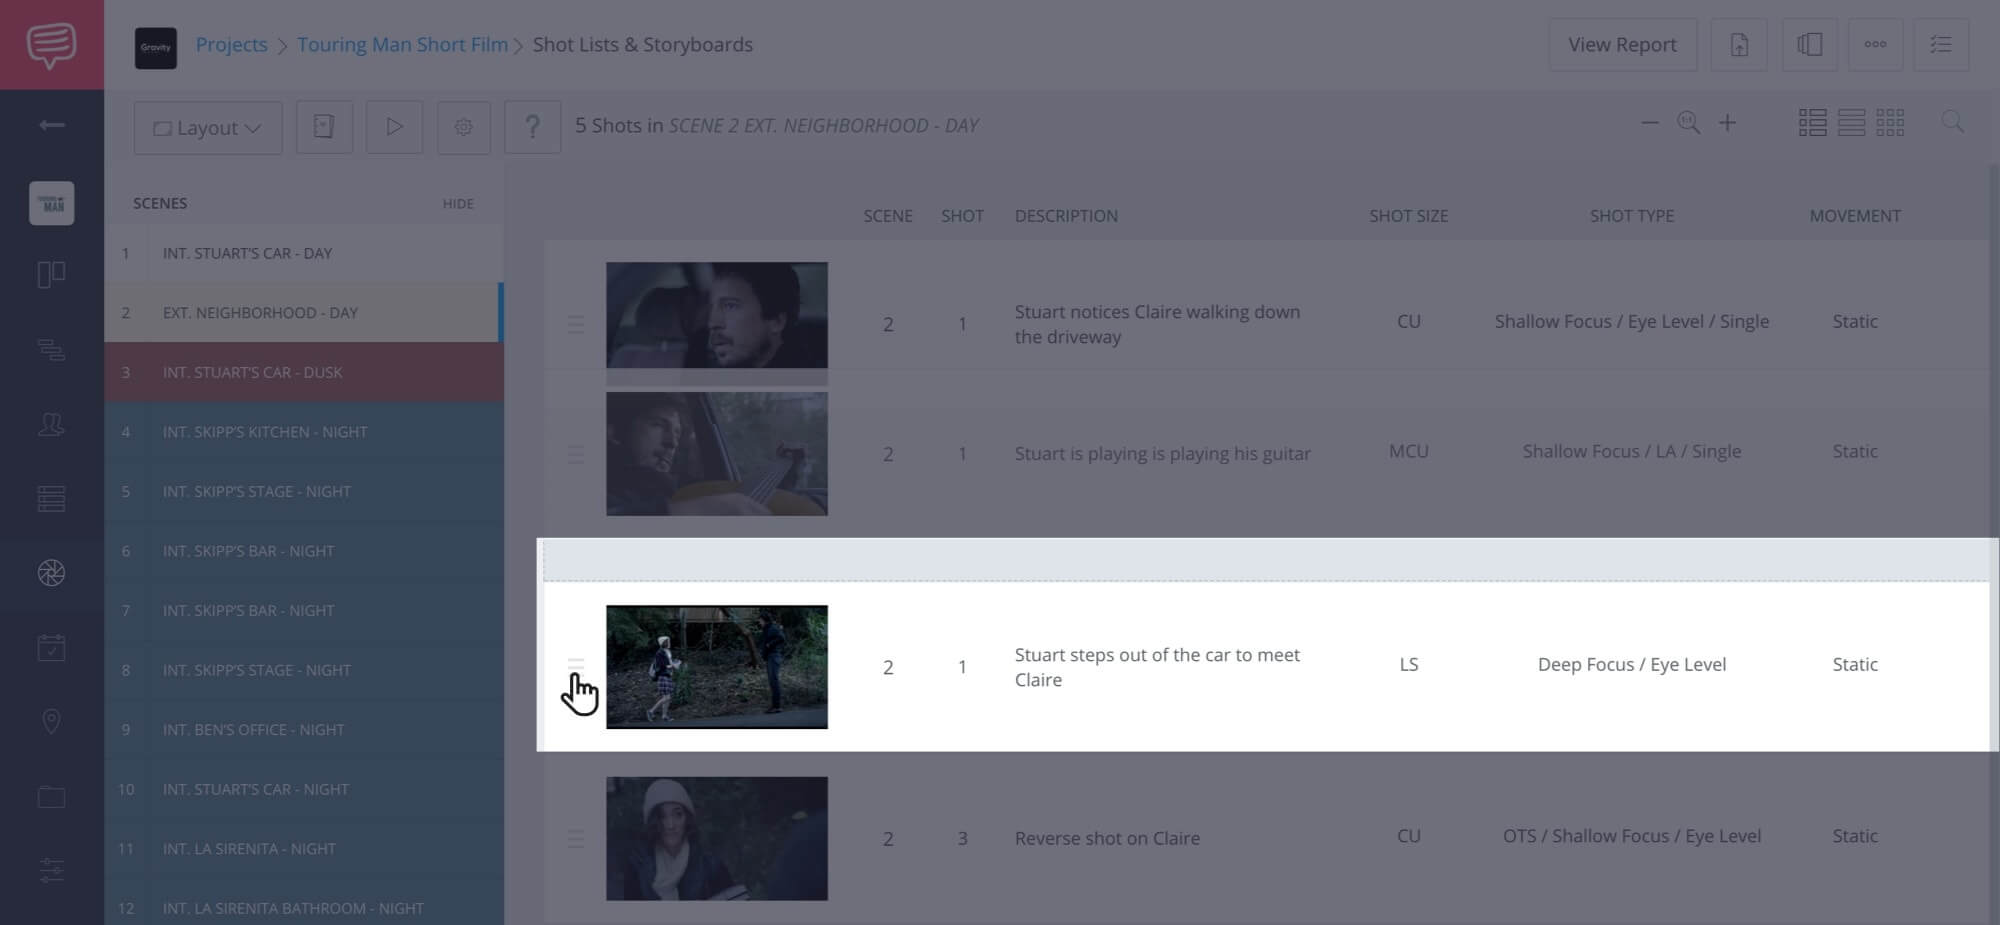
Easily resequence your shots by dragging them to where they need to go.
On top of that, you can upload custom images to each shot to easily identify the look you're going for. Take a look at this to give you an idea:
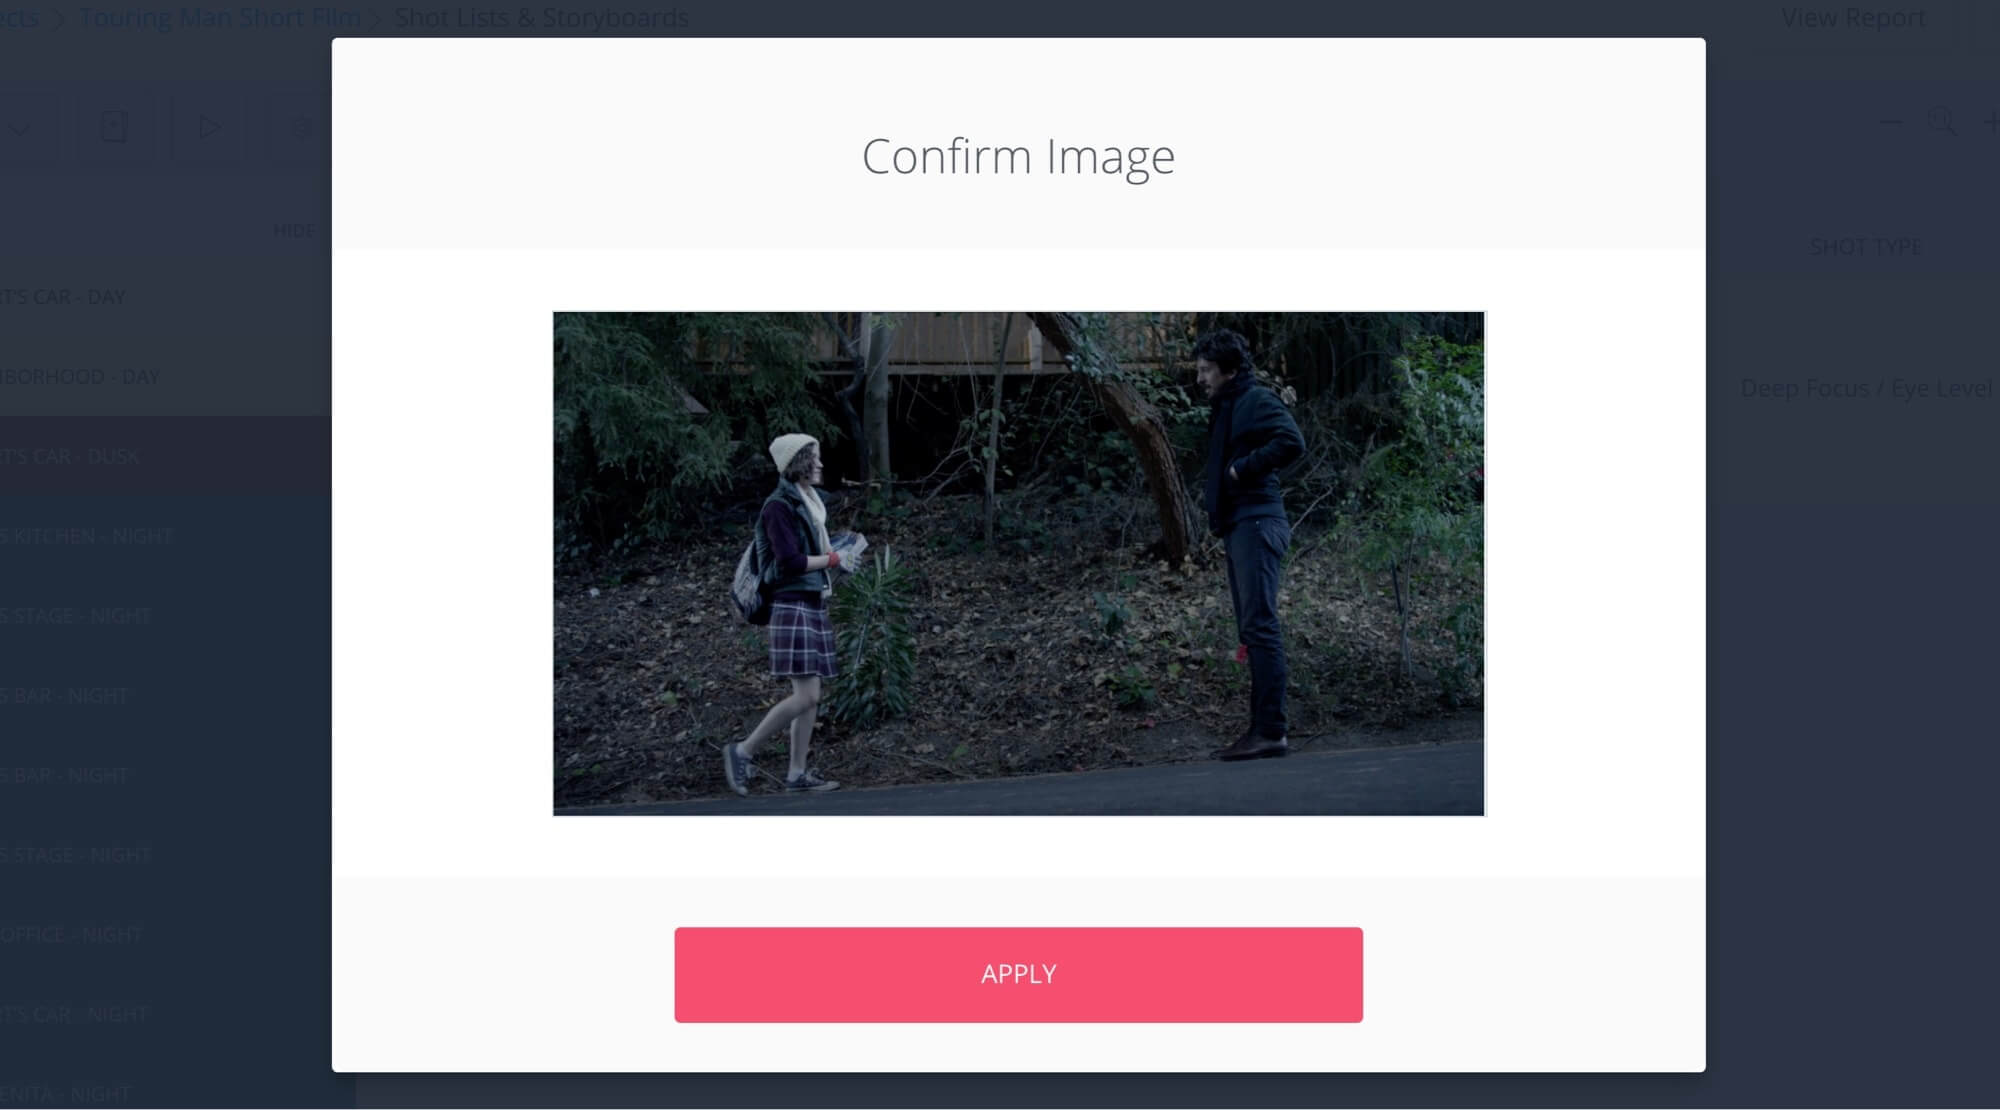
Upload Custom Image
Banner Notes
If you need to add banner notes, click on the button at the bottom. Notes are a nice way to break up a shot list.
You could add a note indicating when there is a company move, meal break, or elongated setup time for gear. You can adjust the color of notes as you like.
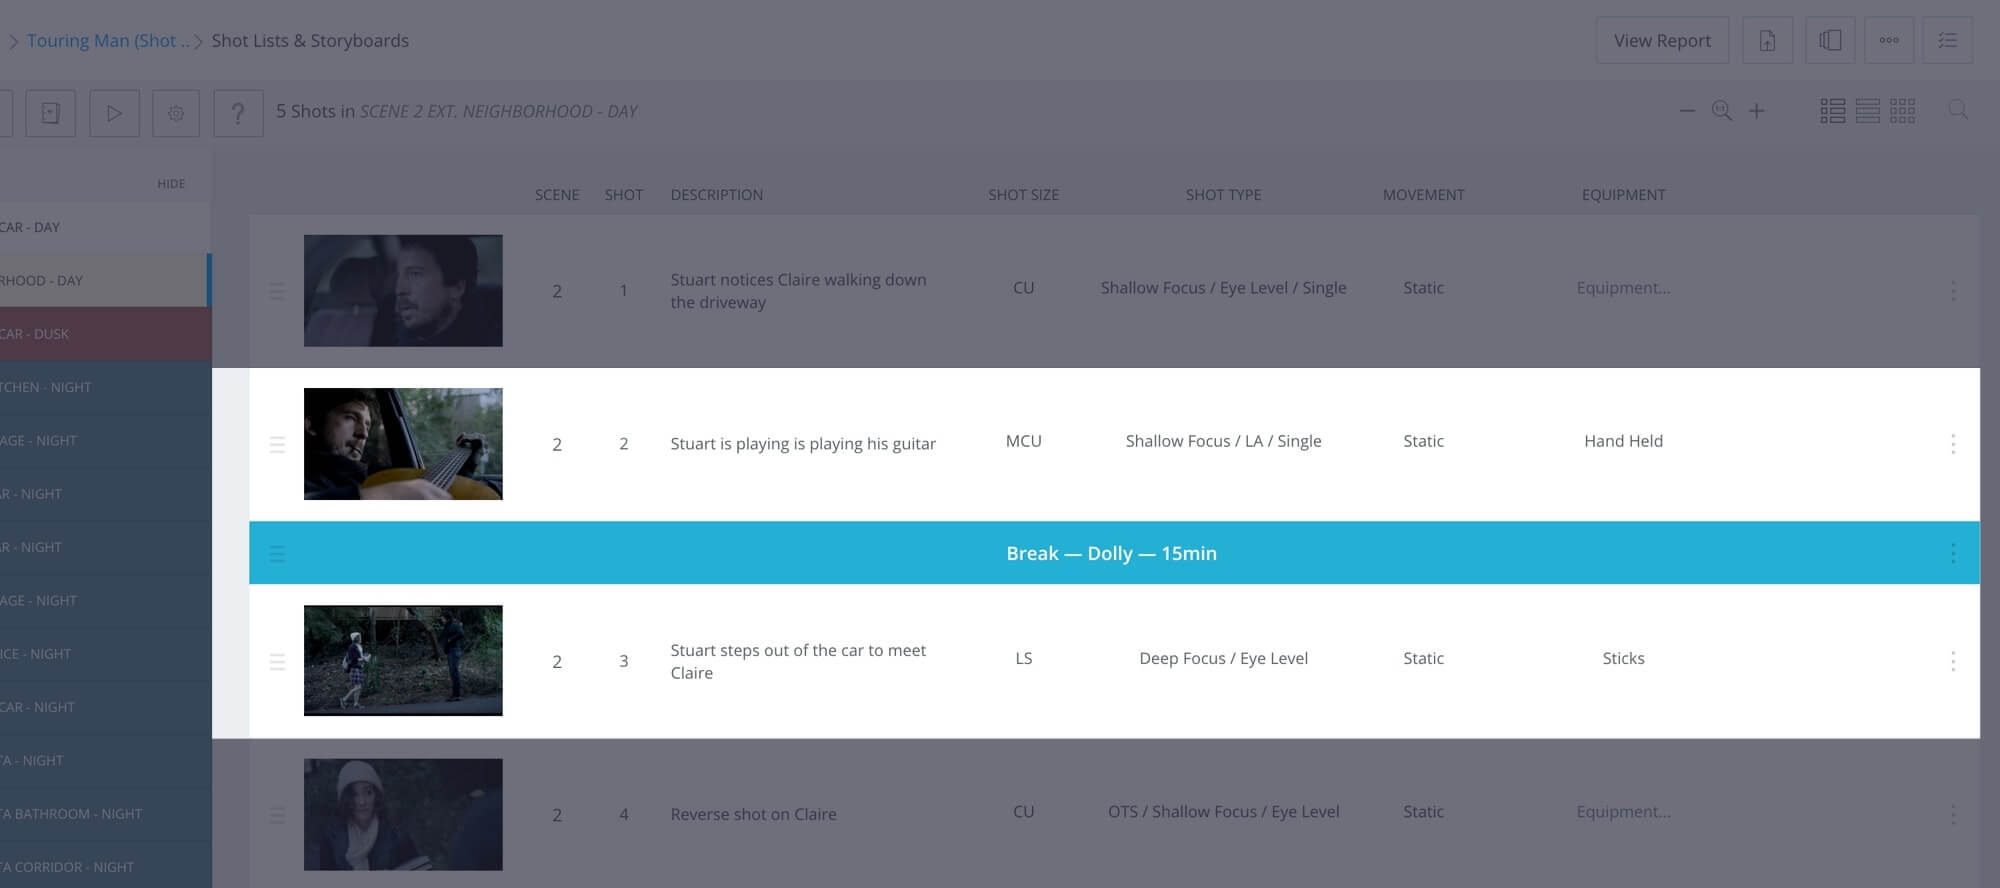
If you need to a note as you go, just click the button and get it done!
These actions will up your productivity and organization when you create your shot list.
Pro Tip: Use the cheat sheet hotkeys to create and organize your shots faster as you go.Color-CODING
StudioBinder supports color coding per shot (and note) for added organization.
For example, start thinking about which shots you can lose if you don’t have enough time on your day. Use color labels to mark off the shots that are nonessential and can be lost.
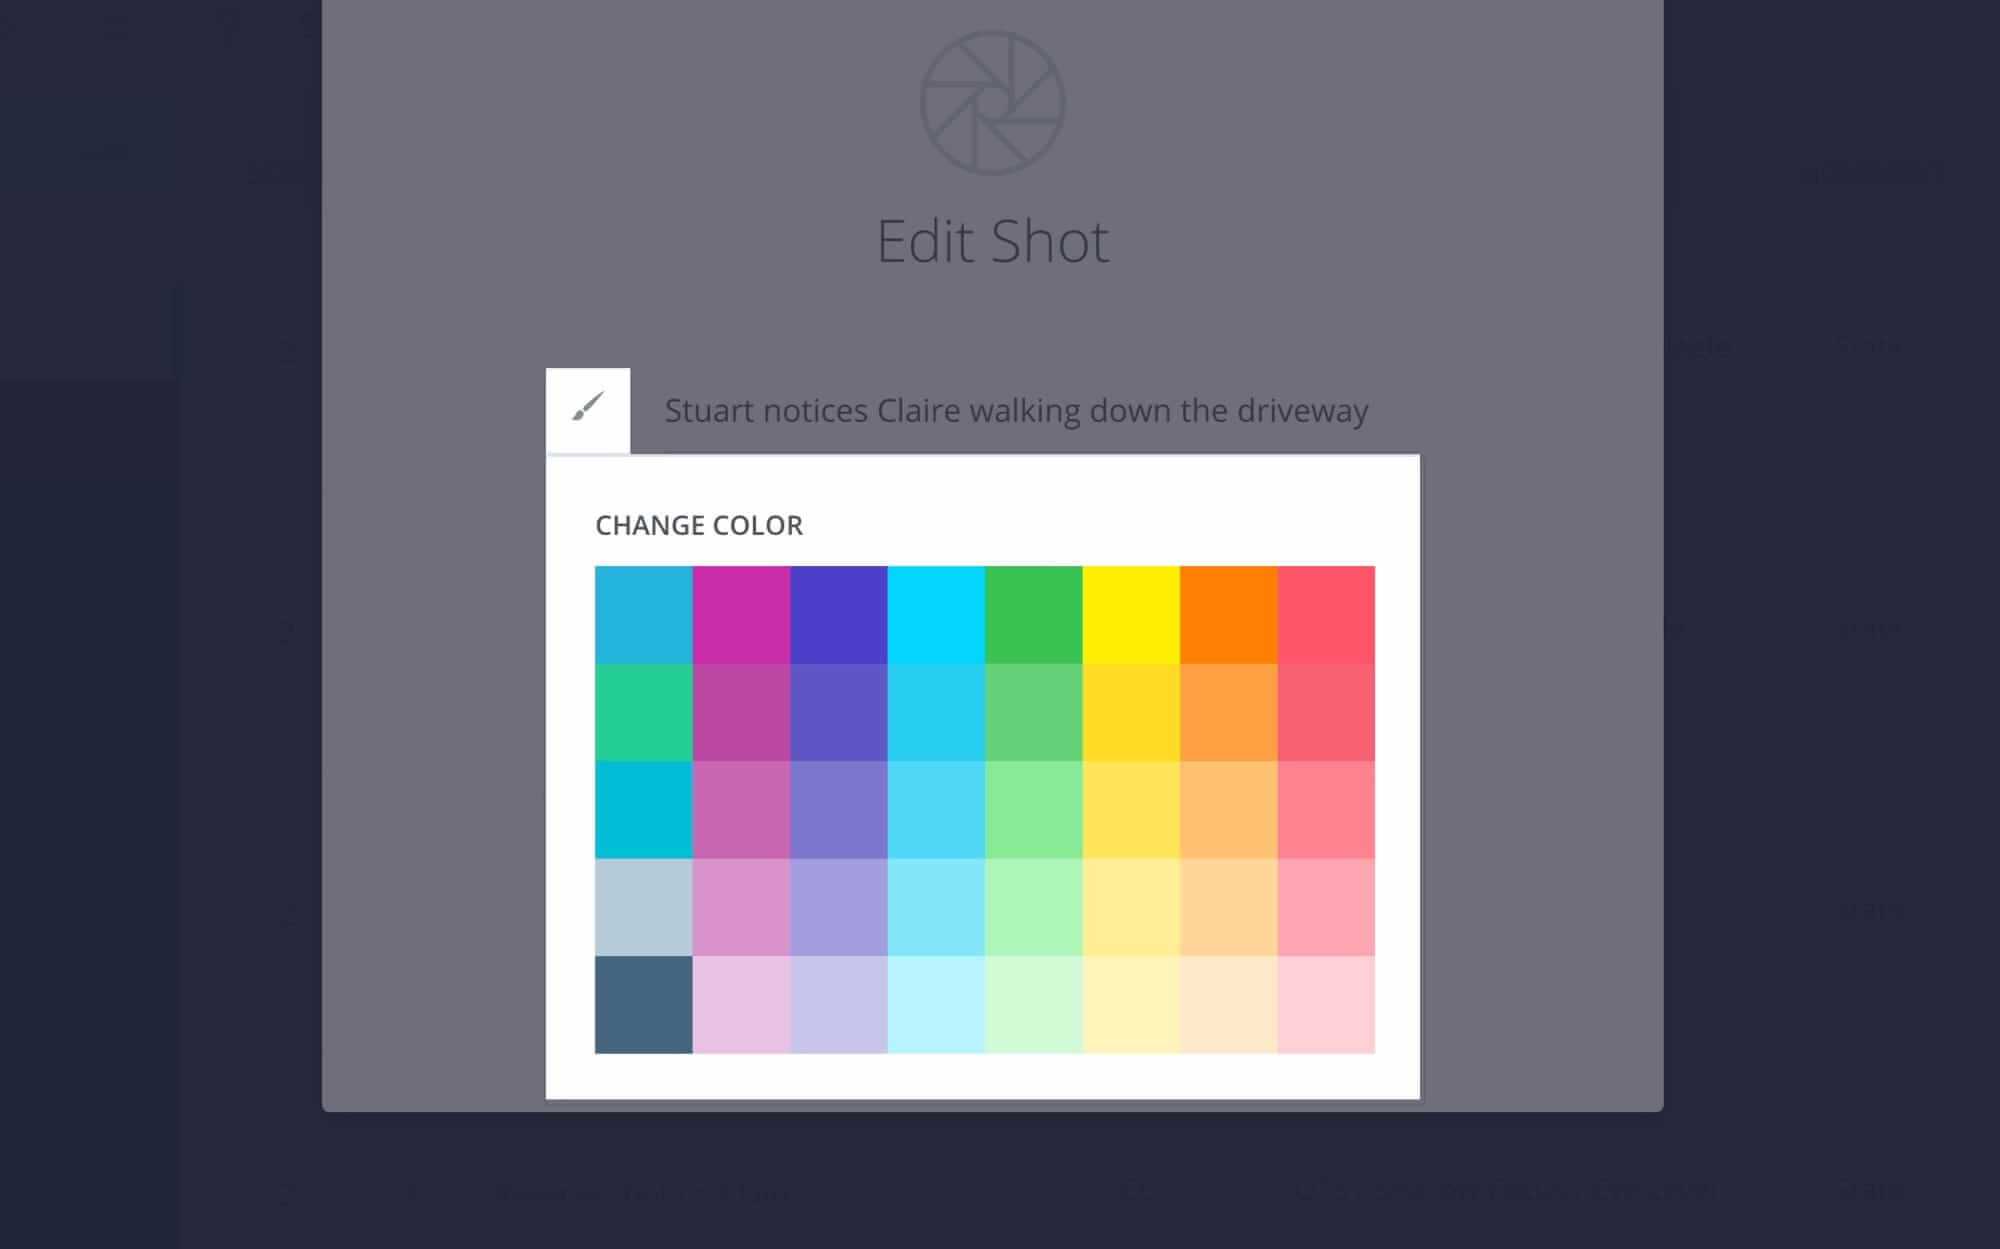
Use color labels to mark off the shots
This will color your scene accordingly in your shot list and reports.
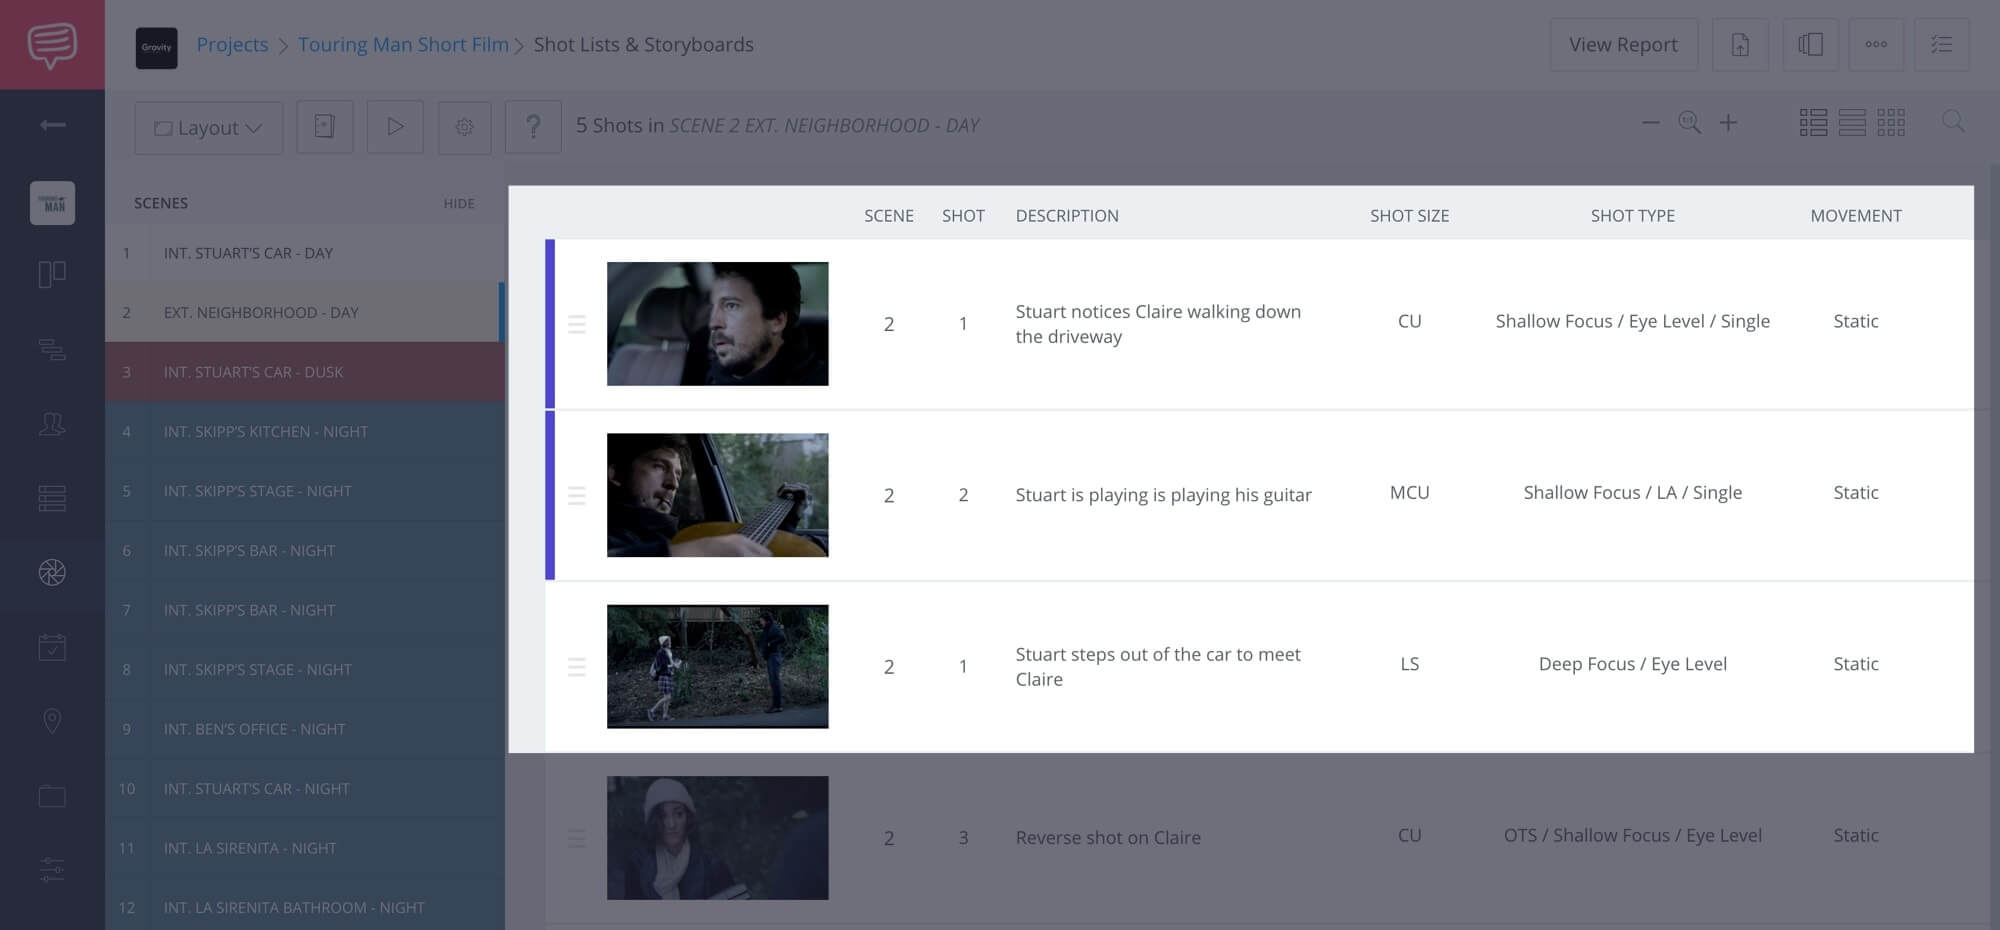
color your scene accordingly in your shot list
Add Task Card as you work
Create tasks to collaborate with your team as you go
StudioBinder’s shot list software supports tasks as well. That way you can share shot lists with the DP, director and visual collaborators, and get their feedback as you go.
Filmmaking Project Management Guided Tour
For example, you may meet with your DP to go over which lenses to use for a shot.
To do this, click on the Task Cards button. This will open up the sidebar. Click “+” button to add a new task card.
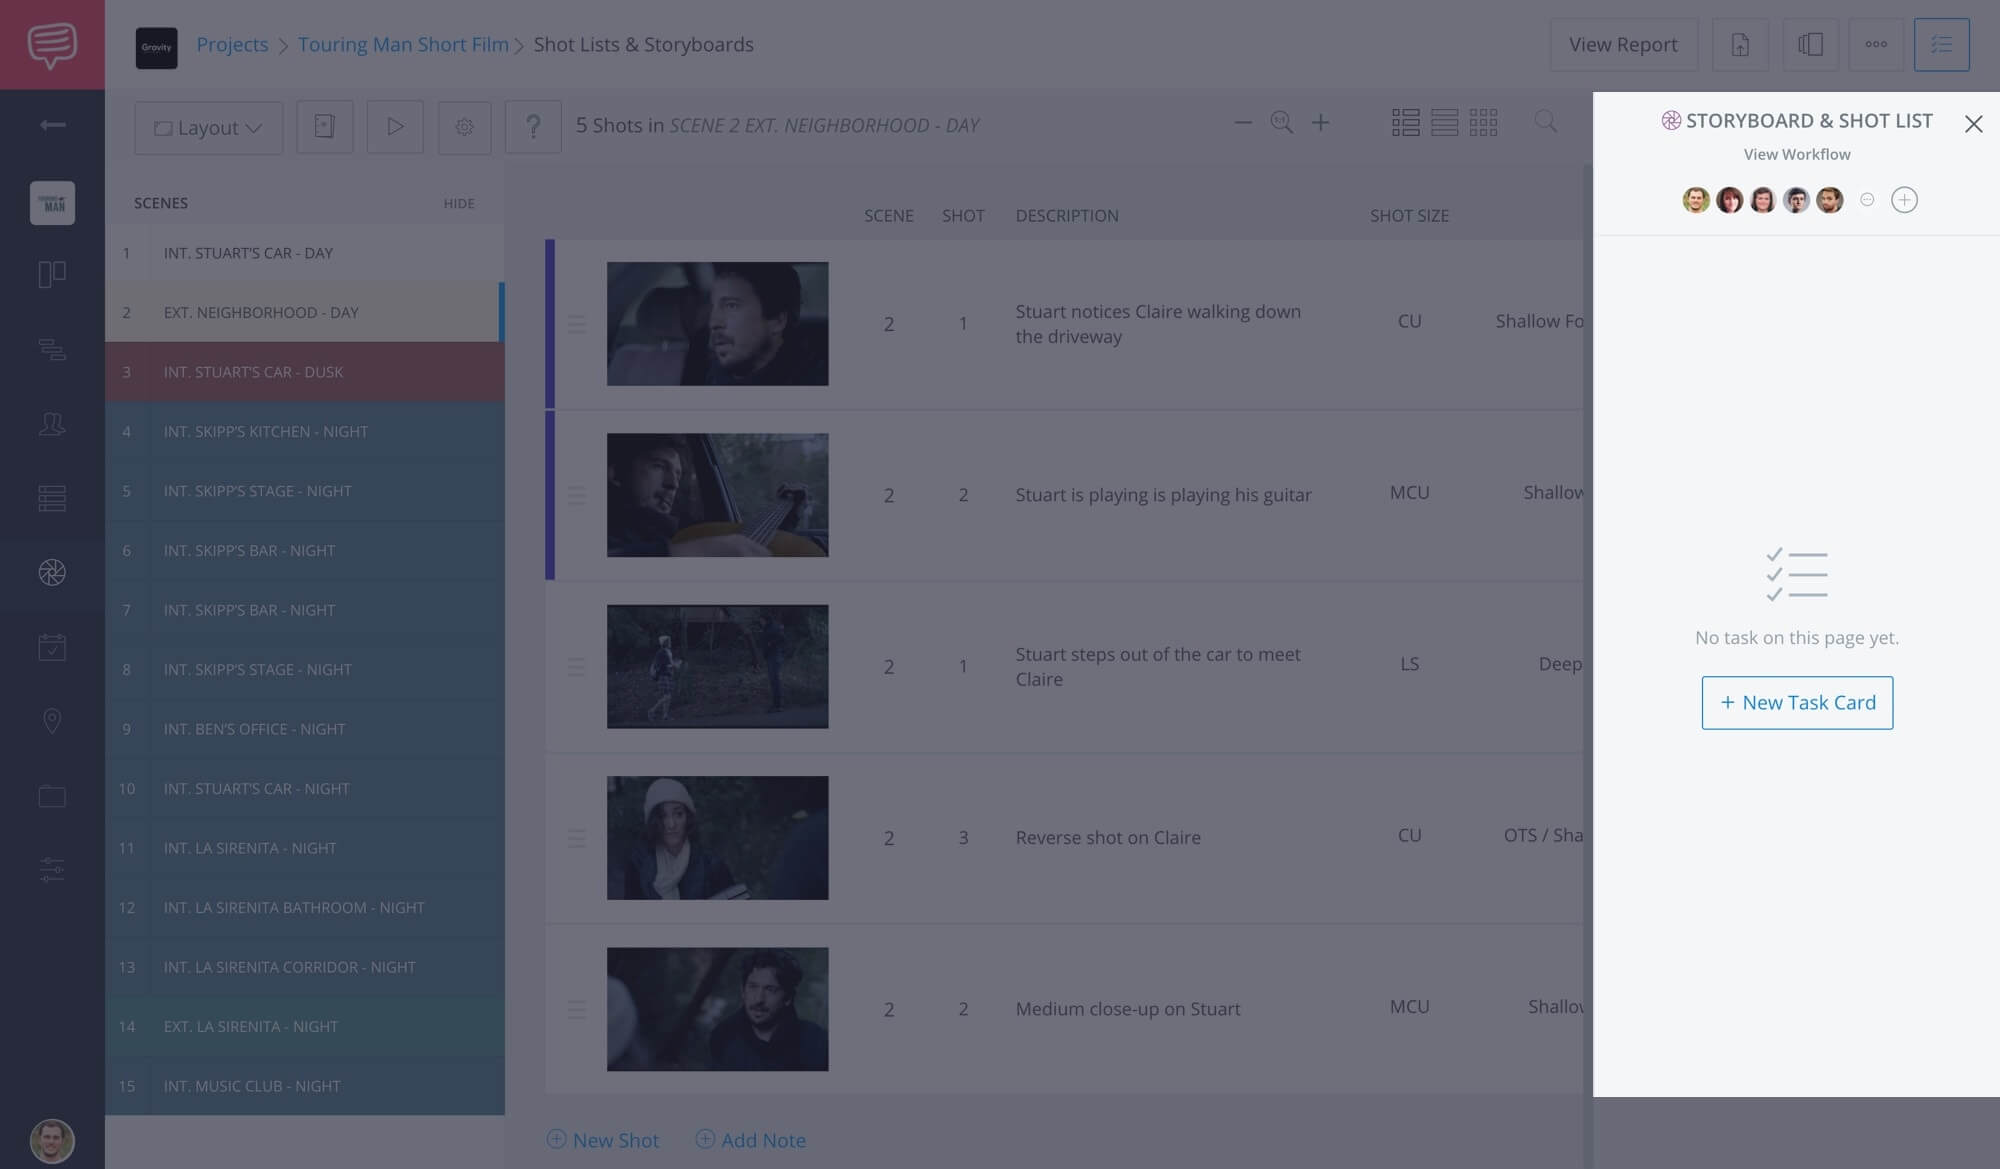
Adding a Task Card as you work.
After you name your task card, a pop up opens with oodles of details you can fill out: tasks, due dates, file attachments, comments and teammates you can assign the card to.
Most importantly, add tasks to outline the steps you want your visual collaborators to take to address a particular shot or sequence.
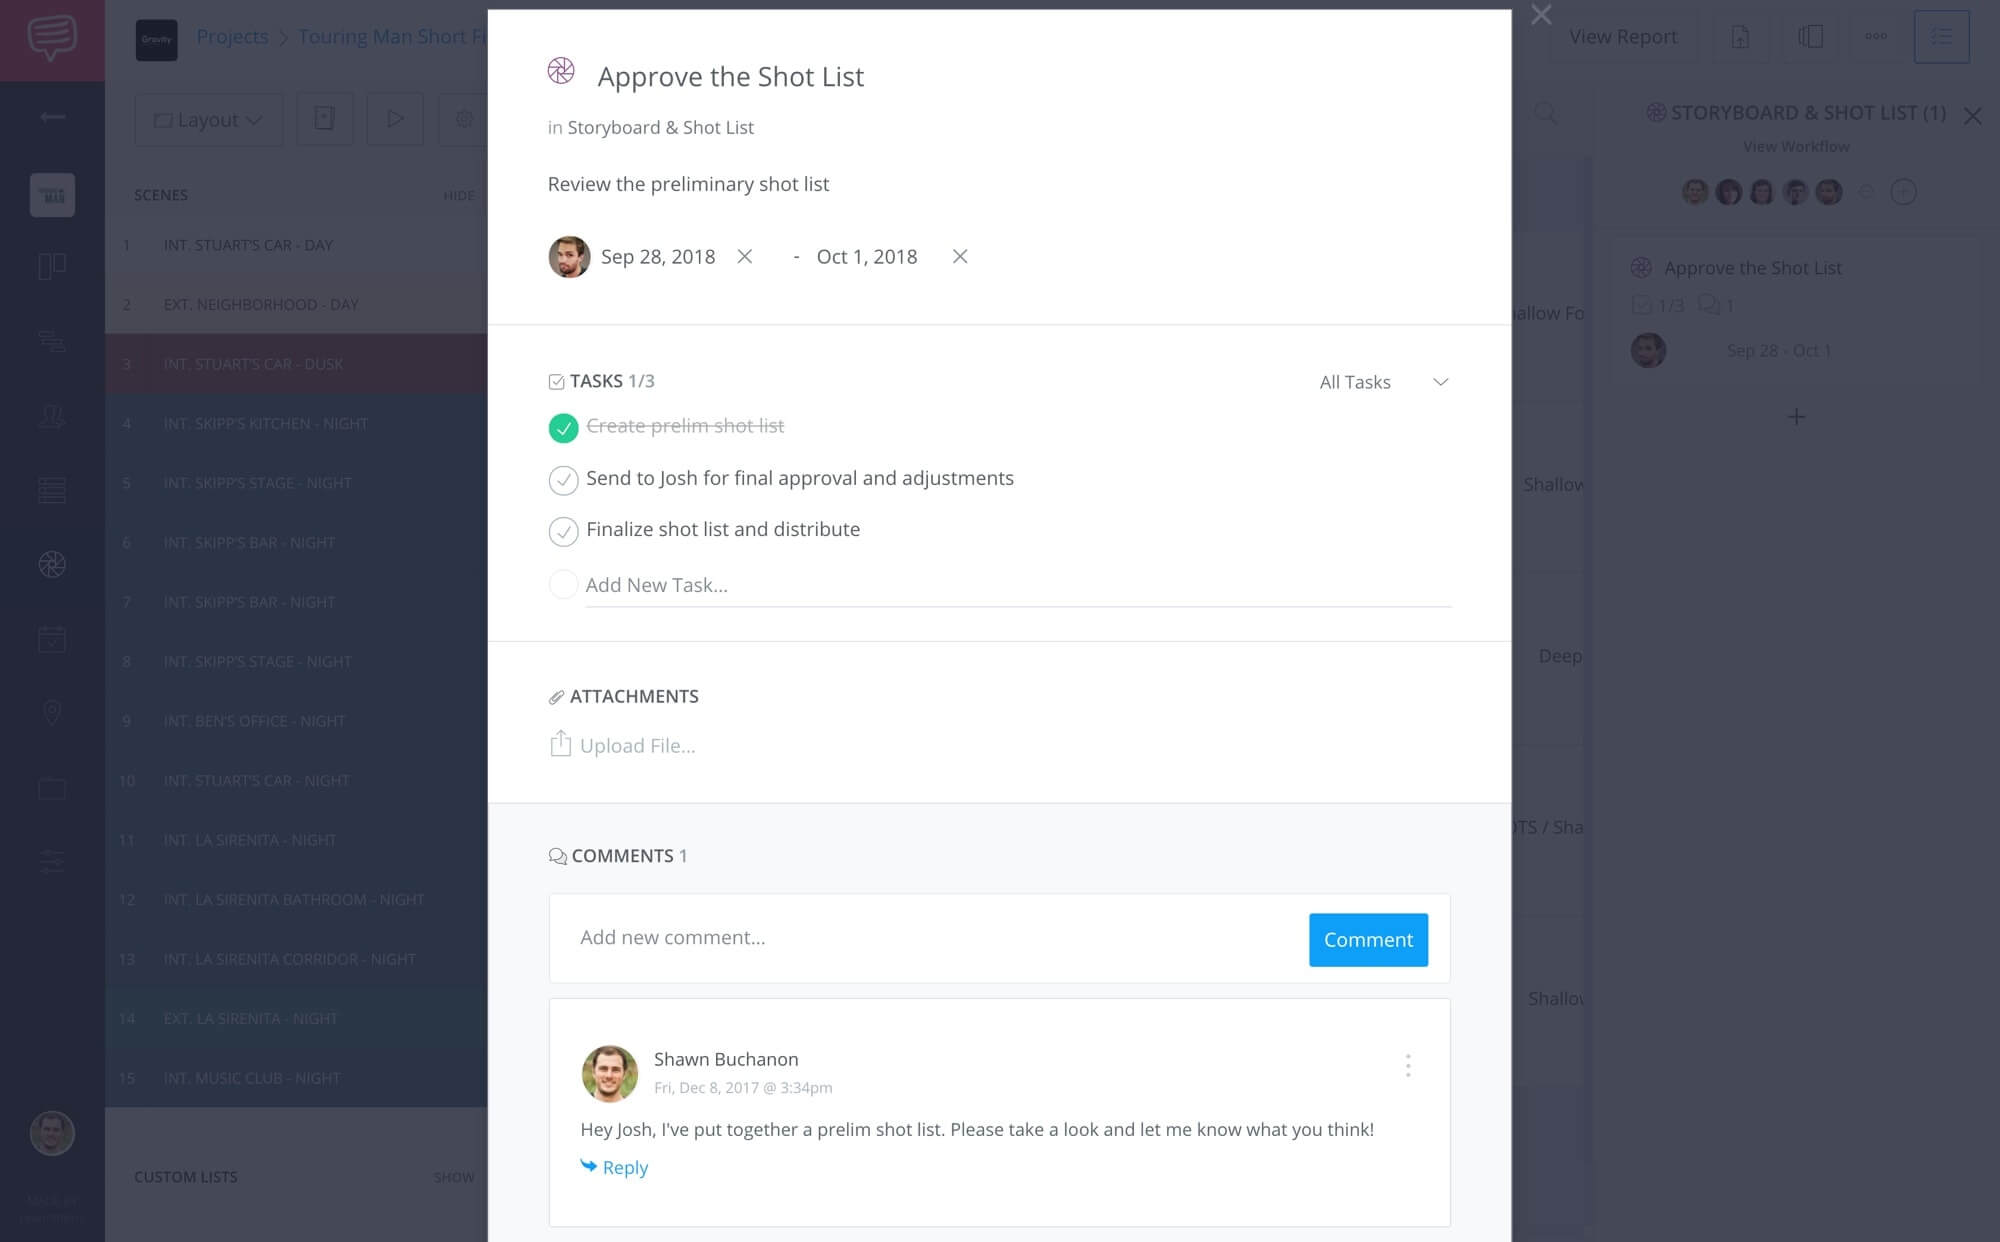
Handy, no?
Status
Don’t forget to assign a status for your task with the Change Status button which associates a color to the task card.
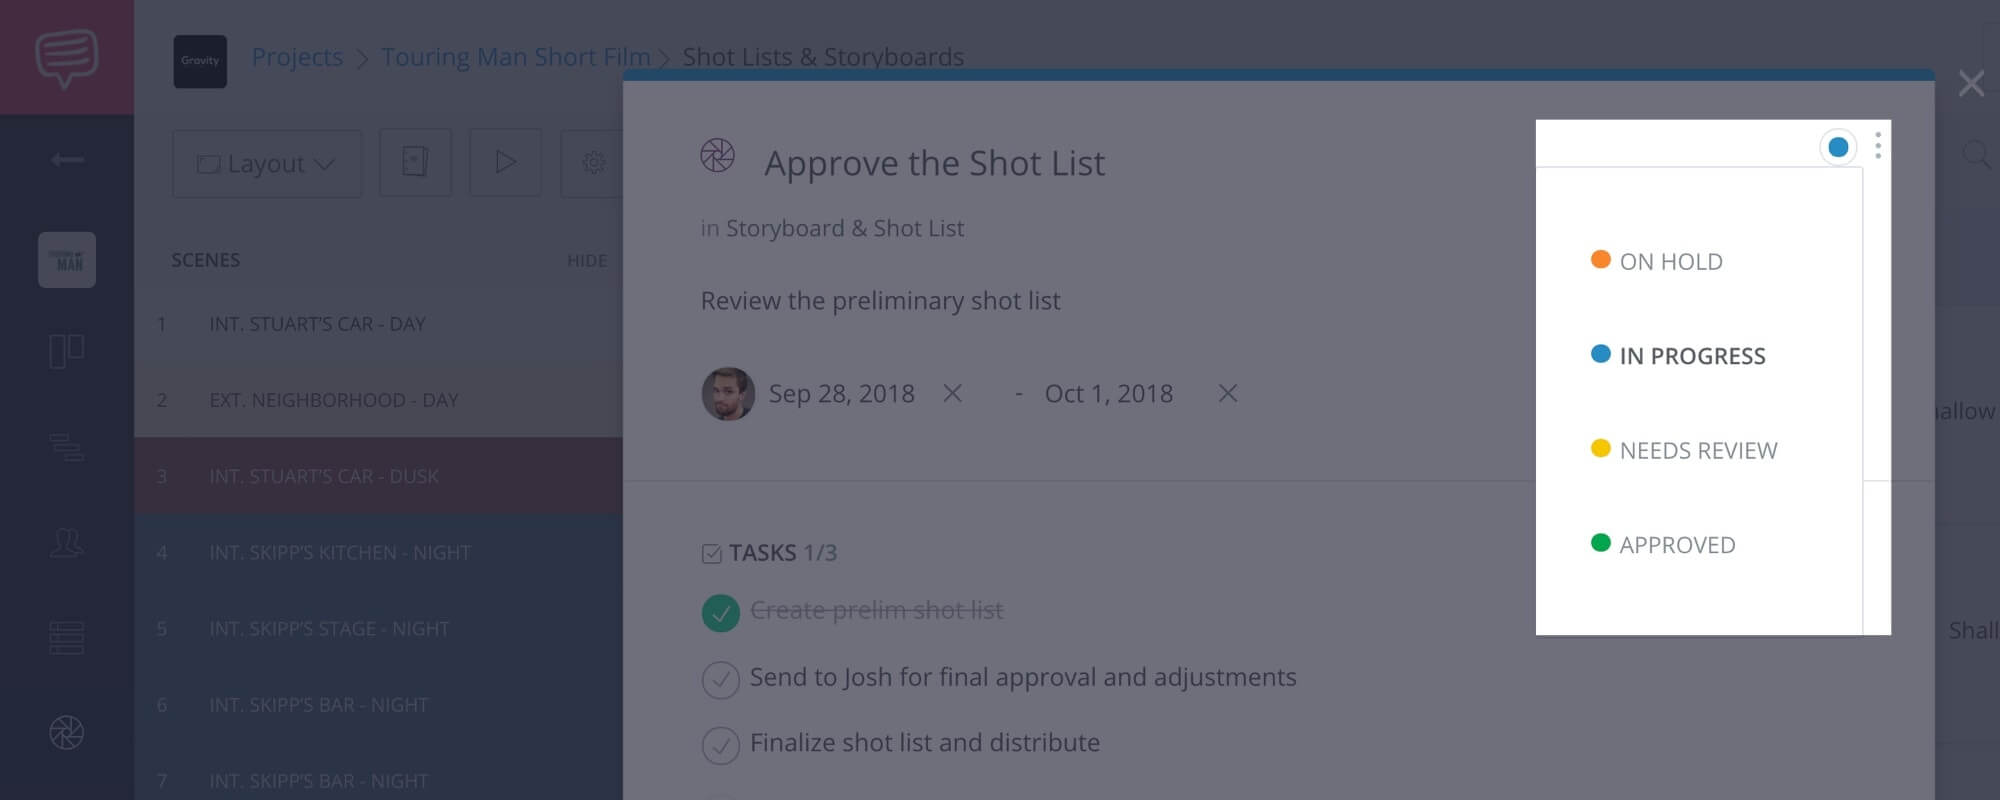
Assign a status for your task
All of the task cards (across the various StudioBinder pages) aggregate on the Workflow dashboard’s status columns so you can quickly identify which cards are on hold, in progress, needs review and completed.
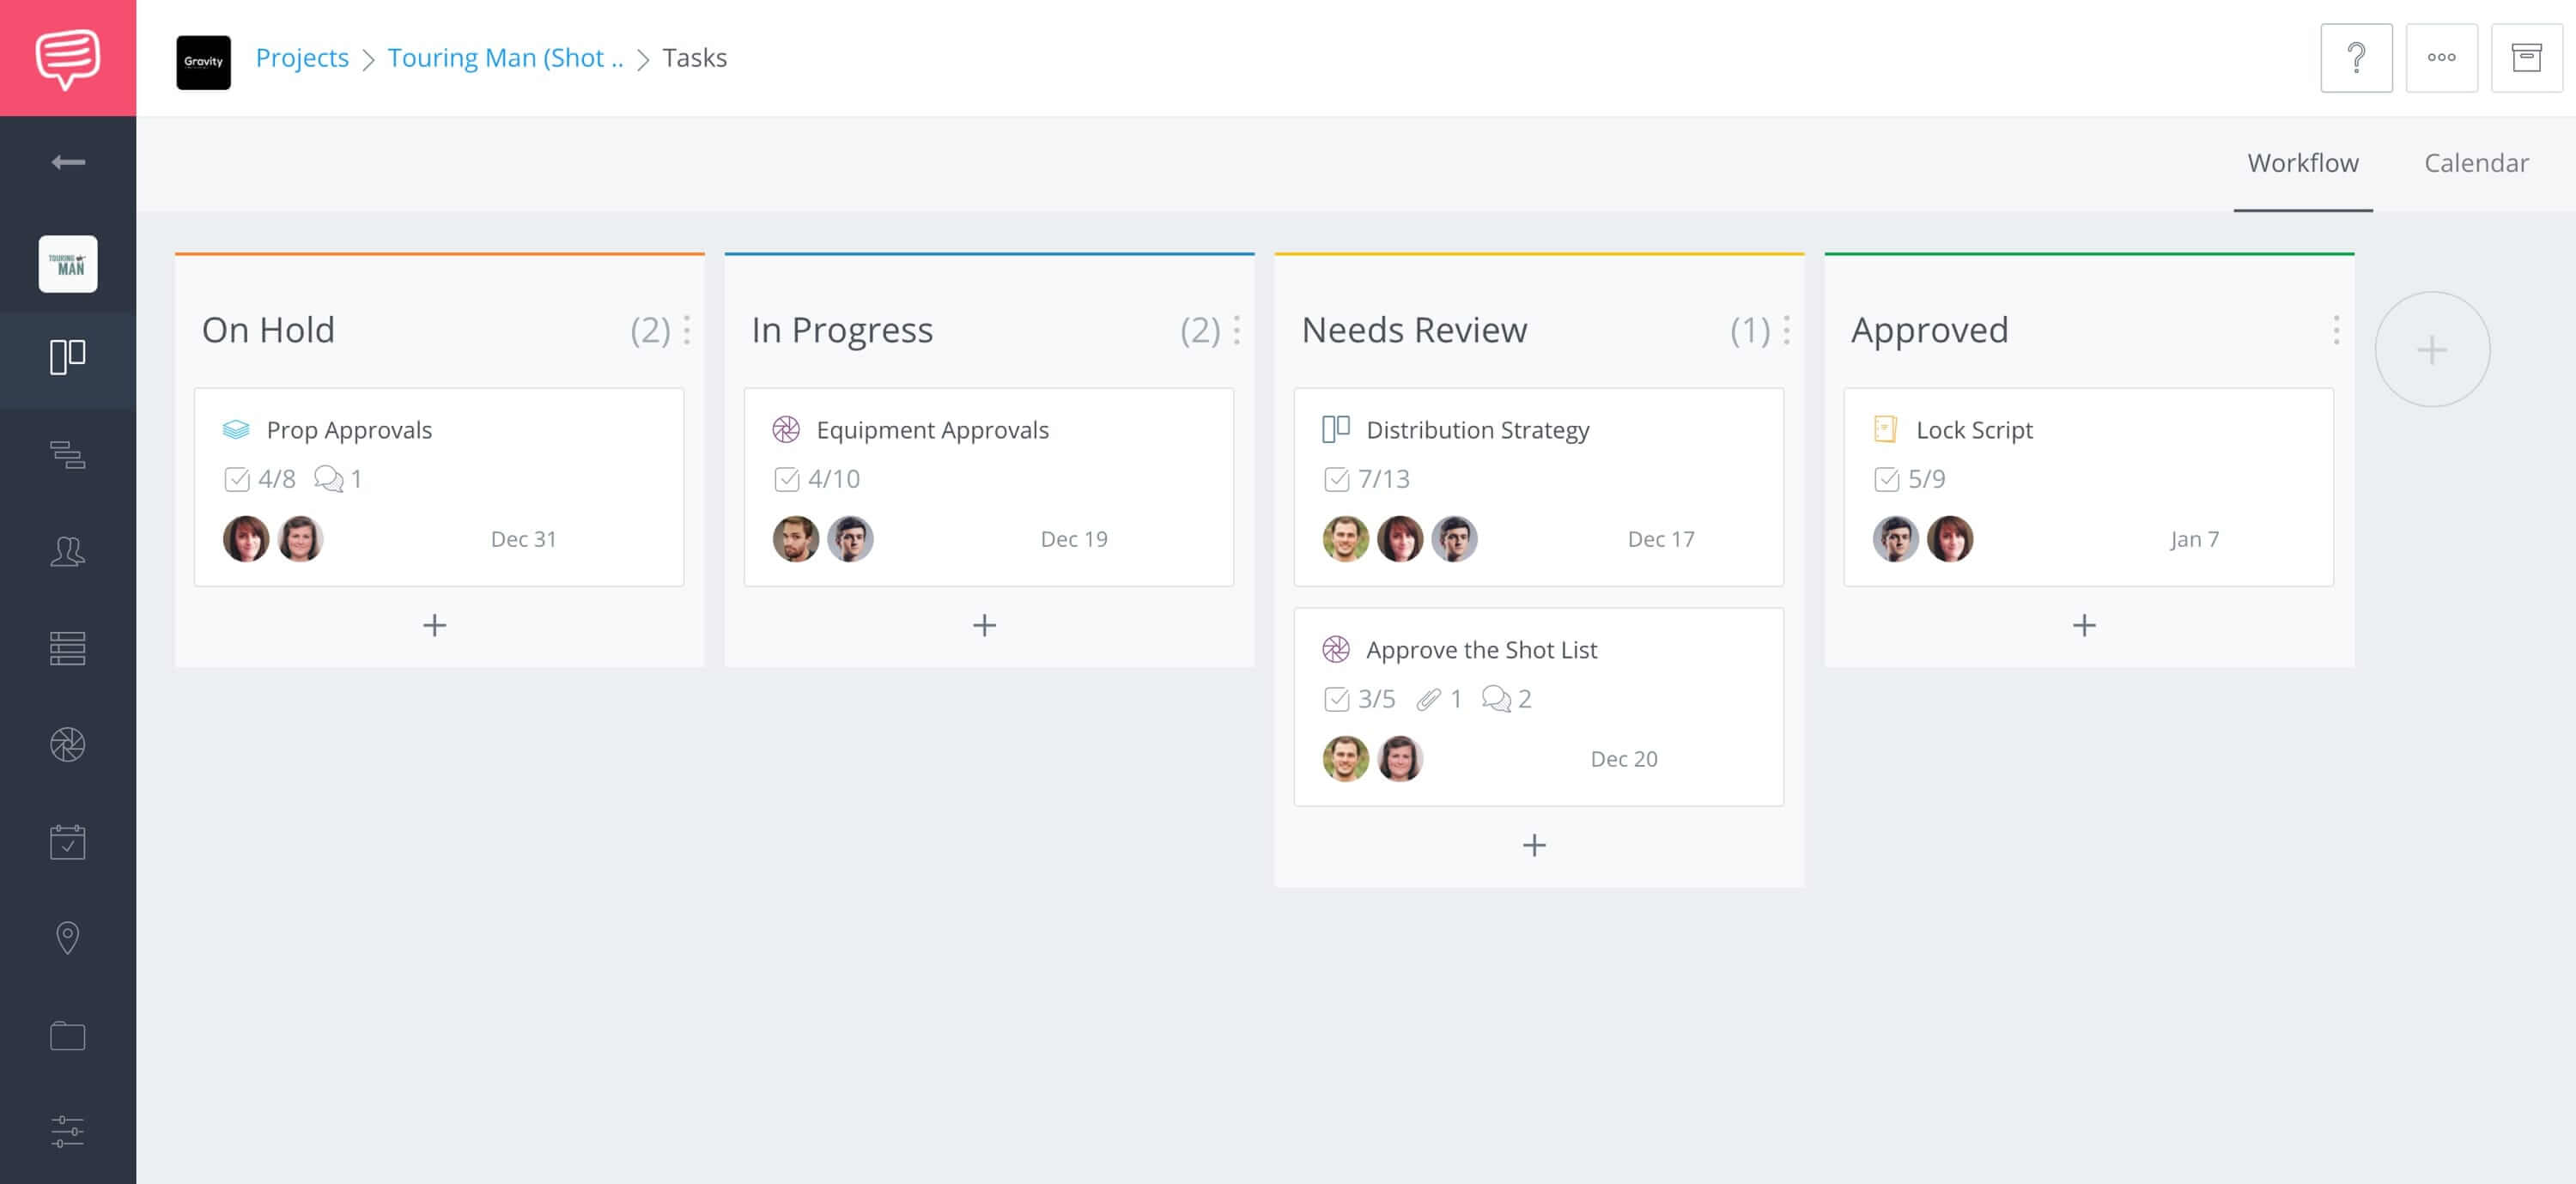
All task cards aggregate in StudioBinder’s Workflow dashboard
customize your final shot list report
Sharing a print-friendly shot list
Almost there!
You’ve created and sequenced your shot list to your liking.
Now it’s time to customize your final shot list report. Keep in mind who will read your shot list and what they need to take from it. Your goal is to create a meaningful shot list that’s a quick and easy read.
First, click View Report. Then use the buttons to customize how your shot list will be presented.
Scenes
Click this button to filter between your scenes or custom lists if you used them.
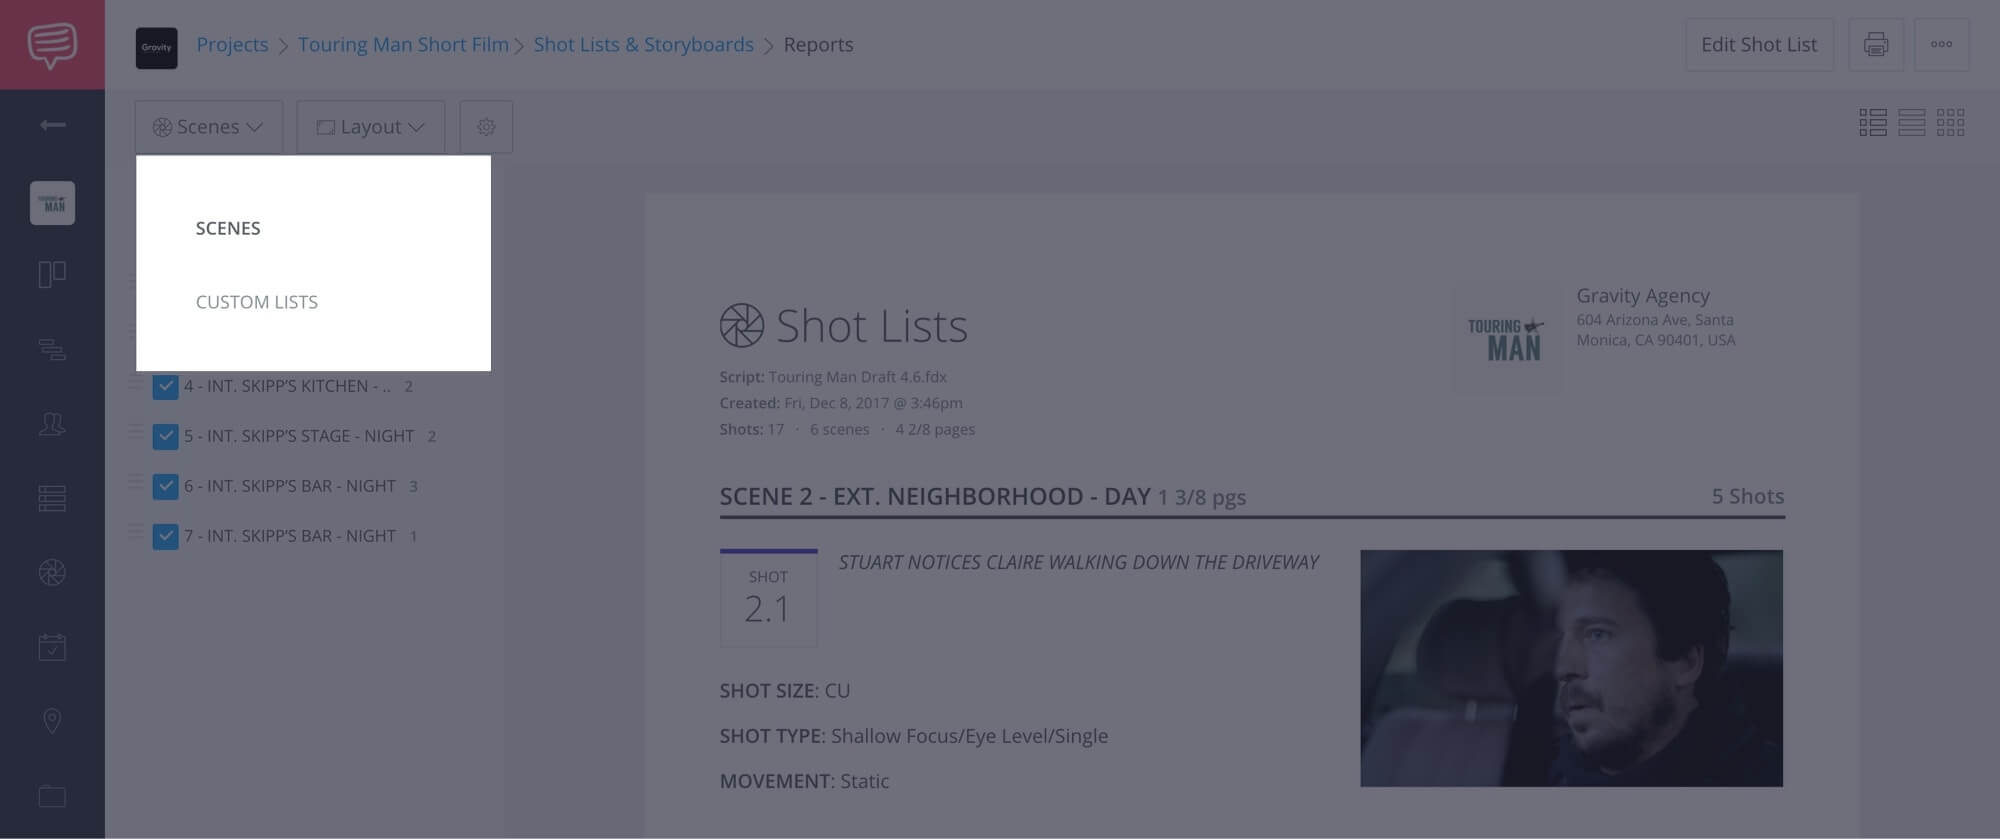
The Scenes button selects shots lists. Choose those from your uploaded script or the additional lists you added.
The Scenes Sidebar
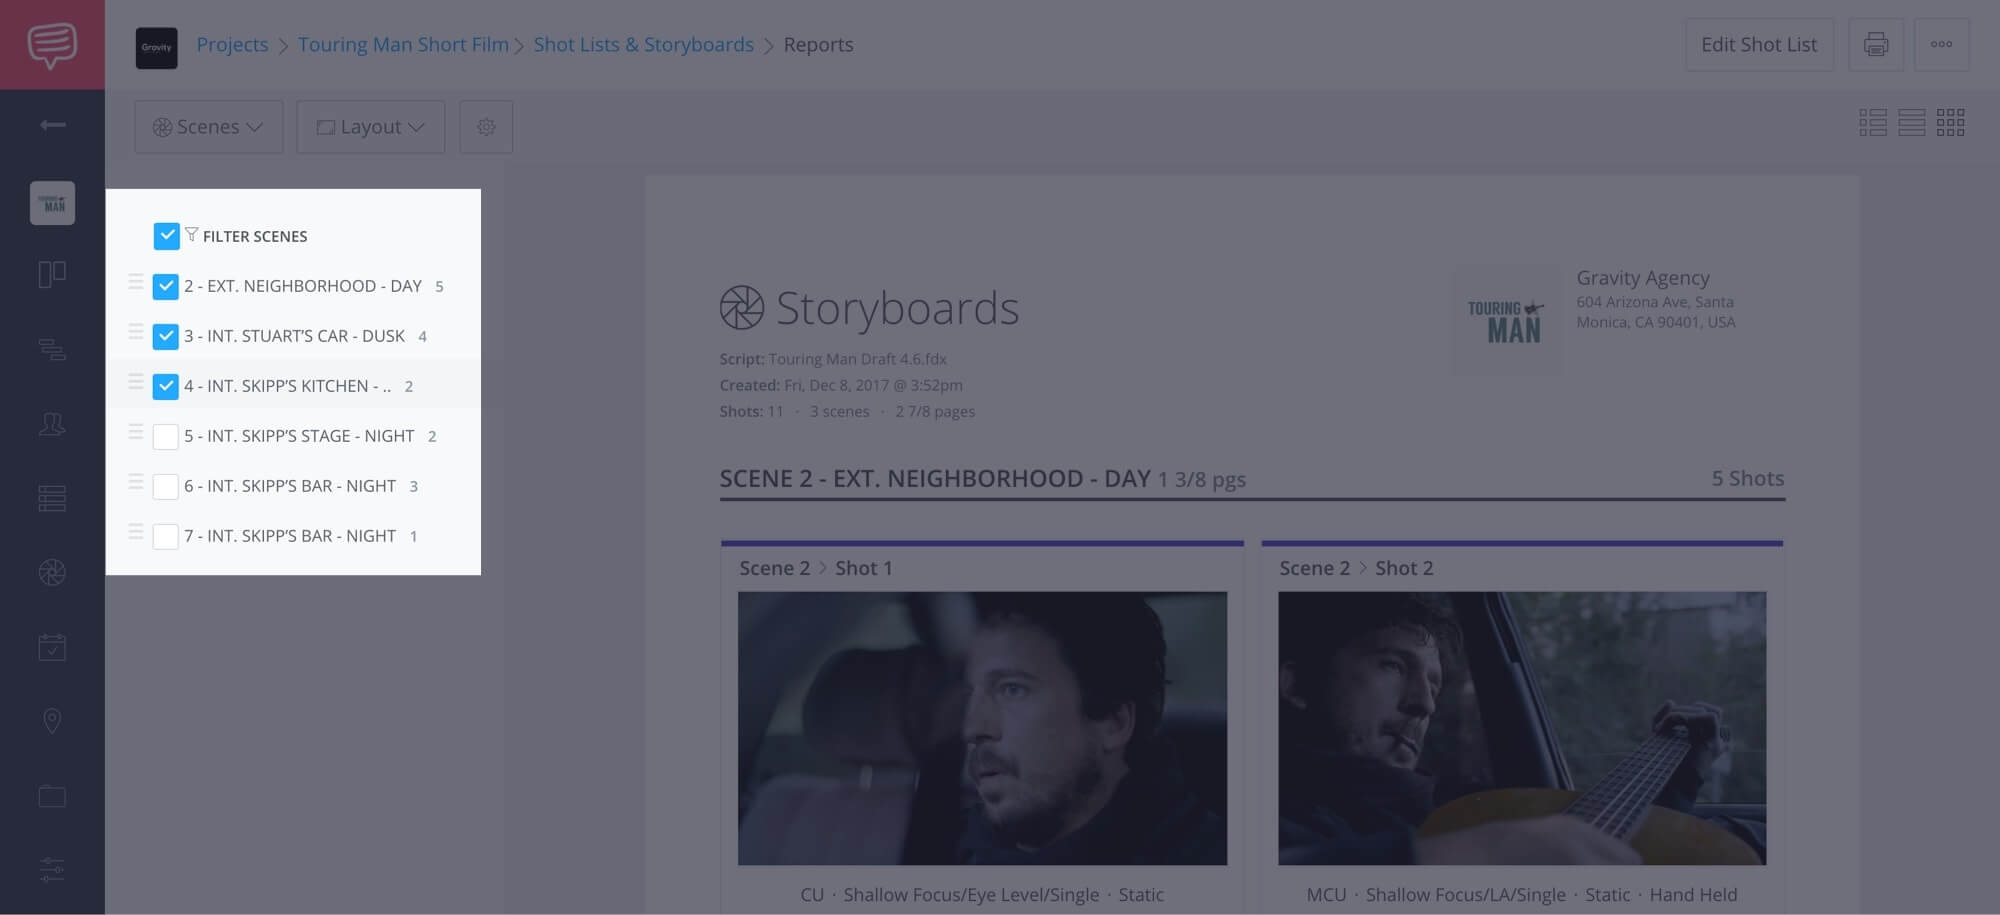
This is where you customize which scenes should be included in your shot list report.
Use the checkboxes to filter accordingly. Also rearrange the ordering of scenes to your liking by clicking on the triple bar and drag and dropping.
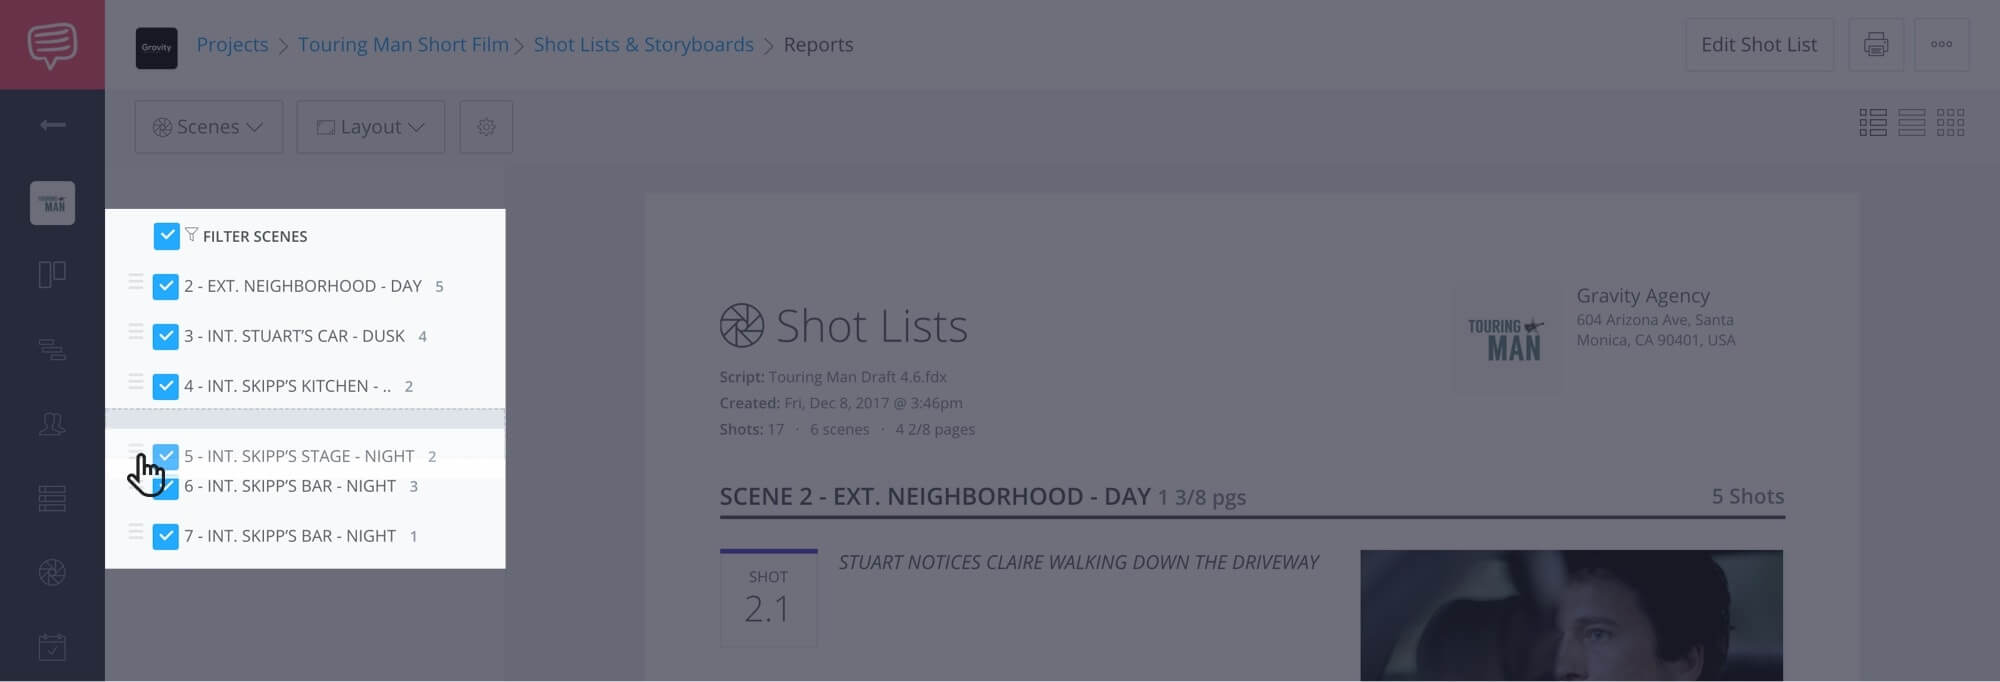
Tweak which scenes to include and in what order in the Scenes Sidebar.
Layout
The Layout button allows you to choose the best display settings to fit your reporting needs.
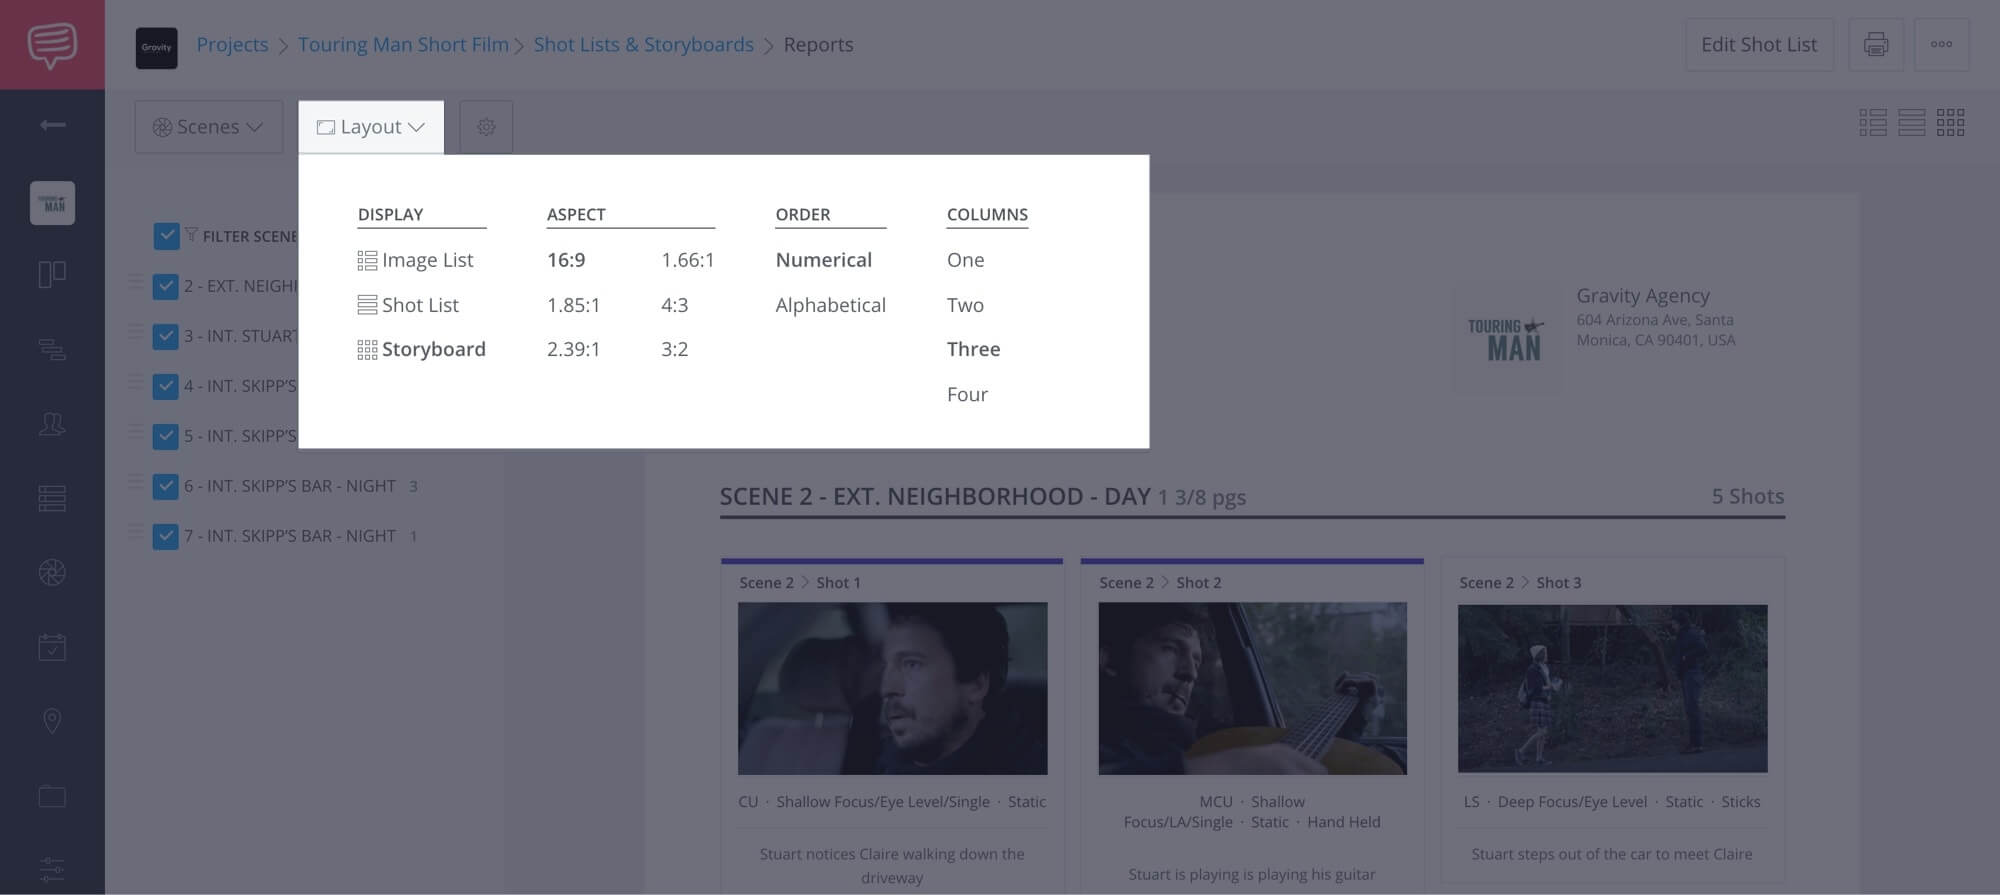
Use the Layout button to choose how your shot list will be displayed.
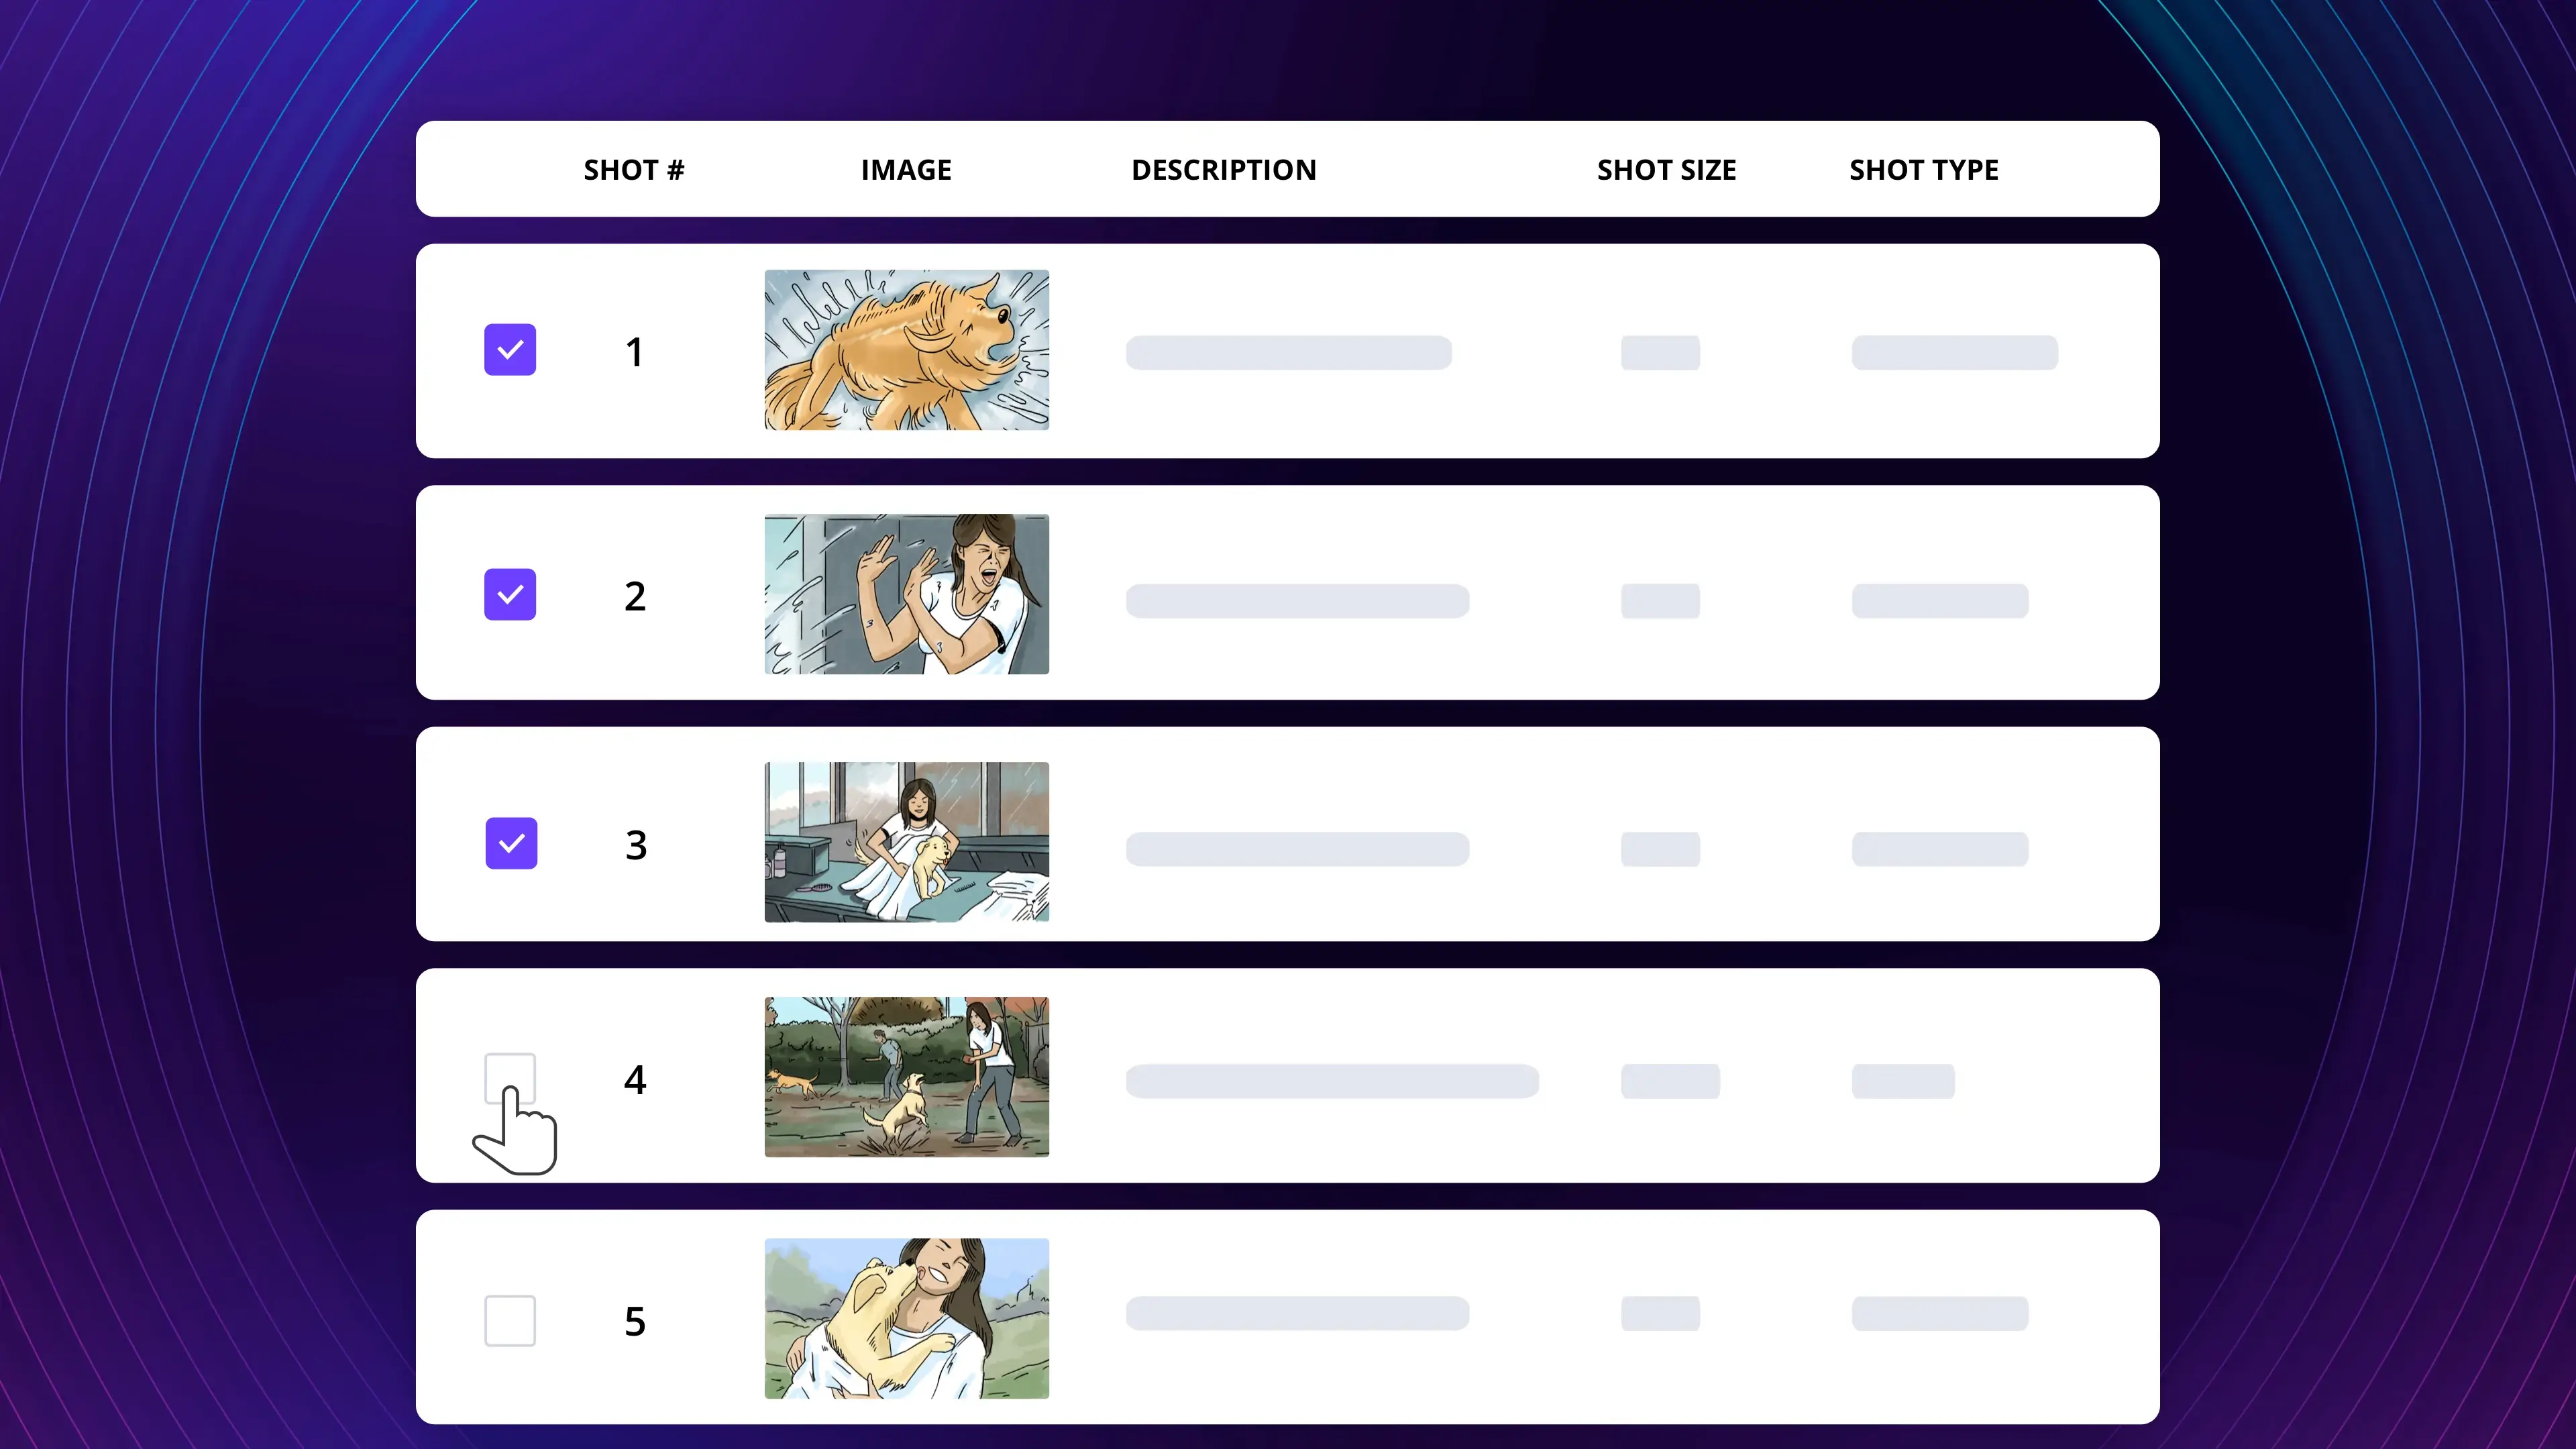
Select the Storyboard view if you would like to see your shot list with images. This will not be useful until you import storyboard images.
Next choose which ordering you would like to use for your shots - numerical or alphabetical.
Also decide how many columns you would like your images to appear in. This will help you choose the most readable display.
Use the layout buttons on the upper right for quicker navigating between the layouts.
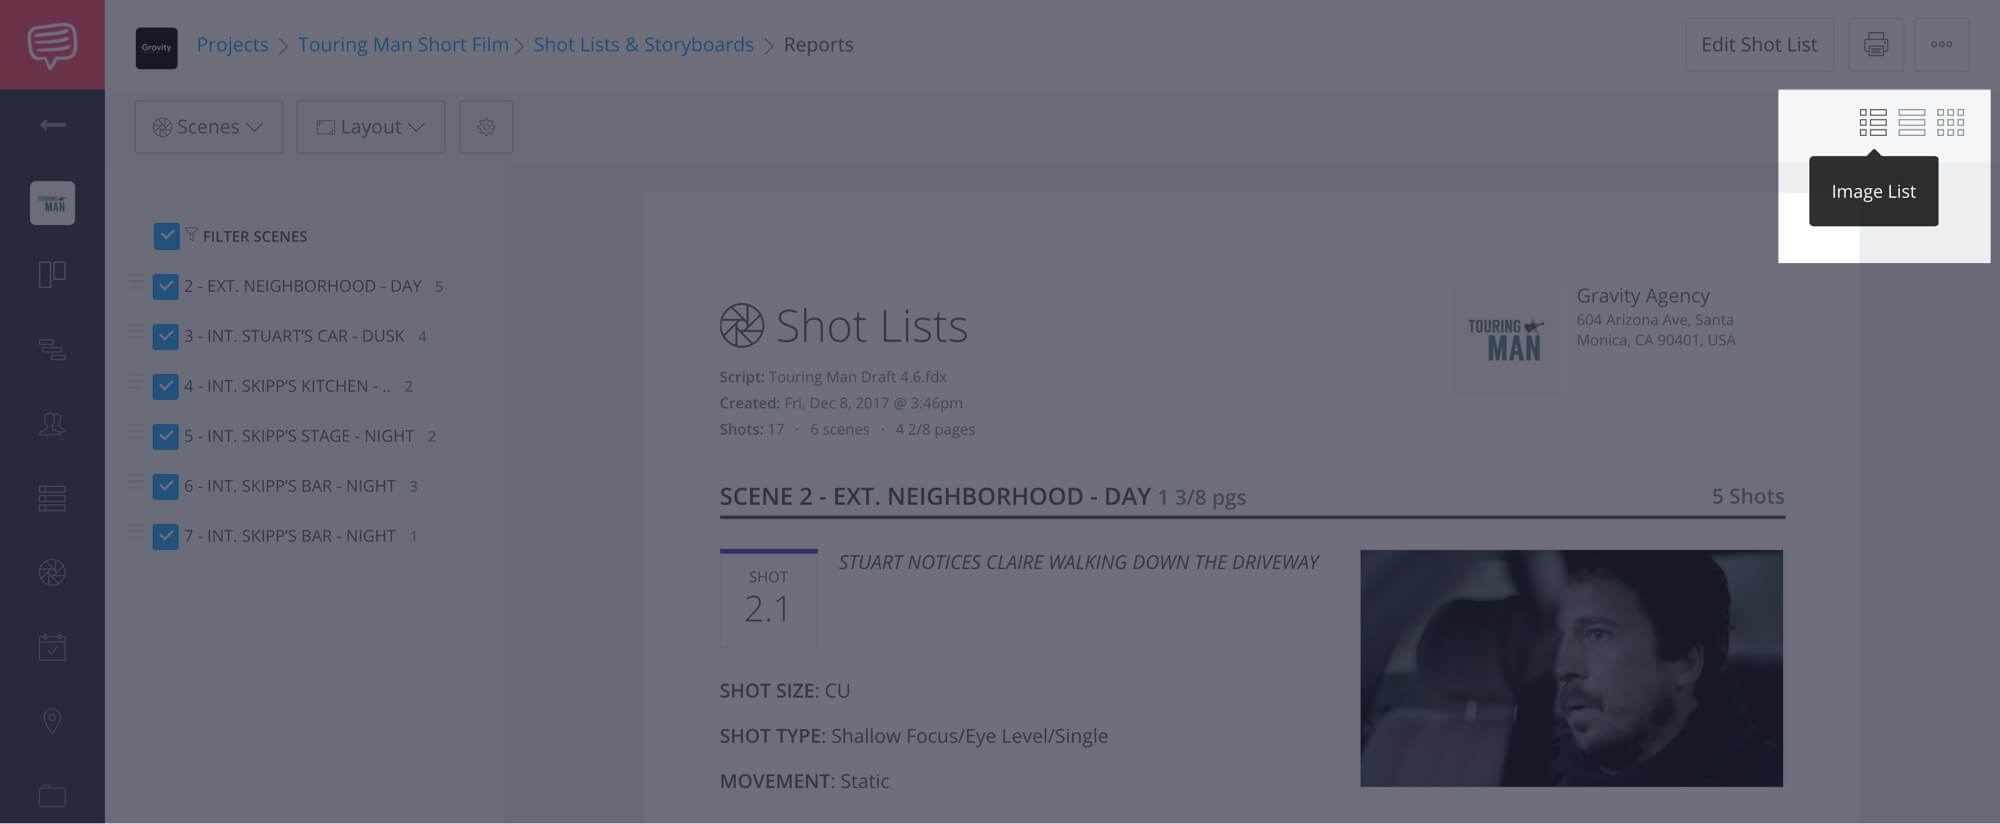
The Storyboard Layout in StudioBinder’s shot list software
Adjust Columns
Use the Adjust Columns button to add or remove columns in your report.
Click on the checkboxes to add or remove any of the input fields you used. This will help you omit details your crew won’t need.
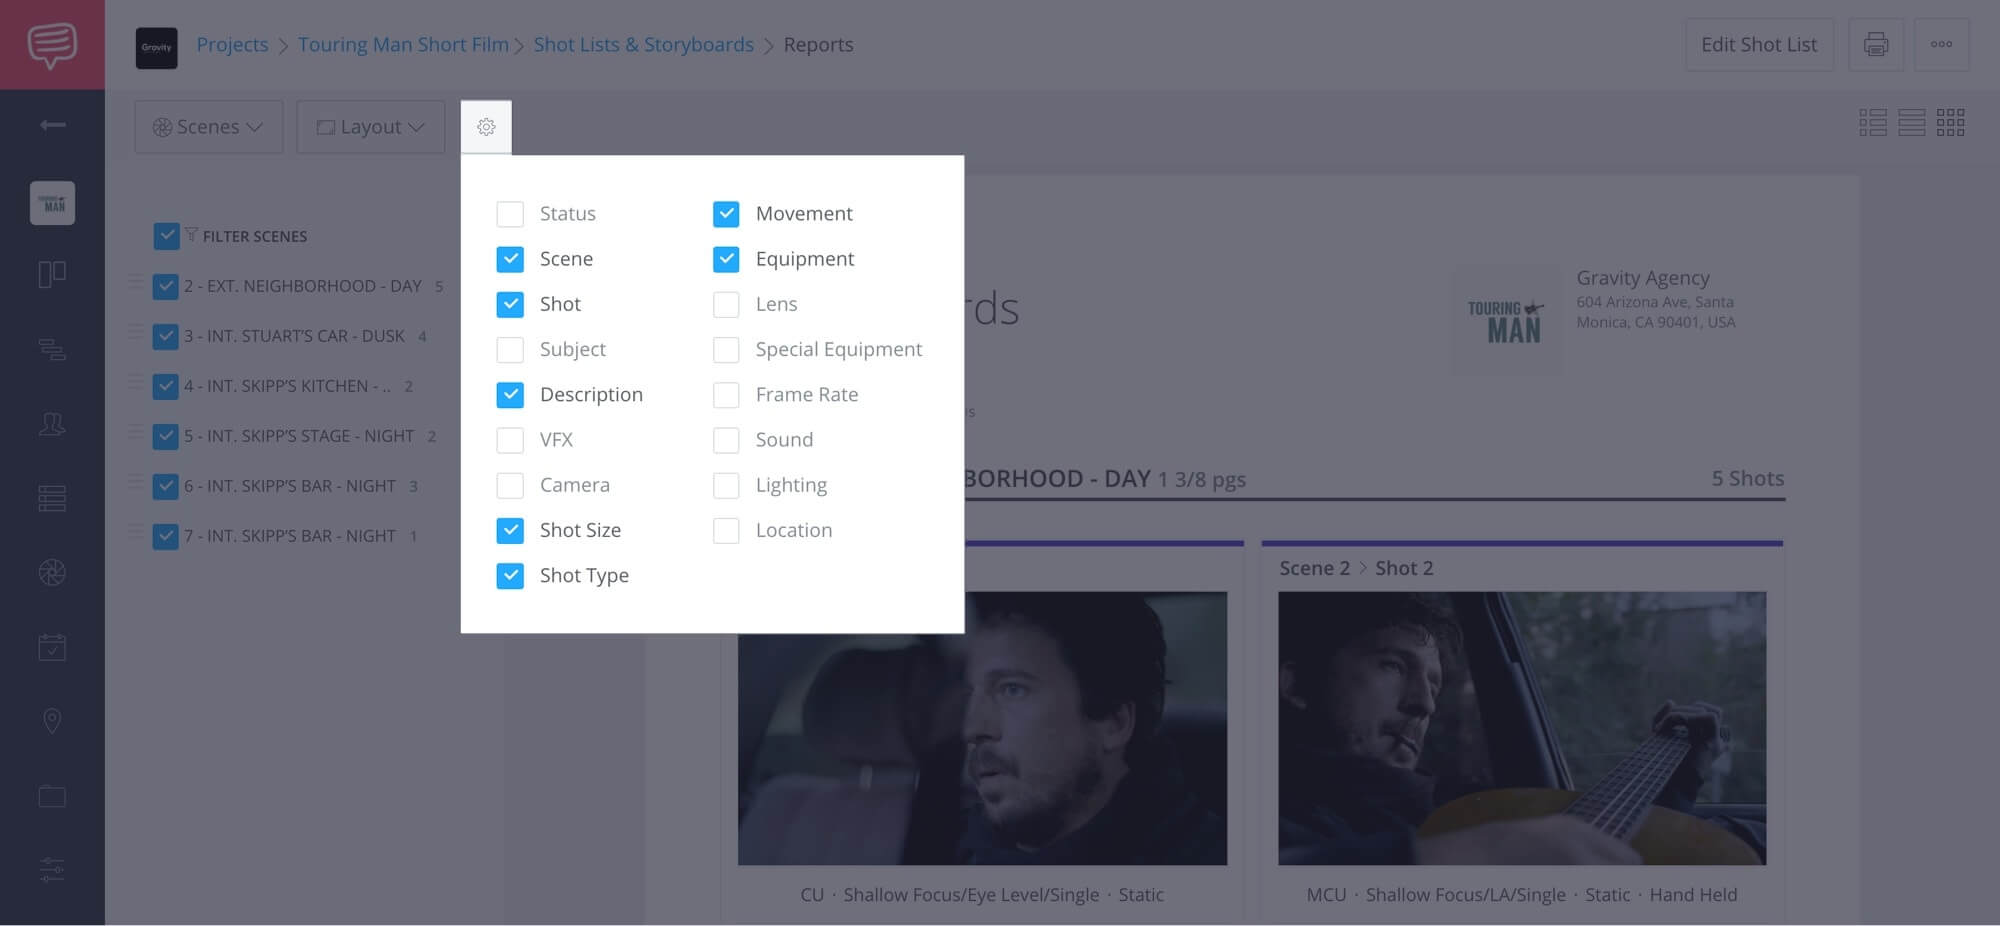
Make your shot list even more handy by adjusting columns to streamline your data.
Filter by Day
Use this filter to specify which production day you’re presenting. Choose the shooting day by clicking on it in the dropdown.
You can also click All Scenes to include all shooting days.
Narrowing down your shooting day on your shot list report.
If you need to make edits to your shot list at any time, click the Edit Shot List button to jump back in.
Keep in mind that your crew will need to read and reread this document many times. Choose the optimal layout and omit data that isn’t mission critical.
Check your work many times to make sure the data is correct. Check your shot data, scene ordering and layout and notes. Show your producer, DP and other shot collaborators.
Printing and Saving a Shot List
Share your Shot List with the Crew
Now it’s time to get that shot list out to your collaborators and crew.
To print the shot list, click View Report in the Shot List & Storyboards page. Make the sure Filter by Day button is displaying the production days you are creating the report for.
Now is also a good time to double check that the Layout and Adjust Columns settings are correct and optimal.
Whether you are saving your shot list as a file or printing it out, click the Print button.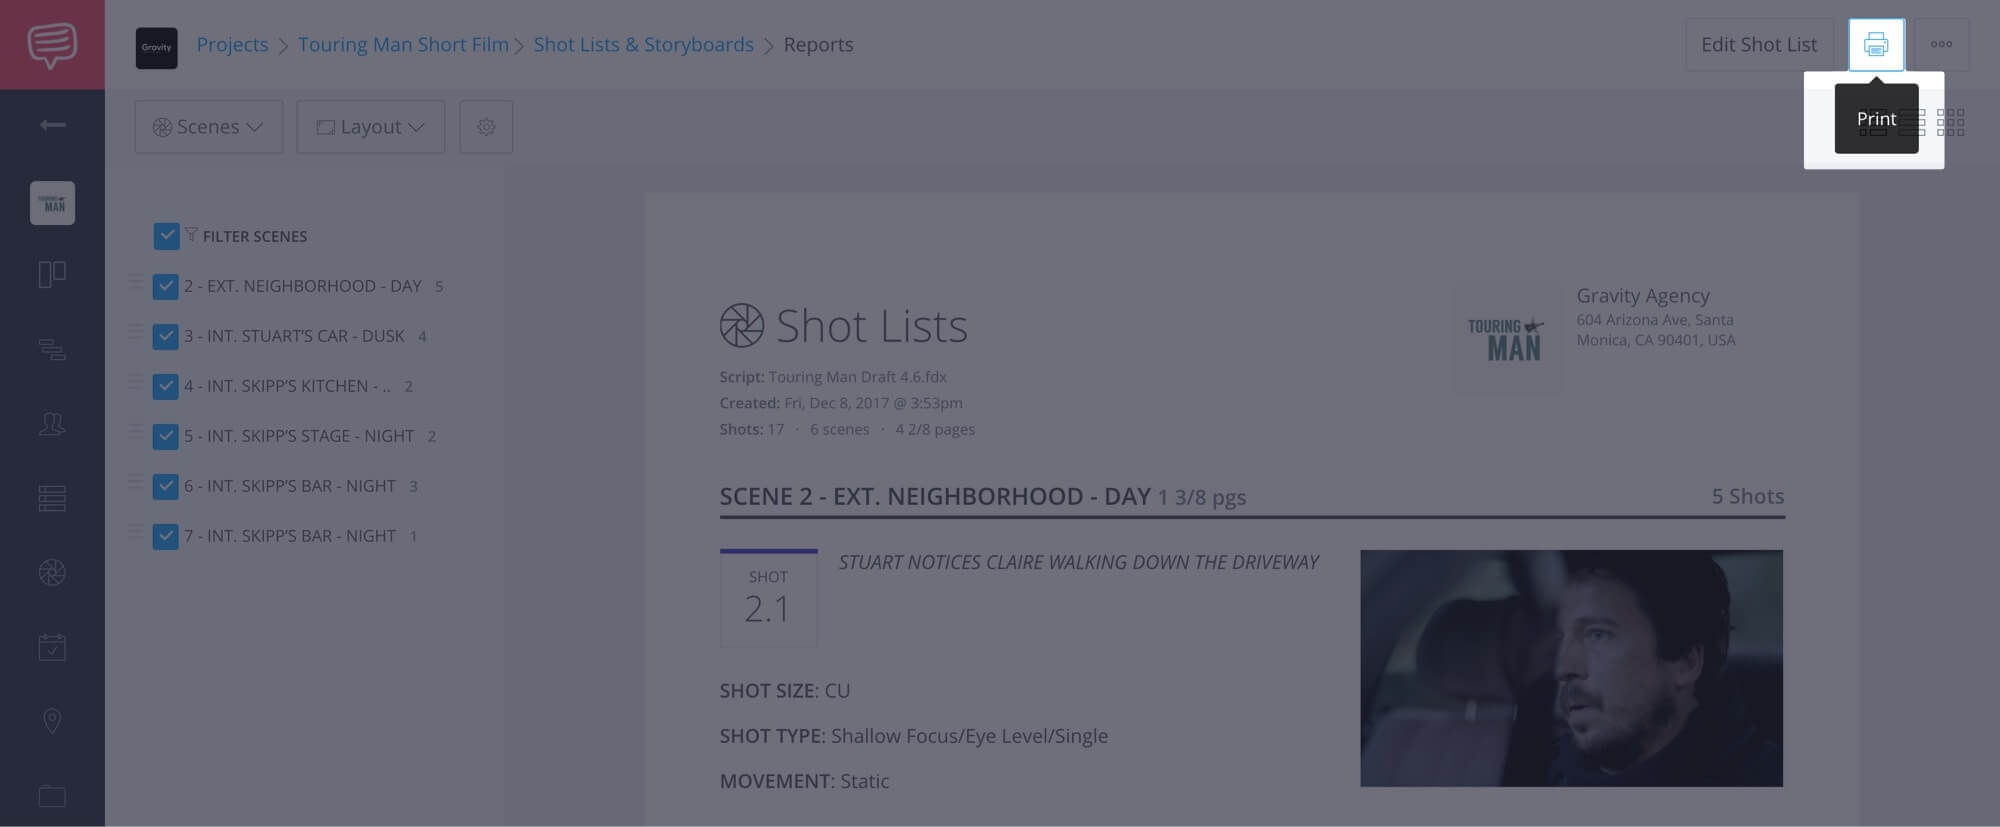
Printing a script directly from the Reports page.
If printing, just make sure your printer is selected, click Print and you’re good to go.
If saving, click Destination and change your destination to Save to PDF. Note that this is how it’s done on Chrome. The process varies slightly from browser to browser.
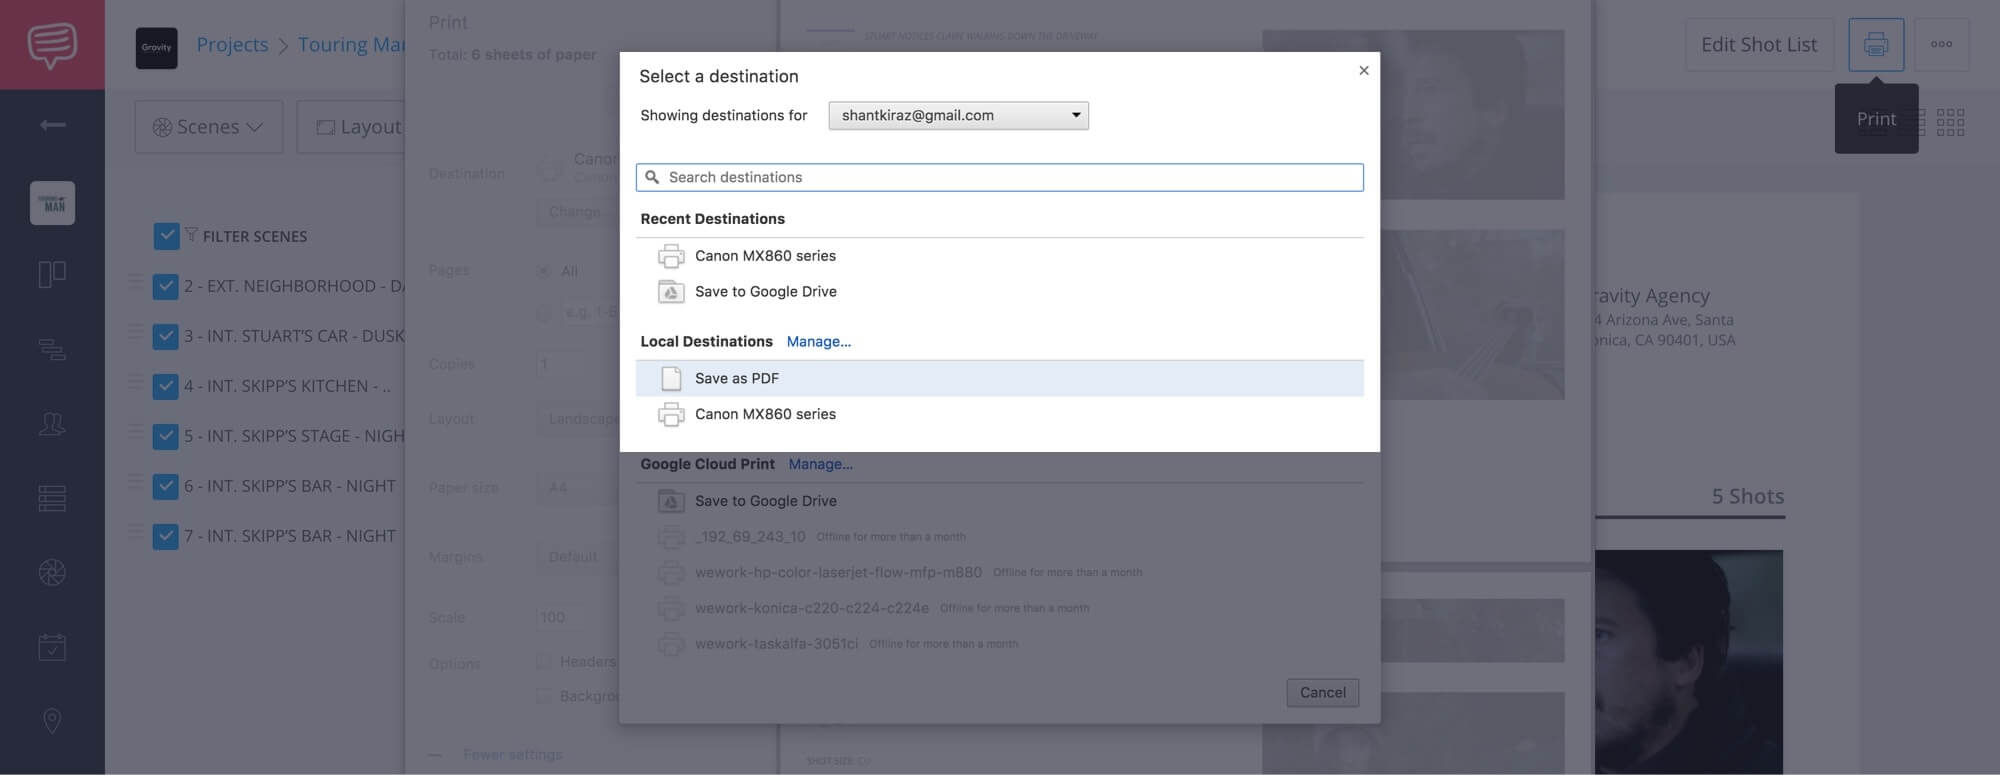
Save your script as a PDF to email or include with your call sheet.
Since the Reports page is optimized for printing and sharing. Make sure to print from the Reports page and not the Edit Shot page.
When you do, it will look something like this:

What your shot list PDF could look like.
Pro Tip: If your shot demands are complex, you might want to include your shot list when sending out your call sheet. This way everyone will be better primed for the shooting day.
UP NExt
How to Make a Storyboard for Video and Film: The Definitive Guide
Knowing how to make a shot list is a will smooth out your production day. Now read that bad boy over and prepare for your shoot. But don’t stress — you’ve got this!
For further reading, check out how to turn your shot list into an awesome storyboard. Together your shot list and storyboard will minimize confusion and maximize your time while shooting.
Was this blog post helpful to you? Is there anything we didn’t catch? Please let us know in the comments below!
Up Next: How to Make a Storyboard for Video and Film: The Definitive Guide
Showcase your vision with elegant shot lists and storyboards.
Create robust and customizable shot lists. Upload images to make storyboards and slideshows.
thank you so much for the wonderful job you guys do. I am just starting in filmmaking and every article of yours that I have read, has been insightful and very helful. Thank you again
Thank you so much for your servise.
Thank you for sharing. Your product looks amazing!