Filmmaking is a collaborative medium. There are countless people and departments that help bring a project together. So, having a solution that allows you to invite others to work together is invaluable. Luckily, StudioBinder makes inviting and accepting invitations to be a team member easy by having one place to manage your team. Follow along for a step-by-step guide on how to invite and accept teammate invitations.
Introducing Teammates
First, what’s a teammate?
Ok, there are a couple different ways to collaborate on a project within StudioBinder. Let’s quickly go over one of the options which is being a teammate.
Teammate Definition
What is a teammate?
A teammate or "user" is an individual who can access and edit entire projects and associated pages. A user has a dedicated username and password, and is part of your company account. Unlike collaborators, they can collaborate on task cards found on various pages of a project — as a result, project-wide team collaboration is much more effective with users.
Note that users can only be invited on a company plan to occupy an available seat. They can be removed from a seat at any time. Alright, now that we’re all clear on what a teammate is, let’s first see how to invite a teammate to your company account.
Team Page
Step 1: Invite teammates
Depending on how many user seats were purchased when you upgraded to a company plan will determine how many user seats you’ll see on the team page.
If you’re more of a visual person, like myself, take a gander at the following video on How to Invite Teammates.
How to invite teammates • Subscribe on YouTube →
To navigate to the team page you’ll need to make sure you’re the account owner of the company account as they are the only one who have access to this page.
To get to the team page, from the account dashboard, click on the Team page button.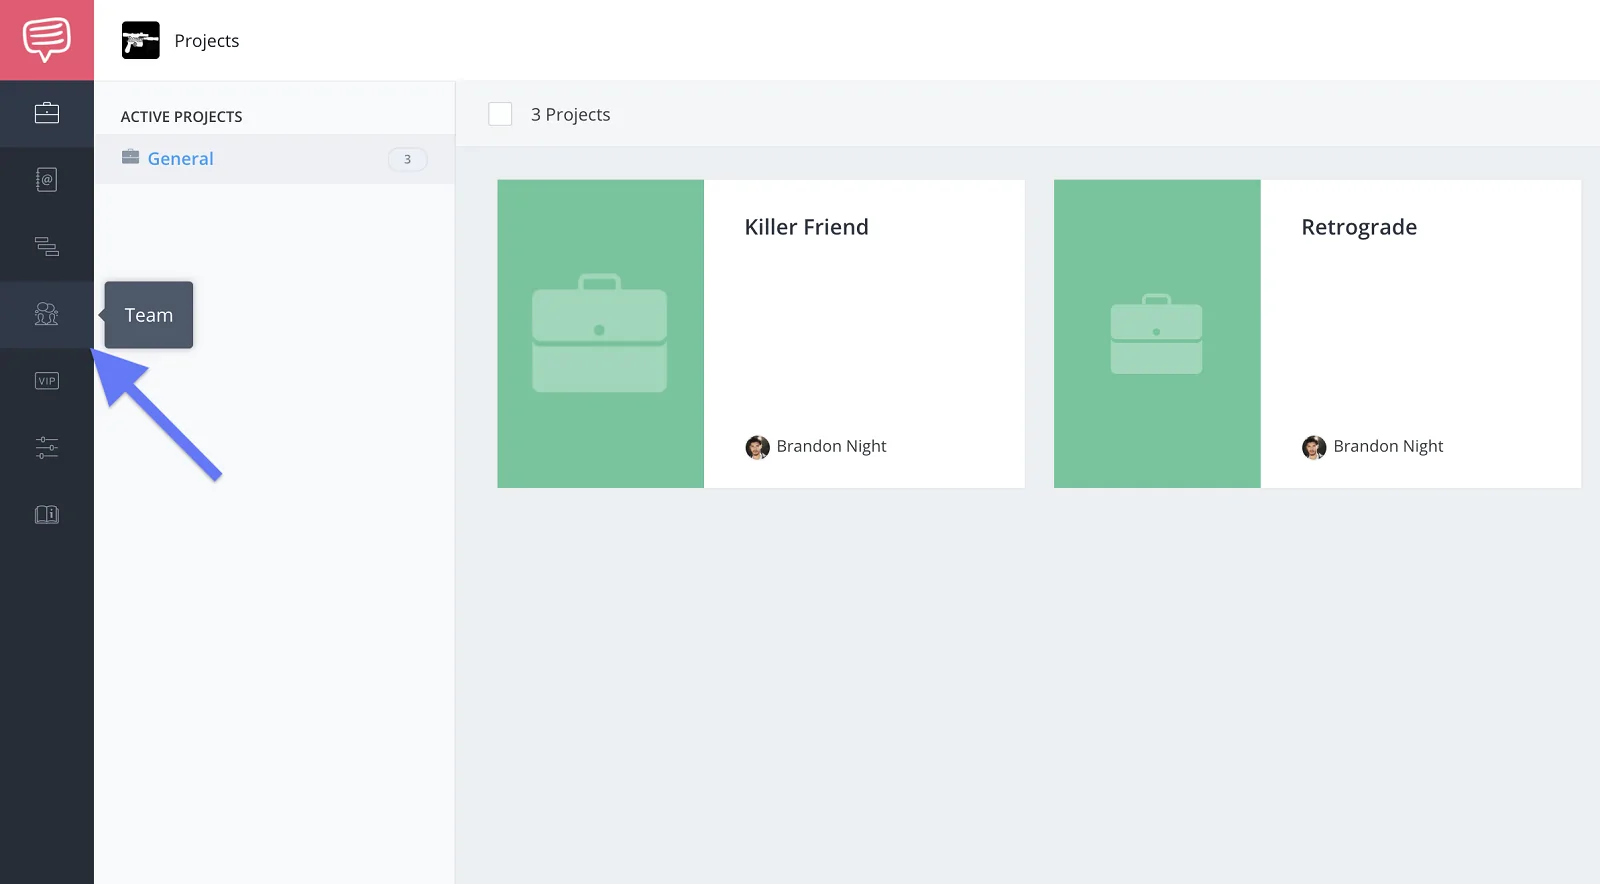
Account dashboard • Click team button
On the team page, you’ll see yourself occupying one of the user seats and boxes with a “+” symbol for any empty seats.
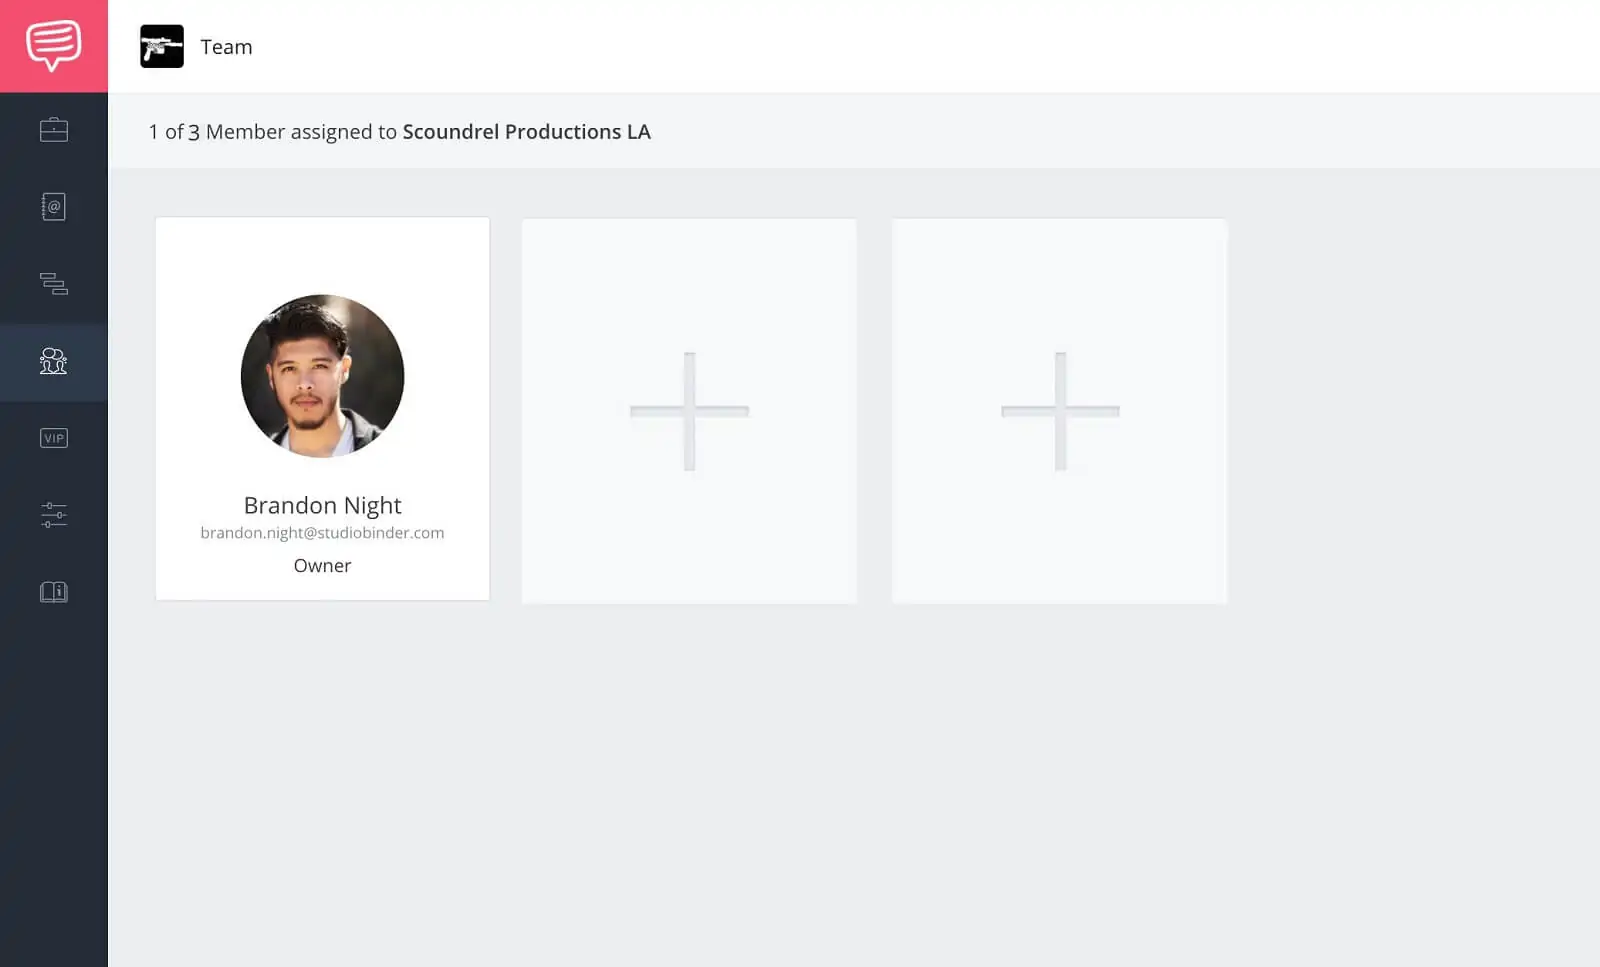
Team page • User seats
To invite a team member, simply click on an empty seat, fill in the information and click Invite New Teammate.
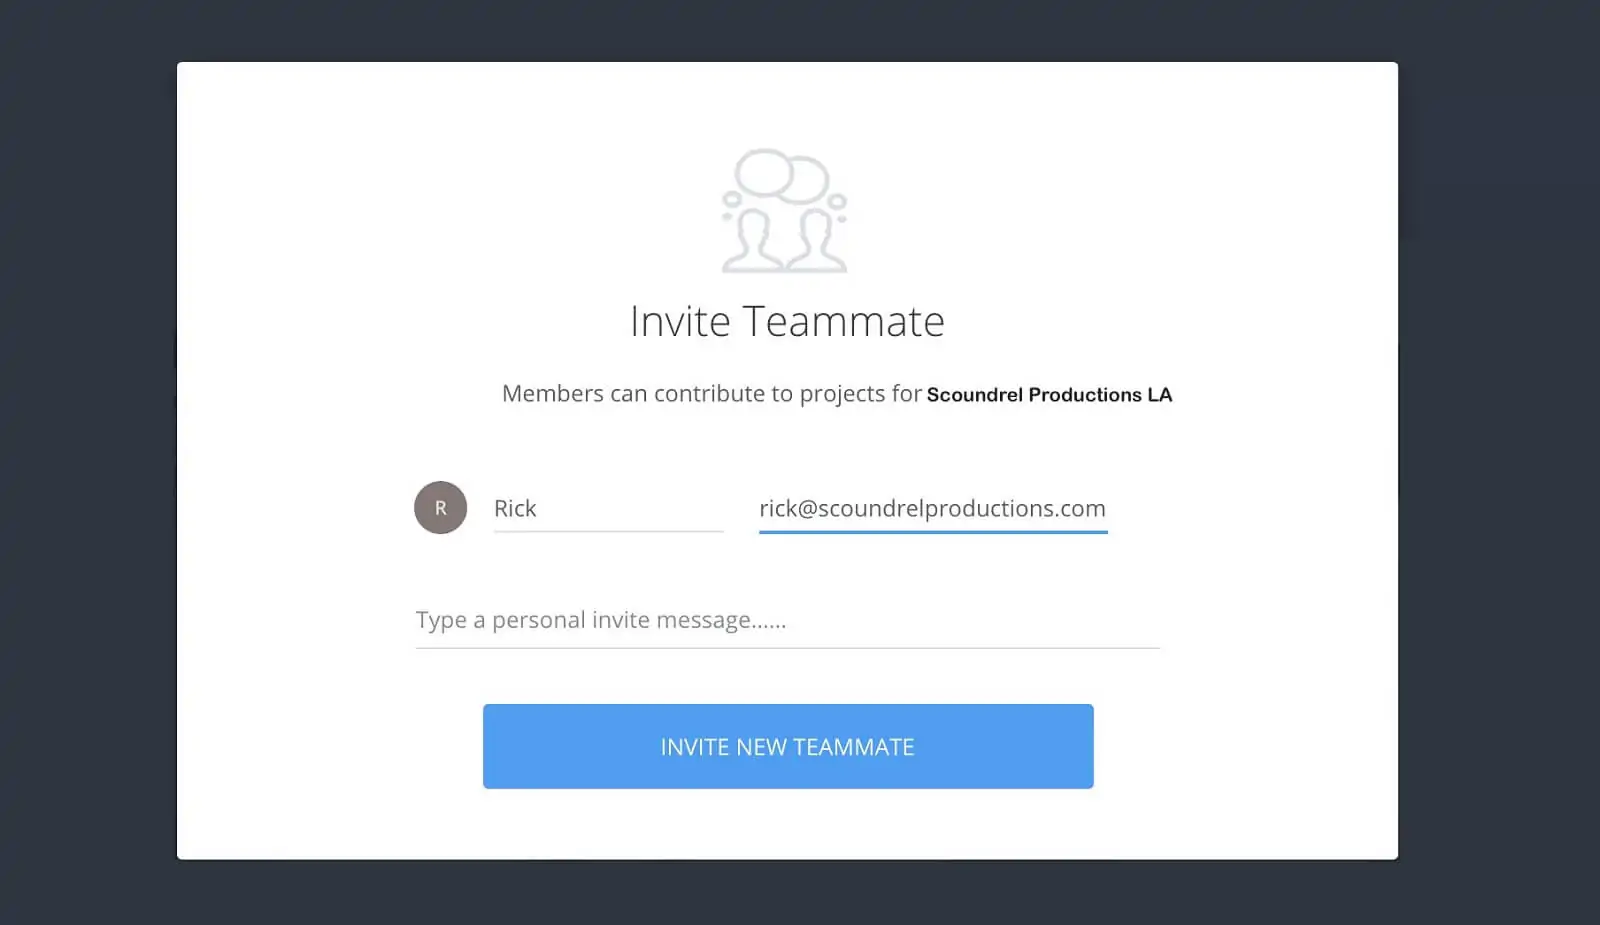
Invite teammate pop-up • Fill in and click invite
An email is then sent to the invitee with a link to accept the teammate invitation. Which takes us into...
Email Invitation
Step 2: Accepting the invitation
Alright, now that the invitation has been sent, let’s go over accepting an invitation. This is mainly for the invitees but who knows, one of these days you might be on the receiving end of an invitation.
First, open the email and click Accept Invitation.
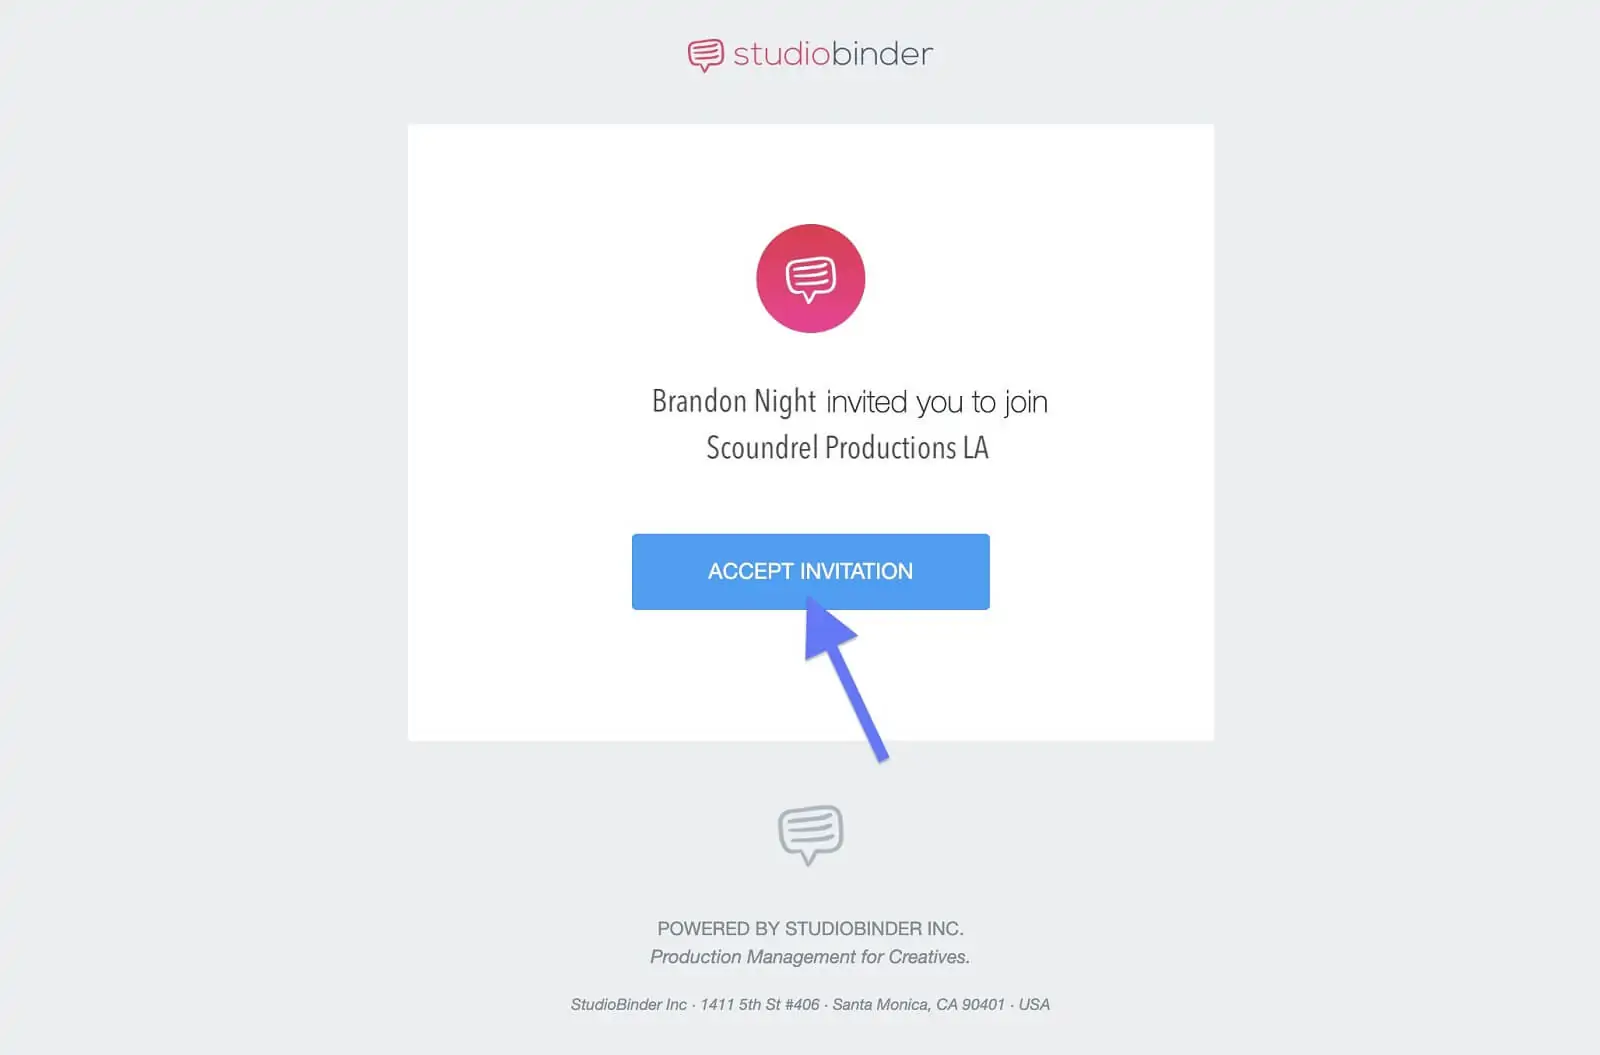
Teammate invitation email • Click accept invitation
This will take you to the StudioBinder page to create an account. Since team members are required to have an account you’ll either need to set one up if you don’t already have one or click Log in if you do.
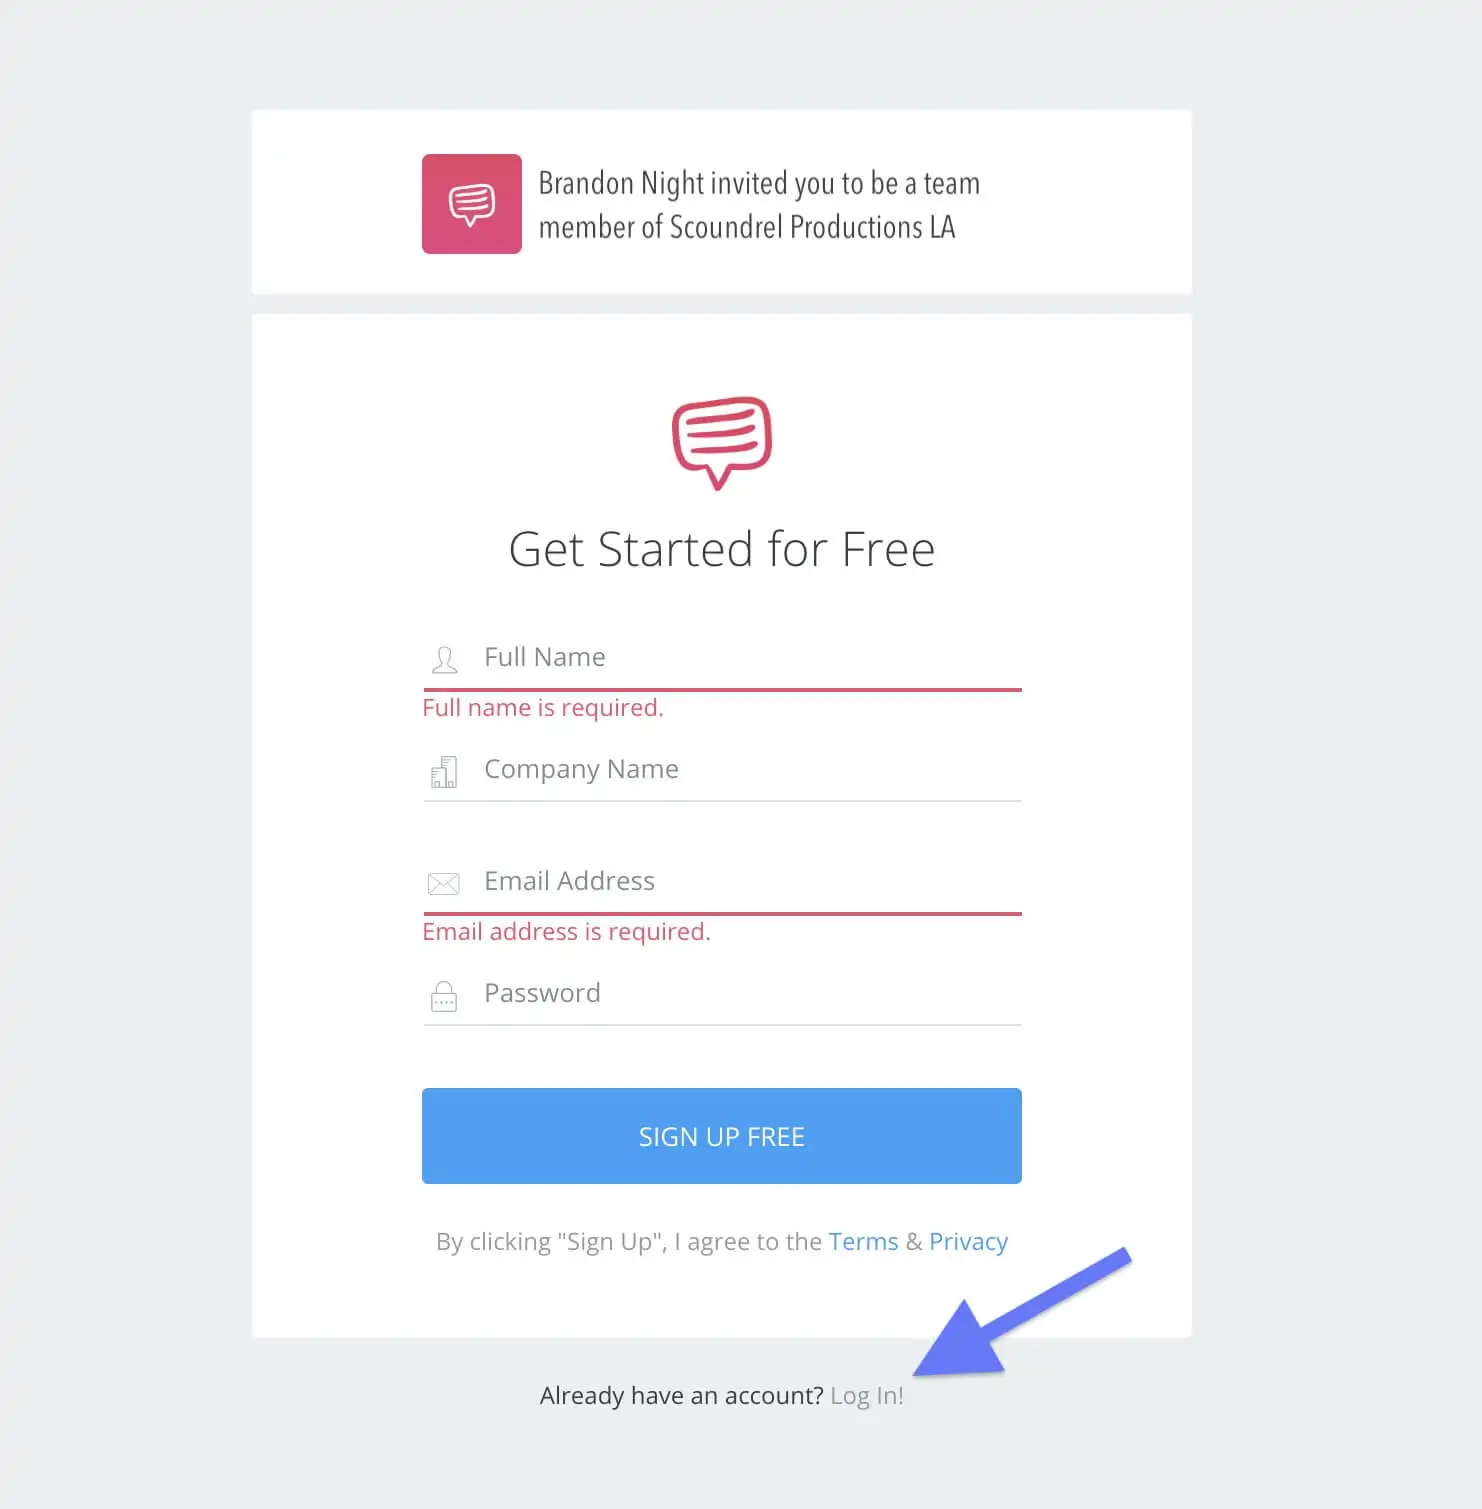
Create account • Log in
Once you’ve set up your account or logged in you’ll be prompted to to accept the invitation once again. Click Accept Invite.
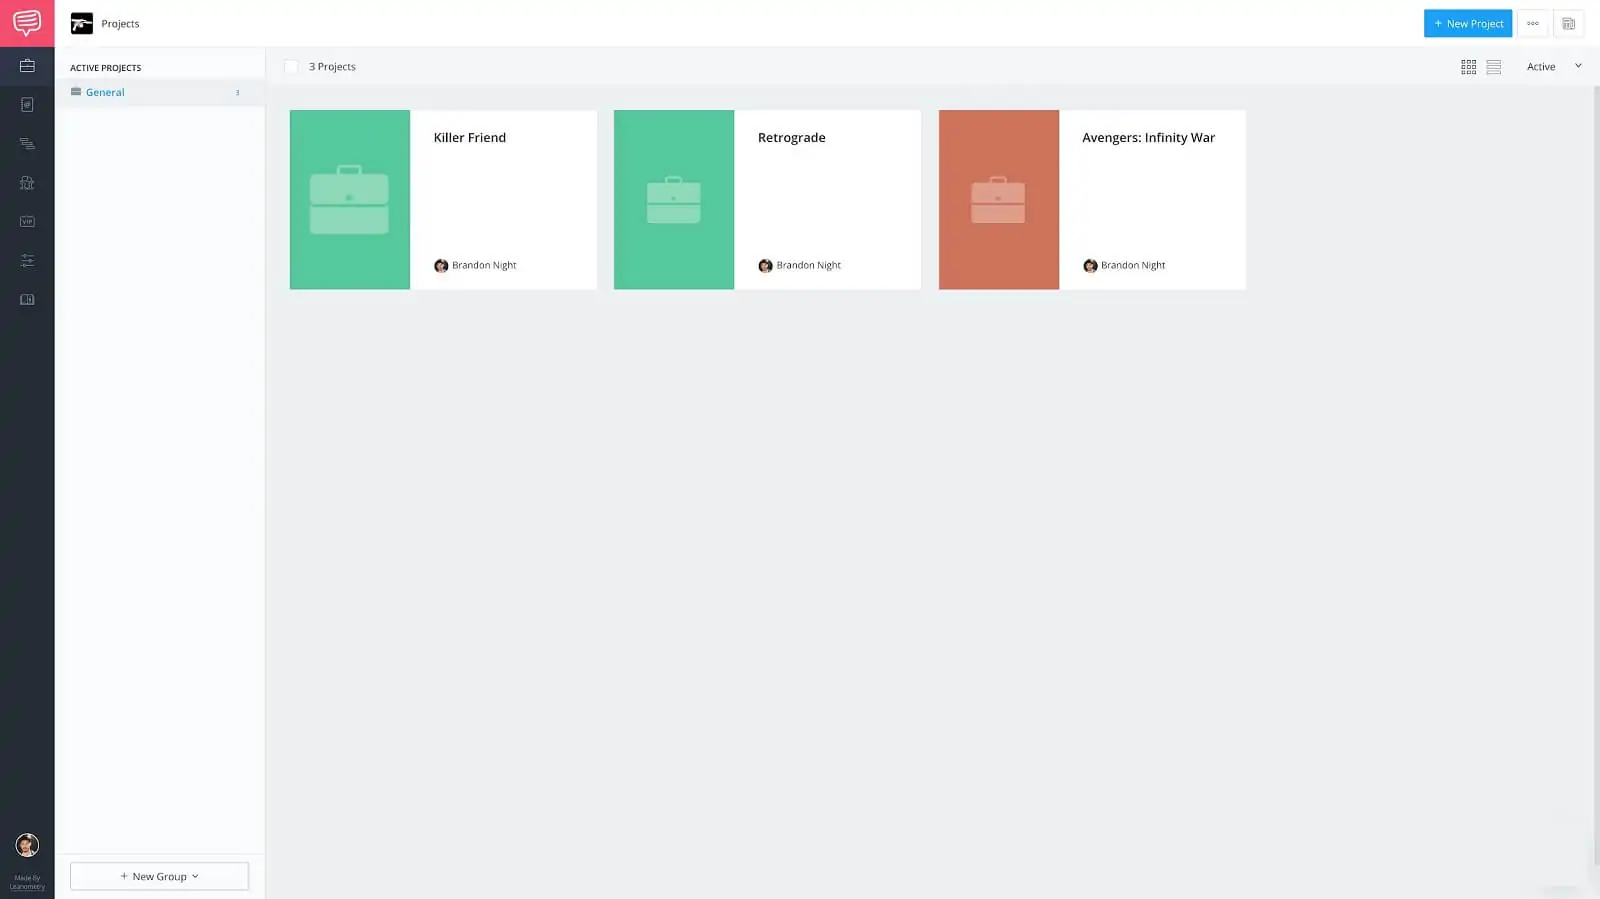
Company account dashboard
Now, eventually when you log out then log back in you’ll, by default, be logged in to your personal account. To access the company account again, click the logo at the top left of the page and you’ll see the company account in the dropdown menu.
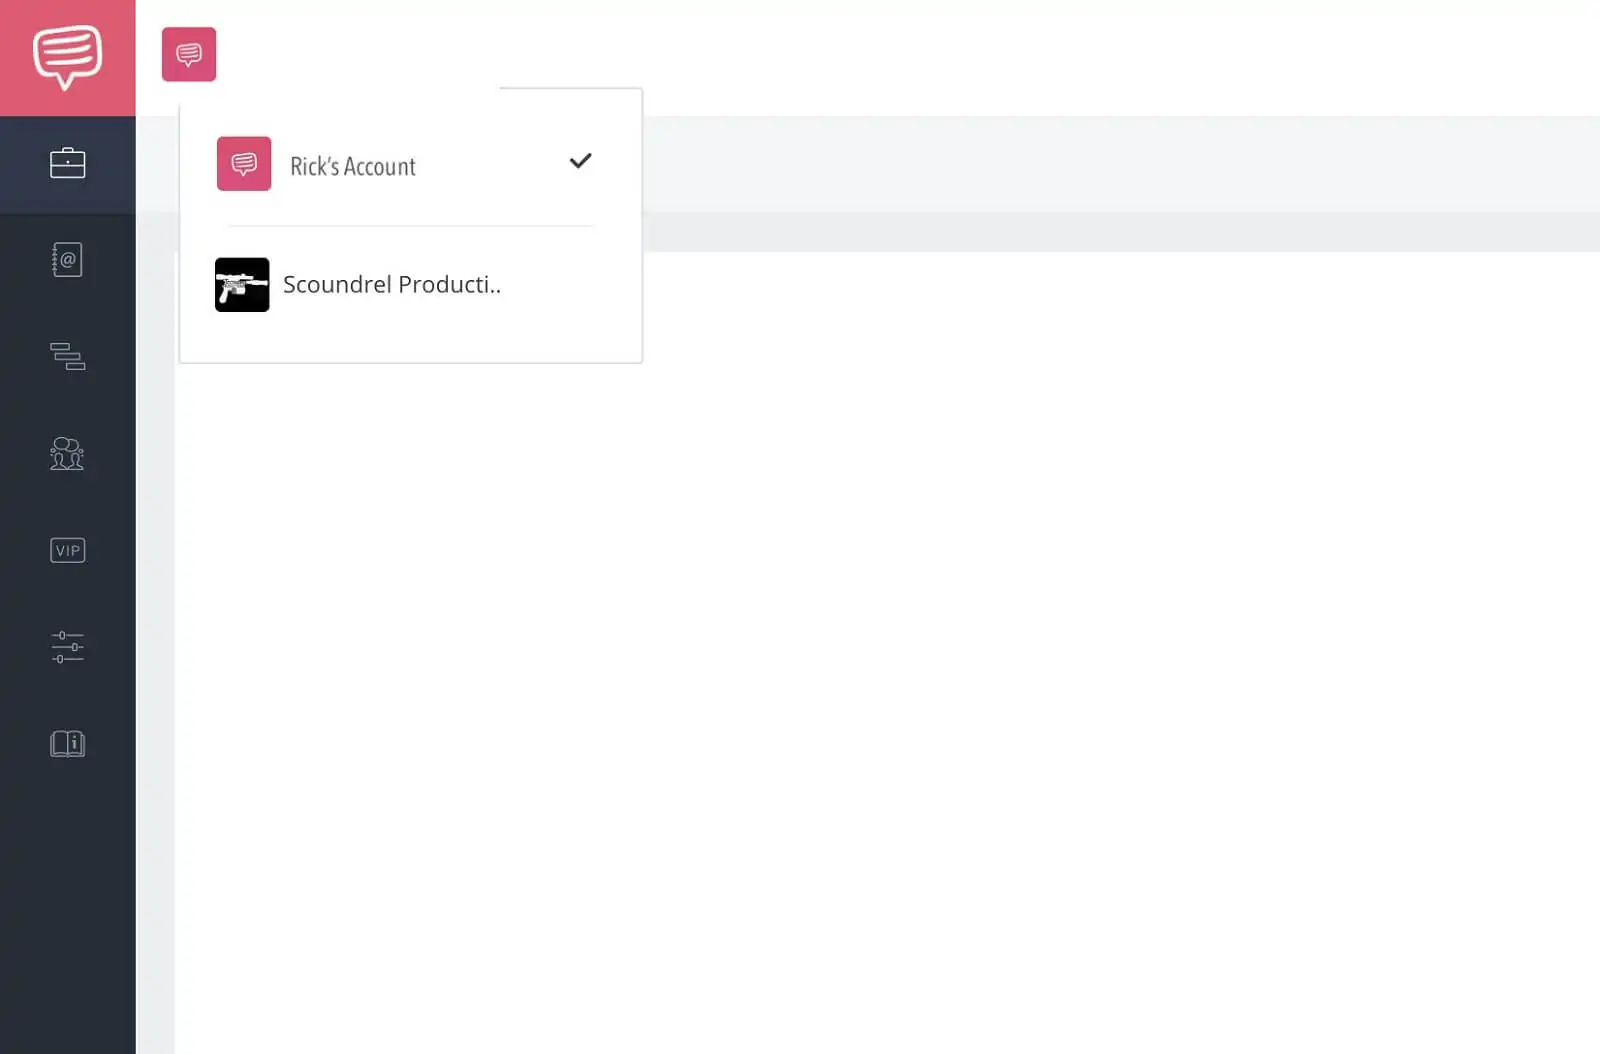
Switch to company account • Choose company account
That’s it, now you’re a teammate and will have access to all of the premium features of the company account. Now, as the company account owner, you can easily remove teammates which is...
Recyclable User Seats
Step 3: Removing teammates
Ok, so removing teammates is just as easy if not easier than inviting them. Having recyclable user seats allows you to purchase fewer user seats and invite and remove as needed.
To remove a teammate, head back to the Team page and simply click the X on the team member you’d like to remove.
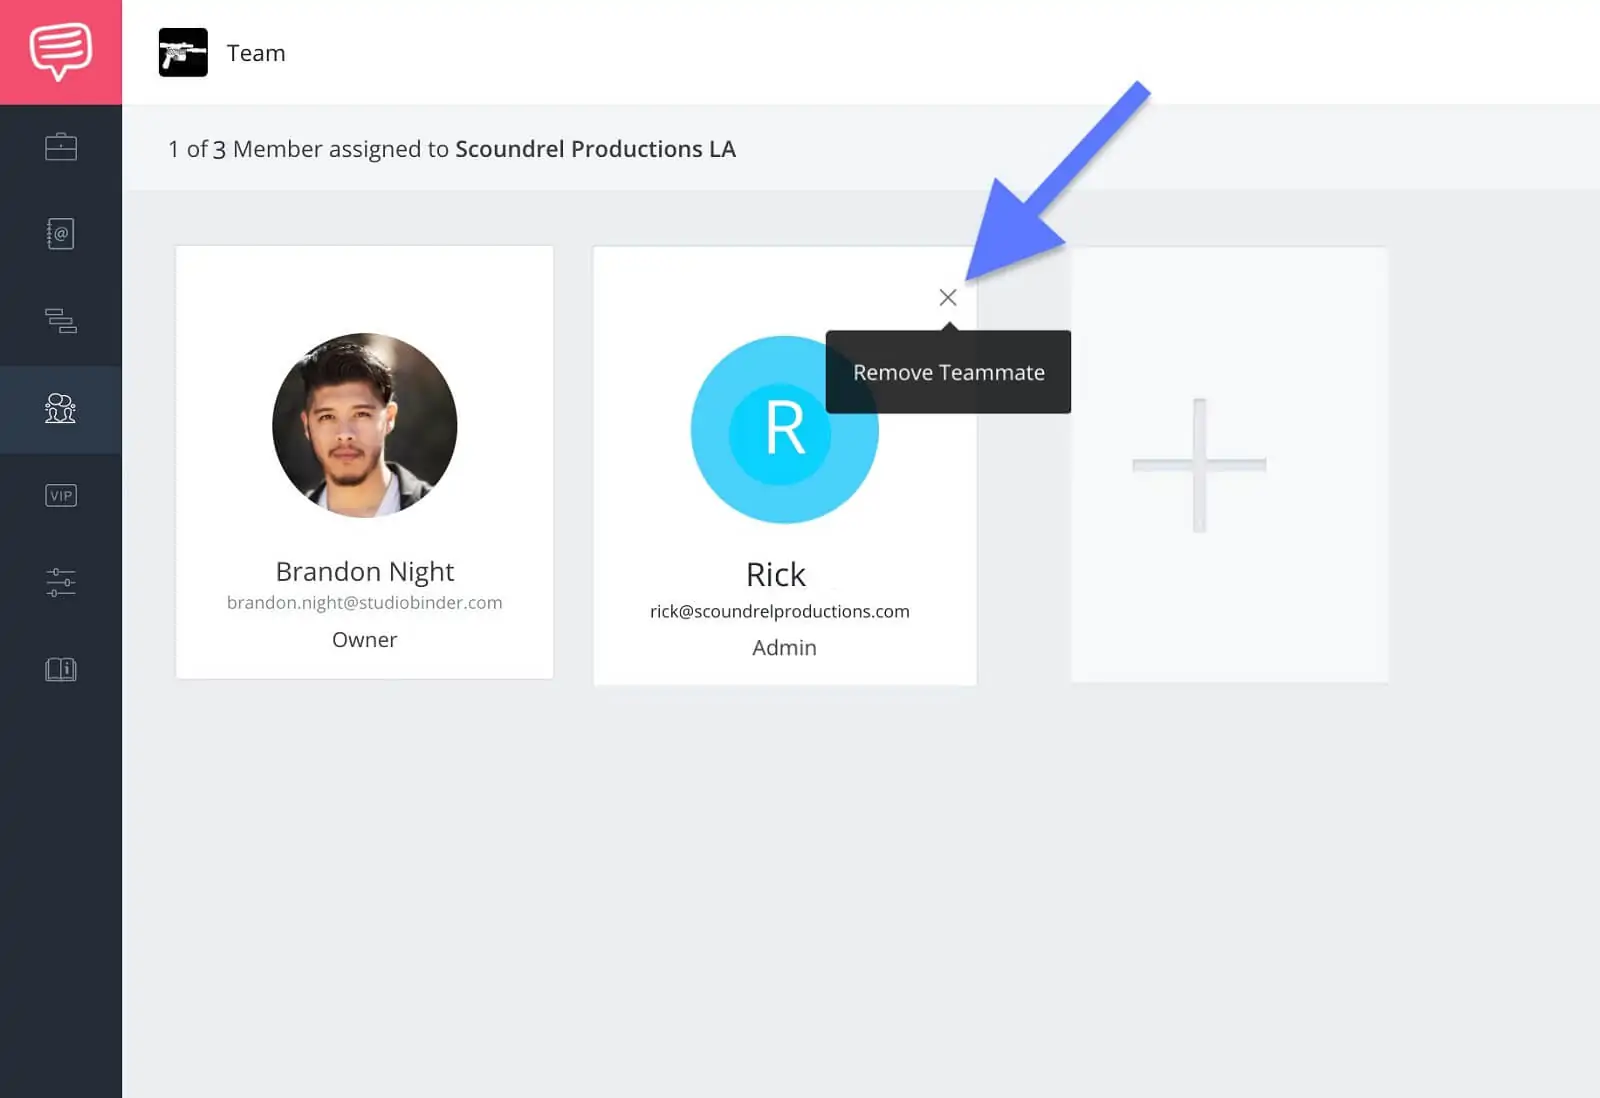
Team page • Click remove teammate
...and just like that the user seat is vacated and ready to be given to someone else.
So, there you go. Adding, accepting, and recycling teammates in StudioBinder couldn’t be easier. Time to choose which plan works best for you and your team and get your next project going! Cheers to the next one and many more after that.
UP NEXT
Using the Collaborator Feature
Okay, you’re all caught up with teammates in StudioBinder, but there’s actually another way to collaborate on a project. Come take a look at how to use StudioBinder’s Collaborator feature. Who are the essential teammates in your production? Let us know in the comments!
Up Next: Collaborator Feature →
Showcase your vision with elegant shot lists and storyboards.
Create robust and customizable shot lists. Upload images to make storyboards and slideshows.

Very interesting