
Are you wondering how to ramp speed in Premiere? We’ll be walking you through four simple steps to create your very own speed ramps in Adobe Premiere Pro. We’ll even provide a couple of tips to set yourself up for success in advance of bringing your footage into the editing room. Let’s get started with a quick definition.
Premiere Pro CC speed ramp
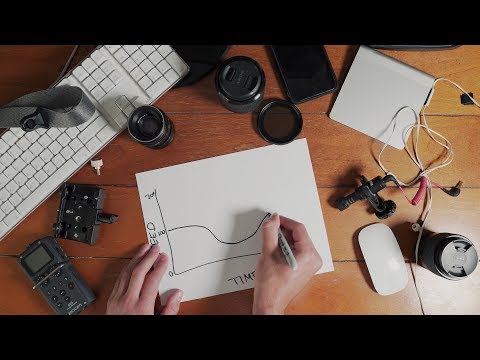
What is speed ramping?
Before we get into how to speed ramp in Premiere, it’s important to first have a thorough grasp of exactly what a speed ramp is. Put simply, a speed ramp is a gradual acceleration and/or deceleration of a video clip. As opposed to an abrupt shift in speed, a speed ramp creates a smooth transition between two drastically different speeds.
Here's an iconic example of speed ramping in Zack Snyder's 300. This simple technique of adjusting the rate of motion turns a violent confrontation into something almost balletic. Combined with the zooms in and out allows this entire moment to be captured in a single shot.

Zack Snyder shows us how to speed ramp in 300
Learn more in our other post on how to speed up a video.
The video below explains the origin and utilization of speed ramping. Plus, it offers a quick tutorial for how to create a speed ramp if you edit in Final Cut vs. Premiere Pro.
Premiere Pro speed ramp, explained
If you encounter any other unfamiliar terms, our ultimate guide to filmmaking terminology is a great resource for looking up definitions. Now, let’s dig into some tips for shooting the footage you intend to speed ramp.
How to speed ramp in Premiere
Step 1: Create your project
If you already have your project file up and running, you can skip to Step Two. Otherwise, open Premiere and create a new project. Next, import the footage you intend to speed ramp. The quickest and easiest way to import footage in Premiere is to click and drag the footage into your project window.

How to ramp speed in Premiere • Step 1: Import
If you don’t already have a sequence in place, the quickest way to generate one is to simply drag a clip into the timeline. Premiere will automatically create a sequence with the appropriate settings for the clip.

How to speed ramp in Premiere • Enlarge your view of the video track
The following steps will be easier if you enlarge the video track. You can do so by dragging the handles at the end of the timeline (circled in the screenshot above).
How to ramp up speed in Premiere Pro
Step 2: Isolate the moment
Pick out the moment where you wish to apply the speed ramp. Movement is key to a satisfying speed ramp, so be sure to pick a highly dynamic moment. There are many ways to isolate the moment in Premiere.
You can set in and out points, use “Command+K” to cut, or use the razor blade tool to split the clip into pieces.
If you plan to speed ramp multiple times throughout a lengthy clip, then there is no need to split it up, we’ll be doing that with keyframes.
PREMIERE PRO SPEED RAMP
Step 3: Create keyframes
Next, we’ll be creating keyframes. But first, we’ll need to make sure the keyframes are visible. Get into the appropriate view by right clicking on your clip then choosing “Show Clip Keyframes” → “Time Remapping” → “Speed.”

How to speed ramp in Premiere • Show keyframes
Select the pen from the toolbar (or just press the “P” key) and click on the white line running across the video track to make a keyframe. You need at least two keyframes to create a speed ramp, one where you want the speed ramp to begin and one where you want it to end.

Use the pen tool to create keyframes • Speed ramp audio Premiere Pro
More complicated speed ramps can be made through the use of additional keyframes. Once your keyframes are in place, switch back to the selection tool. The hotkey for this is “V.”
How to speed ramp in Premiere
Step 4: Ramp it!
Now comes the pivotal moment, it’s time to adjust the speed. Premiere Pro makes this quite an easy task. All you have to do is click on the white line between the keyframes you have made and drag it either up to speed up the video or down to slow down the video.
That’s all it takes to adjust the speed for that portion of the clip, but it’s not yet a true speed ramp since the change will be abrupt. So, let’s smooth it out.

Speed ramping transition Premiere Pro
With the selection tool equipped, click and drag one side of the keyframe marker. This will spread out the number of frames that the speed transition will occur over. The further you space out the two halves of the keyframe indicator, the longer and more gradual the speed ramp will be. Do the same to the other keyframe, and your speed ramp is complete!
This video offers a detailed tutorial for speed ramping in Premiere Pro using a slightly different method.

How to speed ramp in Premiere Pro
There are multiple effective ways to create a speed ramp in Premiere, so feel free to experiment and get creative with as many keyframes and speed ramps as you want.
How to speed ramp in Premiere
Set yourself up for success
There are a handful of considerations to keep in mind when shooting anything that you plan to speed ramp later on in post. Planning everything in advance can lead to higher-quality projects at every level.
Smooth and stable footage will produce the best results when speed ramping. Handheld footage can still be speed-ramped, but the flaws of shaky, jittery footage will be magnified by a change in speed.
So if you lack steady hands, it is best to use a steadicam, stabilizer, or tripod to keep your footage looking smooth if possible.
You can also stabilize your footage in post before speed ramping.
If you want to include slow motion in your speed ramp, then you will achieve better results if you shoot at a higher frame rate. You may even want to purchase a slow motion camera to get the very best slow motion possible.
Once your footage is shot, you’re ready to start creating your first speed ramp in Premiere Pro.
UP NEXT
How to Reverse a Clip in Premiere Pro
You now know how to speed ramp in Premiere. But, what if you want to know how to reverse a clip? If you want to get fancy, you can try combining your skills and speed ramp a reversed clip. We’ll walk you through the three simple steps necessary to reverse a clip in Premiere Pro, up next.
Up Next: Reversing Clips in Premiere →

Share your vision with elegant shot lists and storyboards.
Create robust and customizable shot lists. Upload images to make storyboards and slideshows.

