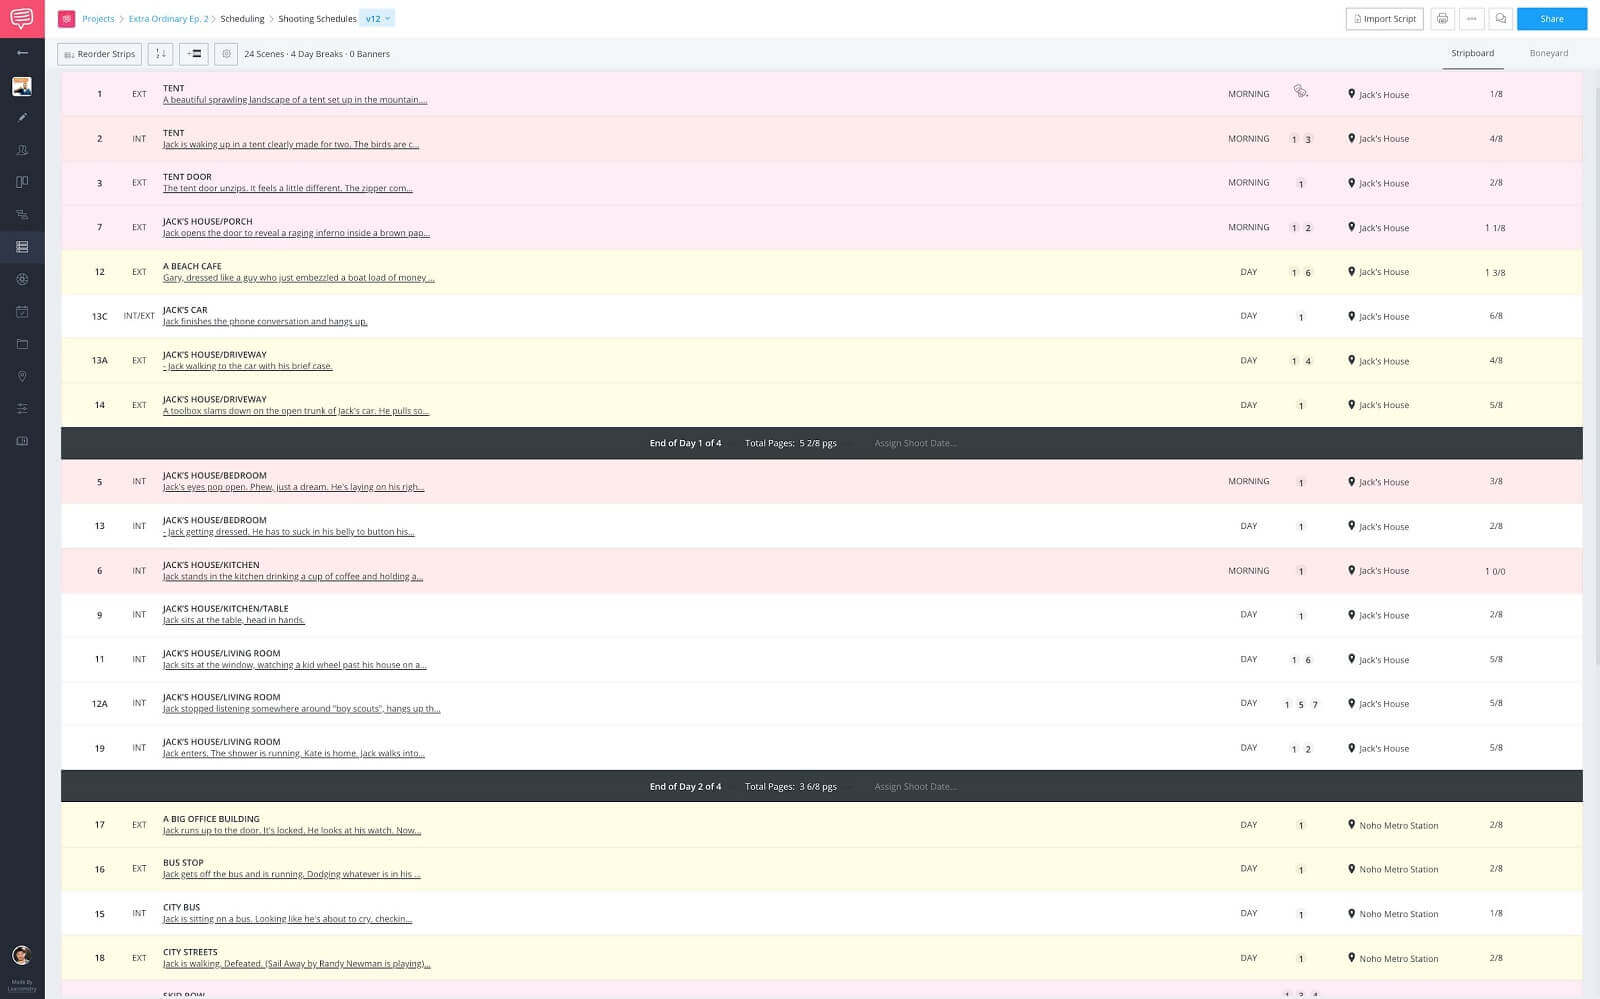
Not every scene is written equally. Especially when it comes to scheduling. You might have a scene that is only five eighths of a page, but is action packed. Which means you might have to schedule that single scene over multiple days. Now, typically when a script is at the stage of being scheduled, there aren’t going to be any major changes. However, scripts and therefore schedules are ever evolving. That’s why being able to adjust scenes on the fly is crucial. Follow along for a step-by-step process on how to split a scene for scheduling purposes.
Shooting Schedule Meaning
First, what’s a shooting schedule?
Before we get to splitting a scene, we should probably go over exactly what a shooting schedule is. It might sound obvious, but there’s more to it than you might think.
Shooting Schedule Definition
What is a shooting schedule?
A shooting schedule is a plan that every film, TV show, or commercial follows to make sure that the video production goes smoothly. It's a simple breakdown of the scenes, talent, time, cast, company moves, and day breaks. If a finalized project is buried treasure, this is the map to get you there. Traditionally, a film production board (aka stripboard) was created using cardboard charts that held color-coded strips of paper that represented scenes in a shooting script. The strips were then reordered by the Assistant Director (AD) to become the shooting schedule.
Who typically has input on the schedule?
- Assistant Director (AD)
- Director
- Cinematographer
Shooting schedules are never "done." There are almost always changes that come up, sometimes last minute. When these situations come up, you'll need to think on your feet and re-arrange the schedule. Having this skill is highly valuable for any filmmaker and we'll show you this scheduling trick that will make your life easier.
To really bring it home, let’s hear from Brent over at Sharegrid on what shooting schedules are and why they’re important.
Why shooting schedules matter • Subscribe on YouTube
Alright, now that we’re all experts on shooting schedules, let’s get into how to split scenes after you’ve begun scheduling.
So, I have my schedule here that I’ve begun.Shooting schedule page • Populated stripboard
However, I just got word that Scene 8 needs to be scheduled over two days because the director wants to get as much coverage as possible. So I’ll need to modify the script.
It’s really easy to make changes to your script in StudioBinder. The most important thing to remember is that any pre-production work is tied to the scene number it is in. For example, if you create a breakdown for Scene 4, but later change that scene to Scene 3A, those tagged elements will be lost or misplaced.
To show rather than tell, let’s watch how script changes are made easily in StudioBinder.
Screenwriting Tutorial: Script Changes • Subscribe on YouTube →
Alright, I mean I could probably stop here and you could get there on your own, but I told you there would be a step-by-step process. In Heath Ledger’s Joker voice “And here we go…”
Documents Page
Step 1: Open the script
As you saw in the video above, script changes are made on the documents page. That’s where any script that has been imported, is stored and can be edited.
So, from here on the shooting schedule page, I’ll click on the documents page button, which is a pencil here on the navigation sidebar...
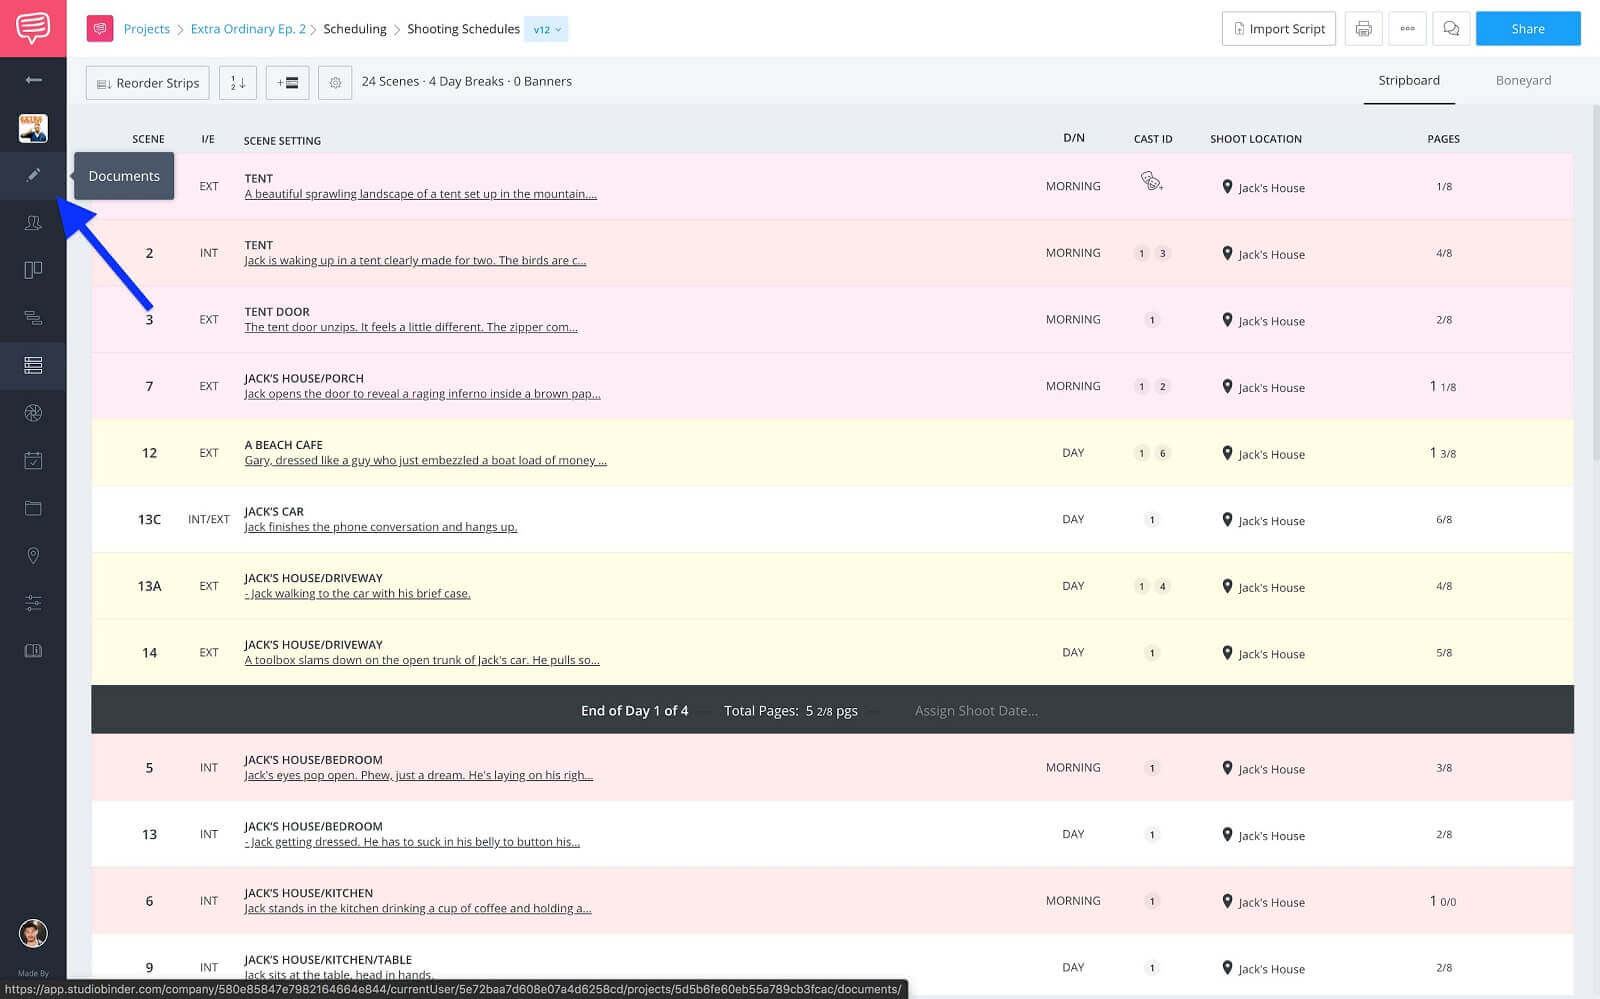
Navigation sidebar • Click documents button
...on the documents page click the scripts folder to open it...
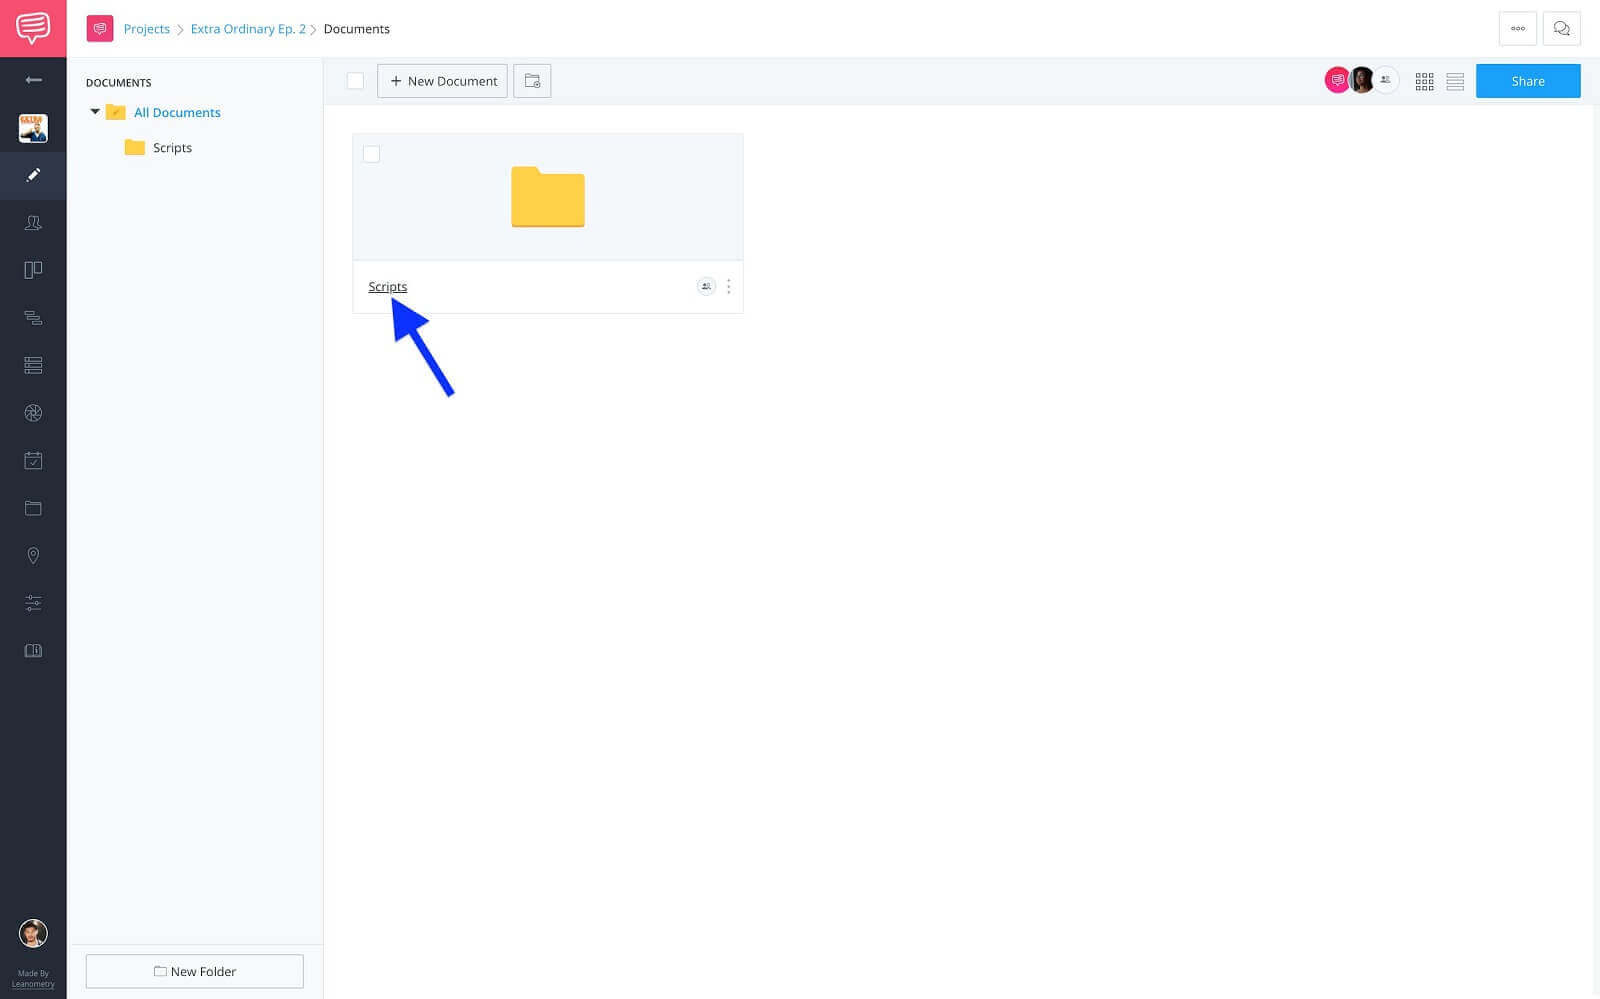
Documents page • Click scripts
...and finally click the script file to open the screenplay. This opens up the screenwriting page where we’ll be making the edit to the script.
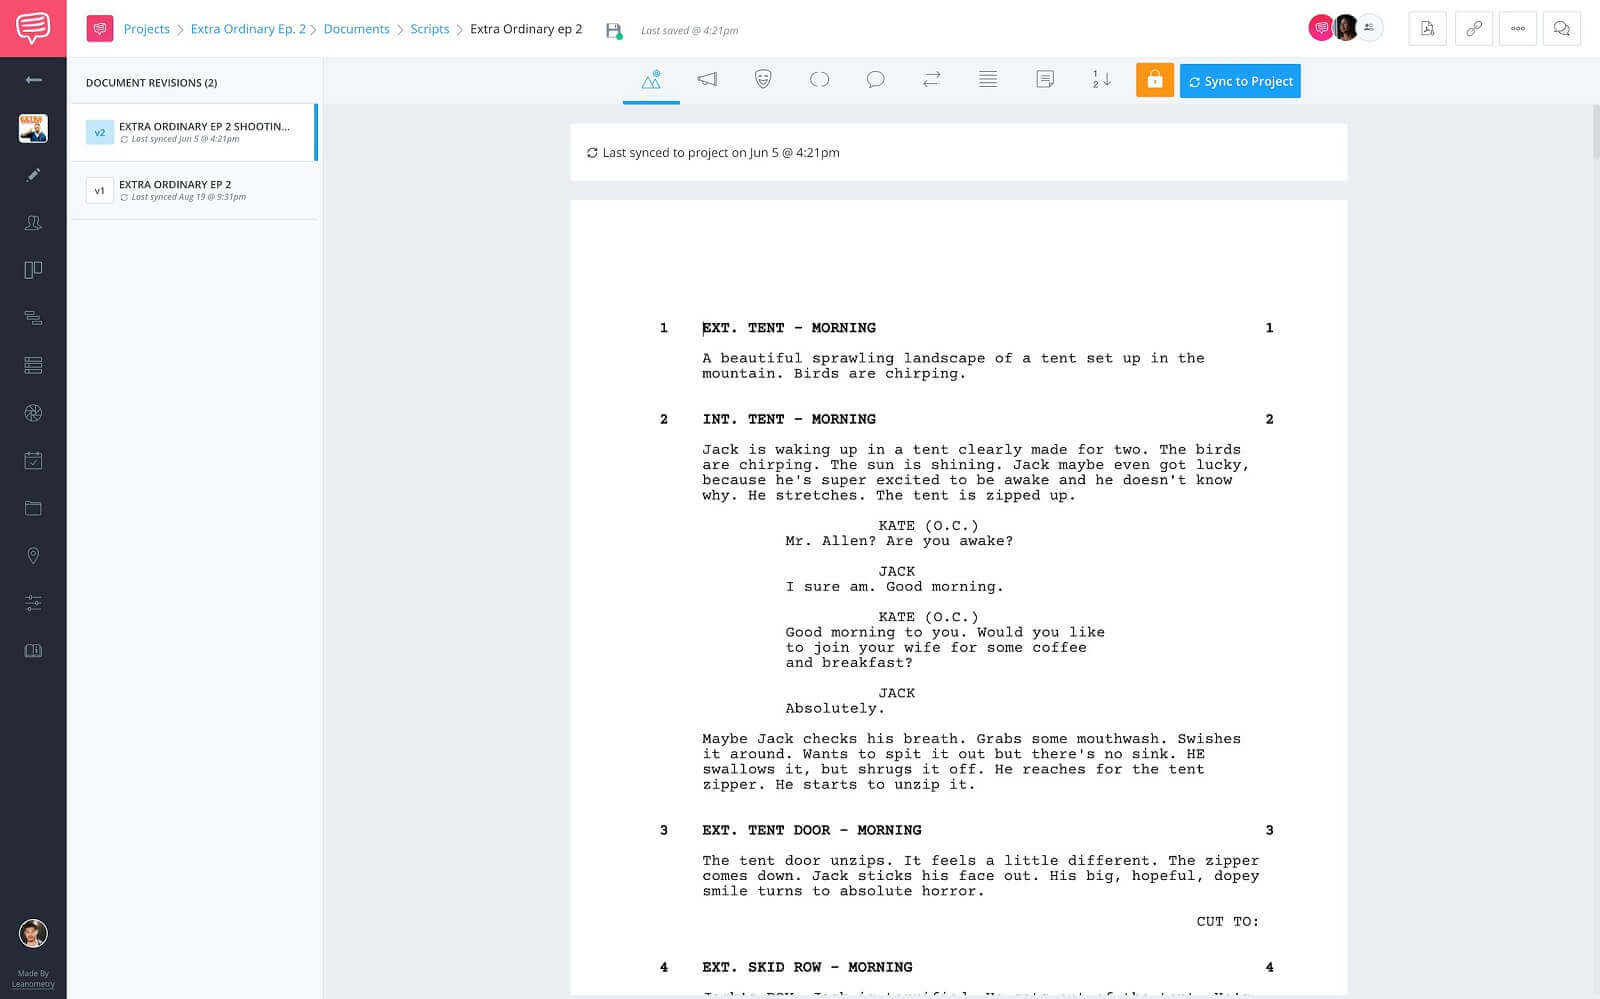
Documents page • Screenwriting page
Ok, with the screenplay page opened up we can now locate Scene 8 and where exactly we want to make the split.
Edit Script
Step 2: Add a scene heading
In order to schedule a single scene over multiple days, one scene has to be broken out into two scenes. For this, we’ll need to add a new scene heading in between Scenes 8 and 9.
Now, since the script is locked...
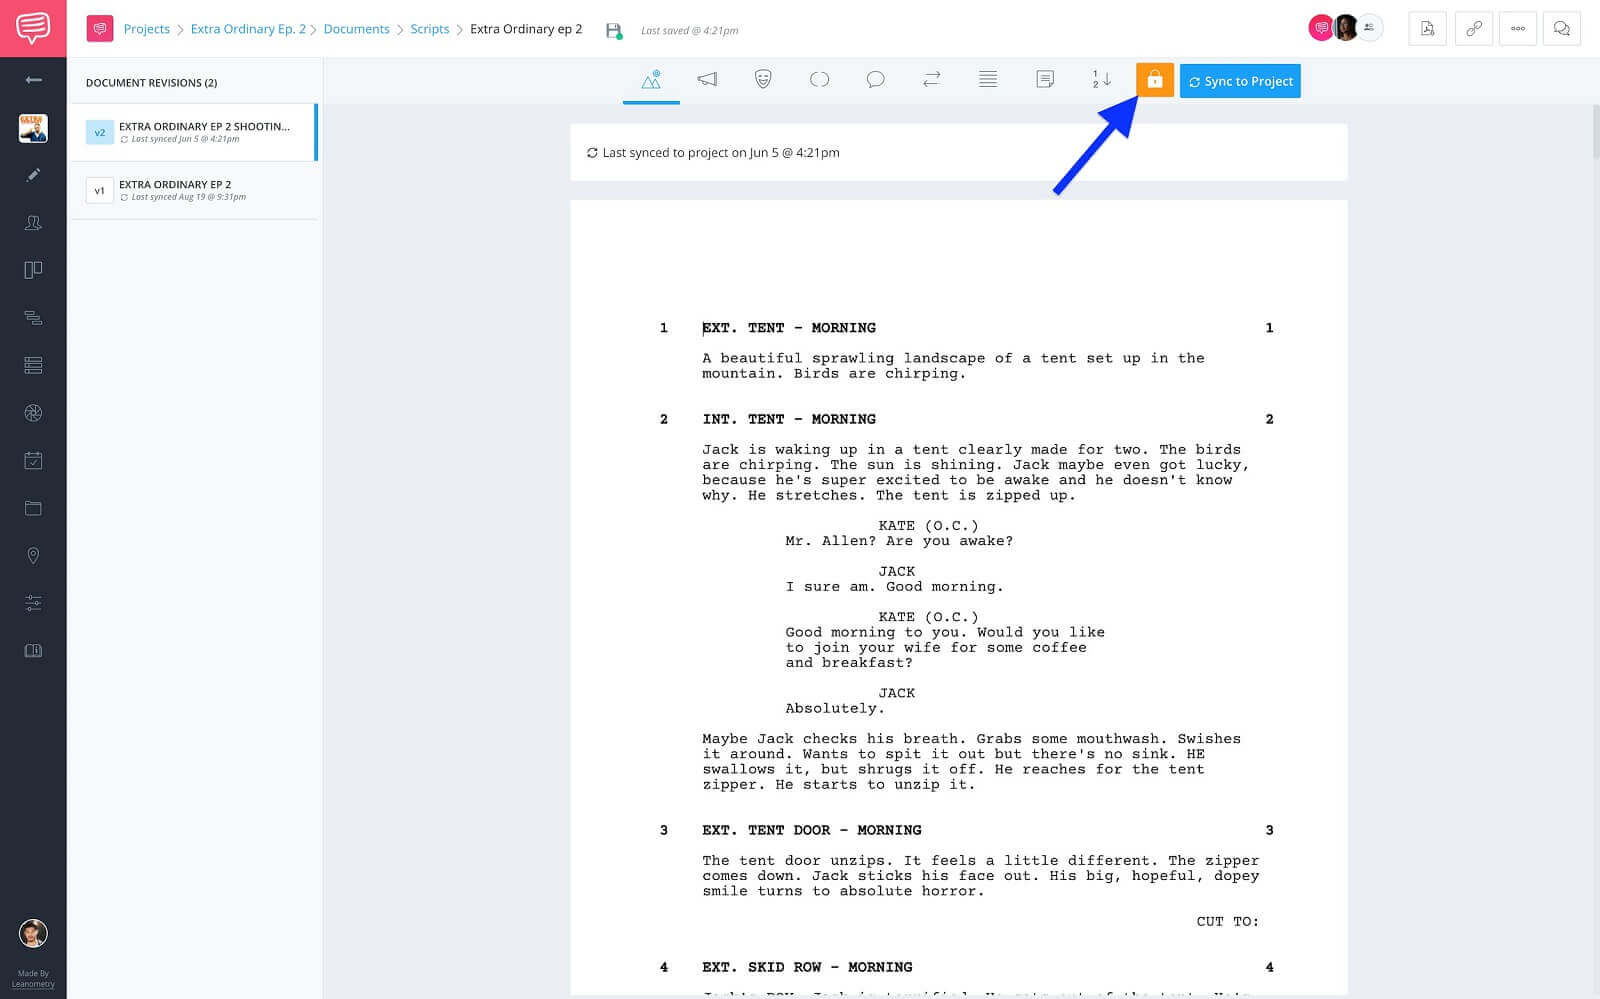
Screenwriting page • Locked script
...if you remember from the video, StudioBinder locks a script once it has been imported or synced to the project. This locks in the scene numbers. To avoid altering existing scene numbers, StudioBinder will automatically append an alphanumeric scene number to scenes added between existing scenes.
Pro tip:
If you click the lock/unlock button and it doesn’t become visually apparent right away, refresh the page and the change will be updated.
So, here I have Scene 8. I’ve found where I want to split the scene so I’ll add a new line by pressing enter on the keyboard, then clicking on the scene heading format option from the toolbar.
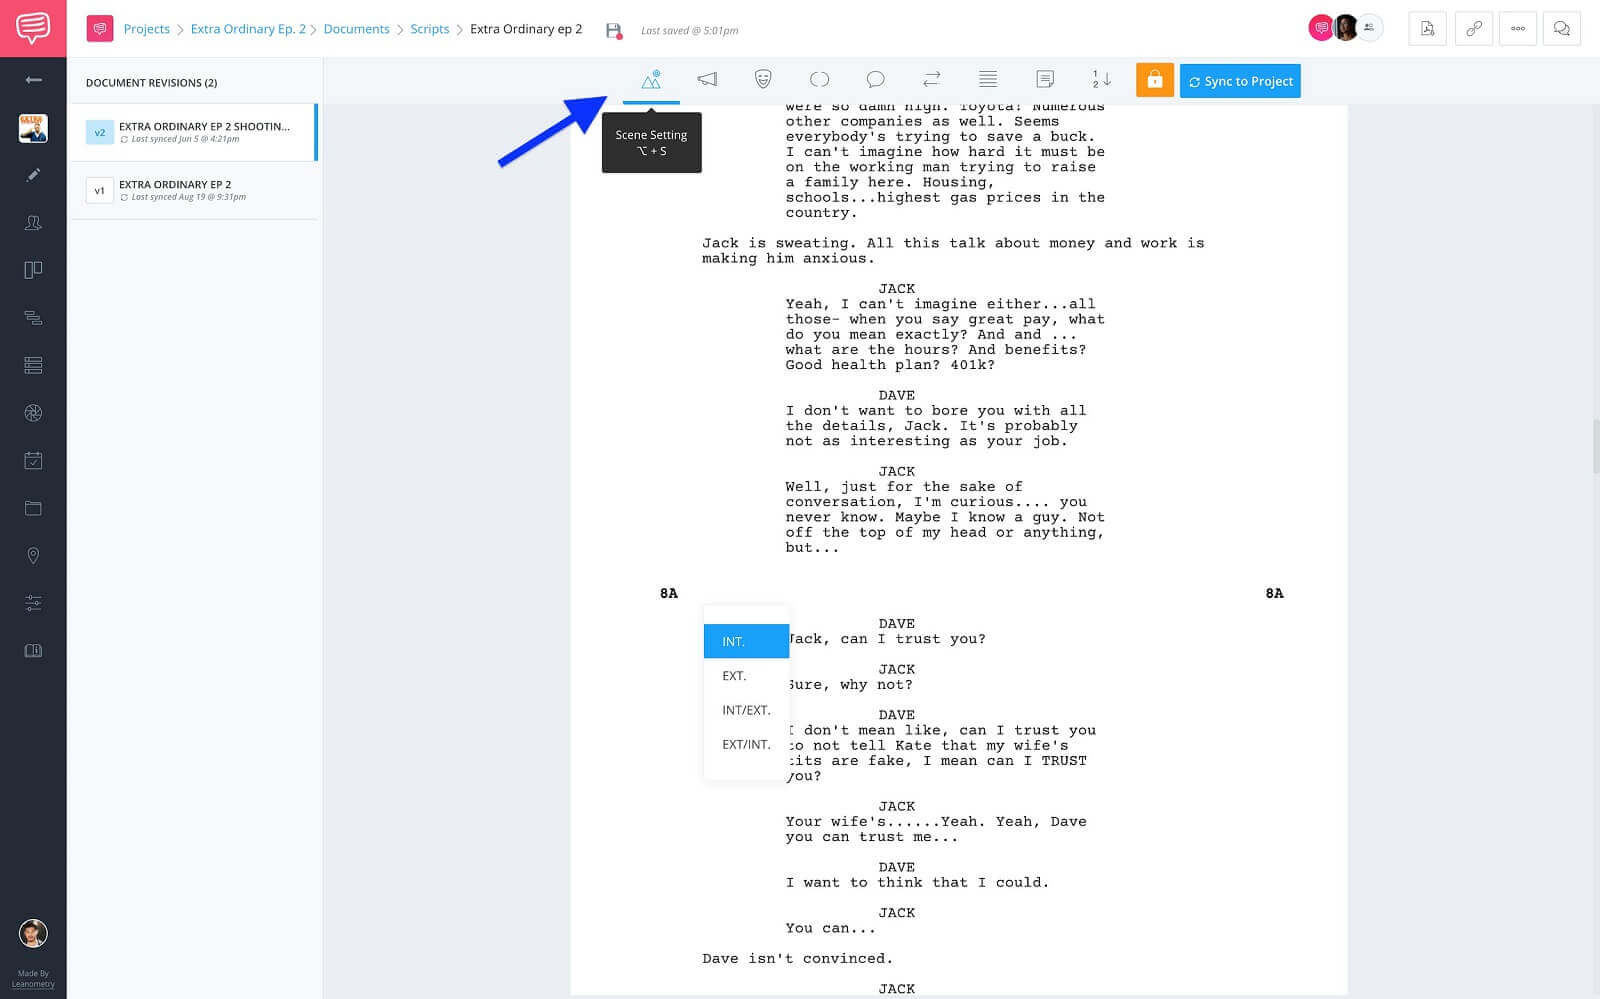
Screenwriting format elements toolbar • Click Scene Heading
You can also use the keyboard shortcuts, on a Mac that would be Option (⌥) + S and for a PC CTRL or ALT + S.
You’ll notice the scene has been given the number 8A. So the existing scene numbers are unaffected.
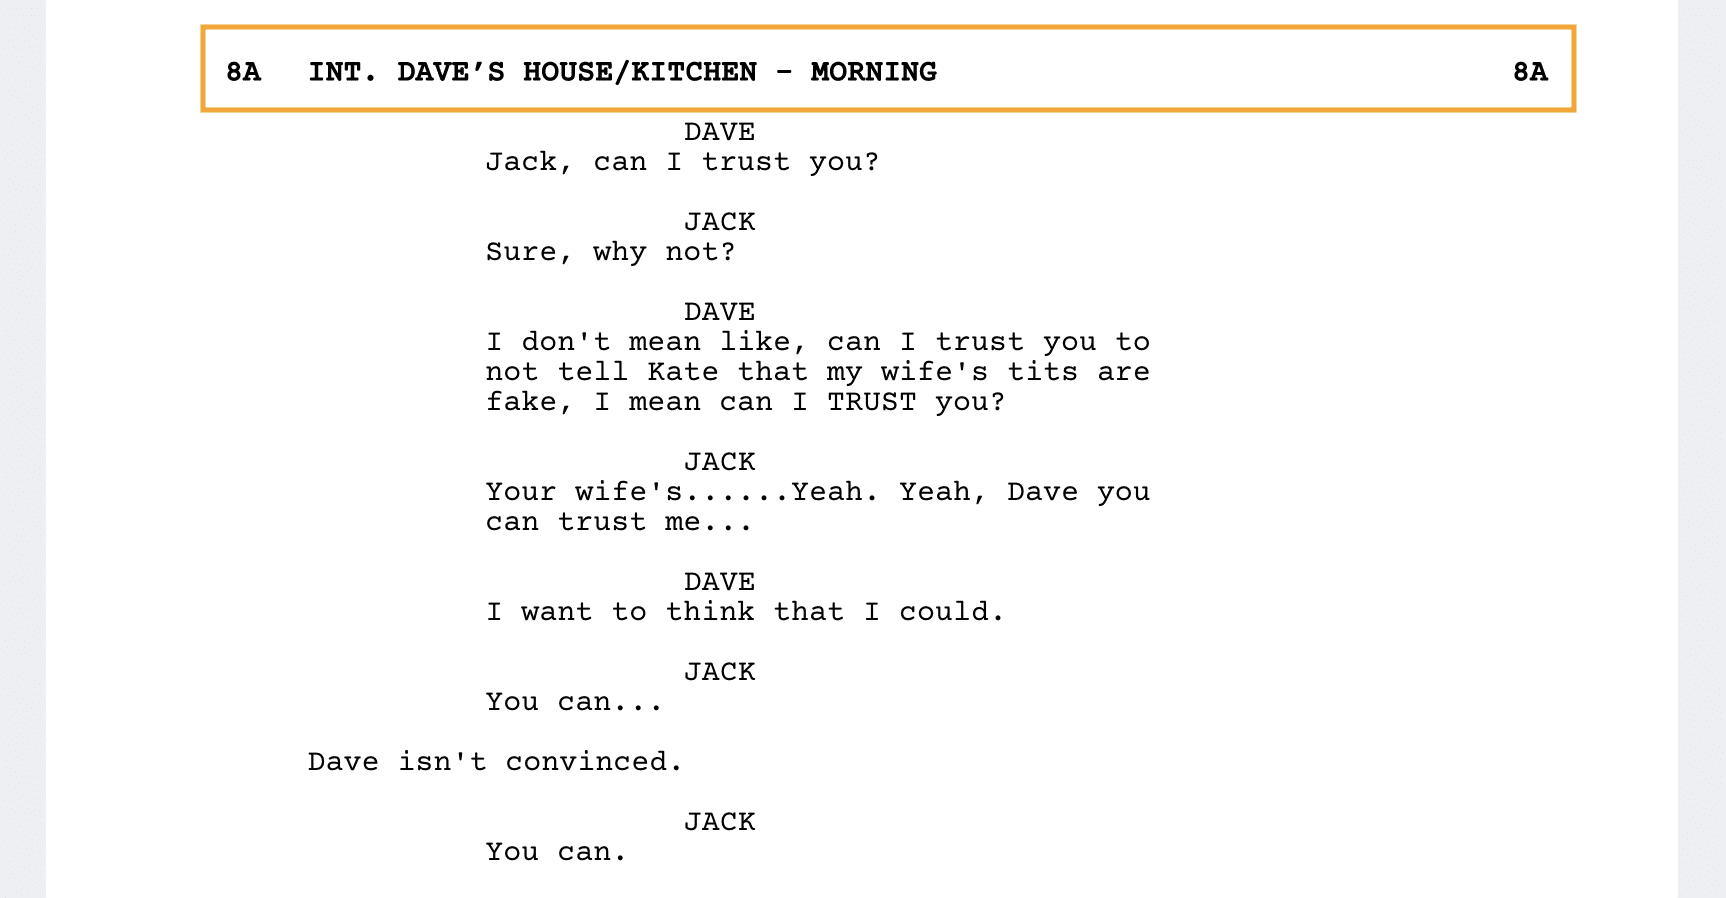
New scene heading • Alphanumeric scene number
Now, I’m going to copy Scene 8’s scene heading…
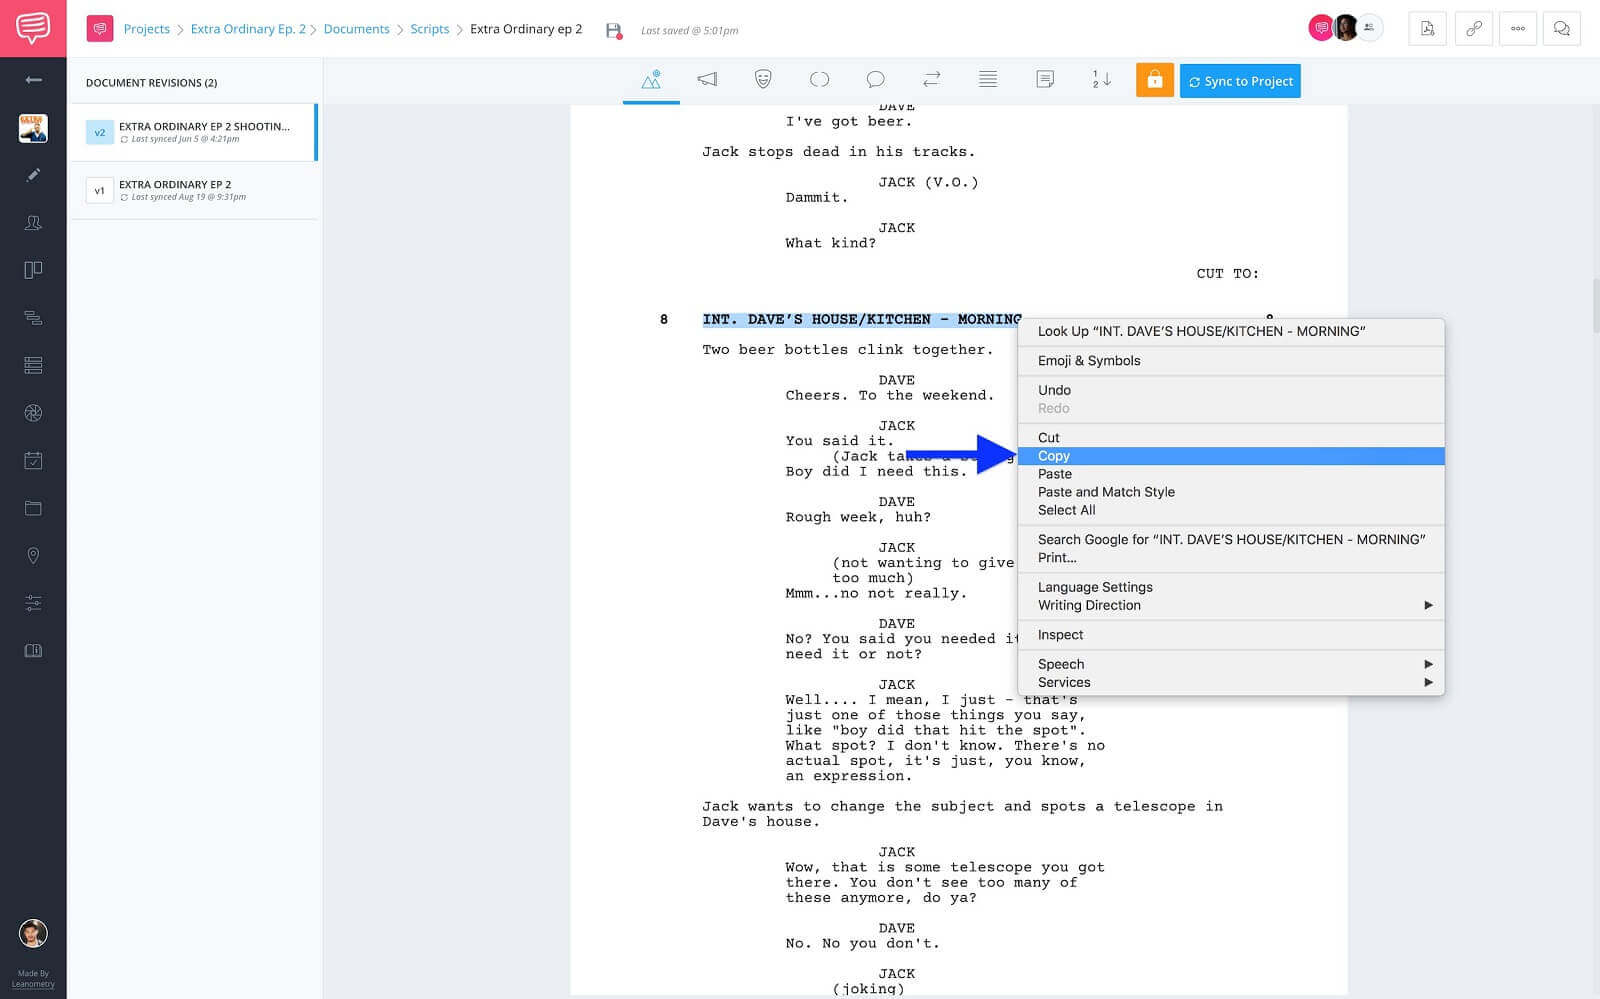
Existing scene heading • Copy scene heading
...and paste it here. This is because it’s still the same setting, it’ll just be scheduled independently.
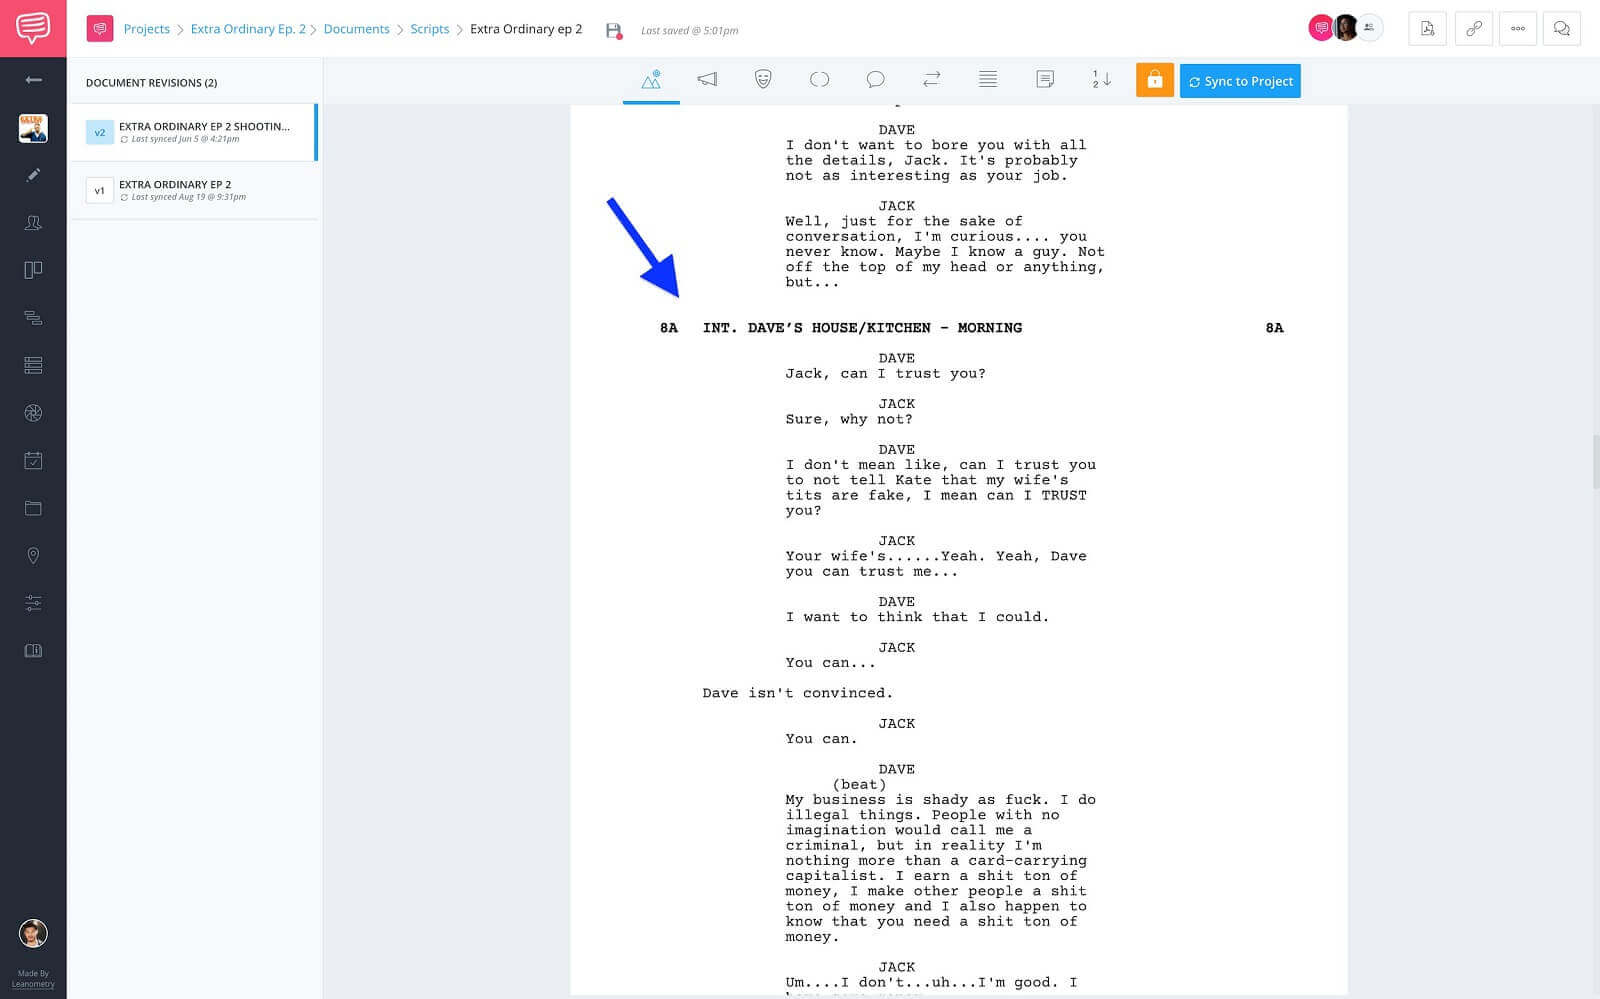
New scene heading • Paste scene heading
Alright, I’ve added a new scene heading and split the scene. Now, it’s time to populate this change across the project.
Sync Screenplay
Step 3: Sync and schedule
Syncing script changes couldn’t be easier in StudioBinder. Well, ok technically it could be, but we’re talking one click rather than two. BUT, that second click could be vital. That’s where the sync screenplay feature shows you what changes are going to be applied to the new version.
Let’s hear from StudioBinder CEO, Robert Kiraz, about the sync screenplay feature.
Feature spotlight: sync screenplay • Subscribe on YouTube
Alright, now I’ll sync the script by clicking the sync to project button...
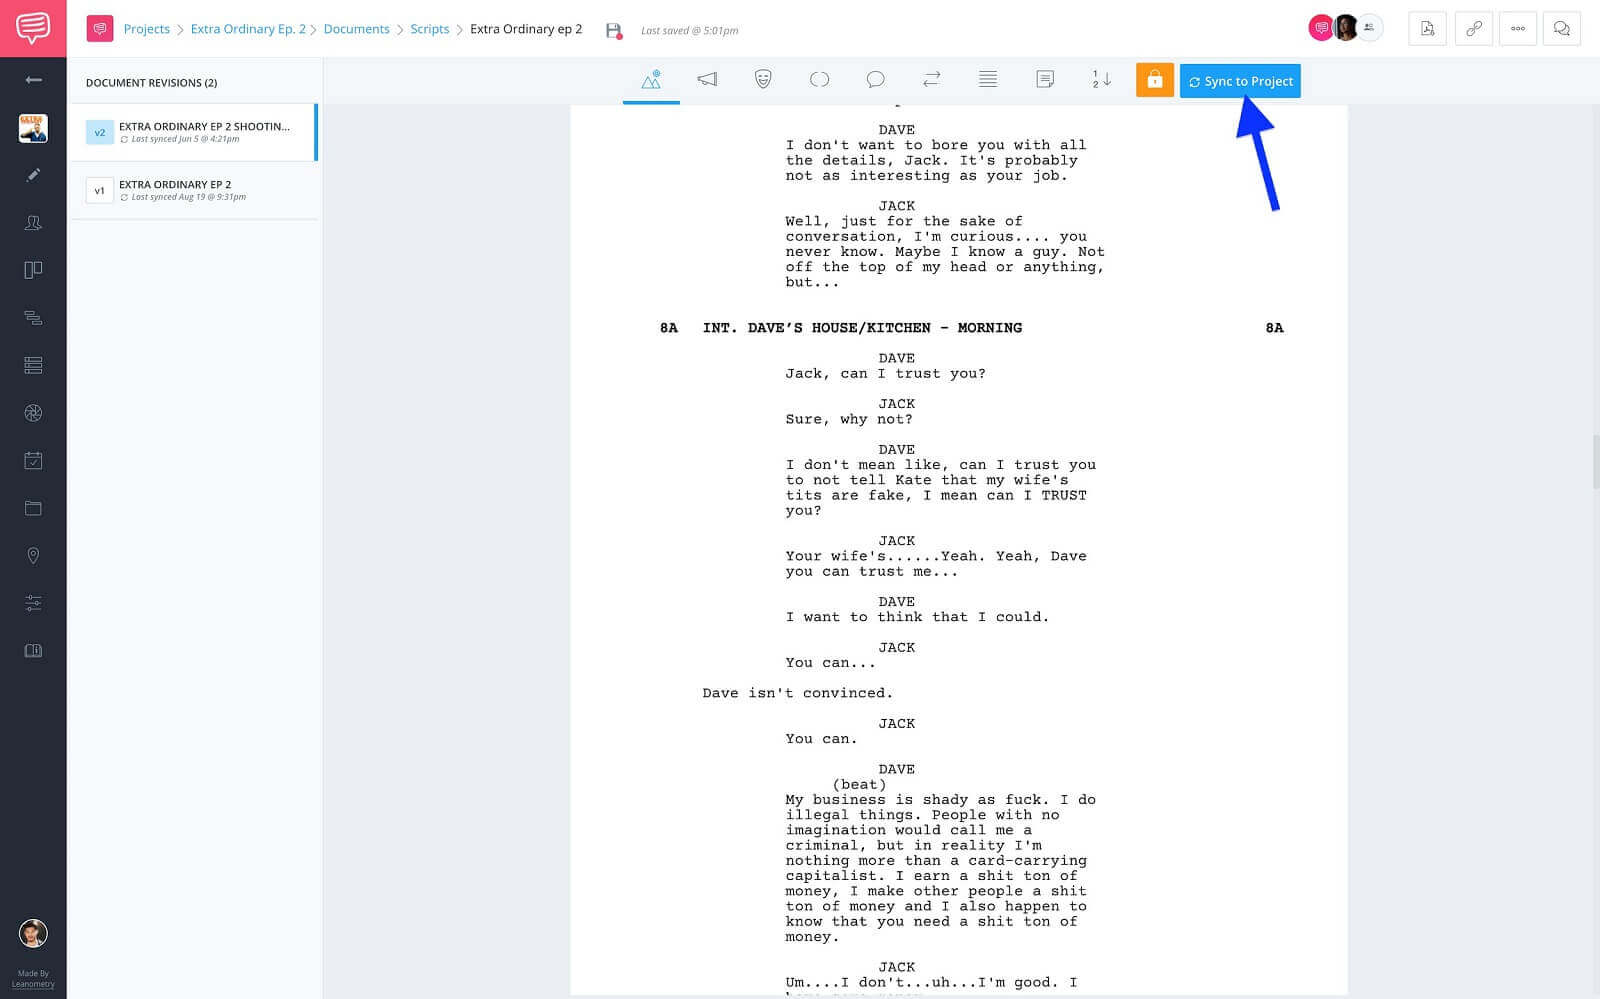
Screenwriting page • Click sync to project
...this brings up the sync screenplay screen.
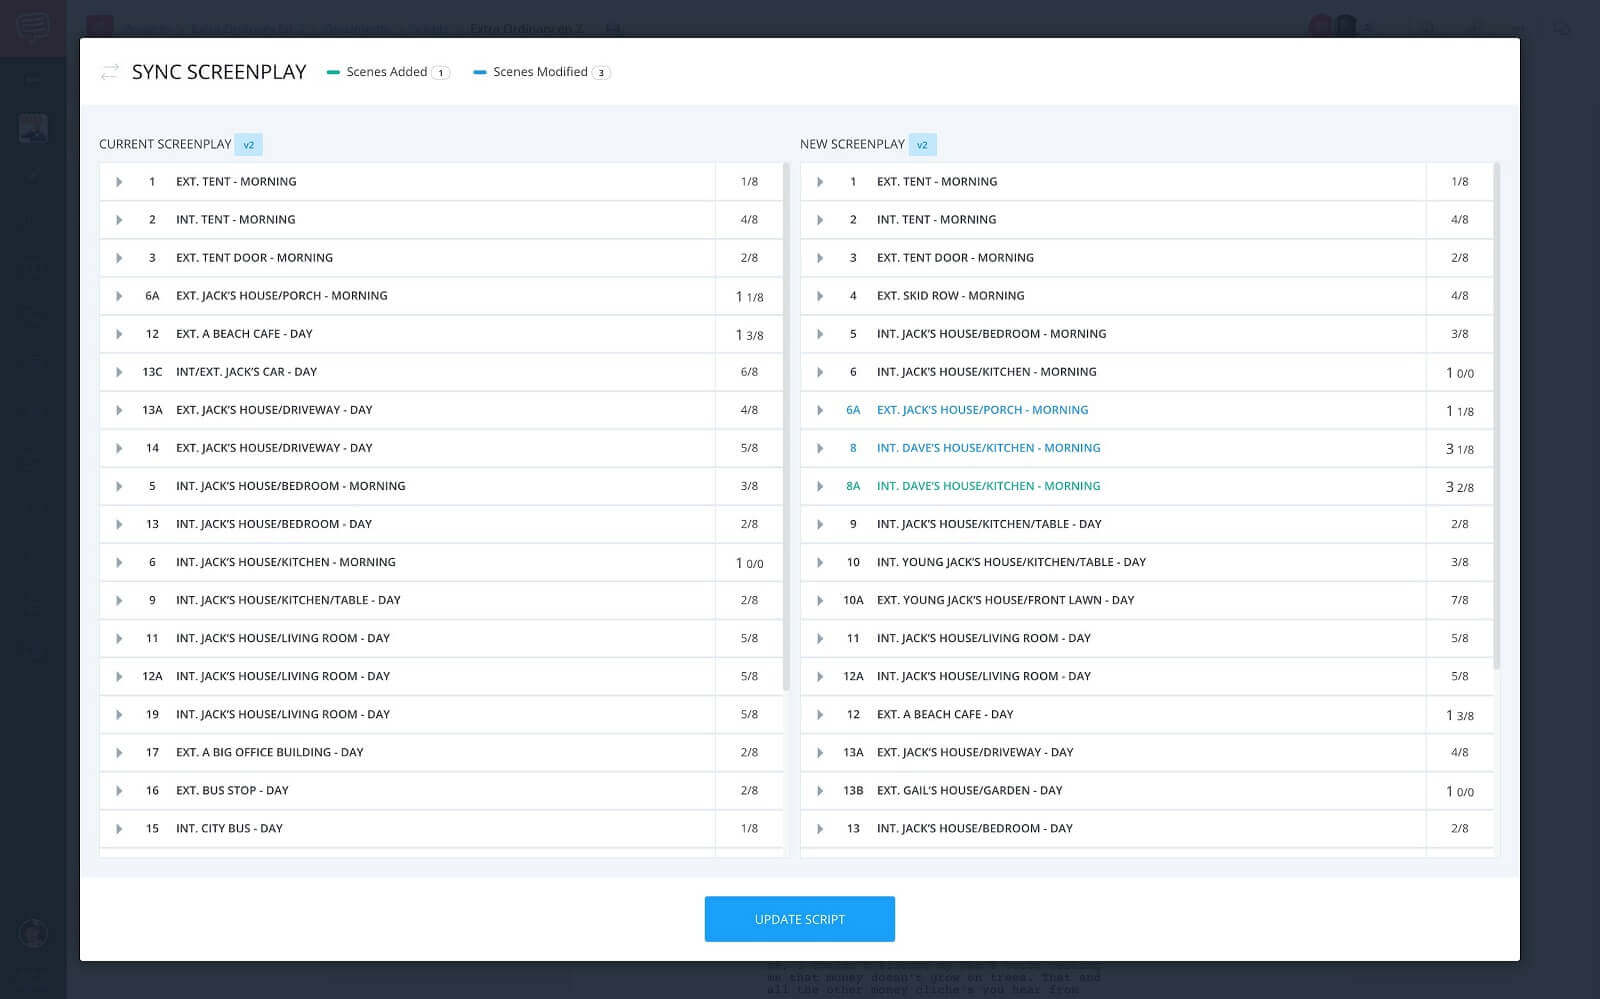
Sync screenplay screen • Click update script
Once I’ve confirmed the changes I click Update script. This populates the new scene 8A to the shooting schedule page.
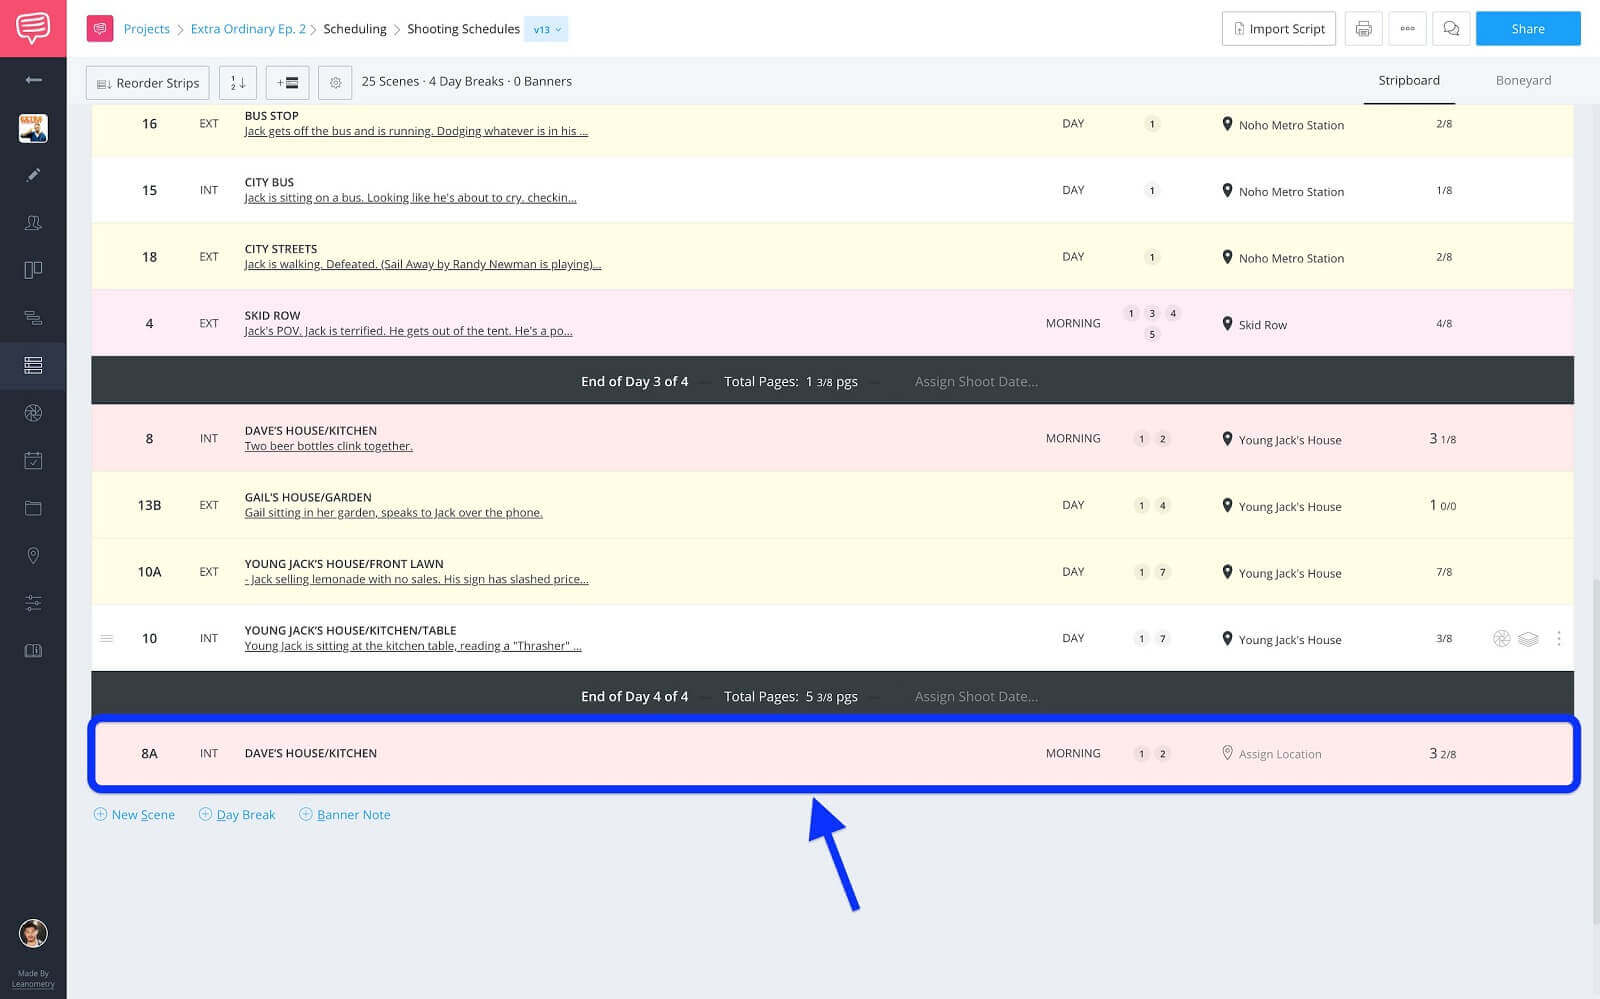
Shooting schedule page • New scene strip
Now, this scene strip can be placed in the schedule where it needs to be.
So, if you’re scheduling your project and need to split a scene you’ll be able to do it with your eyes closed! If not, bookmark this page and use it anytime. Be sure to check out StudioBinder’s Support page, YouTube channel, and Tutorials page for any help with your project’s features.
UP NEXT
Create your shooting schedule
Scheduling any production can be a massively difficult task. Hopefully, with this "scene splitting," you'll be able to make the most accurate and efficient schedule. Speaking of which, now it’s time to dive deeper and see how to create a better shooting schedule. Have any questions about splitting scenes? Let us know in the comments!

