
Why do filmmakers need to know about 3 point lighting? It’s great for picture-day photography, but what if you’re looking for an explanation of how 3 point lighting works for film and video?
We’re going to show you why 3 point lighting is important for filmmakers, but also take you deeper into some advanced techniques, and how you can use it to effectively light large scenes.

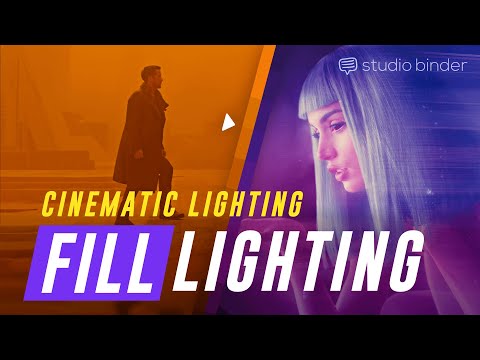
Watch: Cinematic Lighting (with a Fill Light)
Subscribe for more filmmaking videos like this.
3 Point Video Lighting
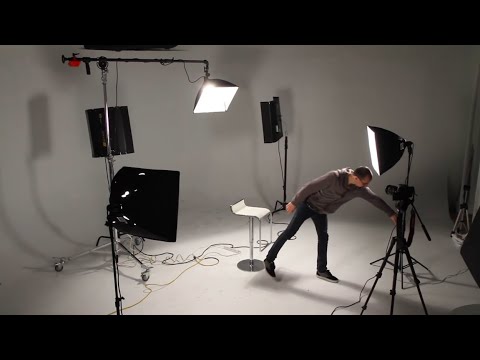
How to setup 3 point lighting
The light sources are labeled as such:
- Key Light — Used as your primary lighting point
- Fill Light — Used to fill opposite the key light
- Backlight — Used to extract the third dimension

Three Point Lighting Diagram
3 point video lighting is all about creating a three-dimensional look. By placing three light sources at strategic points around the subject, each light source illuminates a separate dimension of the subject and creates an image with greater representation of height, width, and depth.
3-Point Lighting in less than 10 minutes
Three point lighting deals with the relationship each light has with one another. This is called the light intensity ratio.
Generally, the key light to fill light ratio is 2:1.
This means that your key light should be twice as bright as your fill light. The relationship of intensity and placement can change depending on your goals, but the above ratio will give you a relatively cinematic look for narrative filmmaking and even some YouTube videos.
If you're doing a commercial or corporate video, you may want the ratio to be closer to 1.5:1 so that you get a much more inviting image. If you use a 1:1 ratio, your image may be too flat and devoid of dimensional benefits.
Take a look at the 3 point lighting plan for our comedy, Mental Mistakes:

Mental Mistakes Lighting • Shot Listed in StudioBinder
This shoot included 3 point lighting setups that were used to light multiple characters across various sections fo a room:

3 Point Lighting Setup for Comedy • Shot Listed in StudioBinder
Film lighting is all based on light source intensity and angles:
- Source of light — refers to the physical origin
- Angle of light — refers to the path of approach
- Intensity of light — refers to the amount/brightness
For instance, the sun is a single source of light, but it can approach your subject from various angles. You can use the sun to create a complete three point lighting setup for your video by cutting off angles with flags, bouncing light with reflectors, and diffusing light with various materials.
Take a look at how the sun was used as a key light in various shots for this scene from Once Upon a Time in Hollywood:

Once Upon a Time in Hollywood • Shot Listed in StudioBinder
Imagine if you had to create a 3 point lighting setup for shots that had harsh sunlight in the background like this shot:

Spahn Ranch • Shot Listed in StudioBinder
It’s important to note that there are various ways to increase and decrease light intensity, but due to the way light works, each method will have a different overall effect — they’re not interchangeable.
- Diffusing the light will decrease the intensity
- Dimming the light will decrease the intensity
- Moving a light further away will decrease the intensity
Each of these methods change light intensity in their own unique ways. You may find yourself in a position where you need less light from a particular source, but simply moving the light further away will have a somewhat adverse effect when compared to, say, diffusing the light.
![Once Upon a Time in Hollywood — How Tarantino Directs Suspense [Director's Playbook]](https://i.ytimg.com/vi/f_YqbxqjBYM/hqdefault.jpg)
The Director's Playbook • StudioBinder
Professional cinematographers will often adjust and incorporate all three methods to get the optimal look for their creative goals, or use objects like homes and awnings to help block light:

Spahn Ranch • Shot Listed in StudioBinder
The most important thing to be said about how to build video lighting setups, including 3 point lighting in film, is that it all depends on your creative goals. If you need a clean and corporate look, you’ll probably want to build a more standard 3 point lighting setup for your video. Your three point lighting setups should always depend on your creative goals.
If you take one light source out of your 3-point lighting setup, you won’t receive the full benefits. Think of it like your favorite recipe for cookies; if you leave out one ingredient, the cookies won't be perfect.
The look can change based on the ratio of your light sources. If you have a very strong key light, but have a weak fill light, your subject will be unevenly lit — which can be a good for those creepy horror shots.
Want to create a creepy look for a horror film? Why not study some of the best horror films you should see as a fan of the genre. You can still use a three point lighting setup for the dimensional benefits, and adjust the setup (intensity + angle) in a way that still achieves intended look.
Key Light Definition
How to build a key light setup
A key light is the primary light point for your scene. The key light is most often placed in front of your subject, at an angle, and thus illuminates one section of your subject.
Th key lights angle can range from 15 and 70 degrees, with 45 degrees being most commonly used. For cinematic 3 point lighting, the key light often lands on the front portion of your subject that is faces away from the camera, also commonly referred to as the "smart side".
Positioning you key light in this way is by no means required, but it will allow your less intense fill light to favor the camera which, in turn, will give your image a smoother look that is still well lit.
Take notice of the key light example in the diagram below:
Key Light Example
Place your key light anywhere you wish. Bounce it off walls or through material, just as long as it hits the front of your subject at an angle. Once you’ve decided where to place your key light setup, you can then accurately determine where to place the fill light and backlight.
FILL LIGHT DEFINITION
How to build a fill light setup
A fill light is the second light for your scene, and its purpose is to fill in missing light for your video. It is often placed in front of your subject, opposite to your key light, also at an angle to continue to create some depth, but also to bring out detail in the other side of your subject.
Take notice of the fill light example in the diagram below:
Fill Light Example
The angle at which you place your fill light does not have to be identical to your key light, but if you are going for an even, polished look for a commercial or interview, you may want to rely on symmetry.
Angle isn’t everything, because the light intensity matters too.
The fill light intensity is generally suggested at around 50-75% of the intensity of your key light. In many marketing and commercial situations, you should actually go higher like 85-95% so as to get a more even look, but you can also go down to 25-45% to get some really cinematic lighting looks that you would see in narrative filmmaking.
BACKLIGHT DEFINITION
How to build a backlight setup
A backlight (rim light, or hair light) is the third light for your video lighting setup, and its purpose is to offset the flattening of dimensions caused by your key and fill light. It approaches from behind your subject, often at an angle on the same side as your primary light point.
You can see a backlight example in the diagram below:
Backlight Example
The most common placement for your backlight can be achieved by placing it on the same side as your key light, and then moving behind the subject so that the backlight is aimed toward the fill light.
Related Posts
LIGHTING FOR YOUTUBE VIDEOS
Can 3 point lighting be used for YouTube videos?
What about lighting for YouTube videos? Youtube videos can mean a lot of different things, but if you’re a vlogger or influencer you will generally be recording footage in an interview setting. This is where you can apply three-point lighting techniques with a color-by-numbers approach.
Consider fine tuning your lighting scheme by moving your key light to cast from a different angle, or play with the intensity of your fill light. Often you will want a clean look, but that doesn’t mean a flat look.
Use your backlight to fix that. Do you have some cool emblem or branding on your wall? Use a set background light to really make it pop. Try out a kicker light to give your face some extra character.
Youtube videos (specifically beauty channels) benefit most from soft light. This means that most of your light is being diffused by some piece of material, or bounced off of some surface so that it evenly coats your subject, rather than crashing down with harsh intensity.
Here's Sean Cannell from Think Media walking through how to achieve a professional look for your YouTube videos if you're on a budget.

3 Point Lighting on a Budget
VIDEO THREE POINT LIGHTING GUIDE
3 Point Film Lighting Kit
An inexpensive three-point light kit is the Bescor Photon LED 3-Light Kit. This is a bi-color, flicker free LED 3 point lighting system that has a CRI rating of 95, and comes with light stands and plug-in power ability. You can also power these with an NP-F battery.
The fixtures have four barn doors which will allow you to adjust the angle of each light, and because they’re LEDs, they don't give off uncomfortable heat, and have decent output for the price tag.
If you really want to soften the light, use some diffusion material, or bounce the light against the ceiling and walls. You can use the sun as your key, fill, or backlight and the kit to light the rest of your scene.
You can also build your own three point lighting setup with lights from our list of professional lighting setups for filmmakers.
UP NEXT
Cinematography Techniques
Now you know how to use three-point lighting in your next video project. You understand why 3-point lighting is important, and how video lighting differs from photography lighting.
Next, you’ll want to check out our complete guide on cinematography techniques. We provide a bunch of practical tips and information that will help you navigate the world of professional cinematography, including a downloadable cheat sheet with 30 strategies to becoming a better cinematographer.
Best Cinematography techniques & tips →

Share your vision with elegant shot lists and storyboards.
Create robust and customizable shot lists. Upload images to make storyboards and slideshows.

