
For portrait photographers, loop lighting is essential. And for beginners, it’s a straightforward lighting setup to learn. It can be created with only one light source and an understanding of where to put that light source. So, what is loop lighting photography and how can you capture it? In this article, we’ll be taking a look at what defines loop lighting as well as how to create your own setup.
Loop Lighting Meaning
Let’s define loop lighting
Loop lighting is a flattering pattern most often used in portraits. It creates a dynamic look while not being super dramatic. So, what is it?
Loop Lighting Definition
What is loop lighting?
Loop lighting is a lighting pattern that creates a circular shadow on the subject’s face just under the nose. You can achieve this by placing the key light 45 degrees to the side of the subject and raising it just above their eye line.
The circle or “loop” shape that sits just below the nose, is on the opposite side of where you place your light. It is also typically marked by a longer shadow under the chin and jaw due to the downward slope of the light. Loop lighting is one of the most common lighting setups used in portrait photography because it is flattering for most faces.
Characteristics of Loop Lighting Photography:
- Key light at 45 degree angle to subject
- Raise light above eye line
- Shadow of nose on subject’s cheek
Loop portrait photography
What is loop lighting used for?
Loop lighting has a simple setup that is most commonly used for portrait photography. Why? It is often the most flattering. The angle of a loop lighting setup still has enough of an angle to add dimension to a face, but it also illuminates without any harsh, unflattering shadows. Knowing how to create loop lighting photography can add real depth to your portraits.
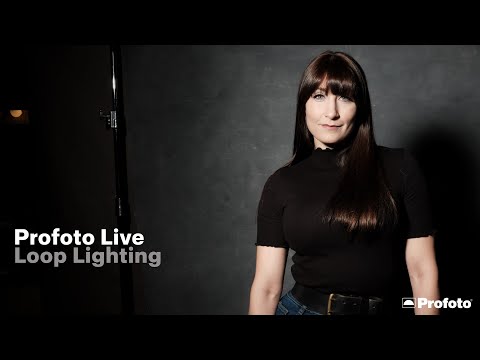
If you’re familiar with butterfly lighting, you can simply shift that setup by moving the light source slightly lower and towards the side of the subject’s face. From the portrait above, you can easily see the loop shaped shadow below the model’s nose.

Loop lighting portrait
Loop lighting photography is also typically achieved with a soft, diffused light source. This makes the loop lighting more flattering and better for portrait photography. The shadow created by loop lighting can make a subject’s face appear longer in a portrait and give them more defined cheekbones.
Now that you know what it looks like and how it affects a portrait, how exactly do you achieve this look?
Related Posts
What is loop lighting in photography
How to capture loop lighting
Loop lighting has a simple setup. But knowing it, can add real depth to your portraits, without having to rely on the sometimes overly dramatic techniques, nor are you stuck playing it safe with flat lighting.
At the bare minimum, loop lighting photography can even be achieved with one light source. Check out the video below to see the full demonstration on how to create a loop lighting setup.
Loop portrait photography
Steps to achieve loop lighting photography
- Pose your model
- Set the light just above eye level of your subject.
- Next, move the key light to around 45 degrees on one side of your subject. See where the shadow from your subject’s nose falls. Angle the light down so the shadow is cast across your model.
- Move your light from side to side and up and down. Take time to find your desired shape. The subject’s face shape and nose will affect the shadow’s shape and so your angles might need adjusting. 30 degrees might end up being ideal or even well above 45 degrees.

Loop lighting portrait setup
Tip: your shadow should be small. This lighting pattern is best for those with oval-shaped faces. The downward angle can lengthen the face, and even give the appearance of high cheekbones.
Experiment with different qualities of light. Typically, softer, diffused light will be more flattering, but will also reduce the sharpness of your shadow. With loop lighting photography, a light quality that is between soft and harsh will result in the best portrait.
Loop lighting is one of the most common but critical lighting patterns to know, especially for portrait work. However, it takes a bit of experimentation and practice to master. Next time you are shooting portraits, be sure to experiment with loop lighting.
UP NEXT
How photographers use rim lights
Photographing true dynamic portraits often takes more than one light source. Knowing how to rim light your subjects will be the difference between beginner and professional looking photos. In our next article, we take a look at the effects of rim lighting and how you can incorporate it in your lighting setups.
Up Next: What is a Rim Light? →

Share your vision with elegant shot lists and storyboards.
Create robust and customizable shot lists. Upload images to make storyboards and slideshows.

