
You’ve downloaded a storyboard template but if you don’t know how to use a storyboard template, you’re a bit stuck. What notes and annotations go next to the panels? What do those abbreviations mean? And, most importantly, how can I use this storyboard template in a way that works best for me? Fear not, budding storyboard artist, we will cover all of these questions and more as we run through the essential steps of how to use a storyboard template. Pencil’s out, let’s go.

Watch: StudioBinder's Storyboard Creator
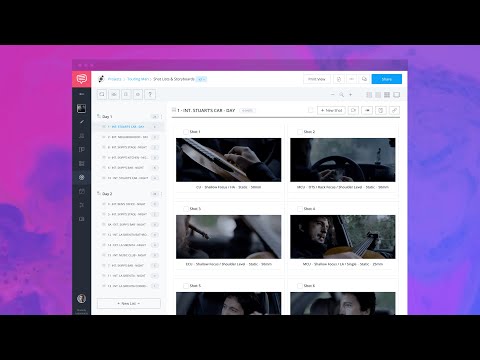
Subscribe for more filmmaking videos like this.
How to Use a Storyboard Template
Get your free storyboard template pack
You can't start painting if you don't have a canvas. And you can't learn how to use a storyboard template without a template. So, before we get started, download our FREE pack of storyboard templates. This includes over 60 variations of different layouts, custom designs for different applications such as Illustrator or simple PDFs, and portrait and landscape versions of each one.
Free downloadable bonus
FREE Storyboard Template Downloads
If you prefer the old-school, pen and paper method of storyboarding, download our FREE printable templates. Included are 60+ files for Word, Illustrator, Photoshop, and PDFs. You can also choose various layouts between 2- and 16-panel sheets in landscape or portrait.


Now that that's done, let's get started. Naturally, we'll start with the basics of how to use a storyboard template and we'll finish with tips for slightly more advanced templates.
Storyboard Template Basics
1. Draw images and make notes
Below is an image of one of the storyboard templates you'll find in our storyboard template pack. Give it a quick look and then we'll run through each of the elements.

How to Use a Storyboard Template
The most important element in any storyboard template is the panel. That's the box where the image is drawn. The general idea is to use one panel for one shot but there are always exceptions to that rule.
Read more on this in our "Do's and Don'ts of Storyboarding."
Beyond the panel, there are a number of notations to make to help keep things organized. There are spaces for the Project, Page Number of the screenplay and any Scene Notes you want to add. Then for each panel you can designate the Scene Number, Shot Number and Shot Size.
In short, shot size refers to the size of your frame in relation to your subject. Various options here range from an extreme close-up to an extreme wide shot. For a complete guide on shot sizes, check out our breakdown below.
![Ultimate Guide to Camera Shots: Every Shot Size Explained [The Shot List, Ep 1]](https://i.ytimg.com/vi/AyML8xuKfoc/hqdefault.jpg)
Ultimate Guide to Shot Sizes • Subscribe on YouTube
In the alternate storyboard template below, there are boxes where you can select the shot size. To the right are more lines available for another storyboard notes you want to add.

Storyboard Template Tips
Those are the basics of how to use a storyboard template. In the next section, we'll add a couple more advanced options to help you take your storyboard template game to the next level.
Related Posts
Professional Storyboard Template
2. Plan out your set and add lenses
This version of the storyboard template has everything we covered above and more. The main benefit of storyboards is to be able to share your vision with your film crew. And the more clearly you can communicate that vision, the more efficient that process can be.
There are two additions that will help with this specificity — areas for a lens choice and a set plan. Here's what that looks like in the template.

How to Use a Storyboard Template • Advanced Version
One new element is for choosing a lens. As you know, the various types of camera lenses all have different qualities. From wide angle lenses to telephoto lenses or spherical to anamorphic lenses, this is another critical decision.
For a refresher on what each lens adds to your shots, here's a video breakdown.
![Ultimate Guide to Camera Lenses — Every Type of Camera Lens Explained [Shot List Ep. 7]](https://i.ytimg.com/vi/uSsIqR3DuK8/hqdefault.jpg)
Ultimate Guide to Camera Lenses • Subscribe on YouTube
For a deeper dive into camera lenses, download our FREE e-book The Ultimate Guide to Camera Lenses below.
Free downloadable bonus
FREE Download
Camera Lenses Explained
Every type of camera lens has distinct qualities and visual characteristics that every image-maker should understand. Download our FREE e-book to get in-depth explanations on prime vs. zoom lenses, anamorphic vs. spherical lenses, wide angle, standard, telephoto and even specialty lenses that all tell a slightly different story.


The set plan is there for you to draw a quick and dirty floor plan of your set. This would typically include where to place the characters, camera, and lights. For shots that lean heavily on blocking and staging, this is a key piece of the pre-production process.
Here's a video on scenes that employed blocking and staging to great effect.

How to Use a Storyboard Template with Blocking and Staging
Those are some of the basics and advanced tips on how to use a storyboard template. Now get those pencils and out and start visualizing your next film.
UP NEXT
How to make a storyboard
By now you know how to use a storyboard template but there is a lot more to learn about actually making a storyboard. In this next post, we'll cover tips and techniques used by professional storyboard artists and why they work.
Up Next: Creating a storyboard →

Share your vision with elegant shot lists and storyboards.
Create robust and customizable shot lists. Upload images to make storyboards and slideshows.

