
Color grading can completely transform the look of your video, but unless you’ve spent years inside a coloring house, you may not have the technical know-how to achieve the desired look. The right LUT can help turbocharge this. So what is a LUT?
This article will define and explain LUTs so that you can use them to color grade your videos to give you the specific look you want. We’re also providing a free Ridley Scott inspired LUT pack to transform your footage. Let’s dive in.
lut Color grading • what does lut mean?
LUTs help color grade your footage
LUTs are the quickest way to grade your footage once you’ve color corrected. It's important to note that if your footage doesn’t match from shot to shot, is not properly exposed, or is poorly color corrected, that applying a LUT will not work the way you hoped it would.
First things first, what does LUT mean?
LUT Definition
What is a LUT?
LUT (known as Lookup Table) is a term used to describe a predetermined array of numbers that provide a shortcut for a specific computation. In the context of color grading, a LUT transforms color input values (camera) to your desired output values (final footage).
Why use LUTs on footage?
- Set a predetermined look for a specific visual feeling
- Increase the speed at which you can color grade
- Use as a reference point to develop your unique style
An even more layman LUT definition is: A preset color look for your video footage. LUTs can be directly applied to your footage. This makes the grading process go by much faster, and specific LUTs can transform footage to look like your favorite films and shows.
Here are the basics of color grading with LUTs:
What are LUTs?
Now, there are several different types of LUTs available: calibration, transform, viewing, 1D and 3D.
No matter which type you apply, you’ll want to know the input level and color space intended for the LUT you wish to use.
LUTs are used through standard NLE’s (Non-Linear Editor - Premiere, Final Cut, Avid) or coloring software like DaVinci Resolve or Speedgrade. You can also use them in motion graphics programs like After Effects.
LUT COLOR GRADING • 1D VERSUS 3D
1D LUTs vs. 3D LUTs
There are generally two types of LUTs out there that you can use. Both types will use both bit size and bit depth to determine the accuracy of your lookup table.
The bigger these numbers are, the better your color grade can look. Check out this LUT video that shows 1D LUTs vs 3D LUTs.

1D LUTs vs 3D LUTs
A 1D LUT is called such because it is controlled by one value setting, and can be boiled down to a gamma curve preset. While this achieves the general goal of a LUT, it does not provide you with the level of control most editors and colorists would prefer. You will most commonly find 1D LUTs that use the .lut extension.
A 3D LUT maps hue, saturation, and brightness to an individual axis, so that you have much more control over specific color values in your image. These are commonly found with .cube file extensions.
There is also color presets known as CDLs. This stands for Color Decision List, and they are less stylized, but also less destructive to your footage. All of this matters when doing LUT color grading.
RELATED POSTS
Cinematic Lut COLOR GRADING examples
Make your shots more cinematic
Film LUTs can help your footage mimic 35mm film so you don’t spend your entire day adjusting sliders and color wheels.
First, it's important to determine the look of your footage. Log exposure works better with Log specific film LUTs, while there are some film LUTs designed for footage with traditional digital saturation and contrast.
As general best practice, we suggest you record your footage in Log whenever you can.
log profile Definition
what is camera log?
Log (also known as S-Log) is a shooting profile to provide wide dynamic and tonal range, to provide more latitude when you're ready to color grade your footage with LUTs. At first, the image may appear flat (or "washed out"), but it retains shadow and highlight detail that would have been otherwise lost. The feature is mostly used in filmmaking and videography.
After you've determined the look of your footage, practice color grading with LUT packs. Here's an excellent LUT tutorial to get you started:

Color Grading LUT Master Guide
LUTs can help emulate 35mm film, but it can also provide a way to mimic the cinematic looks of your favorite films and shows, and give you a jumping off point for your own style, but know that any adjustment you make won’t affect the LUT values.
In the video below, you can see how David Fincher's directing style often includes using a neo-noir color scheme for his films.
Fincher's best movies are dark, and call attention to eerie colors by washing over the video with sickly greens or haunting blues.
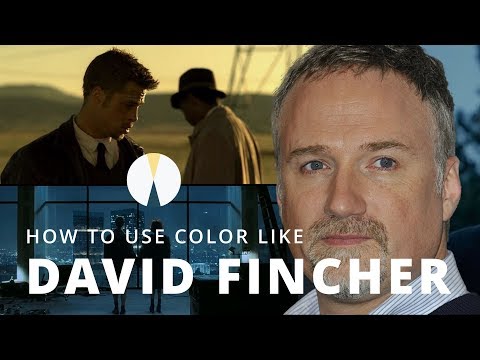
How to master movie color palettes like David Fincher
Color grade your film correctly, and it can amplify the feel of your film, submerging your viewer into a world dominated by your color scheme.
Color grade your film incorrectly, and it can undermine your intentions, throwing off the viewer in some very unsettling ways. You may intend to apply different color grades to different scenes.
This is a situation where LUTs are extremely useful because they will give you the option to create preset looks that can be strategically applied to specific scenes.
A good example of this is the film Traffic.
You can see here how each story is supported by the color schemes, and this not only helps from an artistic and emotional standpoint but we also gain some visual organization that is helpful for the viewer.


Different color grading schemes in the same film
Color is such a wonderful tool for the artist, but color coding is an age-old method for organizing practically anything.
The same way you know where to dispose of your recycling versus trash, or whether you’re allowed to drive through an intersection is used to orient the viewer throughout Traffic.
As another example of color grading, take a look at the color theory video which shows you how everything boils down to hue, saturation, and brightness.
A light and desaturated red will evoke a different feeling from a dark and deep red, so just imagine how much more complicated your color schemes can become when you add different hues into the mix.
RELATED POSTS
FREE LUT PACK DOWNLOAD
Emulate the Ridley Scott look
Now that we know the quickest way to color grade your footage would be with a free cinematic LUT pack; we're providing free LUTs inspired by Ridley Scott films. They can be used as Premiere Pro LUTs, Da Vinci Resolve LUTs, Final Cuts LUTs, or Speedgrade and After Effects LUTs.
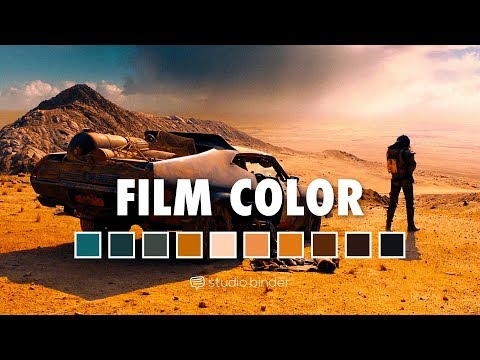
Take a look at the video below for an example of Ridley Scott's movie color palette:

Mastering the Movie Color Palette: Ridley Scott
Our LUT pack was created with 4K footage that was shot with a flat image profile (Log).
If you apply a LUT like these to footage that was shot with boosted contrast or more color, the corresponding values of your footage may end up being pushed beyond the acceptable range.
If you want to achieve a desert look for your footage, consider using our The Martian LUT:


If you want to achieve a Sci-Fi look for your footage, consider using our Blade Runner LUT:


If you want to achieve a grungy, hyper-contrasty look for your footage, consider using our Black Hawk Down LUT:


You can use these free LUTs to color grade your footage, and gain an even more cinematic look.
Free downloadable bonus
Download your FREE Cinematic LUT Pack
Emulate the same look as any Ridley Scott film with our free cinematic LUT pack. Developed in 3D to give you the maximum latitude when you color grade your Log footage.

lut color grading • LOG VIDEO
How to apply LUTs to Log footage
As mentioned before, most LUTs are meant to be applied to Log footage since you'll have the most dynamic range and latitude when you're color grading your video.
Once you download our free LUT pack from above, here's how to apply LUTs using Adobe Premiere Pro CC:

Apply LUT in Premiere Pro
If you’re ever unsure about the value levels, you can check the histograms or meter to make sure levels aren’t clipping or too low.
Related Posts
UP NEXT
Color grading vs. color correction
Now you know what LUTs are and how to apply them to your footage, it's time to get deeper on the color grading process. Our next article will help you identify the key differences between color grading and color correction. There's a time and place for both, but which comes first?
UP NEXT: Grading vs Correction →

Share your vision with elegant shot lists and storyboards.
Create robust and customizable shot lists. Upload images to make storyboards and slideshows.

