
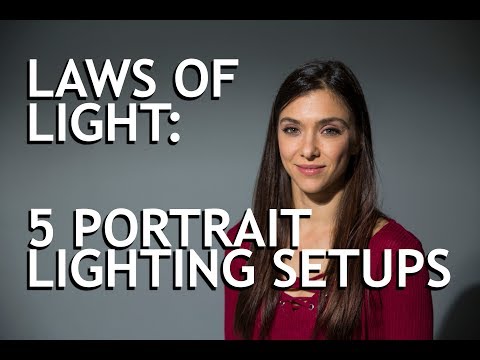
One of the best places to start when learning about photography is learning about the different portrait lighting setups. From these lighting setups, you’ll be able to learn how light position can completely change the effect on a photo. One of the most common portrait lighting setups is broad lighting. What is broad lighting and how is it created? This is a simple, yet distinctive lighting setup that you will want to use or avoid depending on the effects you are trying to create in your photograph. In this article, we’ll discuss those effects and help you add this technique to your photographic arsenal.
What is broad lighting
First, let’s define broad lighting
Along with Rembrandt lighting, split lighting, loop lighting and a few others, broad lighting is a fundamental portrait lighting setup. To understand how This type of lighting differs from other lighting setups, it's important to understand the broad lighting definition.BROAD LIGHTING DEFINITION
What is broad lighting?
Broad lighting is a type of lighting setup where the area of a subject’s face that is facing the camera is lit more brightly. The term “broad lighting” comes from lighting the broad side of a subject’s face. It is also on of the typical photography lighting setups for shooting portraits. This is the opposite of short lighting. Broad lighting is typically less flattering for a subject because it widens the face. However, it's beneficial to use subjects that have a more narrow face and want the look of a wider face.
What is broad lighting used for?
- Illuminative effect
- Widening a subjects face
- More contrast against background
- Placing shadows on the short side of a subject
Types of Lighting in Photography
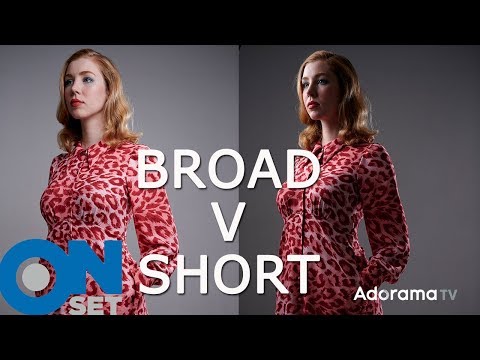
Broad lighting vs short lighting
The opposite of broad lighting is short lighting. Understanding the differences between the two different types of lighting in photography can help you decide on how you want to light your subjects in a portrait. To get a more visual understanding of the differences between broad and short lighting, check out this photography lighting breakdown by Adorama.
Types of Lighting in Photography
To recap these two types of lighting in photography, broad lighting illuminates the broadside of a subject’s face. The shadows fall on the far side of the subject making the image appear brighter and more illuminative.

Broad lighting photography
Because this lighting casts a shadow on the far side of a subject, it can be much less dramatic. It can also be less flattering on a subject as the direct light can make wider shapes and faces more prominent.
For this reason, cinematographers often use this lighting as a stylistic choice. What is broad lighting used for in cinematography? We’ve put together a few sample shots in StudioBinder’s storyboarding app to see it in action.

Lighting on the Broad Side • See the Full Storyboard
Short lighting, on the other hand, lights the short side of a subject’s face. This is the side that is further away from the camera.

Short Lighting
The result of short lighting is more shadow and contrast on the broad side of the subject. This makes short lighting more dramatic. Short lighting is also more forgiving when it comes to face shapes as it does not accentuate the wideness of a face as broad lighting does.
As mentioned in the video above, it’s important for photographers to understand why they are lighting a subject with a certain lighting setup. Neither lighting setup is necessarily better than the other. They are better for specific shots depending on the effect you're trying to create. If you find that the illuminative, highlighting effect of this lighting is something you want, then it’s important to know how to set it up.
Related Posts
What is broad lighting
Broad lighting setup
While there isn’t necessarily one specific way to set up your lights for this type of lighting, there are general guidelines to follow to achieve the lighting effects.
1. Determine the broad side of your subject
This lighting setup all depends on the direction your subject is facing. For instance, if your subject is facing camera left like the image below, their broad side will be the left side of their face, the side primarily facing the camera.

Broad Portrait Lighting Example
2. Place your light
Once you’ve determined your subject's broad side, place the light in a position to illuminate it. With a subject facing camera left like our image above, our light will be to the right of the camera illuminating the subject's broadside.
Broad Lighting Photography Setup • Diagram by Andrea Minoia
3. Experiment with a fill light
You might want to experiment with some sort of bounce or reflector on the left side of the camera in this setup to provide a little bit of fill light and add depth to your shot. Check out how much of a difference a little bit of fill light makes in a this type of lighting setup in this video below.
What is broad lighting
As you can see, a broad light can be an easy lighting setup to figure out, but it isn’t always necessarily the most interesting. Adding elements like fill light through a bounce board can add depth, highlights, or even a catchlight to elevate your shot.
Related Posts
UP NEXT
How to Master Rembrandt Lighting
Among the other fundamental portrait lighting setups, Rembrandt lighting is arguably the most dramatic and interesting. Why? Learn more about what Rembrandt lighting is and why some of the best photographers and cinematographers alike use it throughout their work in our next article.
Up Next: Rembrandt lighting →

Share your vision with elegant shot lists and storyboards.
Create robust and customizable shot lists. Upload images to make storyboards and slideshows.

