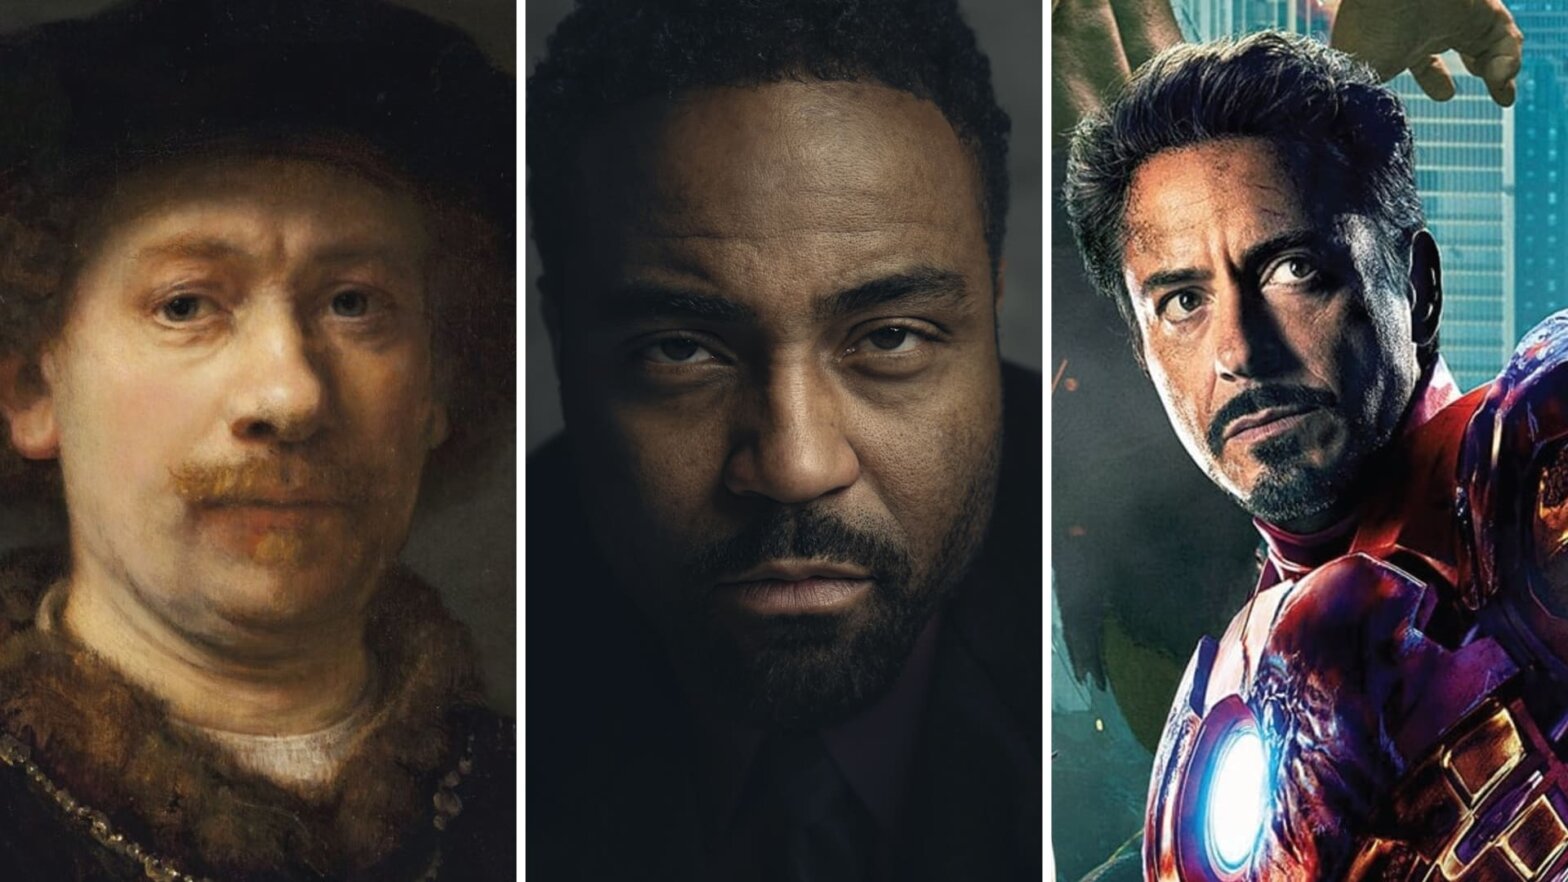
Lighting is one of the most crucial aspects of cinematography. There are literally infinite ways to light a scene, and each one has the potential to drastically change how people view the subject. When you want a dramatic effect that makes the subject’s face interesting, you want what’s known as Rembrandt lighting.
A Rembrandt lighting setup is common in the field of photography. It’s a great way to draw a viewer’s attention to a precise area of the photograph. However, cinematographers have much they can learn from this technique. Let’s look at this technique and how it can help you attain more dynamic images.
Rembrandt Style Photography
Rembrandt photography explained
Rembrandt lighting photography is an easy way to attain a more dramatic image with minimal equipment. Once you see what kind of pictures you can get with this technique, you’ll want to implement it far more often.
REMBRANDT LIGHTING DEFINITION
What Is Rembrandt Lighting?
Rembrandt lighting is a technique utilizing one light and one reflector or two separate lights. It’s a popular technique because it creates images that look both dramatic yet natural. It’s predominantly characterized by a lit-up triangle underneath the subject’s eye on the less illuminated area of the face (fill side). This is known as the Rembrandt triangle.
Traditionally, the triangle should be no wider than the subject’s eye and no longer than the nose. But many filmmakers askew this rule slightly. You can alter the dramatic quality of this technique by adjusting the distance between the lights and the subject. You can also adjust the strength of the fill and main lights until it looks just right.
How to do Rembrandt Lighting:
- Use "window light" for a softer light that works to enhance the effect
- Cloudy days work best, especially when the sun is low
- Place your subject closer or further from the light source to control the amount of light
Rembrandt was also a major figure in the Baroque art movement. Read on for a deeper dive into the various art styles or a rundown of art history movements.
For a quick Rembrandt lighting photography tutorial, check out this video from Jordan P. Anderson where he breaks down how to achieve the perfect arrangement for this technique.
Rembrandt Lighting • Jordan P. Anderson
While people are most familiar with Rembrandt photography, it has made its way into the film world. But how did it make that transition?
Rembrandt Lighting History
Rembrandt lighting origins
As the name suggests, Rembrandt photography originated with the famous Dutch painter, Rembrandt. He was a major innovator in the medium, and that included introducing the art world to his signature form of lighting subjects.
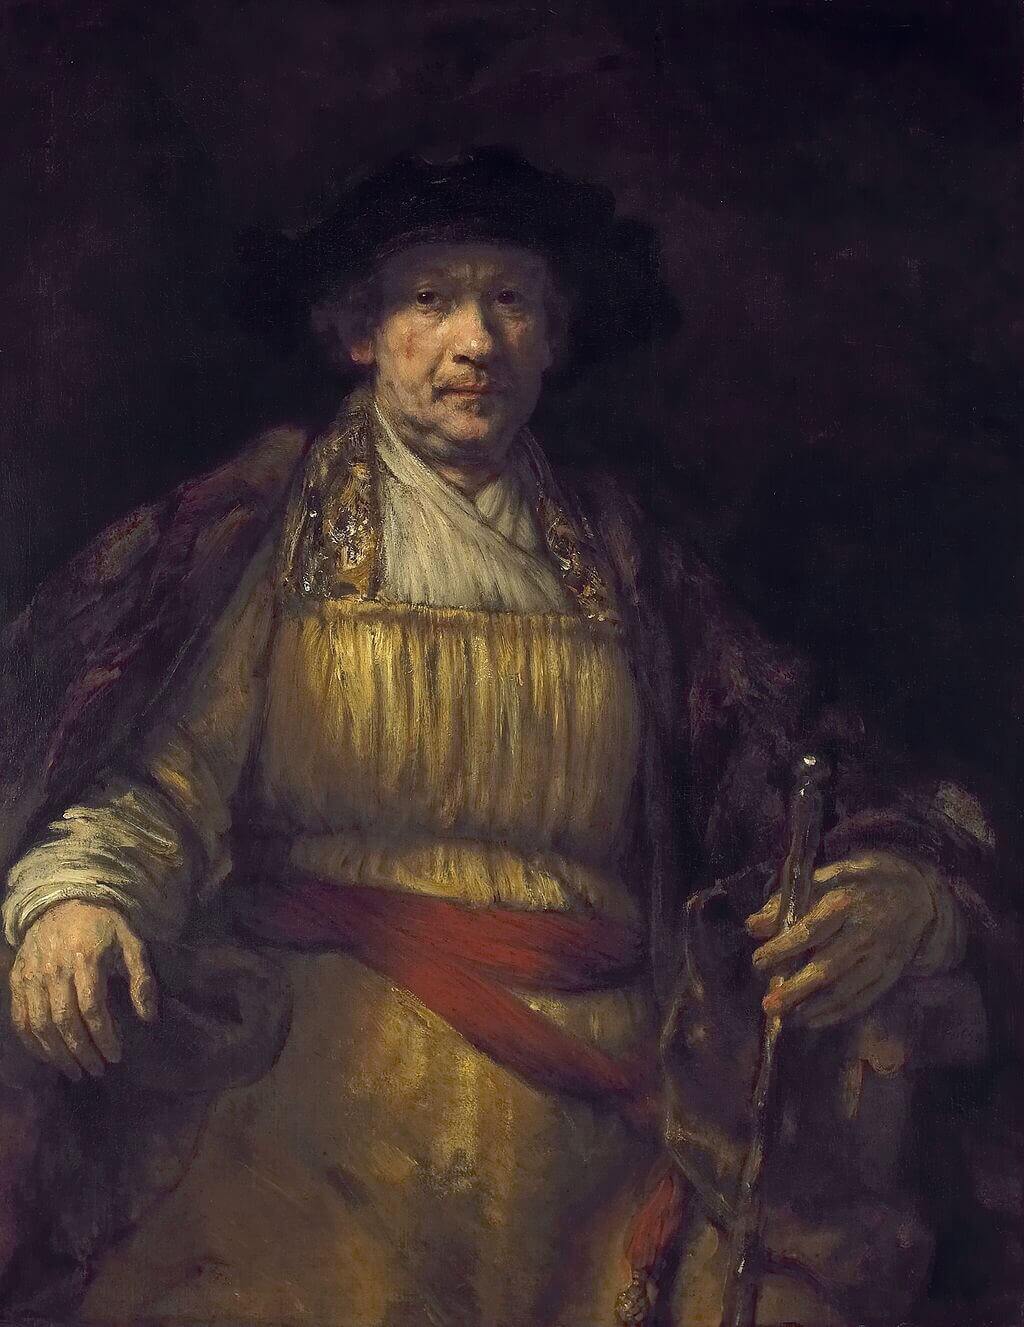
Self Portrait • Rembrandt
In his self-portrait, you can see the technique at play, particularly with the small triangle located just below his left eye. He may have invented the lighting style, but he actually didn’t coin the term.
That distinction belongs to famous film director Cecil B. DeMille. While he was making the 1915 film The Warrens of Virginia, he borrowed some portable spotlights from an L.A. opera house and would create shadows in his shots where shadows would normally appear in nature.
He named the technique “Rembrandt lighting.”
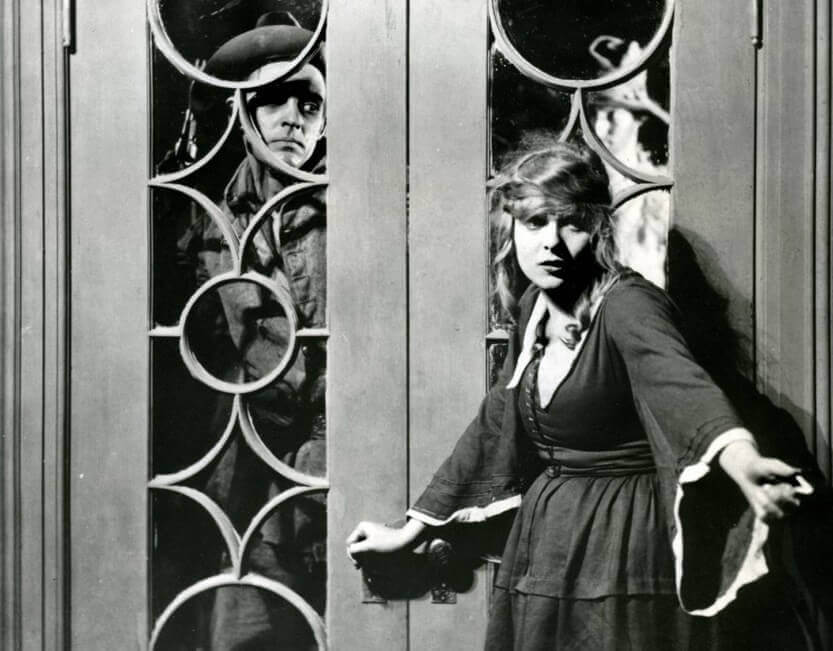
The Warrens of Virginia • Cecil B. DeMille
In the above film still, you can see the signature Rembrandt triangle under Agatha Warren’s left eye.
The technique would go on to be heavily utilized by filmmakers specializing in the chiaroscuro lighting technique, particularly those in the film noir genre. But it has since become a staple in numerous filmmakers’ repertoires. For more on how chiaroscuro works, check out our breakdown.
Chiaroscuro explained • Subscribe on YouTube
Related Posts
Rembrandt Photography Lighting
Rembrandt lighting examples in film
Rembrandt style photography would go on to change the film world forever. For starters, pretty much every actor you know has at least one headshot with Rembrandt style photography implemented.

Rembrandt Lighting in Photography • Actor Headshot
You’ll also Rembrandt lighting appear in films. Generally, filmmakers use this lighting technique during scenes where a character is undergoing an intense, emotional change. Watch this scene from Alejandro G. Iñárritu’s 2014 film Birdman or (The Unexpected Virtue of Ignorance).
Riggan Thomson Confronts the Critic • Birdman
You can see this technique really come into play at around the 45-second mark. Riggan is berating this critic who is about to put out a review of his new play. He unloads all of his vitriol onto her, and the scene ends with her insisting she’s going to kill his play.
It’s an intense scene, and the drastic lighting helps us visualize the dark state of Riggan’s mind, which will be made all the more clear shortly thereafter when he has his vision with Birdman.
You can see a different kind of emotional shift in this scene from Fight Club.
Marla Meets Tyler • Fight Club
Tyler Durden hears Marla talking about death over the phone and goes over to her apartment. As we’re about to find out, Marla’s about to get a new friend with benefits, and this change in her association with Tyler, is marked with the Rembrandt triangle.
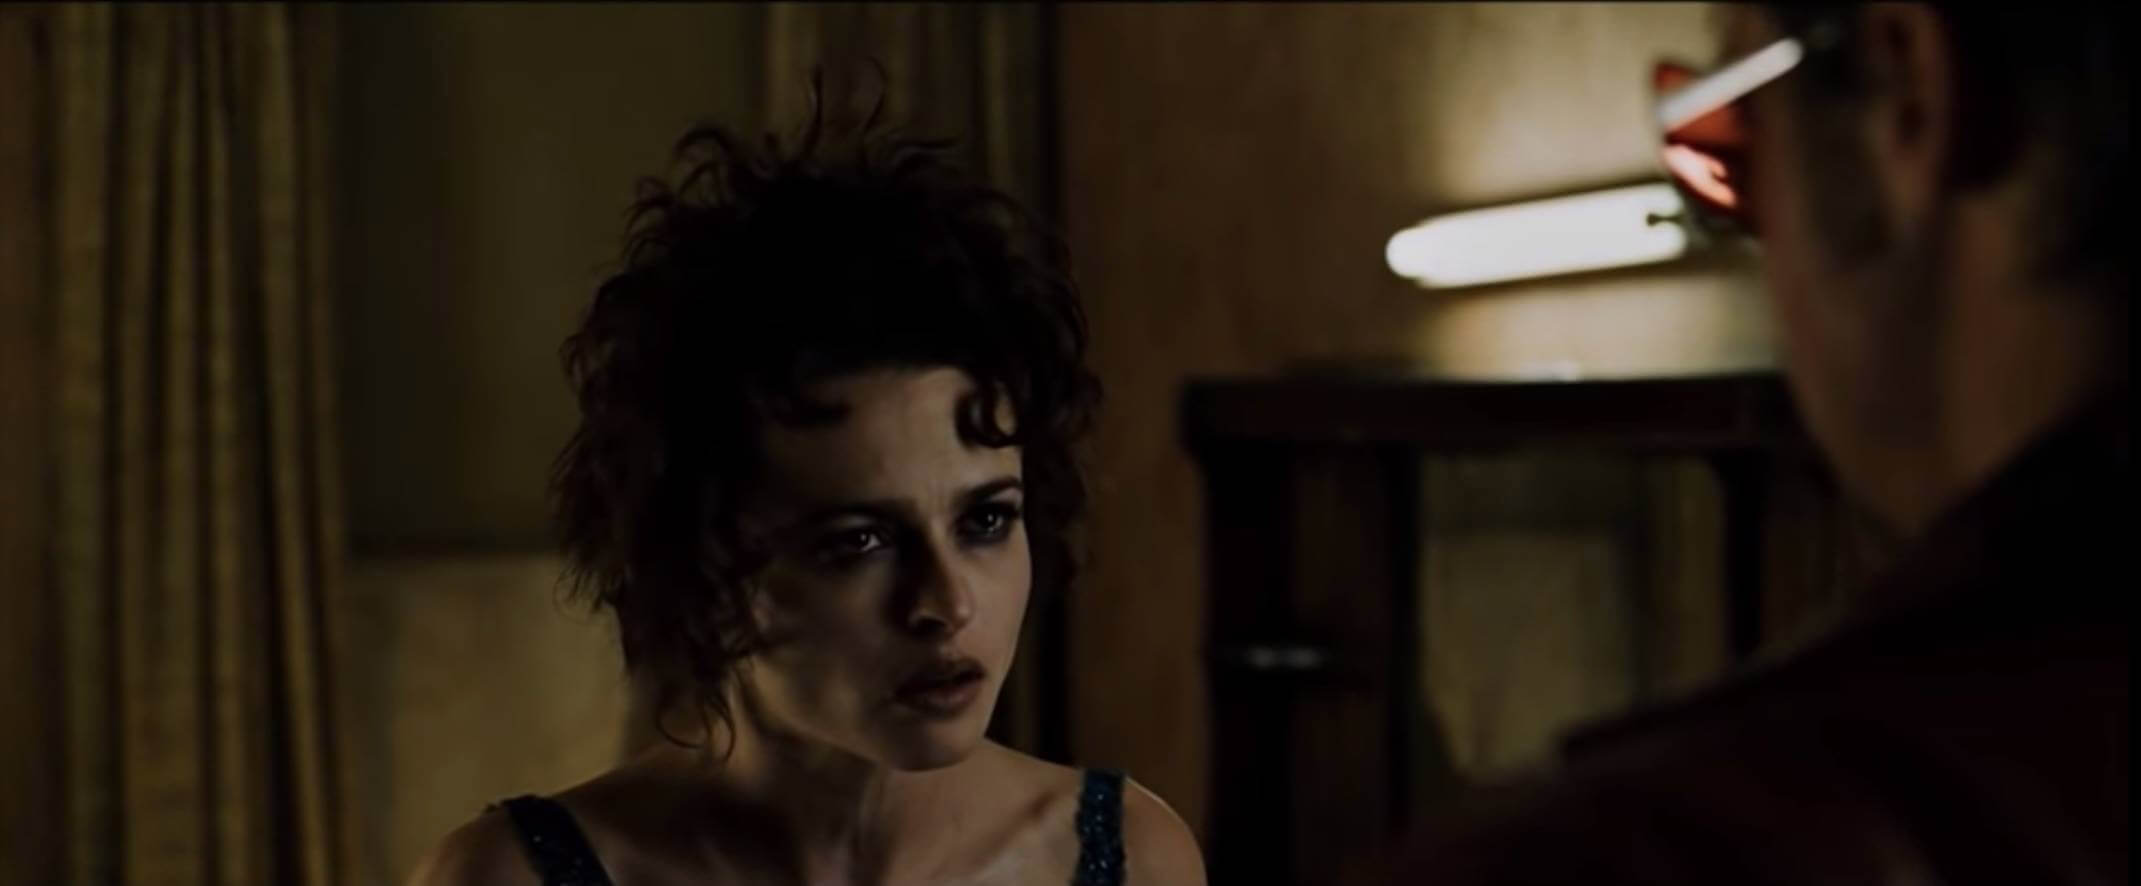
Rembrandt Triangle • Fight Club
The emotional shift in the scene is made all the more powerful with the dynamic, natural lighting, which really gives credence to the dingy, dire situation Marla is currently in.
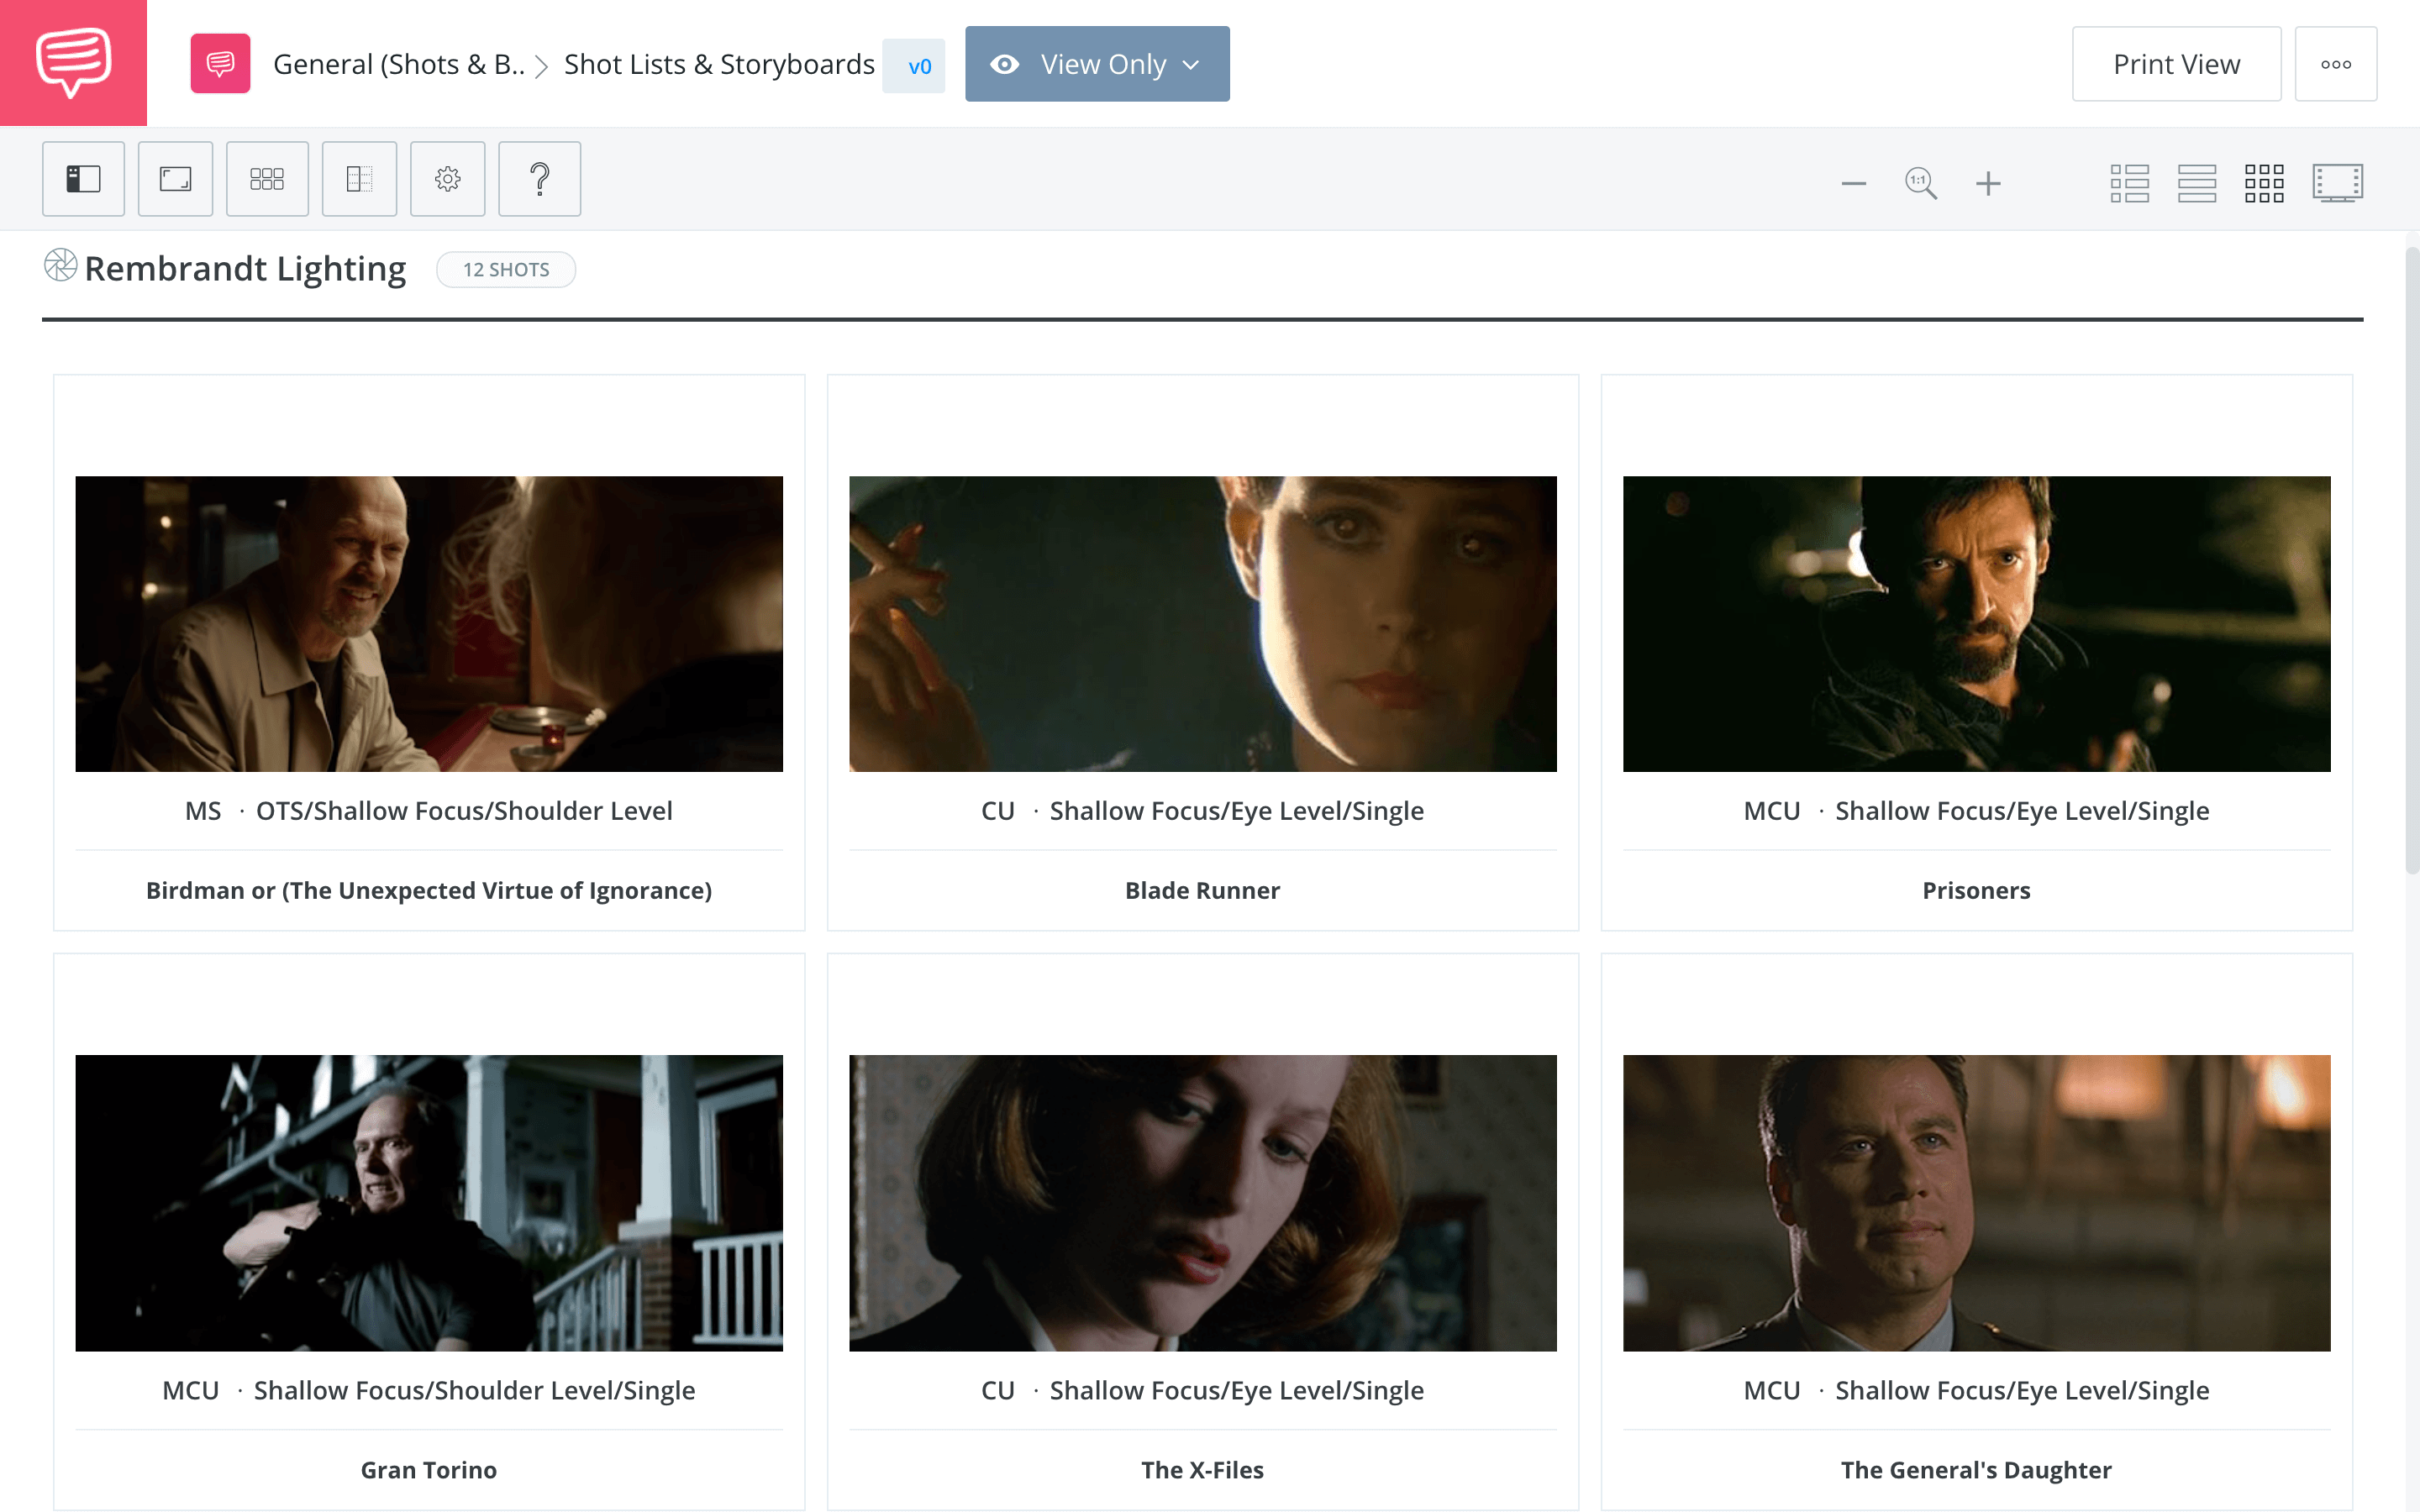
You can see this technique in an array of movies from Nosferatu to Gran Torino. We used StudioBinder Storyboard Creator to put together a collection of Rembrandt lighting examples to see how prevalent this technique actually is.
Rembrandt Lighting • See the Full Collection
The Rembrandt lighting setup is simple to master and you'll be producing more compelling images in no time. So now it’s time to learn how to use it in your own projects.
Rembrandt Lighting Setup
How to do Rembrandt lighting
Rembrandt photography lighting is the best way to get the most bang for your buck. To get great shots, you really just need one light and one reflector. There are three key steps.
Step 1 — Stage your camera
Once you've established the position of your camera and your subject, the Rembrandt lighting can be designed accordingly. In this example, the camera is facing our subject but that doesn't always have to be the case.
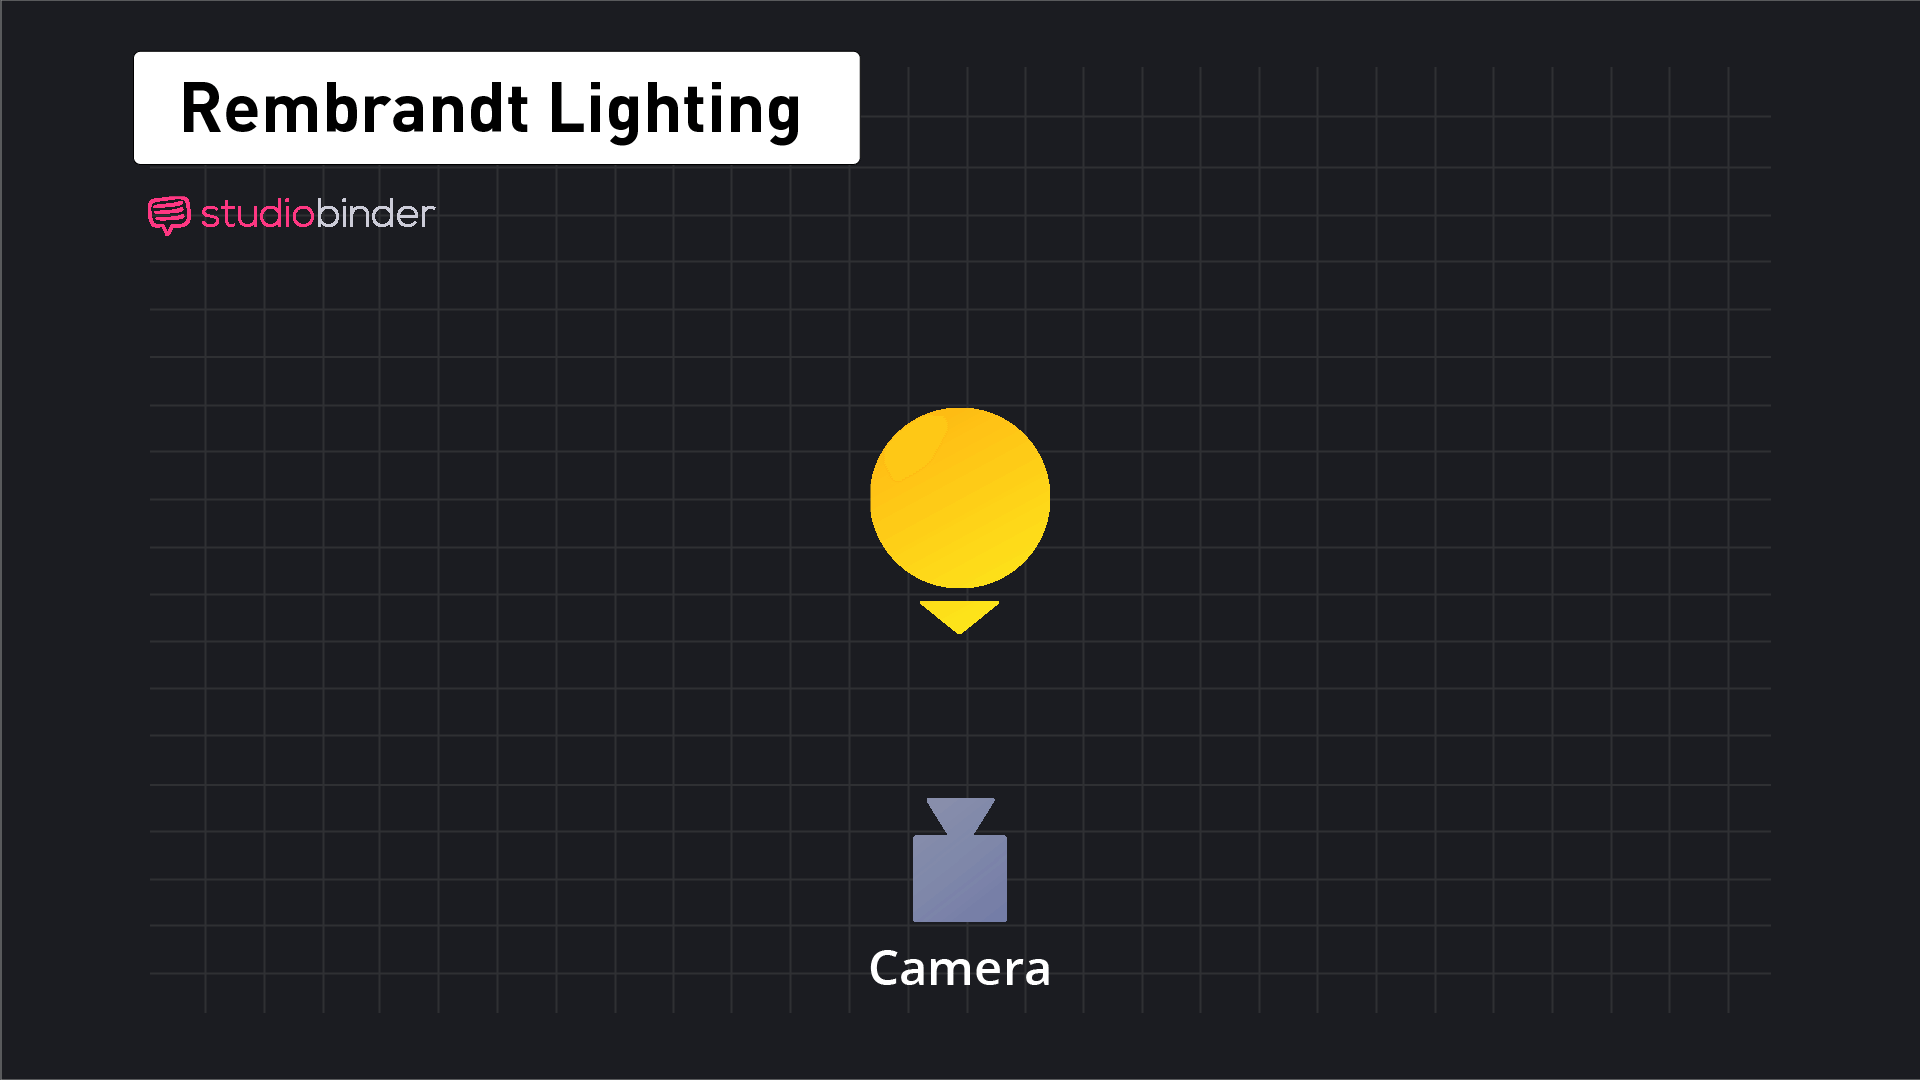
Rembrandt Lighting Photography Tutorial — Step 1
Step 2 — Position your key light
Next, add your primary light source (key light). You'll want the light to be located somewhere above the subject, not on eye level.
Next, you’ll want to angle the light about 50 or 60 degrees to one side. You can adjust the light as necessary until you see that signature "Rembrandt triangle" appear under their eye.
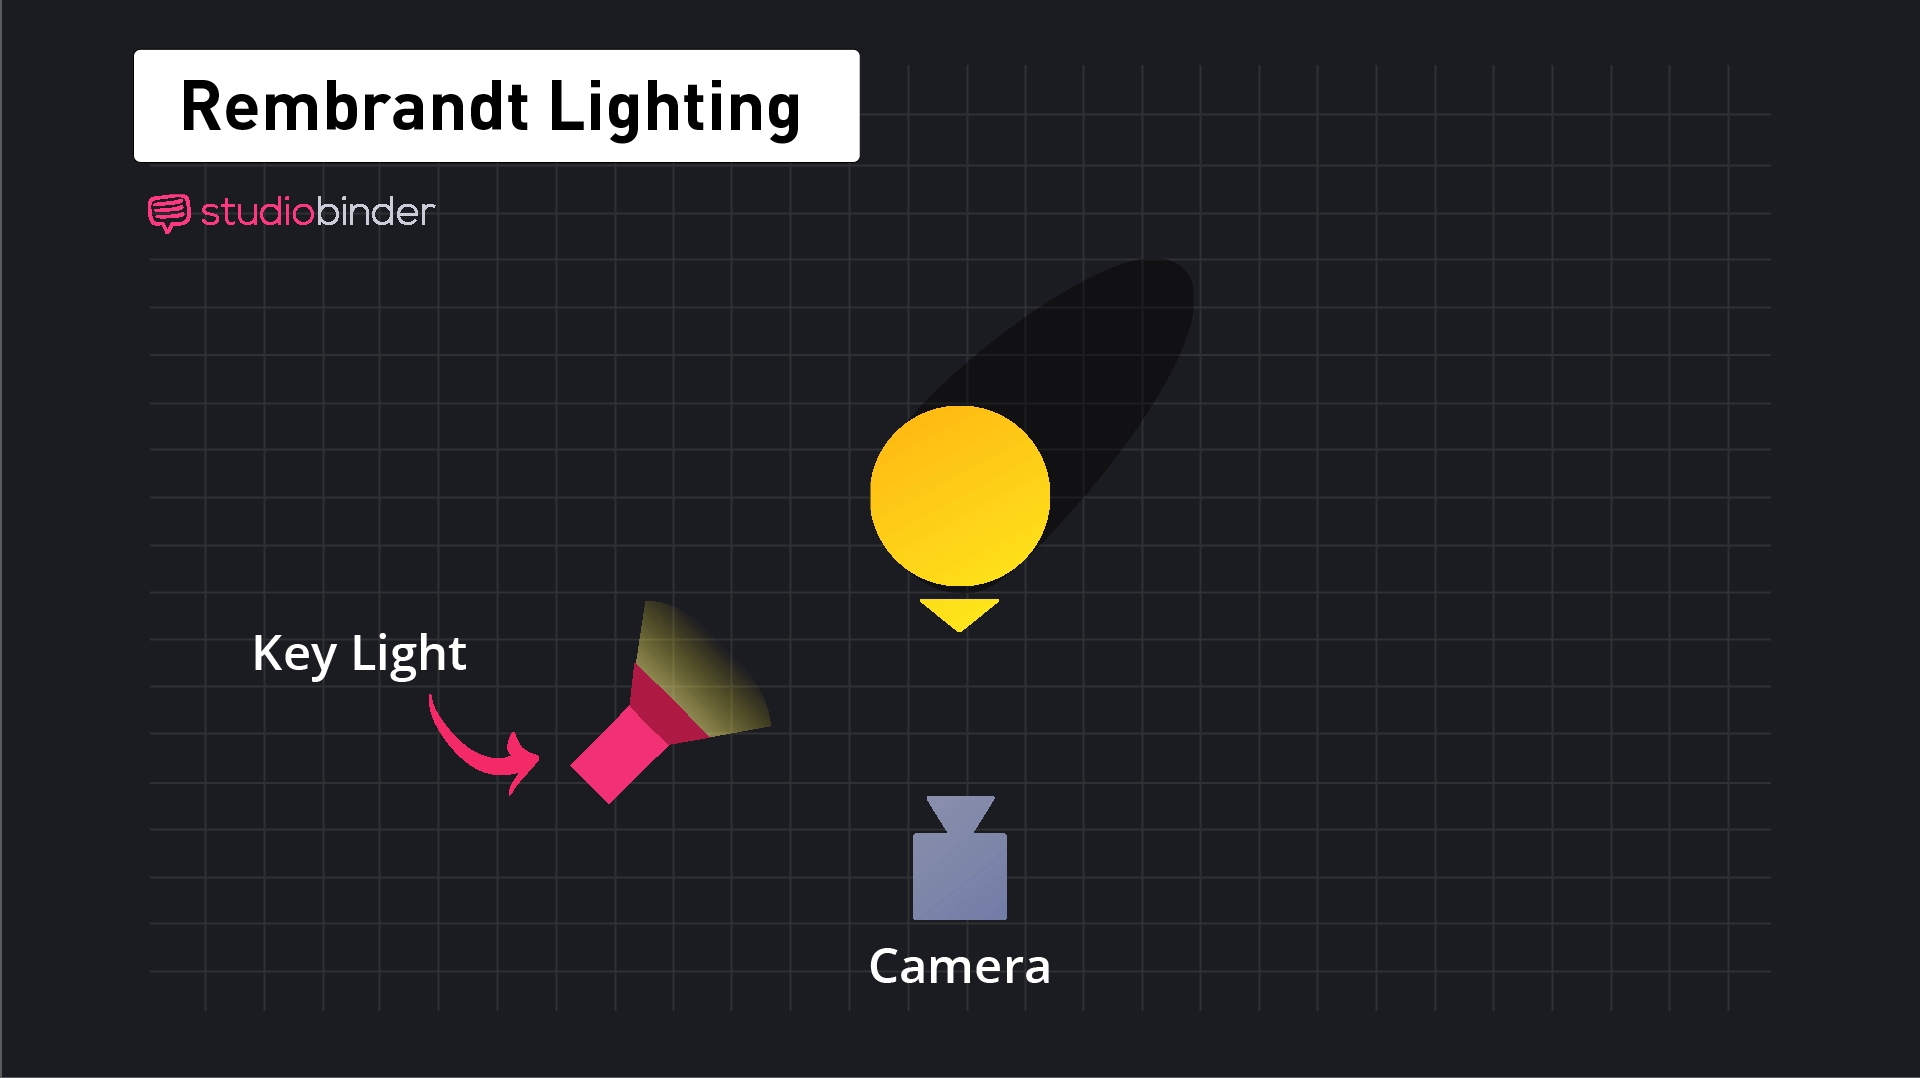
Rembrandt Lighting Photography Tutorial — Step 2
Step 3 — Position your reflector
Place your reflector (or a fill light) on the other side of the subject about three or four feet away at eye level and at a 45-degree angle. This will help to soften the shadows on the other side of the subject’s face.
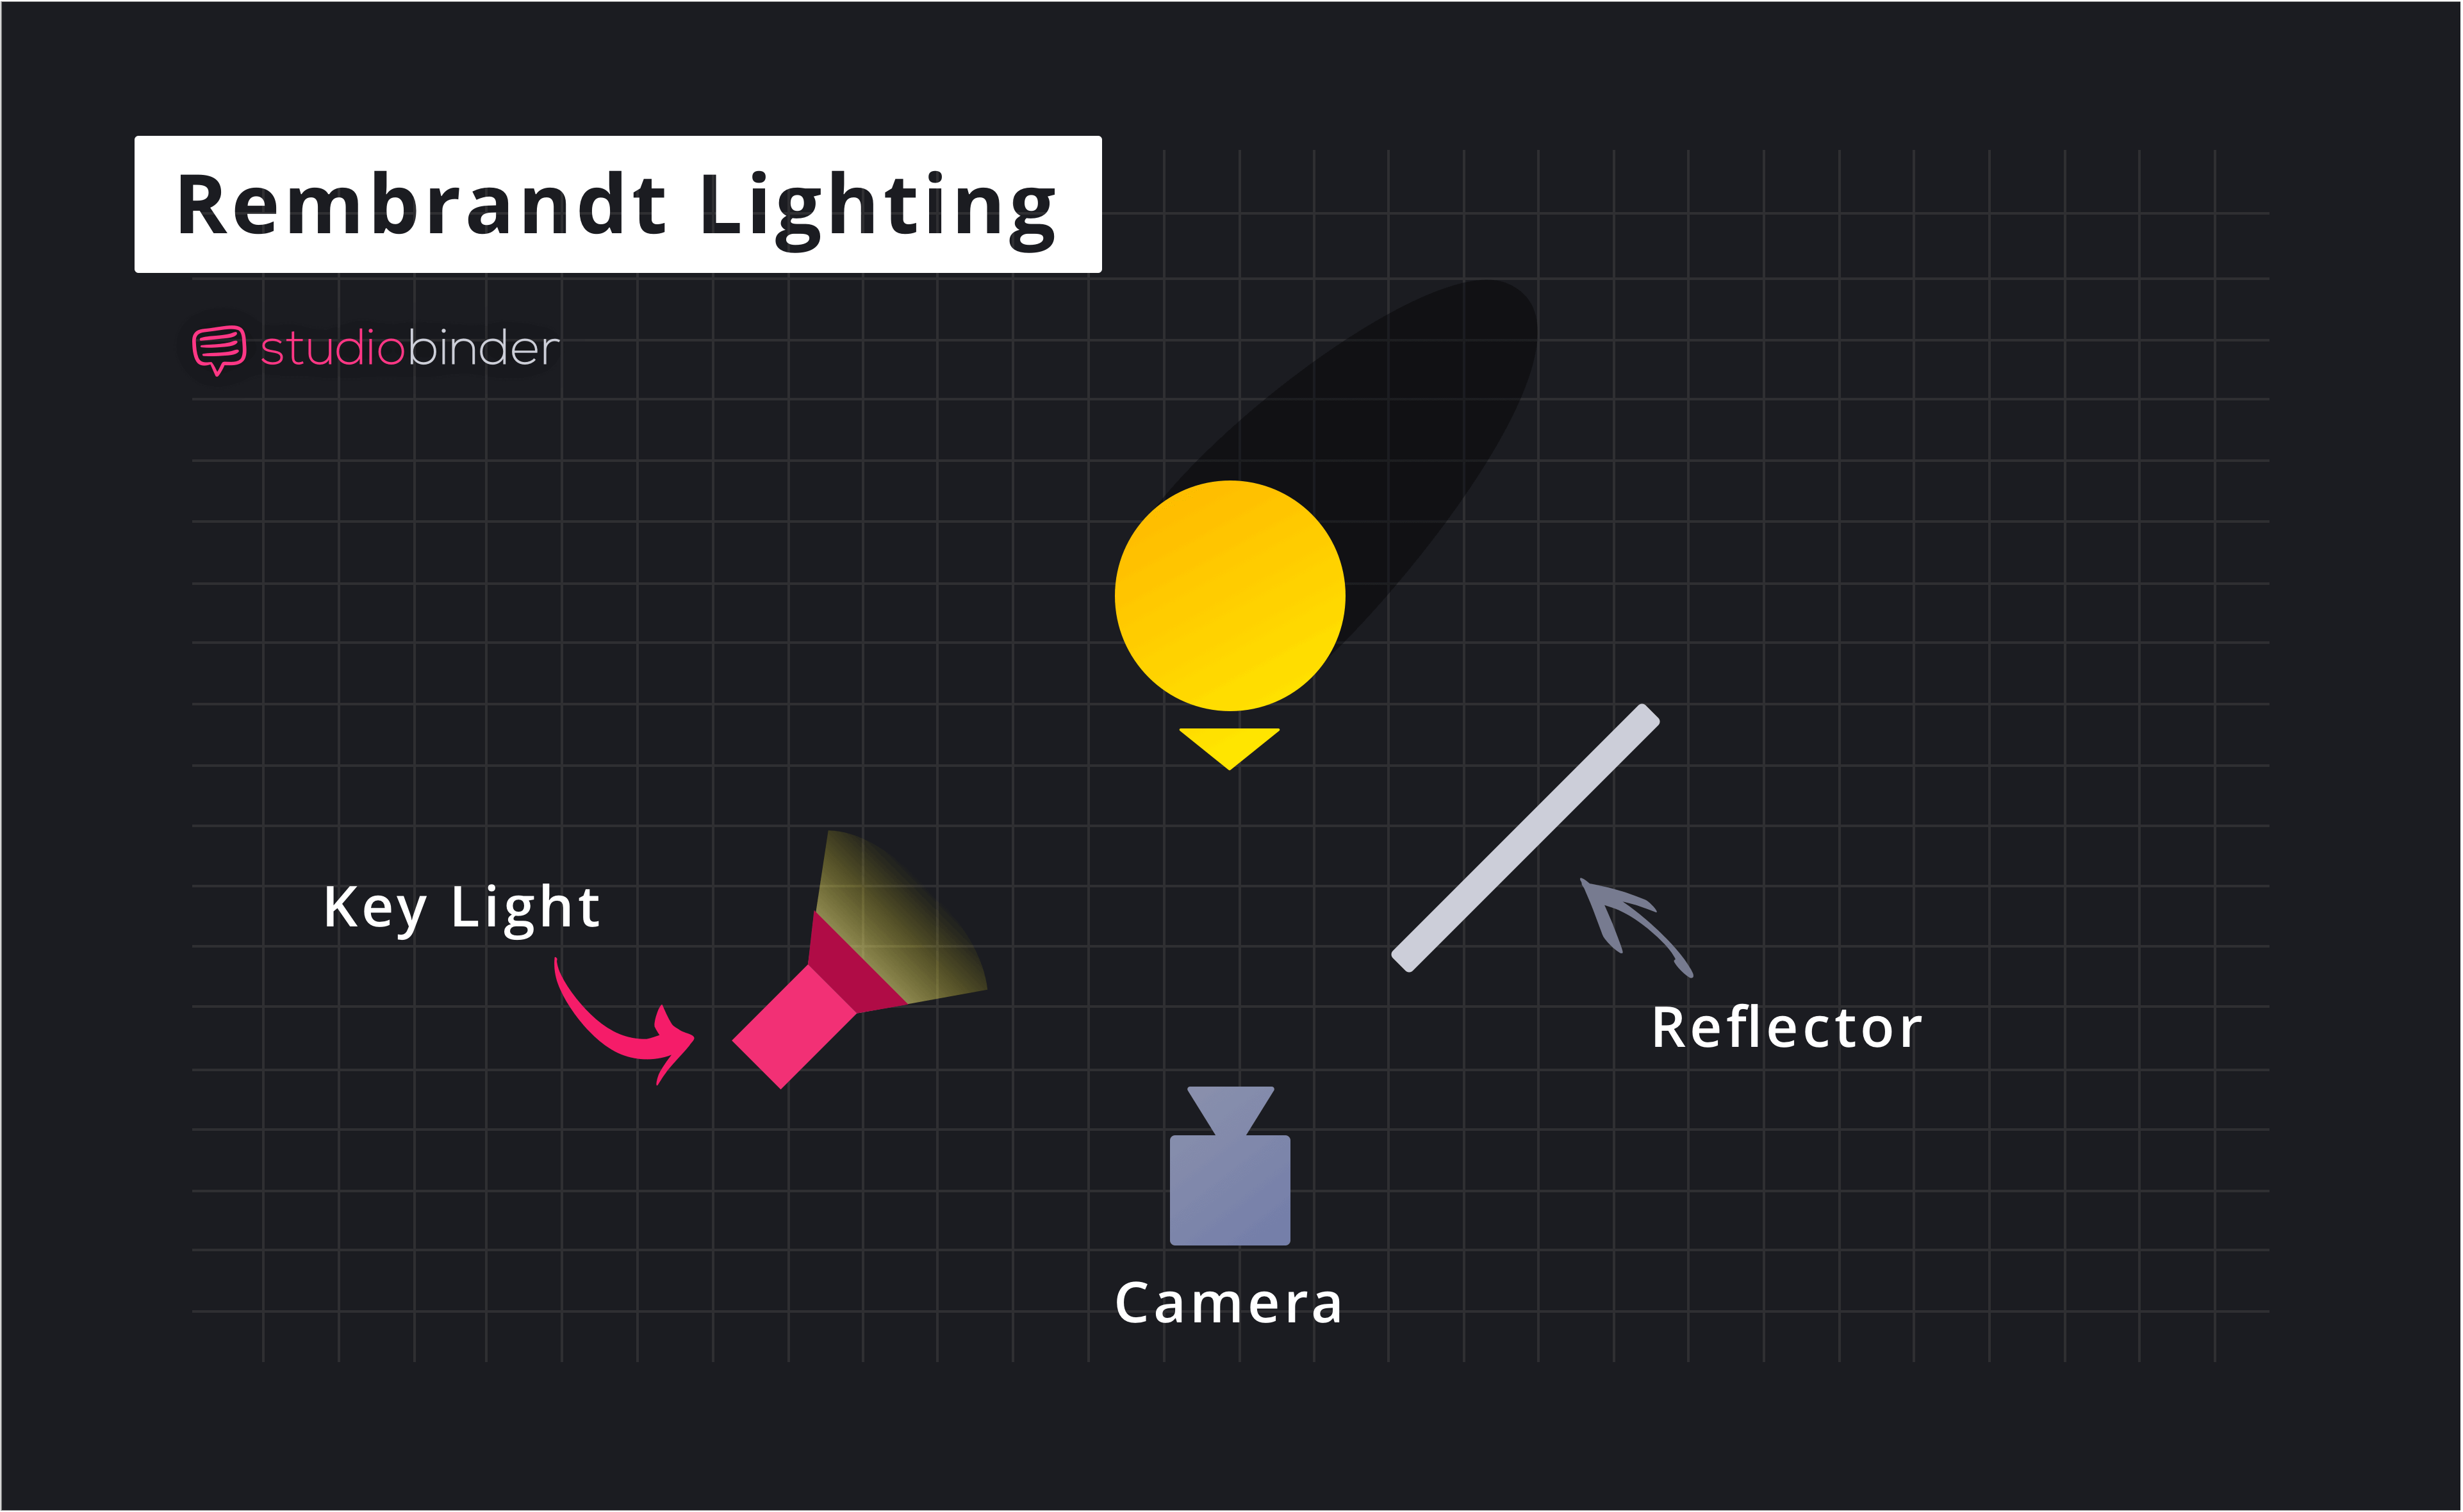
Rembrandt Lighting Photography Tutorial
And that's how easy it is to pull off a Rembrandt lighting set-up in three steps! For another primer, check out this video where you can see the creation of Rembrandt photography lighting in real time and how it only takes a few minutes to get right.
How to Get Perfect Rembrandt Lighting • Adorama
Attaining this look is far easier to attain than many filmmakers and photographers realize.
Plus you get dramatic, engaging shots. You don’t need a lot of equipment, and it can help elevate scenes to be more dynamic. Find scenes in your next project where you can incorporate this technique.
Related Posts
Up Next
What is Golden Hour?
Rembrandt lighting is a technique every cinematographer should be familiar with just like how cinematographers need to understand the basics of golden hour. Both techniques can give your film a distinct look for different scenes, and you should consider both as you’re planning how to film each scene during the pre-production process.
Up Next: Time for Golden Hour →
Showcase your vision with elegant shot lists and storyboards.
Create robust and customizable shot lists. Upload images to make storyboards and slideshows.
