You’ve got a big shoot coming up. You want to visualize the scenes you plan to shoot but you’re wondering how to make a storyboard that touches on everything a good one should. Drawing and formatting fears, technical limitations, concerns about budget — there are a lot of reasons to avoid this process. But it doesn’t have to be stressful. You just have to know how to create a storyboard in the most efficient way. These seven easy steps will have you storyboarding like a master filmmaker in no time.

How to Make a Storyboard in StudioBinder
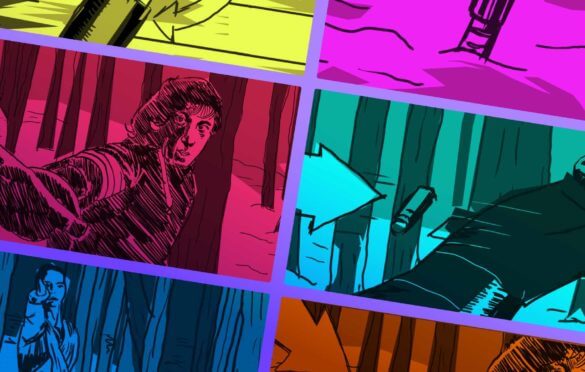
How To Make A Storyboard
What is a storyboard & why they matter
The process of taking the vision in your head and turning it into images on screen usually begins with a storyboard. And this serves two functions — to refine your ideas on paper and to share these ideas with your film crew. Therefore, the more you understand how to make a storyboard, the more efficient they can be.
Before we go too much further, let's answer the question: What is a storyboard?
Storyboard definition
What is a storyboard?
A storyboard is a visual representation of a film sequence and breaks down the action into individual panels. It sketches out how a video sequence will unfold. And it functions as a trial-run for your finished film, video, or commercial, laid out in a comic book-like form.
How to make a storyboard (guidelines):
- A linear sequence of drawings, reference images or photographs that represent each shot in a scene.
- Provides a visual guidance for look, feel and movement.
- Indicates the staging of actors and camera placement.
- May include dialogue and sound direction.
The storyboard is important on so many levels. For example, it is a presentation tool, indispensable for pitches. It is also a planning tool, critical for pre-visualizing your project. And it’s also collaboration catalyst that puts your team on the same page and gets everyone’s creative wheels spinning.
Ready to learn how to make a storyboard? Here’s your guide to writing a storyboard like a pro.
How to Create a Storyboard
1. Choose your storyboard medium
Before you start gathering images, drawing panels, hiring a storyboard artist, or doing any nuts-and-bolts illustration and pre-visualization work, you need to decide which medium to choose.
Basically, there are two options: the old-school method of drawing on paper and the more modern incarnation of using storyboarding software like StudioBinder's Storyboard Creator.
For the hand-drawn method, you can download our free storyboard template pack and then use our guide on how to use a storyboard template.
Free downloadable bonus
FREE Storyboard Template Downloads
If you prefer the old-school, pen and paper method of storyboarding, download our FREE printable templates. Included are 60+ files for Word, Illustrator, Photoshop, and PDFs. You can also choose various layouts between 2- and 16-panel sheets in landscape or portrait.


But how can you make a storyboard if you can't draw? Here are some alternative storyboarding methods for non-artists.
There's actually a way to combine the old and new methods by importing your hand-drawn boards into StudioBinder.
Here's our step-by-step guide on How to Use Storyboard Creator.
Related Posts
How to Make a Storyboard for a Movie
2. Determine your aspect ratio
Even if you think you know nothing about how to storyboard a video, you probably know that a lot of panels are involved.
But how big should those panels be? Believe it or not, storyboard dimensions are an essential decision to be made before beginning the process.
This is simply a matter of determining your aspect ratio — the size and shape of the frame of your camera. Not sure how to pick your aspect ratio? Check out the following video and for the general approach.
How to decide on the aspect ratio of your project
When using StudioBinder, you can preview the various industry-standard aspect ratios. This masks each image non-destructively, and you can adjust on-the-fly at any point.
Changing aspect ratio in StudioBinder
So even if your images don't exactly match the aspect ratio, you're fine. Just upload an image to preview the look of the frame. Pick the aspect ratio that works best for your project, and design your images for that size.
In the example below, click the image to toggle through the various aspect ratios. There you'll find the pop-out window in the upper left corner.

How to create a storyboard • Choose an aspect ratio
Aspect ratios do different things for different projects. Star Wars, The Shawshank Redemption, Pulp Fiction — their aspect ratios help define their worlds. Therefore, whatever aspect ratio you pick, you’ll want to design your images with that in mind.
Related Posts
How to Storyboard a Film
3. Create or import your images
In this section, we get into the nitty-gritty. Once you’ve determined your aspect ratio, you’ll need to start creating or gathering images.
There are essentially two schools of thought. As mentioned earlier, you either go "old school" with pencil and paper or you go with digital storyboards.
You can take photos of your own, or use images from TV shows and movies as your visual references. As long as they clearly communicate your vision, there's no reason not to.
However, no matter the medium you choose, the content of your boards should be approached with the same level of purpose and detail. This is where storyboard composition comes into play.
For example, the most important objects are the actors. As such, you need to make sure that they are front and center.

Creating a Storyboard Starts with Subject
This is where all the creative and practical decisions can be made (and remade) without consequence. For example, choosing your shot sizes, your camera angles, or your camera movement can be worked out in advance, saving you time and creative energy when you're actually on set.
You'll find our complete playlist of videos on these various elements in our Shot List series on YouTube. Additionally, you can also read more about the do's and don'ts of storyboarding.
Related Posts
Movie Storyboard Movement
4. Use arrows for motion
It can be difficult to represent a "motion picture" using a static image. However, there is one solution that is quite simple and clear — storyboard arrows. These arrows indicate motion on the screen, for either the camera or the character.

How to write a storyboard with arrows
Arrows show us where characters are going within the frame. For example, are they moving towards or away from the camera? Walking down the street?
Camera movement sets up how we see the action. Is it a close-up or a wide shot? Is it a static shot? Or a tracking shot following the main character? Here are some quick examples of how arrows are used to indicate a moving camera.

How to do a storyboard with camera movement
If you're using software like StudioBinder, you can select the various camera movements in the shot specs. When we add camera movement, we can also select shot size, shot type, and lens details as well.
Click the image below to explore the various shot specs:

How to storyboard a video • Customize shot specs
As you can see, using arrows to indicate motion is a rather intuitive process. For reference on how to make a storyboard with camera movement, you can use our Ultimate Guide to Camera Movement.
How to Make a Storyboard with Camera Movement • Subscribe on YouTube
For more, check out our other post on How to Storyboard Camera Movement.
How to Write a Storyboard Sequence
5. Add shot numbers & notes
Without shot numbers, your crew and creative collaborators won’t understand references to specific shots. When you're creating a storyboard manually, make sure to number every shot in the correct order.
For example, if you use more than one panel for the same shot, label them with letters as well. So if the first shot has three panels, you would label them “1A,” “1B,” and “1C." See the example below for what this looks like.

As mentioned, StudioBinder automatically adjusts and updates shot numbers. Drag-and-drop your image to a new spot in the sequence to make your labeling and organizing efficient.
Additionally, the other element to add is storyboard notes. This is any text added to the image to help clarify the action or fill in the gaps between panels.
Here's an example from Salt that provides an extra layer of detail and information. Moreover, these notes are especially useful in action scenes to help mark each action beat.

Notes and annotations help guide the story
With this process, convey the intention. Label clearly. Get in and out. It’s pre-visualization, not production. Production comes soon.
Related Posts
Sharing and Collaborating in StudioBinder
How many frames do you want per row? There's no perfect answer. When you're working on an action scene like a car chase, it might be beneficial to have four frames per row t0 fit as much on a single page as possible.
Or if it's a slower-paced scene and you want the detail work to come across, two or three panels could do the trick.
Using StudioBinder, you can create a slideshow. This presents the board as a single panel at a time that you can advance when ready. That way, you don’t need to worry about video editing or making a flip book.
Activating Slideshow View in StudioBinder
Check out an example of a slideshow below. This is a portion of the opening sequence from Austin Powers in Goldmember. Click the image and then select the "Slideshow" view in the upper right corner. In doing so, you can flip between the images to get a sense of the scene:

How to storyboard a video • Play the slideshow
If you want to know how to write a storyboard as a motion sequence, you can string together your individual images as a video. This is called an animatic and it is certainly a more evolved and polished way to present your boards.
For more presentation tips, read our post on How to Display Storyboards.
In conclusion, a storyboard is a communication tool. It exists to help turn your vision into a finished work. It’s there for you to share with others.
This process can seem like one of the most daunting challenges in filmmaking. But rather than look at it as a frightening task, remember that it’s meant to help make your project even better.
Related Posts
Up Next
Create a storyboard of your own
Now that you know how to make a storyboard, it's time to put all this practice into action. You've got a project burning a hole in your creative pocket. And you can even see how the scene plays out, shot by shot. Get started creating a visual representation of that vision and you'll be closer to seeing it come to life.
Up Next: StudioBinder's Storyboard Creator →

Showcase your vision with elegant shot lists and storyboards.
Create robust and customizable shot lists. Upload images to make storyboards and slideshows.

A great book to read which helps understand the directing process and in turn helps with storyboarding is “Film Directing Shot by Shot by Steven Katz. Really recommend that for anyone interested in storyboarding. Also, http://www.frameworks-la.com has some nice storyboards on their site to reference.
Wow! Each article of your’s are really worthy! Keep going…
HI
I RAJESH B. AS I HAVE BEEN DOING MANY ILLUSTRATION WORK FOR DIFFERENT CONCEPTS THESE ARTICLE IS REALLY GOOD FOR STORYBOARDING AND DETAILS
THANKS A LOT
Thanks for another magnificent article. Where else could
anyone get that kind of information in such a perfect method of
writing? I have a presentation subsequent week, and I am on the
search for such information.
Hi,StudioBinder Team. First of all, I want to say you guys did a really great job, and I really appreciated.
I have a little experience after watched your how to make a storyboard toturial, may be you want to know.
The Arrow part of video may be a little confusing for me. At the beginning , the camera move along arrow reversely(left and right), after that the camera move along the arrow(foward and backward).
Its just my experience, if I got it wrong, just forget it. In the end, thanks your sharing
A good lesson i find studiobinder is a best